

IntelliJ IDEA is an integrated development environment (IDE) for Java development. It’s developed by JetBrains, the same company that developed PyCharm, the best IDE for Python. Like PyCharm, IntelliJ IDEA too has two variants:
- IntelliJ IDEA Community Edition (Free)
- IntelliJ IDEA Ultimate Edition (Paid version with extra features)
- IntelliJ IDEA Educational (Ultimate Edition but free for students and faculty members)
I am not going to dive into the features of IntelliJ IDEA or which edition is better. You can read about the difference between the Community and the Ultimate Edition here.
I presume that since you have come to read this post, you are already aware of the advantages of using IntelliJ IDEA. In an earlier post, I showed you how to install PyCharm on Ubuntu. In this post, let me show you how to install IntelliJ IDEA on Ubuntu and other Linux distributions.
Install IntelliJ IDEA on Ubuntu and other Linux distributions

Before we go on installing IntelliJ on Ubuntu, please make sure that you have Java on your system. Read this post to see how to install Java on Ubuntu.
Once you have ensured that, let’s go on with IntelliJ installation. There are several ways of installing IntelliJ IDEA on Ubuntu and other Linux distributions.
- Install it from the Software Center [Recommended]
- Install it using Snap (valid for most Linux distributions)
- Install it using Flatpak (valid for most Linux distributions)
- Install it using unofficial PPA in Ubuntu-based distributions
Method 1: Install IntelliJ IDEA from the Software Center [Recommended for Ubuntu Users]
The good news is that all variants of IntelliJ IDEA are available in the Software Center. You have to search IntelliJ IDEA and it will show the possible results.

You have to select the preferred version and then click on the install button.
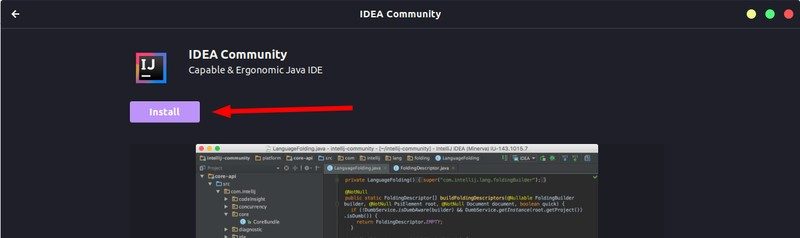
This would be the simplest method for Ubuntu users.
Method 2: Install IntelliJ IDEA in Linux using Snap packages [for all Linux distributions]
The apps in the Software Center are basically the Snap packages. Snap packages are supported by all major Linux distributions and you can easily install several applications through Snap.
First, make sure that you have Snap support on your Linux distribution. After that, you can use the following commands to install various IntelliJ versions.
For the ultimate version:
sudo snap install intellij-idea-ultimate --classicFor the community version:
sudo snap install intellij-idea-community --classicFor the educational version:
sudo snap install intellij-idea-educational --classicMethod 3: Install IntelliJ IDEA using Flatpak [for all Linux distributions]
Like Snap, Flatpak is also a universal packaging system and is supported by a number of major Linux distributions.
Again, you should make sure that you have Flatpak installed on your system. And then, you should go and download the flatpakref installer files from the Flathub website.

Clicking on install will download the flatpakref files. You can then switch to your Download folder where the flatpakref files has been saved and use the following command to install it:
flatpak install com.jetbrains.IntelliJ-IDEA-Community.flatpakrefThe above described command is for the Community edition. You can use a similar approach for the Ultimate edition as well.

Method 4: Install IntelliJ using PPA (valid for Ubuntu-based Linux distros)
There is an unofficial PPA available that you can use to easily install IntelliJ in Linux Mint, elementary OS and other Ubuntu-based Linux distributions, including Ubuntu of course.
This PPA is developed and maintained by Marcel Kapfer and is available for Ubuntu 18.04, 16.04, 18.10, 19.04 and 16.04. So basically, it covers all the active Ubuntu versions and Linux distros based on them.
Open a terminal and use the commands below:
sudo add-apt-repository ppa:mmk2410/intellij-idea-communitysudo apt updatesudo apt install intellij-idea-communityOnly the Community version is available via this PPA, unfortunately. The PPA will download the IDE, so again installation time will depend on your internet connection.
To remove IntelliJ installed from the above PPA, use the command below:
sudo apt remove intellij-idea-community sudo add-apt-repository --remove ppa:mmk2410/intellij-idea-communityWhat else?
If you are old school, you can take the hard road and install ItelliJ IDEA from its source code. It’s limited to Community edition, though. You can browse the source code on its GitHub repository.
You can browse and download the source code on its GitHub repository.
The main part of installing an IDE comes into configuration but I am more of a C++ guy than Java so I leave that part to you :)
I hope this post helped you to install IntelliJ on Ubuntu and other Linux distributions. If you have questions, suggestions or a word of thanks, feel free to drop a comment below.
If this helped you, consider supporting It's FOSS
It's FOSS has been helping people use Linux for the past 14 years. Help us stay independent from big tech. Become a Plus member, enjoy ad-free reading and get 5 eBooks.
