

ArchBang is a minimal and lightweight Arch Linux based distribution. It uses the i3 window manager. With its minimal nature, ArchBang can help you revive your old computer or low-end devices.
There are two ways to install Arch Bang:
- Using the guided installer script
- Following Arch wiki
No prizes for guessing that using the guided installer script will be easier to follow.
In this tutorial, I’ll show you the steps for installing ArchBang with its text-based installer script.
Please check if your computer has UEFI or the legacy BIOS system. Some steps are different for them.
I have performed the demo in a virtual machine. And hence the wifi configuration part is not there. Internet connection is not mandatory here; you can also install it offline. You can connect to wifi from within the system after successfully installing ArchBang.
Also, this method will remove any other operating system installed on your disk. Please be mindful of that.
Download ArchBang Live ISO
To install ArchBang, you need the live ISO first.
You can go to their official website and download the required ISO, as shown in the below screenshot.
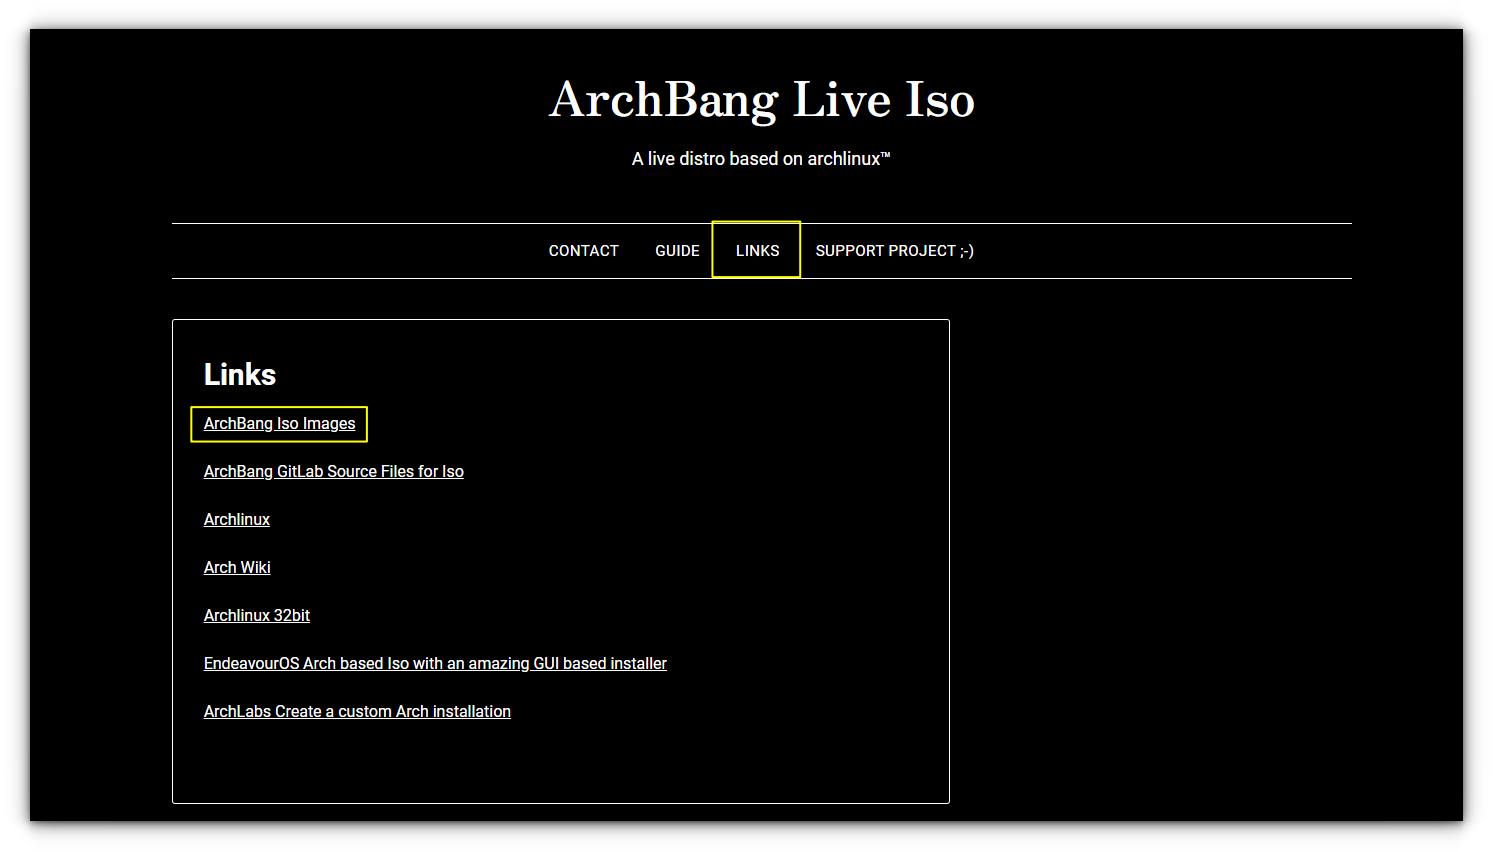
It brings you to their Sourceforge page. Download the ISO, which is approximately 1.2 GiB in size.
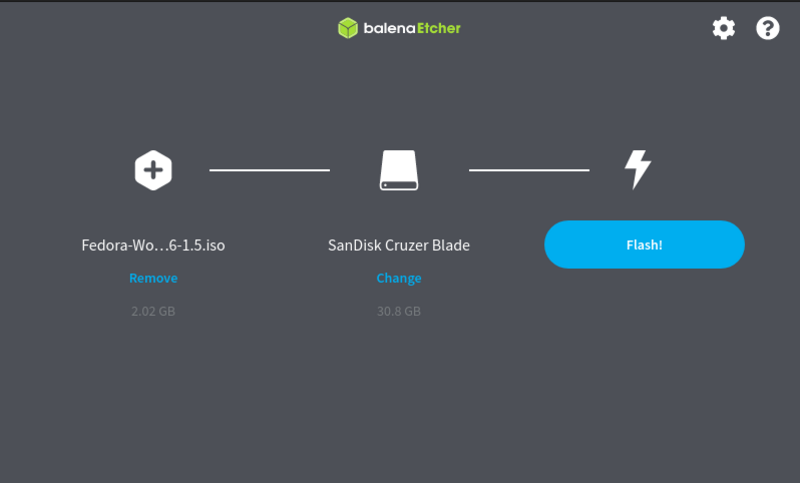
Create the Live USB of ArchBang
Once downloaded, you should make a bootable USB of ArchBang. You can use software like Balena Etcher to create it. It’s quite simple to use.
Plug in your USB, browse to the downloaded ISO file and then hit the Flash button.
Using text-based ArchBang installer
ArchBang live ISO will bring you to the default i3 desktop with conky running.

You have two methods to start the installation process:
- Press Super + I (as per desktop conky) to start installation directly.
- Press Super + T to enter the terminal and use the command:
sudo abinstall
A terminal with several options will appear when you do the above step:
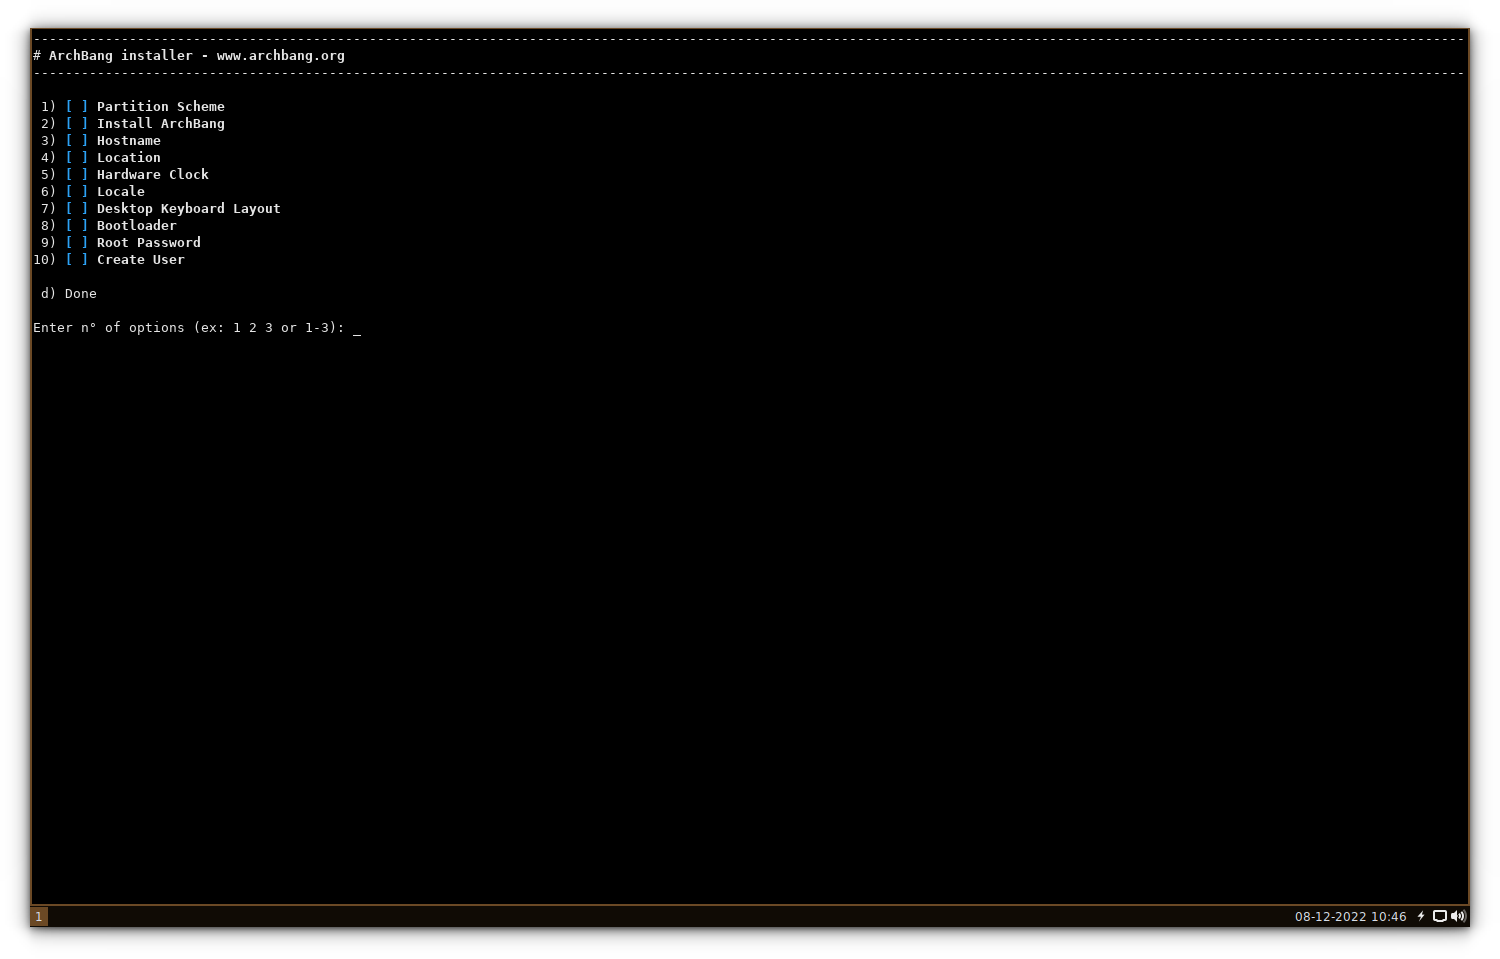
The above screenshot shows the main menu of ArchBang installer. You can select each section with the associated number.
When you complete each category of the above installer, it will return to this menu and you can select the next category by pressing the corresponding number and Enter key.
Also, the completed sections will be checked with an “x” mark.
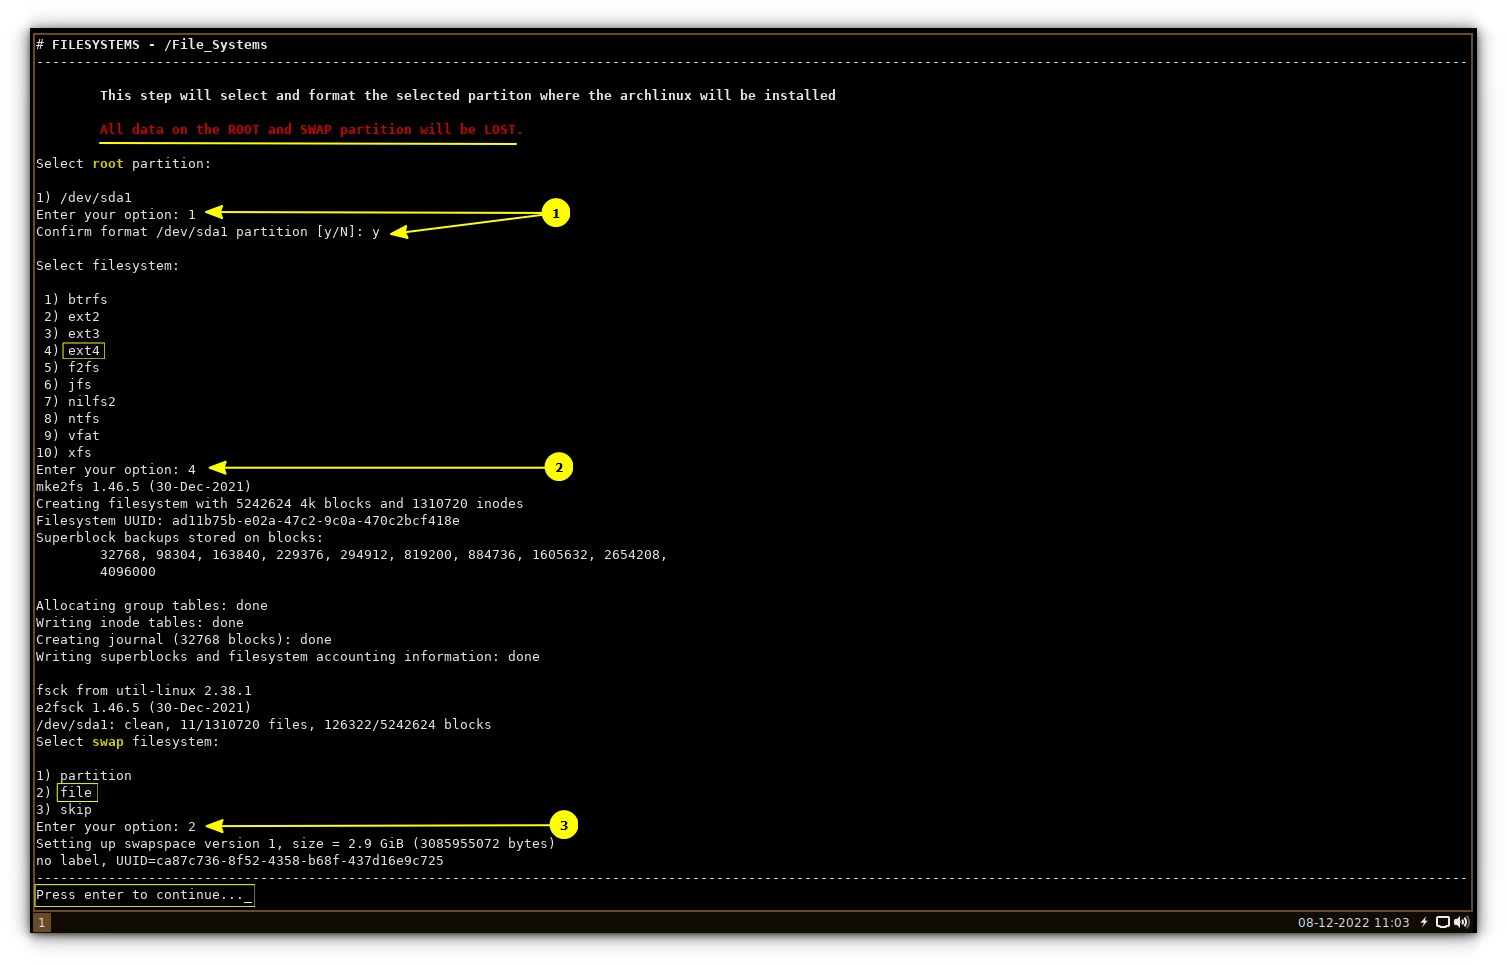
Step 1: Select / Set Partition
On the new installer screen, enter “1” to start partitioning the disk.
Inside this, select the Default option. The installer has several tools to partition the disk, like cfdisk, fdisk, parted, etc. I used fdisk to do the job.
Partitioning for Non-UEFI system
Once the tool is selected, it will ask to choose the storage device. In my case, it was /dev/sda . Select the appropriate choice in your context.
To start partitioning, enter “n” for a new partition. After that, select Primary Partition.
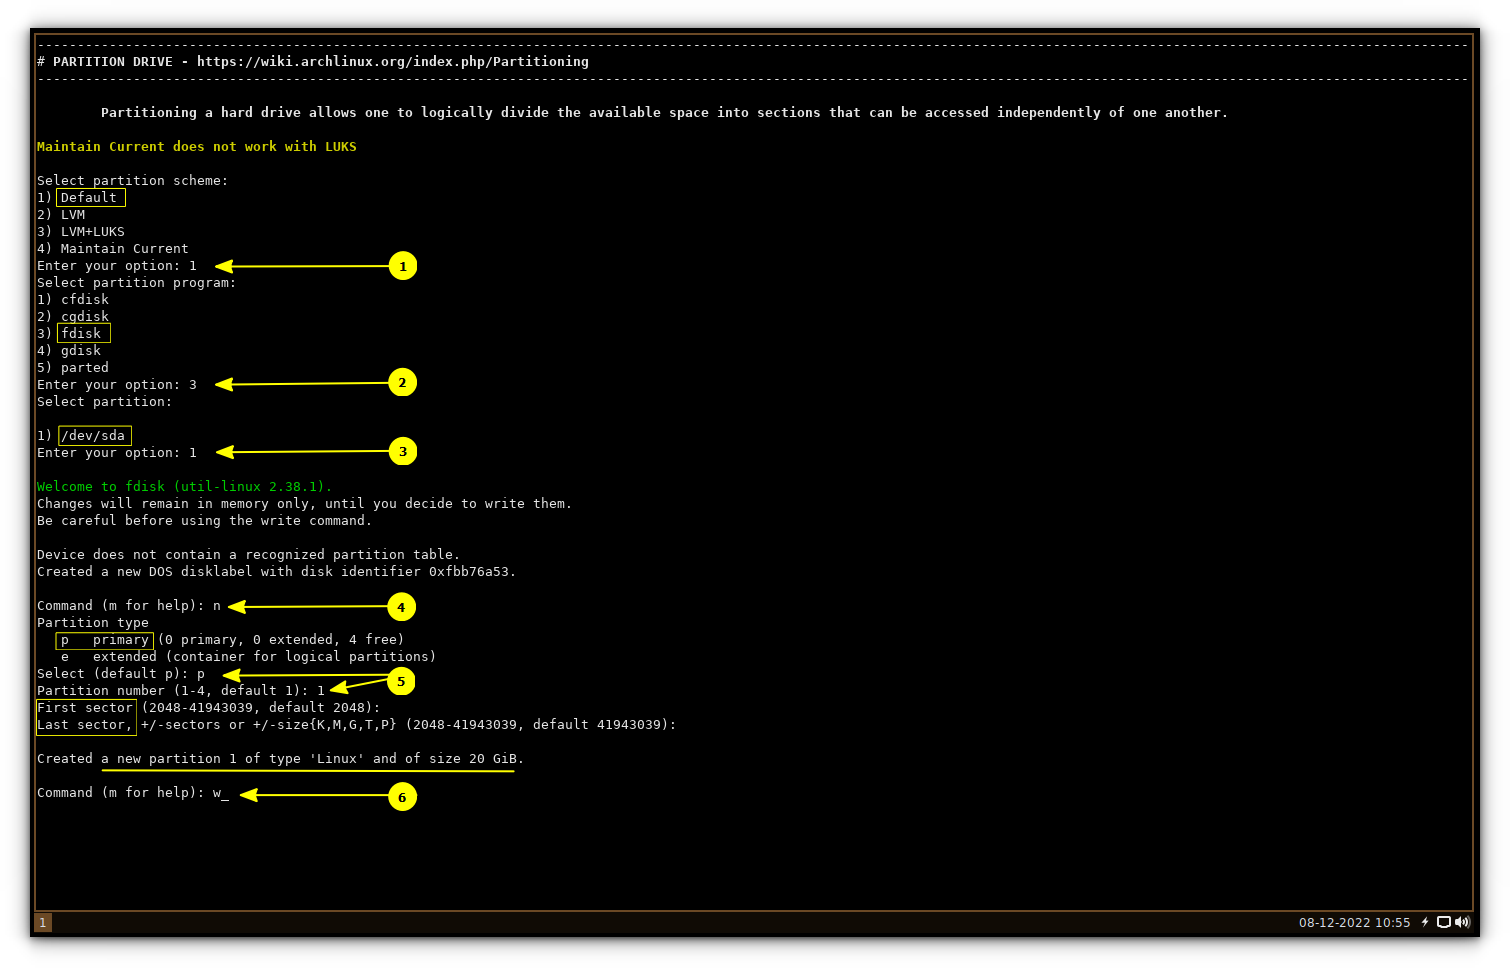
For non-UEFI systems, you can create one single root partition for all purposes. So, accept all the default values for “First Sector” and “Last Sector”. Then, press “w” to write the changes.
On the next screen, you have to choose your filesystem and swap method. In this tutorial, I am using the EXT4 file system and Swap to File as the swap method.
So set those according to the screenshot.
Partitioning for UEFI system
For UEFI users, you need to have two partitions, one EFI, with a 550 MB space, and another main root partition with the rest of the space (Swap as a file setting).
Press n and select Primary Partition. Then select the Partition number as 1.
Accept the default value for “First sector”. Now enter “+550M” as the value for “Last Sector”.
Once again, press “n” and select Primary Partition. Accept the default value for the first and last sectors.
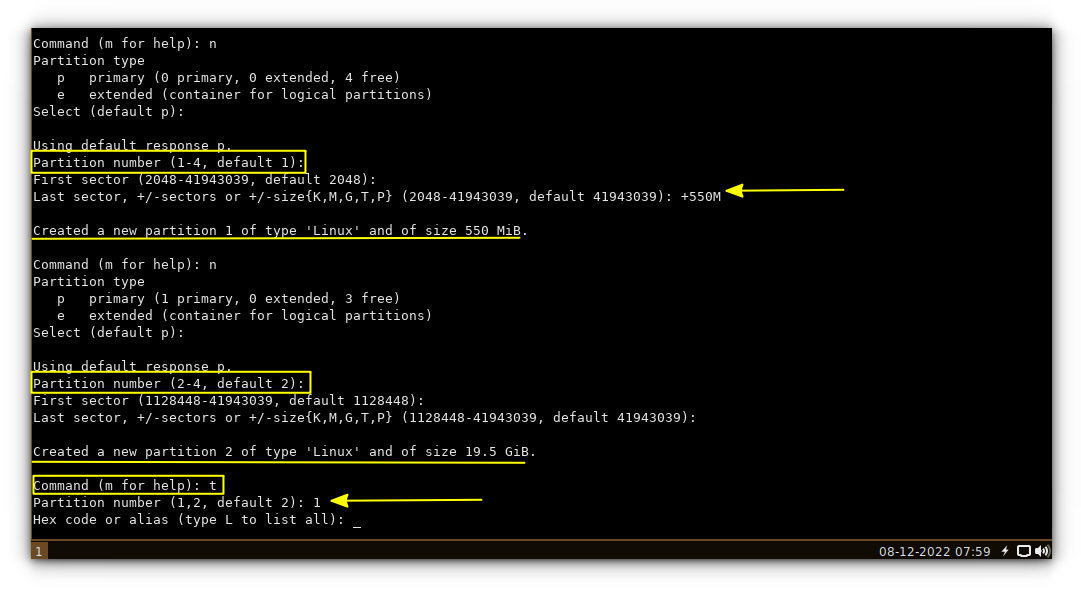
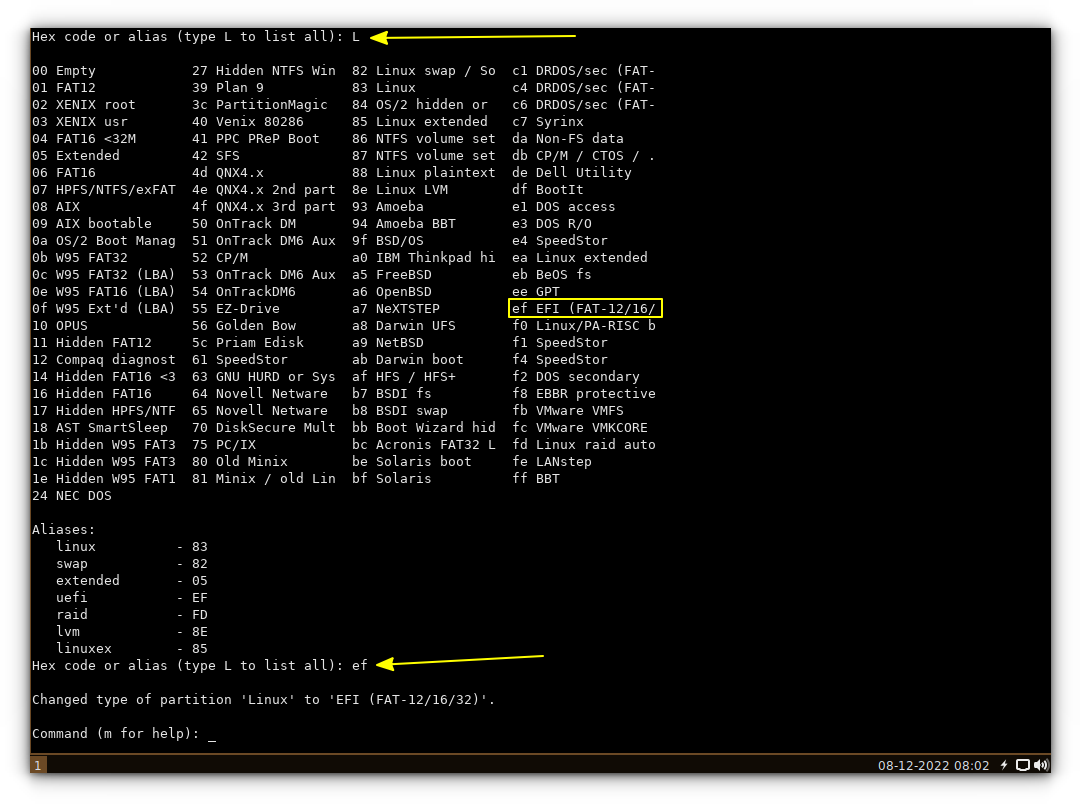
Press “t” to change the type and select the partition number “1” or /dev/sda1, whose type is to be changed from “Linux” to “EFI”.
Select the partition type as EFI, as shown below:
Press “w” to write the changes. Then it will ask for filesystem selection. Here, you need to select the larger partition as the root partition (/dev/sda2, that is option 2 in the below screenshot).
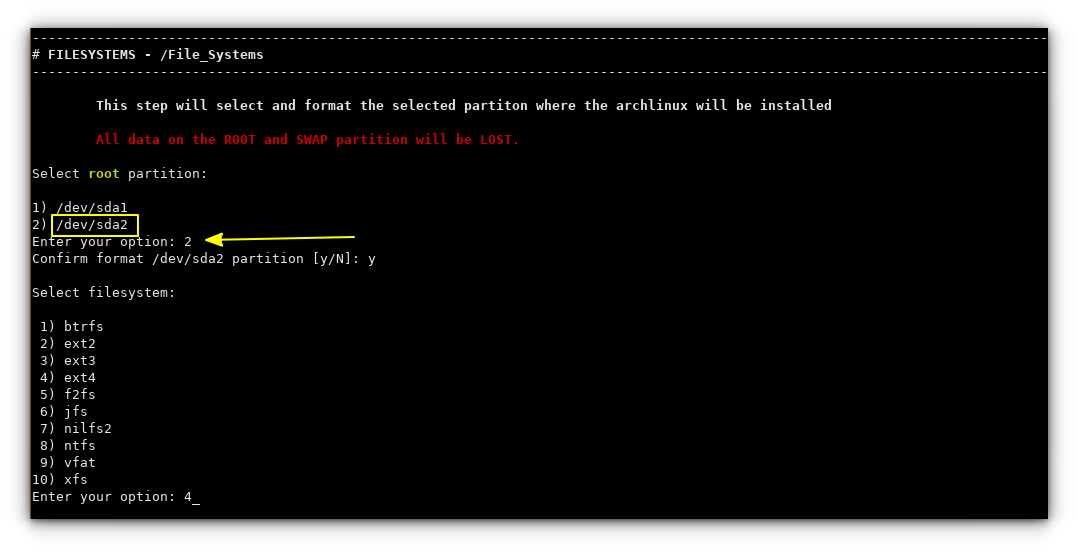
Select EXT4 filesystem. This will again ask for mounting EFI partition.
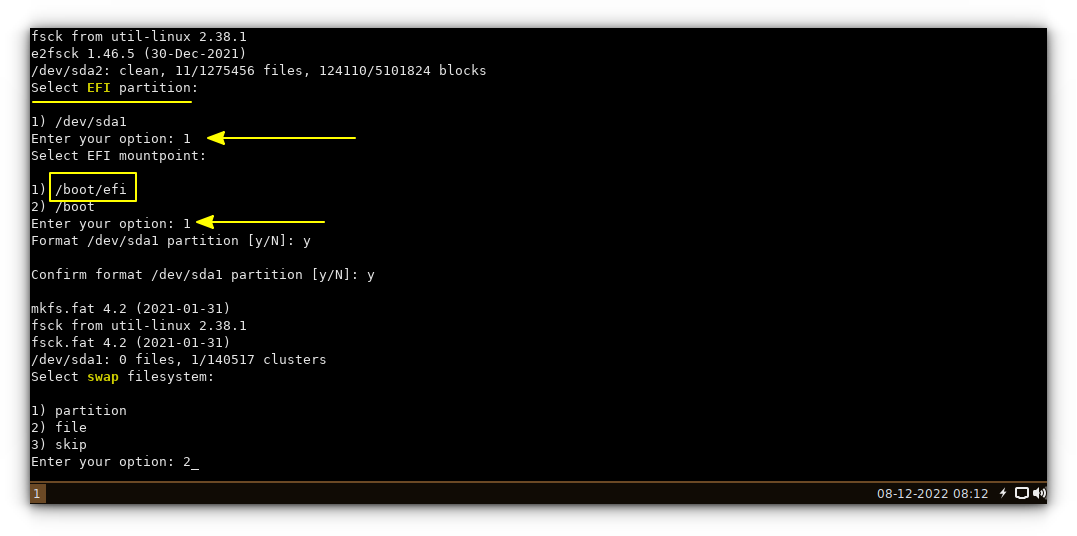
In this step, you need to select the EFI partition at /dev/sda1 and choose the mount point as /boot/efi . This will ask for format. Give consent by pressing “y”.
Also, don’t forget to choose the swap to file option.
Step 2: Start ArchBang installation
This is pretty simple. Select the Install ArchBang option from the main menu by pressing the corresponding number (2 in this case). It will start the installation process.
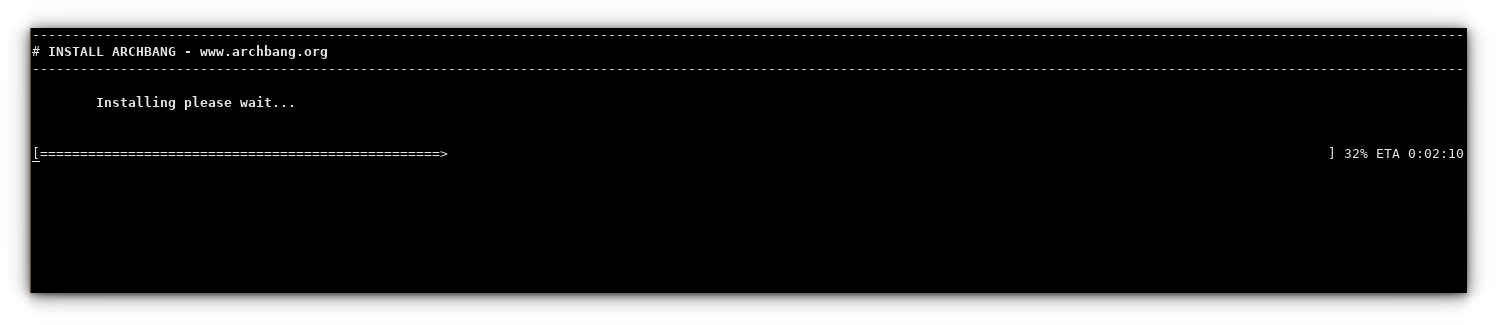
You should wait for some time to complete the installation.
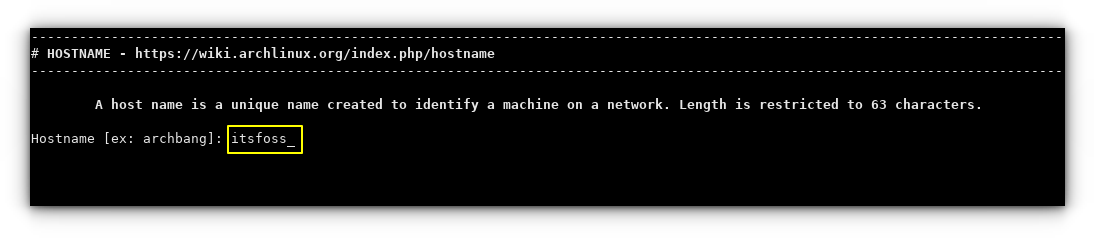
Step 3: Set Hostname
Once installation is completed, Select the 3rd option on the main menu, which is for setting the hostname. You need to enter a hostname.
Step 4: Set Location
Location/Time Zone is typically mentioned in Zone/City format. I used Asia/Kolkata as the time zone.
The installer provides the list of available zones and cities; you need to enter the number corresponding to your choice.
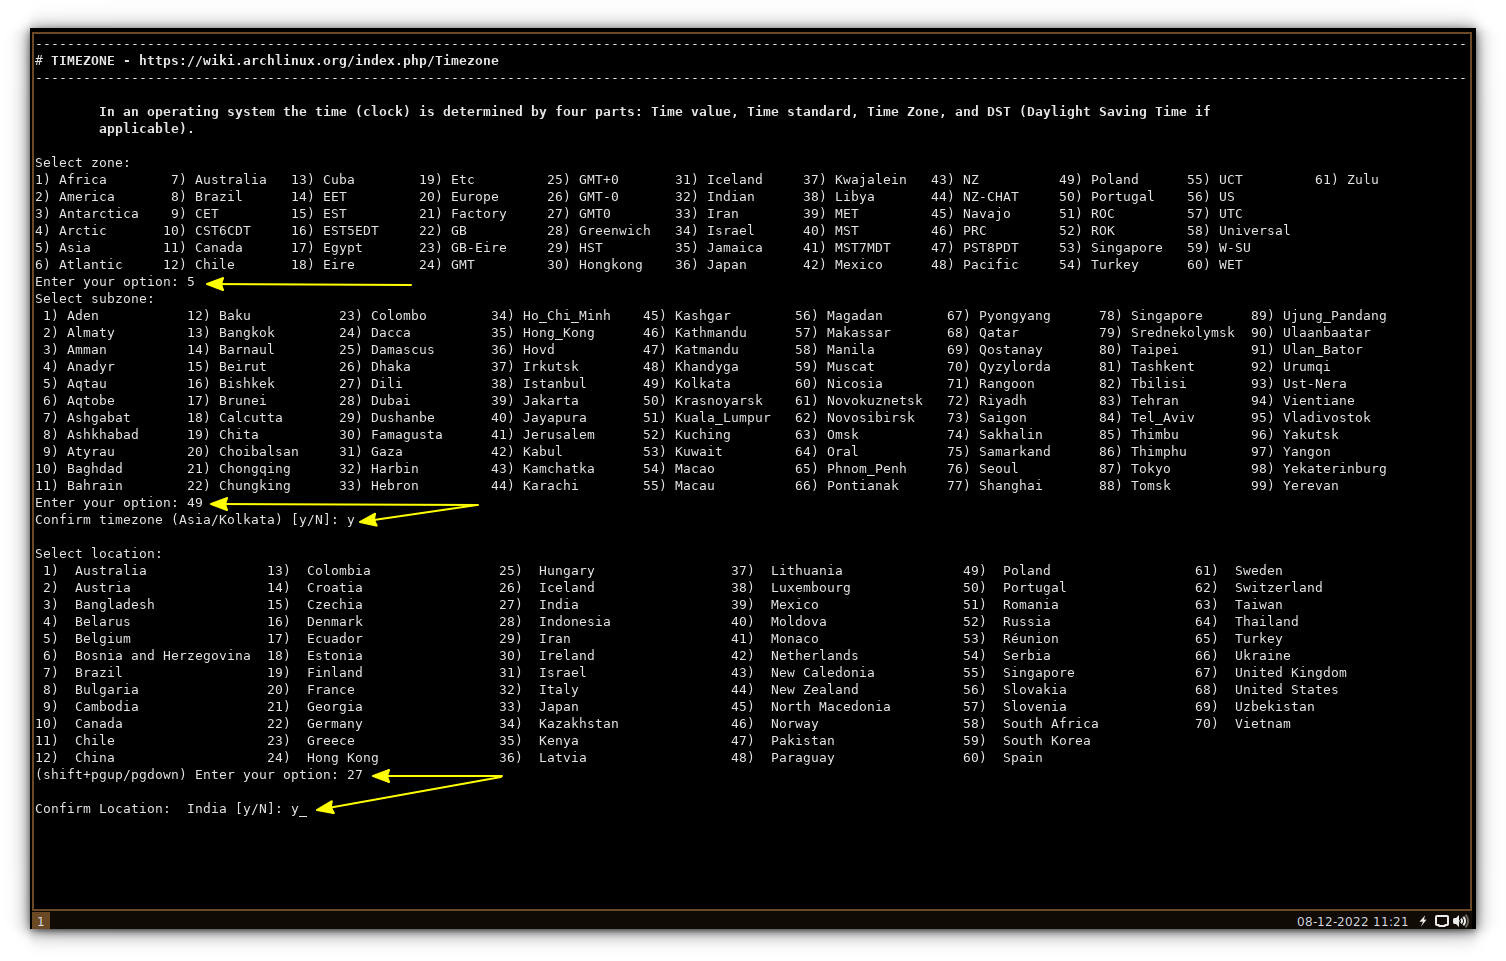
Also, set your location the same way.
Step 5: Set Hardware Clock
You have two options; Set Hardware Clock to UTC or Local Time.
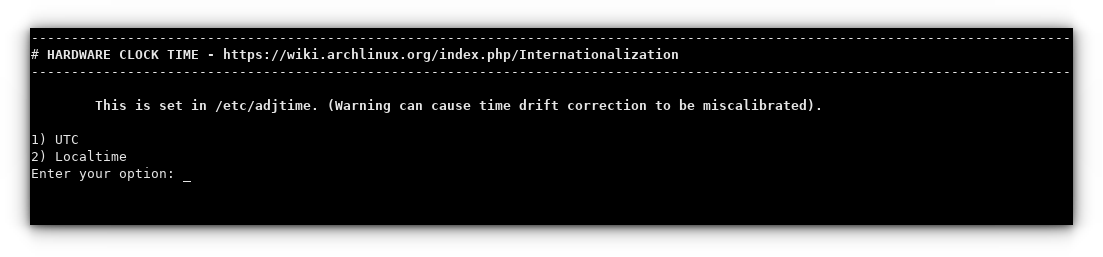
There are two time standards: localtime and Coordinated Universal Time (UTC). The localtime standard depends on the current time zone, while UTC is the global time standard and is independent of time zone values.
Enter your choice and press Enter key.
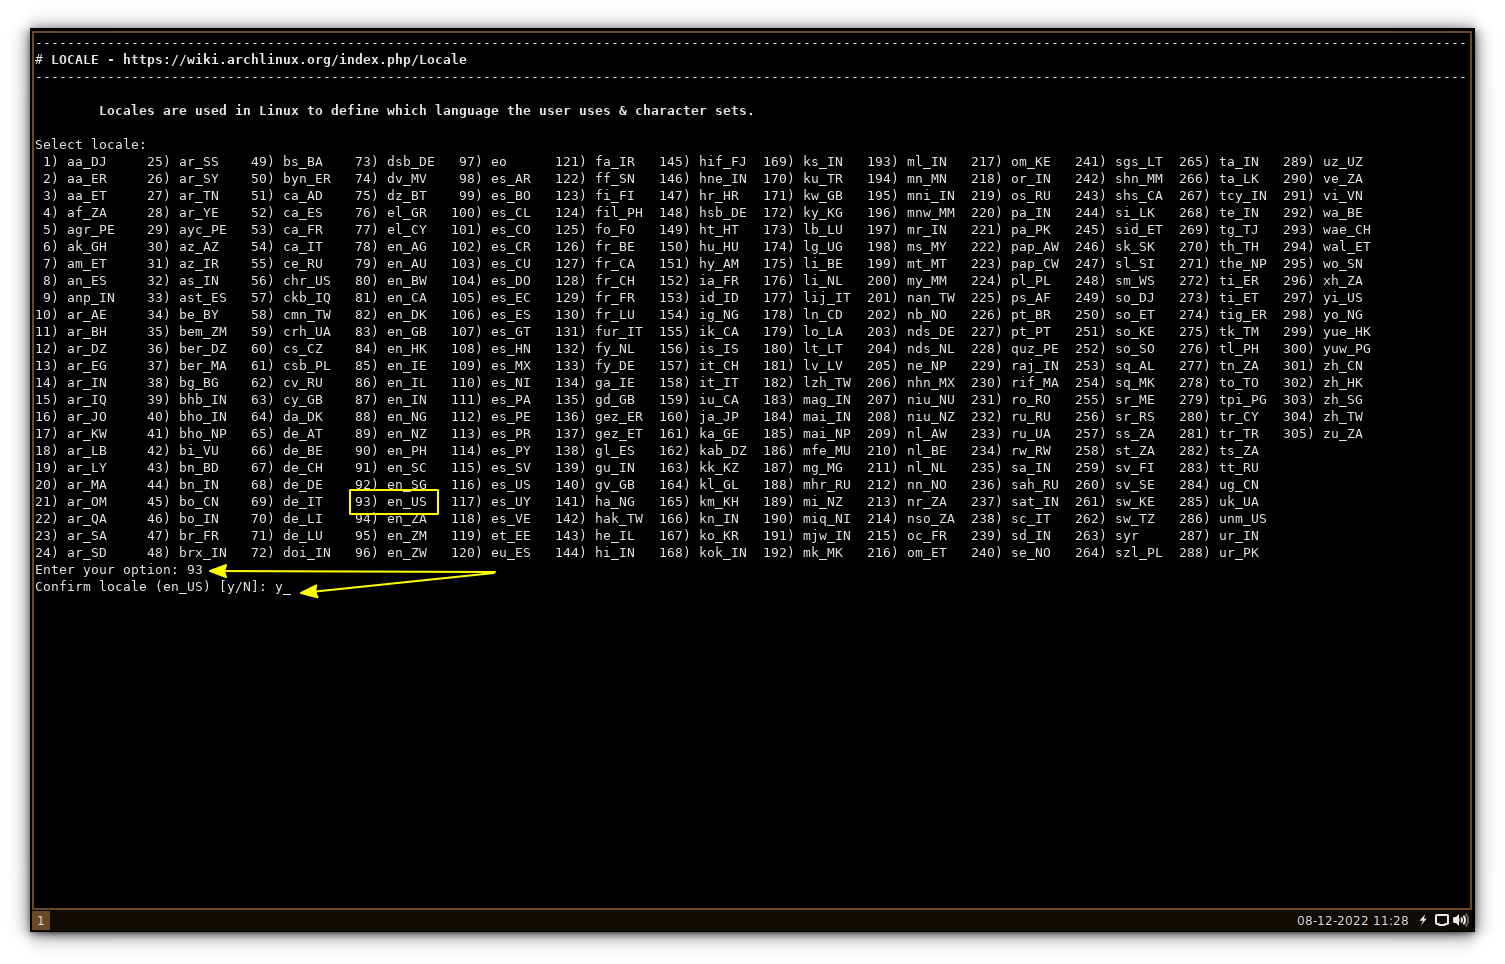
Step 6: Set Locale
Usually, you set the locale to en_US, if you are unsure what to do. That should be fine for most English-speaking users.
If you want to use the operating system in some other language like French, Spanish, Dutch etc, you can choose the appropriate locale from the list.
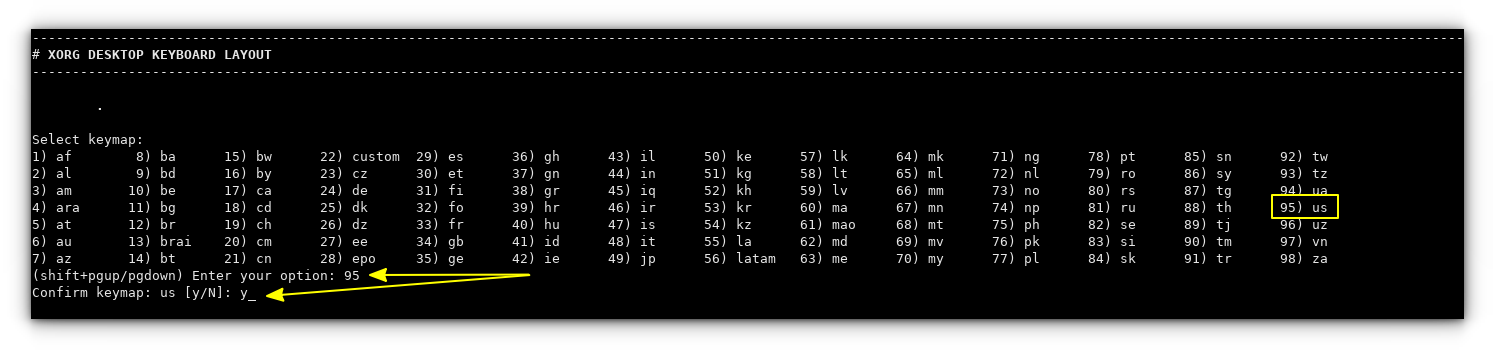
Step 7: Desktop Keyboard Layout
Similarly, most users should be fine with US keyboard. If you have some other keyboard (like French, or Italian), enter the appropriate choice from the available ones.
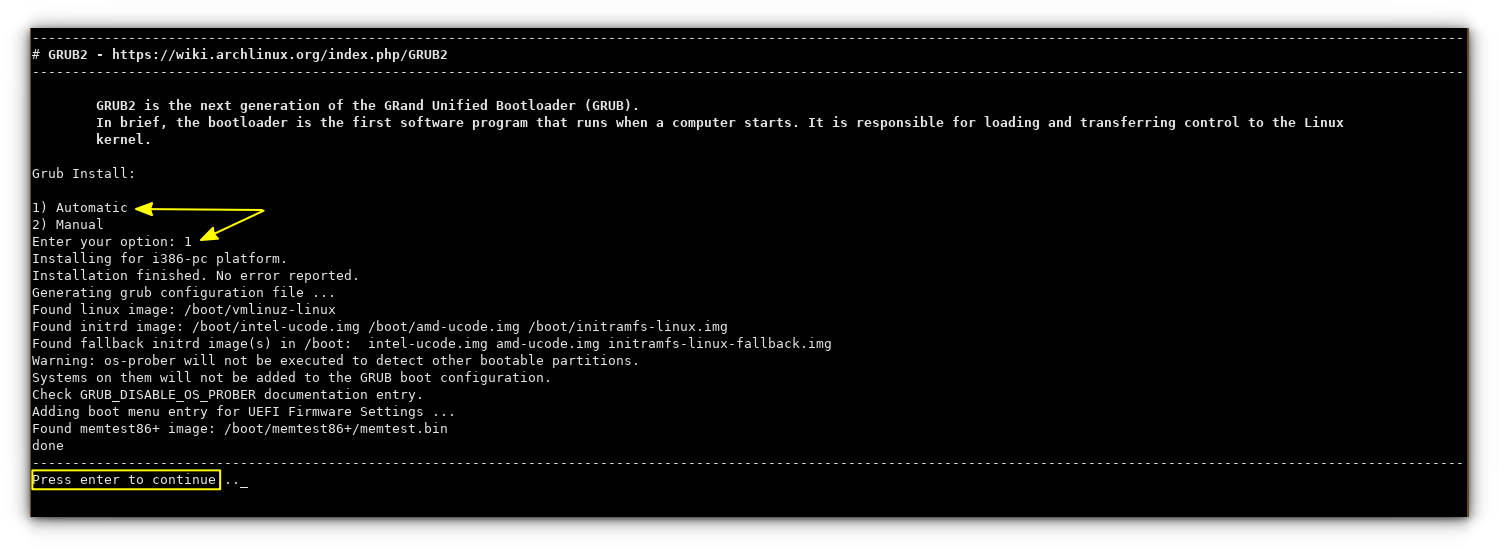
Step 8: Configure Bootloader
In ArchBang, you get GRUB2, Syslinux, or Systemd for the bootloader. To make it simple, I am selecting GRUB2 from the choice.
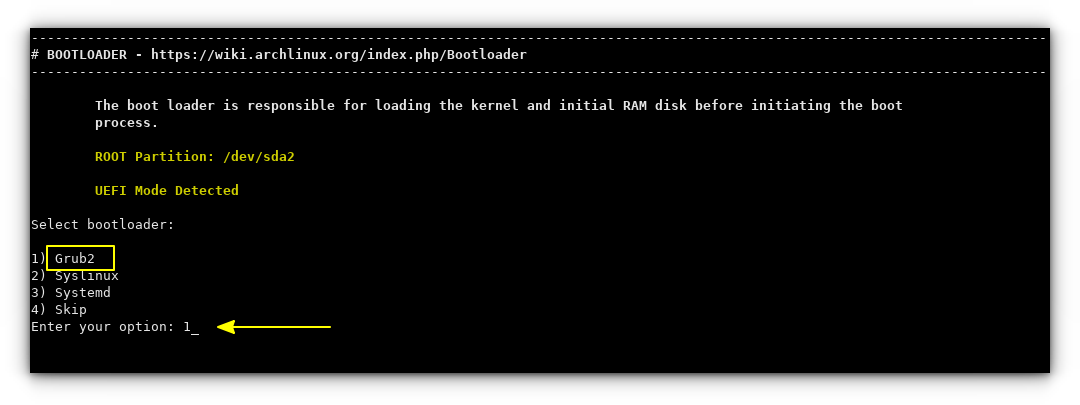
Now, it will ask you to specify the method to install GRUB. Select Automatic and press enter.
Step 9: Set Root Password
Now, you should enter the root password. Select “Root Password” from the main menu.
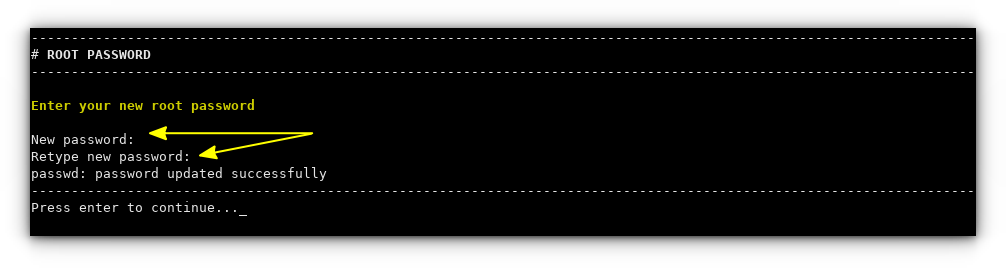
Here, enter and confirm the root password.
Step 10: Create a New User
Using a system with only a Root User is not secure. So, you should create a new user. In this installer, select the 10th option. Here, you should type a user name, password and confirm the password.
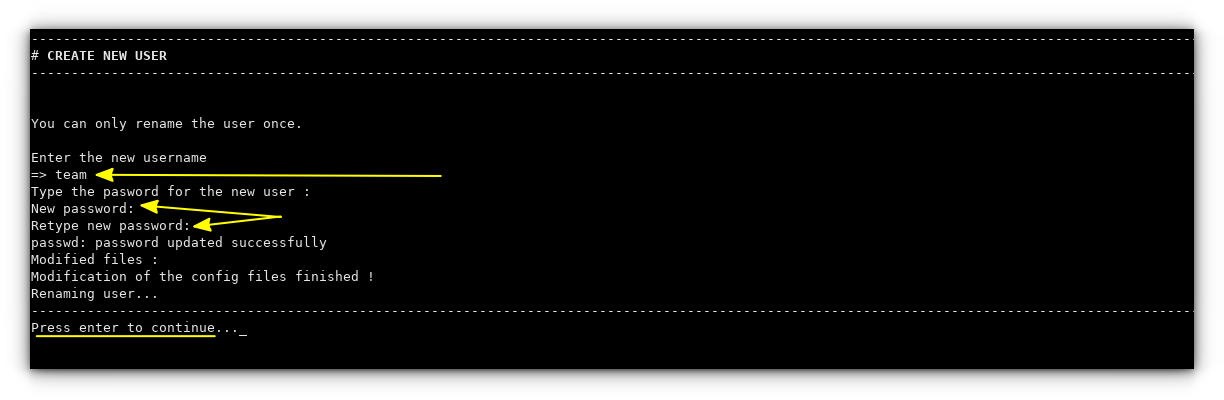
Once done, press Enter to go to the main menu.
Step 11: Finish configuration
At this stage, you have reviewed all the configurations needed. You can now make it to effect by entering the letter “d” as shown in the screenshot below:
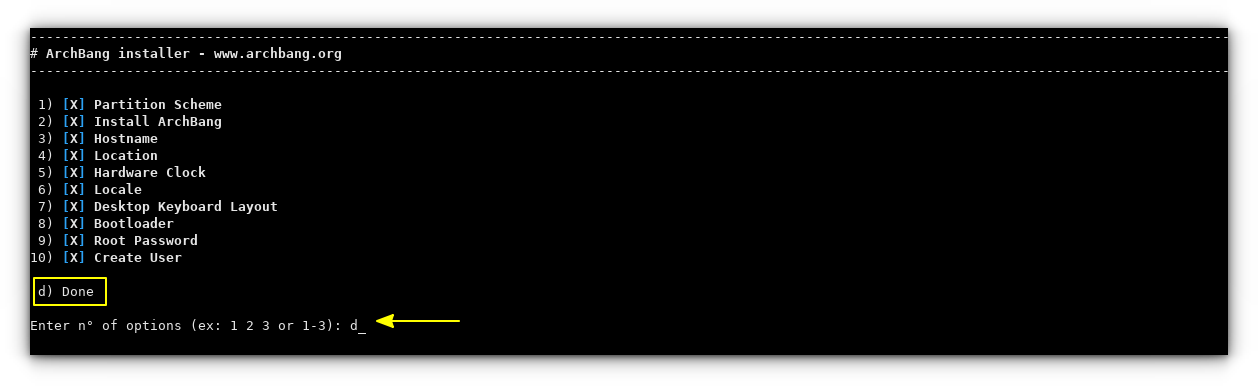
This will ask permission to reboot your system.

Entering “y” will reboot your system to the newly installed ArchBang system.
Post Installation Tweaks
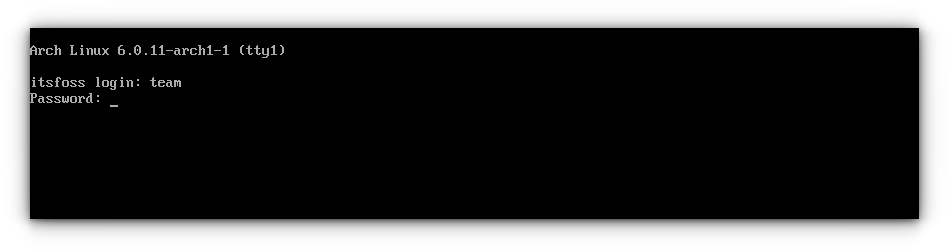
Once rebooted, you will land in the same console. Probably there is no display manager installed. Here you should enter the username and password and press enter.
This will bring you to the i3WM.

Once installed, you need to do a couple of update tasks. Connect to the internet first.
Firstly, you need to update the Pacman keys and archlinux-keyring.
To do the same, open a terminal by pressing Super + T and run the following commands one by one:
sudo pacman-key --init
sudo pacman-key --populate
sudo pacman -Syyu archlinux-keyring
This will update system packages and keyrings. Reboot your system.
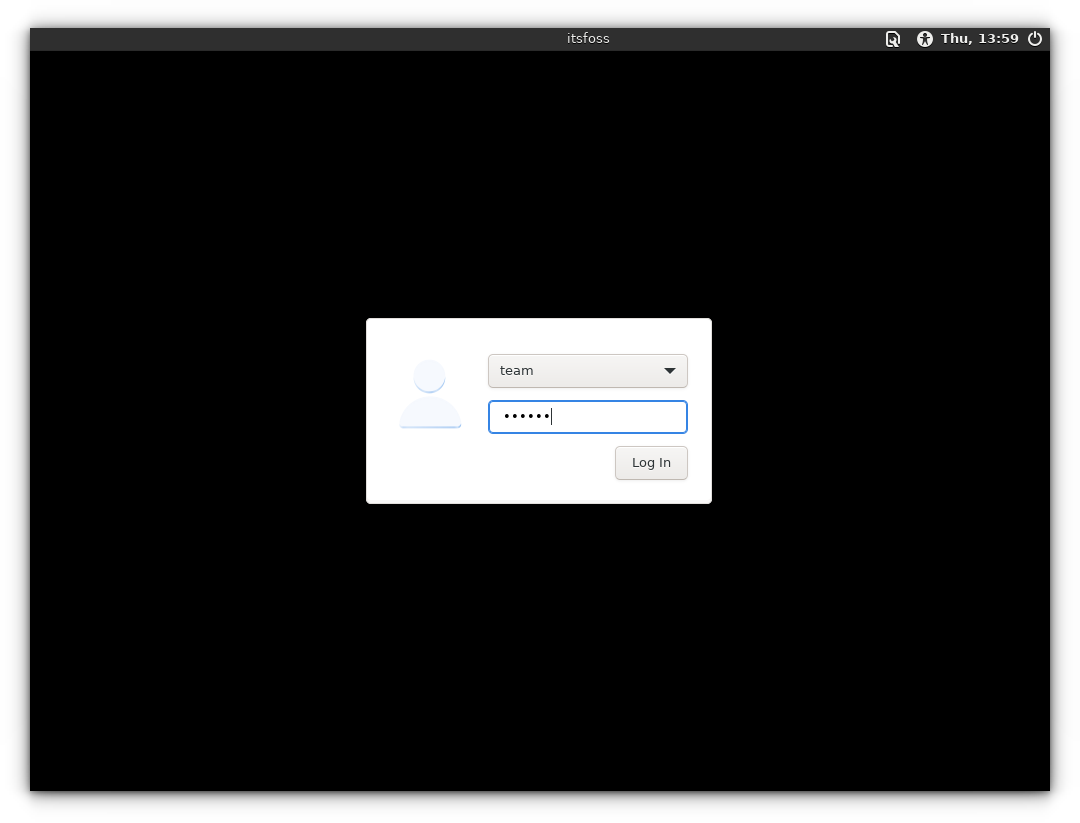
Now, you should install a display manager. I prefer LightDM display manager. So open a terminal and enter the following command to install it:
sudo pacman -S lightdm lightdm-gtk-greeterOnce installed, use the following command to start the Lightdm service:
sudo systemctl enable lightdm.serviceYou will get a good and minimal login screen from the next reboot.
You can now enjoy ArchBang Linux according to your liking.
Wrapping Up
ArchBang brings a good Arch Linux experience coupled with a not-so-hard installer and i3WM as the window manager.
I understand that using a text-based installer like this one could be intimidating for some users. But then, it is one of the joys of the Arch Linux domain. It feels like a challenge and when you successfully install it, it gives you a sense of accomplishment.
I have tried to detail all the steps with the necessary explanation. Please let me know if you face any issues or if you have any questions.
If this helped you, consider supporting It's FOSS
It's FOSS has been helping people use Linux for the past 14 years. Help us stay independent from big tech. Become a Plus member, enjoy ad-free reading and get 5 eBooks.

