

Arch Linux is hugely popular in the desktop Linux world. One of the reasons for its popularity is that installing Arch Linux itself is a complicated task.
I am not exaggerating. Installing Ubuntu or Debian is a lot easier task than Arch Linux because they have GUI based installers.
Arch doesn’t have that. Only lately, it introduced an official installer script. There is still no official GUI installer.
This is why installing Arch becomes a challenge; this is where virtual machines come in.
You can try installing Arch Linux in VirtualBox first and see if it’s something you would like to run on actual hardware. This way, you can experience Arch Linux without disturbing your current operating system.
In this article, I will guide you through installing a functional Arch Linux system in a virtual machine.
Installing Arch Linux on VirtualBox
Clearly, you need to first install VirtualBox on Linux or Windows. On Windows, simply go to Oracle’s website and download VirtualBox.
If you are using Windows 10 or a newer version, please ensure that virtualization is enabled on your system.
Once done, you need to head to Arch Linux’s official website to download the ISO file. You should find options to download using torrent or download the file directly.
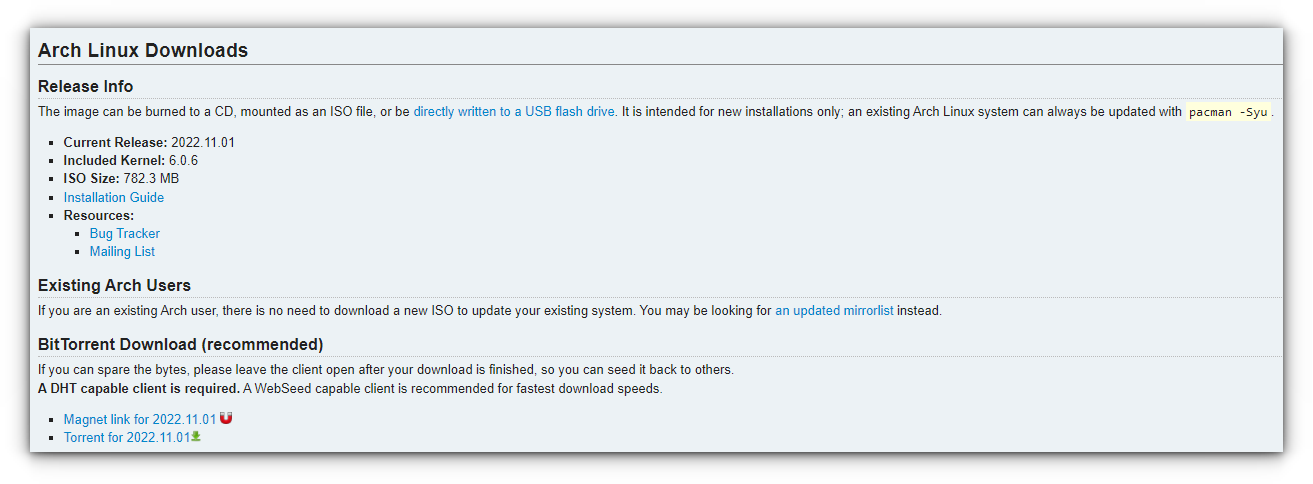
Hold on to the ISO file when needed; you can delete it to free space on your system after successful installation.
Now, let us begin installing Arch Linux on VirtualBox.
Part 1. Creating the Virtual Machine
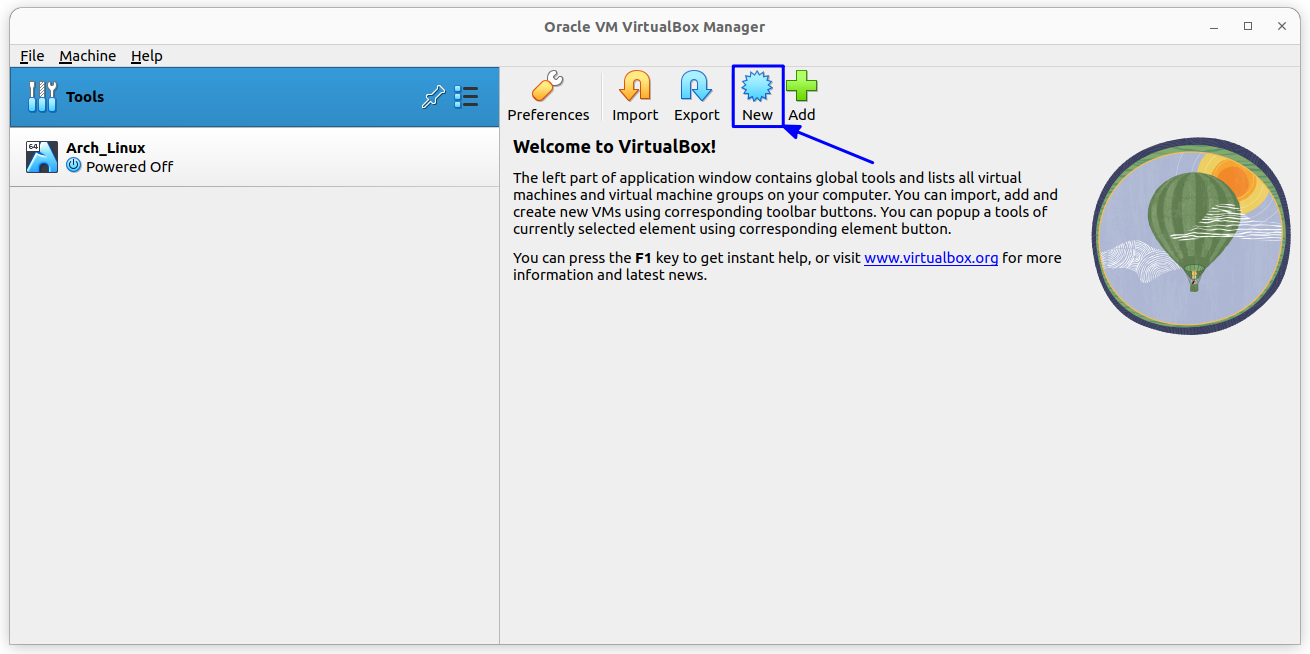
Step 1: First, you need to set up a few things in VirtualBox. Launch VirtualBox and click on “New” to create a virtual machine.
Note that you can continue creating the virtual machine using the guided mode, but you get more options at a single glance with the expert mode.
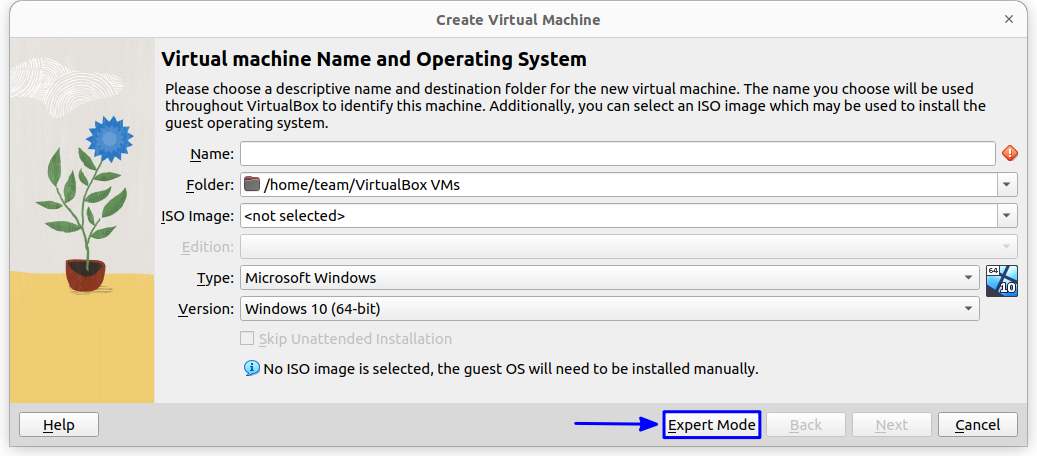
Hence, I recommend using the expert mode to create the virtual machine.
Fret not, the expert mode is as easy, with just a bit of extra available options and nothing else to worry about.
Step 2: Enter the name of your virtual machine, it should auto-detect the “Type” and “Version” respectively when you type in “Arch Linux” in the name field. On newer VirtualBox versions, you can select the ISO file from here itself.

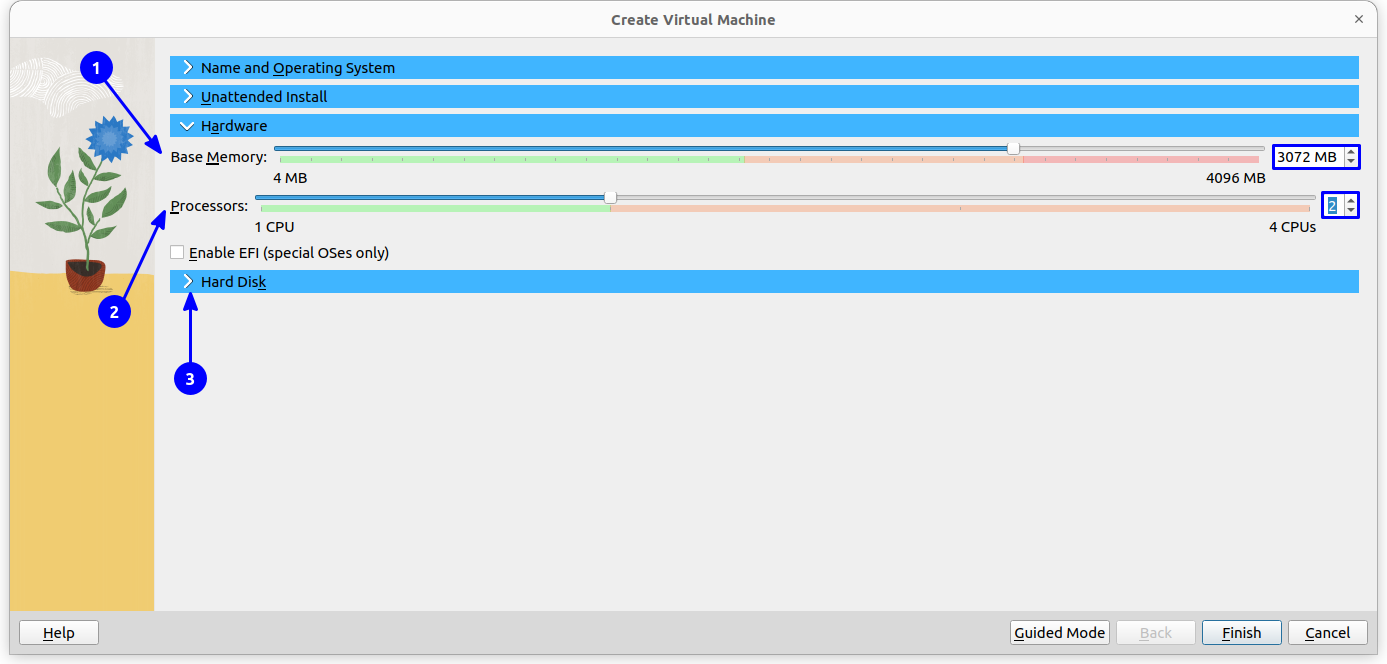
You should increase the memory size to use the virtual machine comfortably. If it is just for minor testing, you can go ahead with the default setting.
In my case, I allocate ~3 GB of RAM and 2 processor cores.
Also, make sure to create a virtual hard disk under the “Hard disk” option. It should be the selected option by default. (On the newer versions of VirtualBox, this option comes under the next step).
Now, proceed to set the virtual hard disk size.
Step 3: You can choose a preferred location path for the virtual hard disk and tweak the size as per your requirements. In order to set the hardware parameters, you need to check the create a virtual hard disk now box.
The installation should not be a problem with the minimum allocated size (8 GB), but to be on the safe side, you may want to allocate at least 10-15 GB.
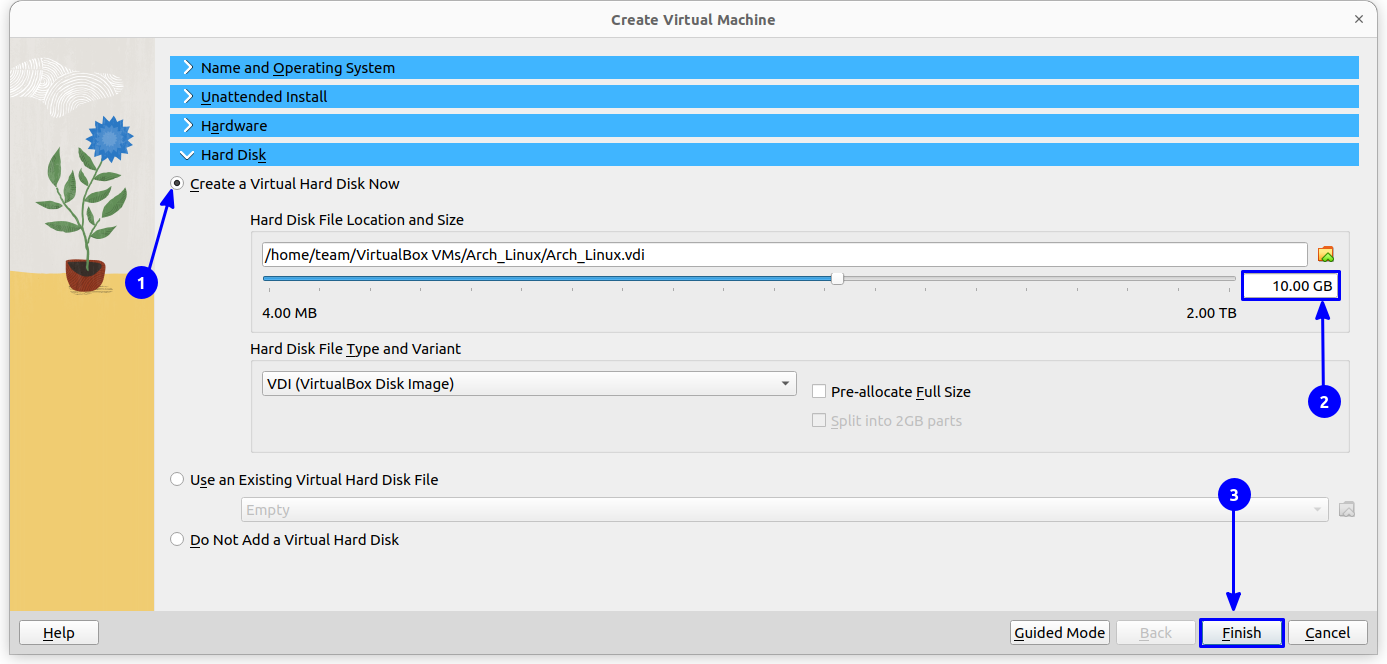
Hard disk file type will be VDI (VirtualBox Disk Image) by default. Also, memory allocation is set to dynamic by default. If you want to allocate the whole size at the beginning itself, you can check the Pre-allocate Full Size check box.
Next, you need to select the hard disk file type as “VDI (VirtualBox Disk Image)” and the storage as “Dynamically allocated,” as shown in the image above.
VDI is the most common hard disk type for the virtual hard disk.
And, when you select the “Dynamically allocated” option for the hard disk storage, it means that the storage space will be utilized as per usage. In other words, 10 GB of space won’t be locked from your disk as soon as the virtual machine is created.
Now, all you have to do is hit “Finish” to add the virtual machine.
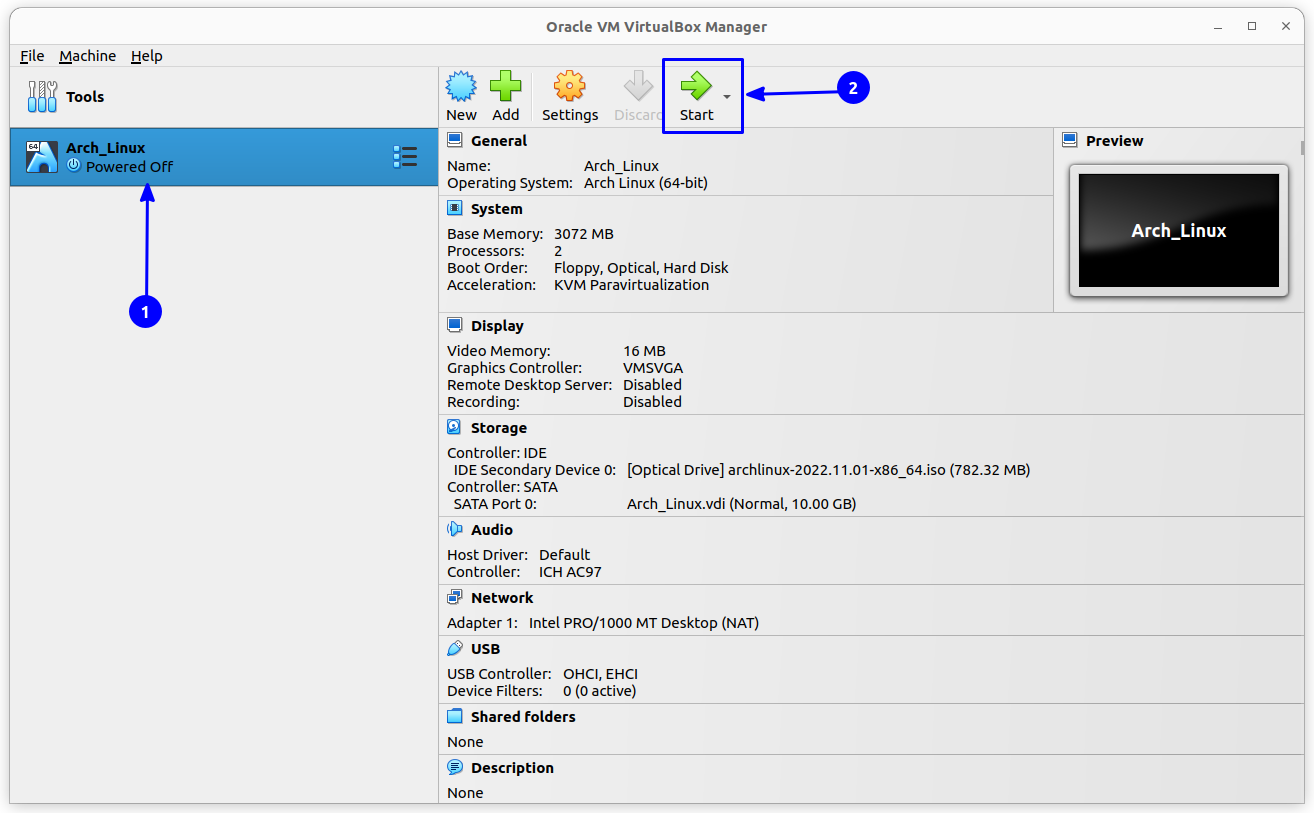
You can start the virtual machine, either by pressing the Start button, or double clicking the VM.
Part 2: Installing Arch Linux using the Guided Installer
Arch Linux has made the installation easier by introducing a guided installer, i.e., it gives you all the options you need to set up a full-fledged Arch Linux system.
So, with the help of a guided installer, you do not have to install a desktop environment and other essential packages yourself separately. All you have to do is follow the onscreen instructions and choose the options suitable for your installation.
In this article, we focus on the guided installer. If you want to do things yourself, you should follow our Arch installation guide.
Moving on to the installation, when you start the VM, you will be looking at this screen:
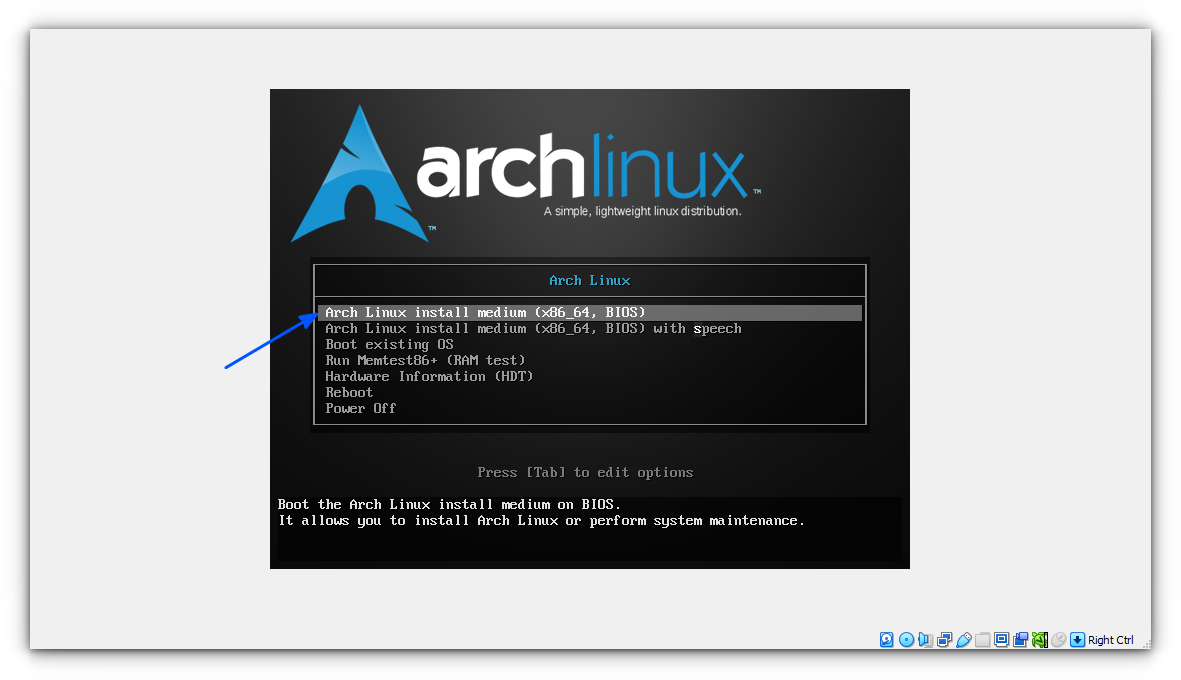
The first option is the ideal way of proceeding. If you have a specific requirement, you can choose other options to boot up Arch Linux.
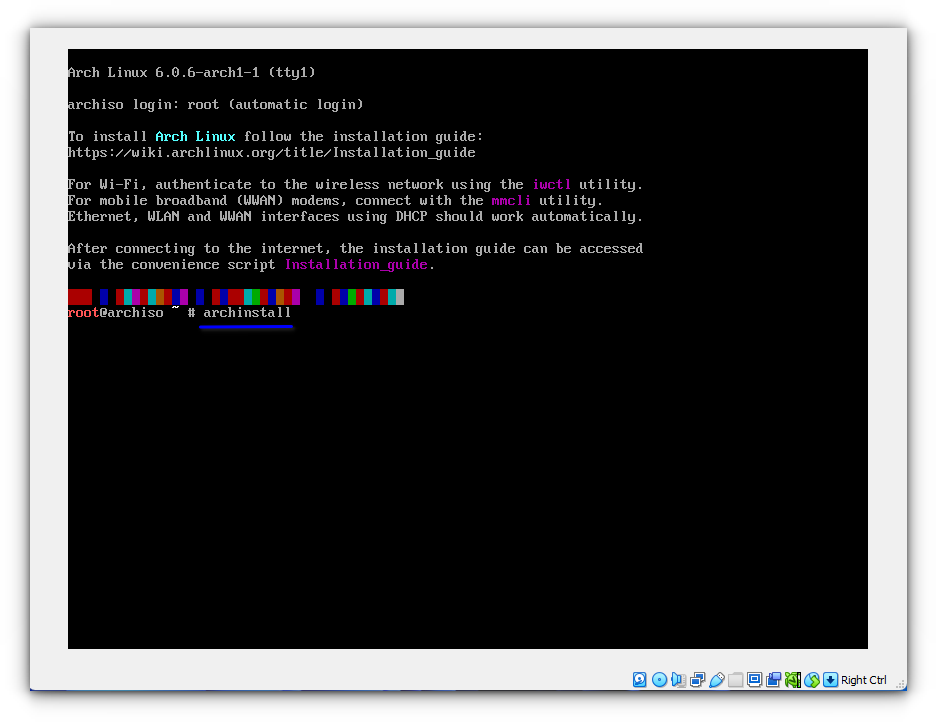
Now, you should be looking at a terminal window. Here’s how to get started:
Step 1: Type in “archinstall” to initiate installation using the guided installer.
This will bring us to the new menu-based installer.
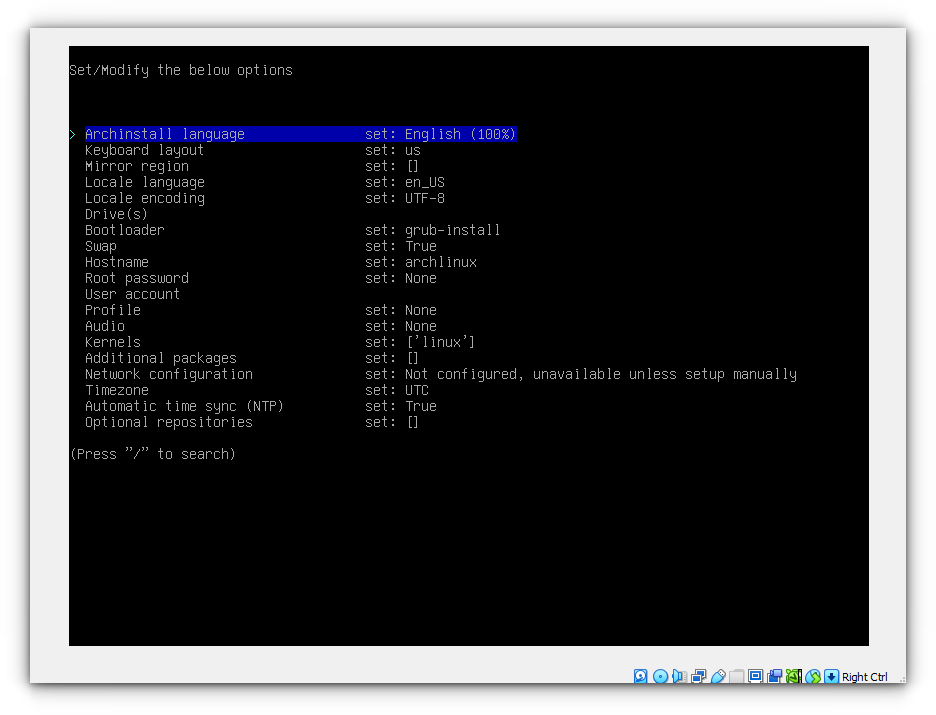
There are options available to tweak many things. Here, default values for many of the settings, like language, keyboard layout etc. are fine. So, only describe the other relevant menu to complete the install.
Step 2: Select the Mirror Region option and press enter. Here, you need to select the fastest mirror region for your location.
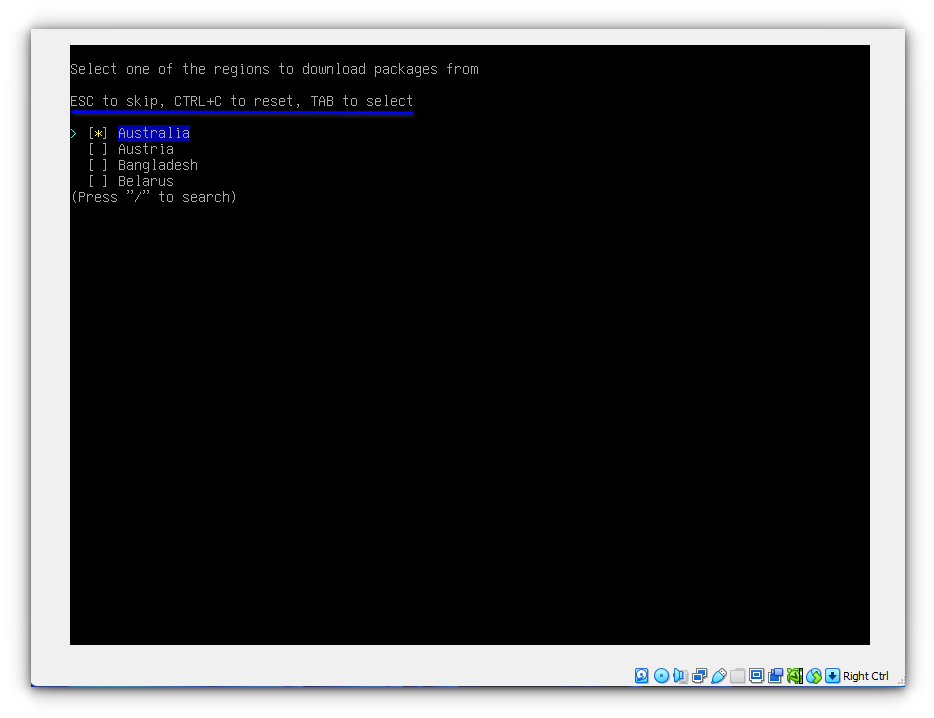
If you have multiple entries, you can select each by pressing TAB key. Once selected all mirrors, press Enter.
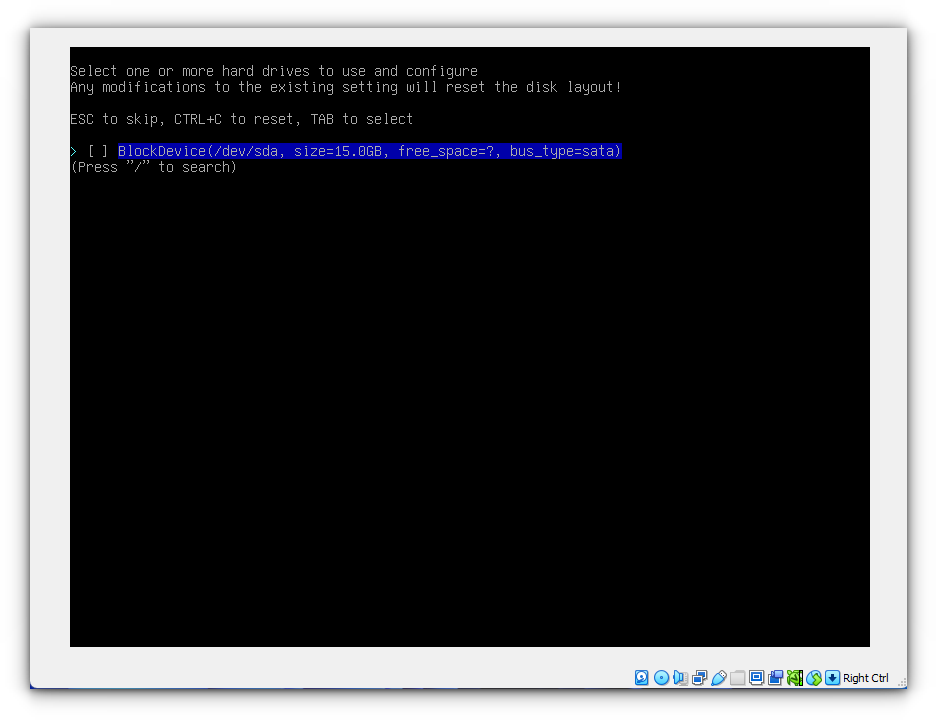
Step 3: Select the Drive option from the main menu to set the hard drive in which you are going to install Arch Linux. Inside this menu, in case you find a list of drives, select the disk with the highest size (which will be our hard disk).
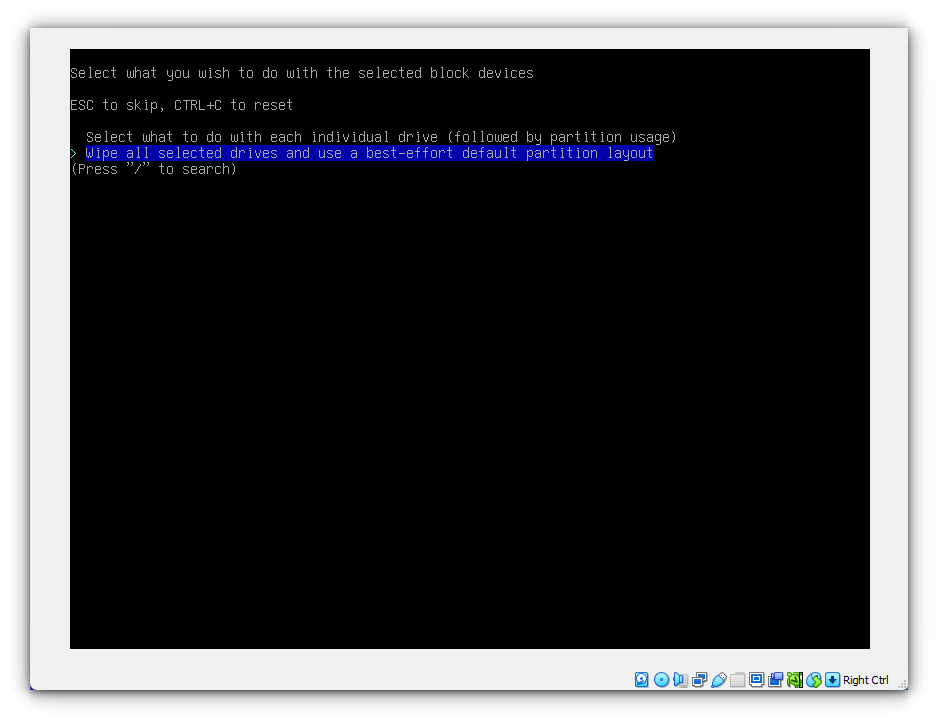
Step 4: Format the drive and set the filesystem.
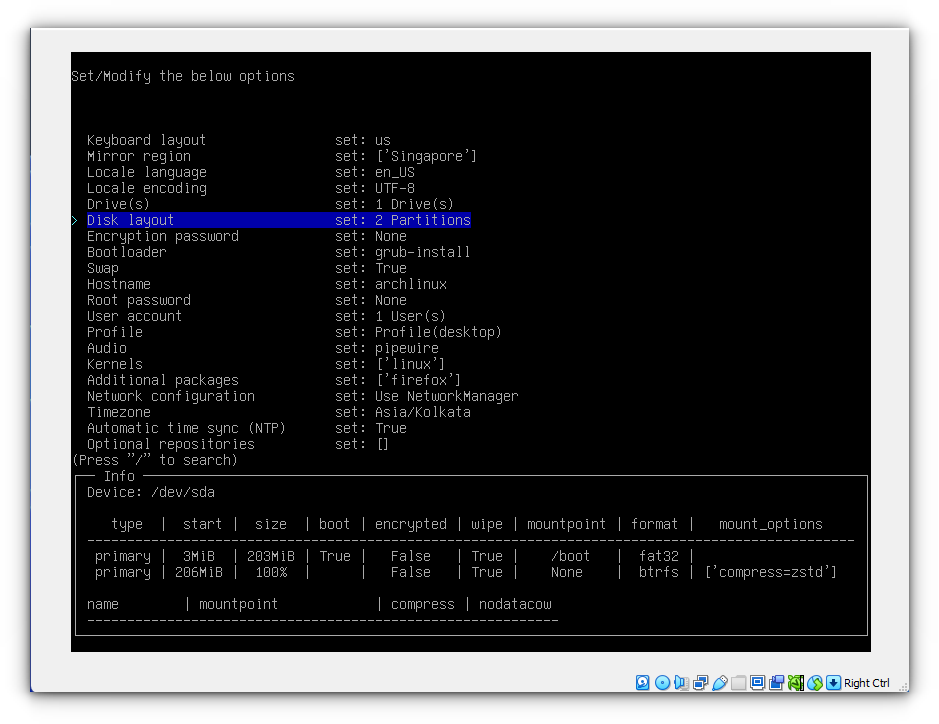
You need to select the Disk Layout option from the main menu and select the option as shown in the screenshot below:
This will ask us to select a file system. In this case, I used BTRFS filesystem. So select your file system preference and press enter.
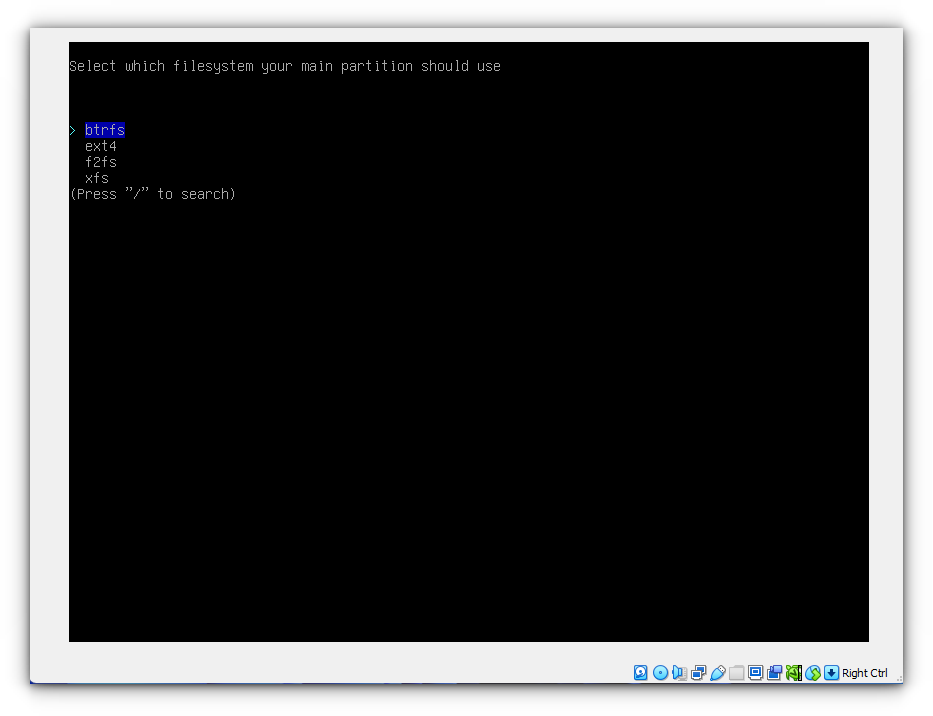
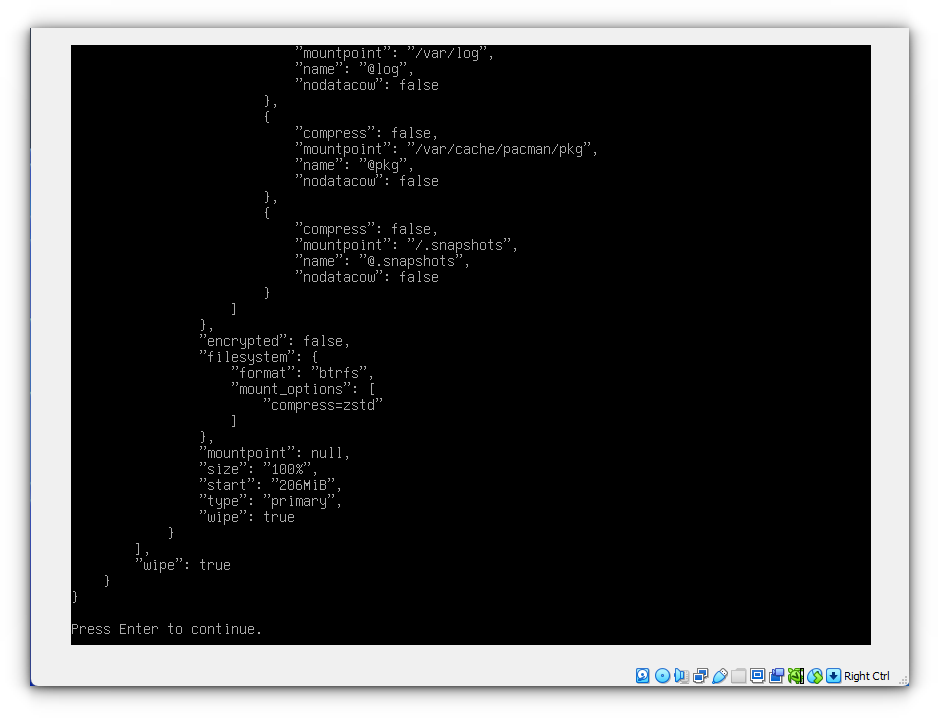
This will ask for several yes/no questions about using BTRFS subvolumes with a default structure and BTRFS compression. Agree on the default and press enter.
Step 5: You can skip creating a root password (This will disable the root, which is not an issue). But you must create a new user and give him sudo privileges. Go to the User Accounts option and select Add a new user:
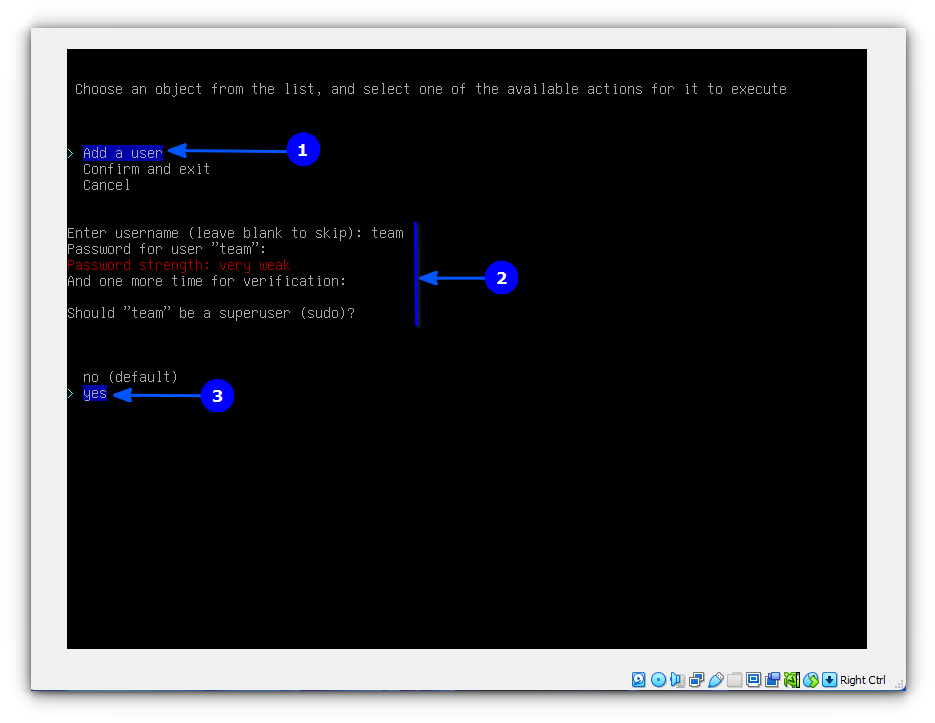
You can select confirm and exit option (if not seen, scroll down using down arrow).
Step 6: In this step, you need to select the desktop environment. First select Profile option. In here, select the desktop option as shown below:
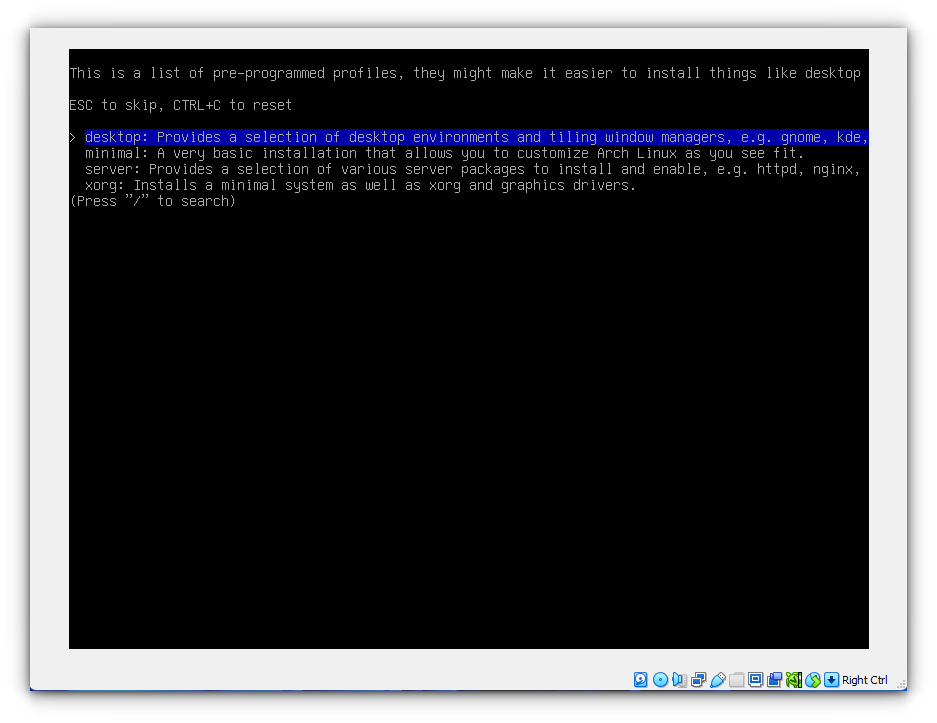
This will list the available desktop environments. Choose your favourite desktop from the list. I used GNOME here.
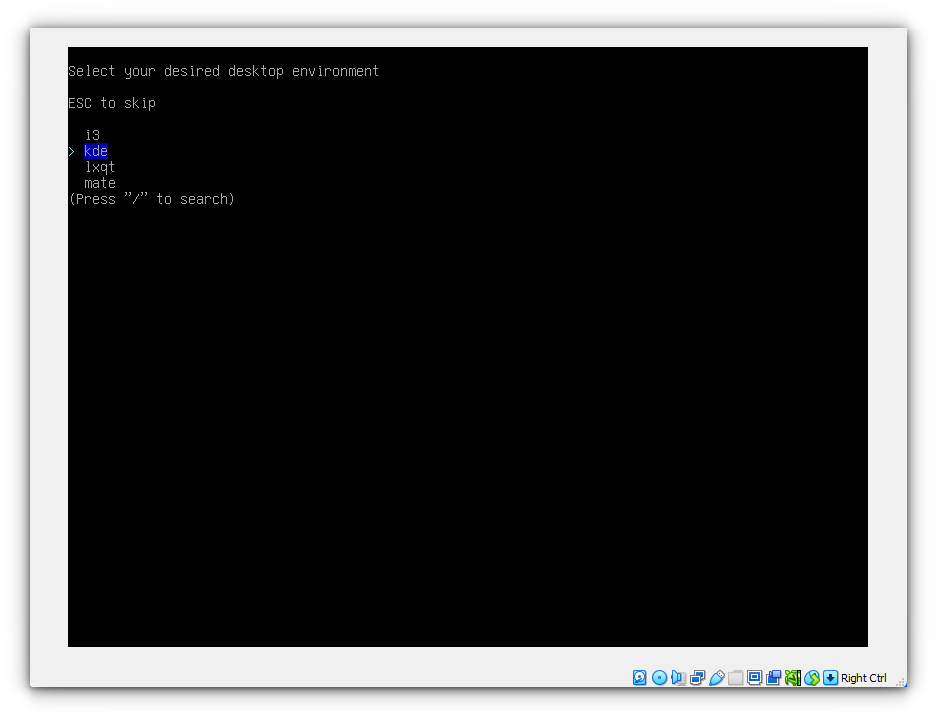
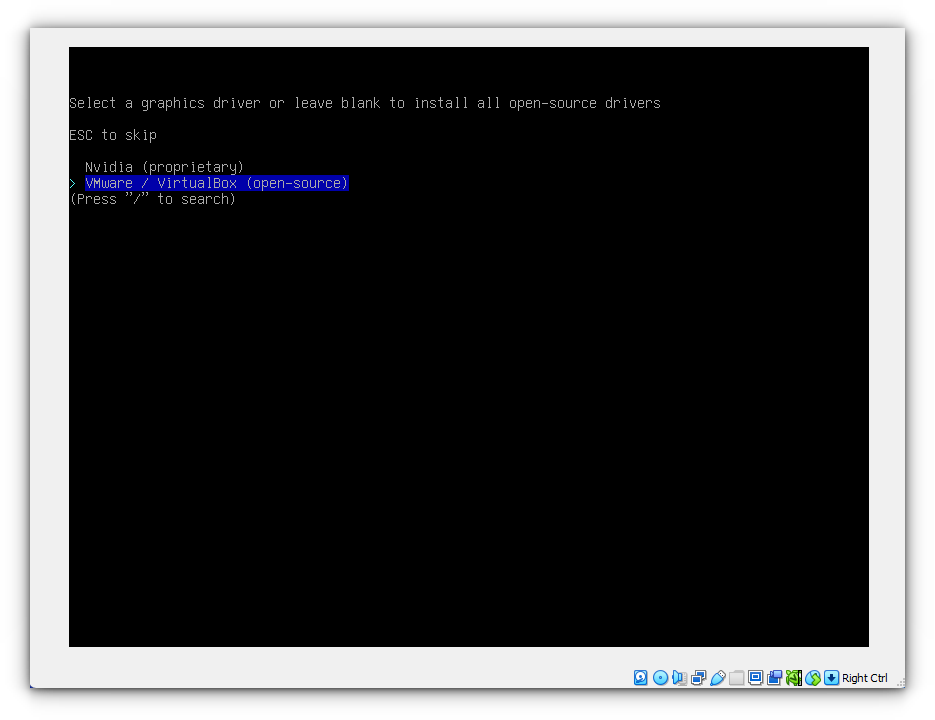
On the next screen, you need to select the graphics driver. For VirtualBox, select the VMware/VirtualBox driver.
Step 7: Now, you need to select the following options from the subsequent options:
- Audio: Default is Pipewire
- Kernel: Either use default Linux kernel or you have other options like LTS, Hardened, Zen etc.
- Additional Packages: Specify additional packages that you need, by name (like firefox).
- Network Configuration: Use Network Manager
- Time Zone: Your Location Time
- Optional Repositories: Testing/Multilib
Once done, this will somewhat be your setup:
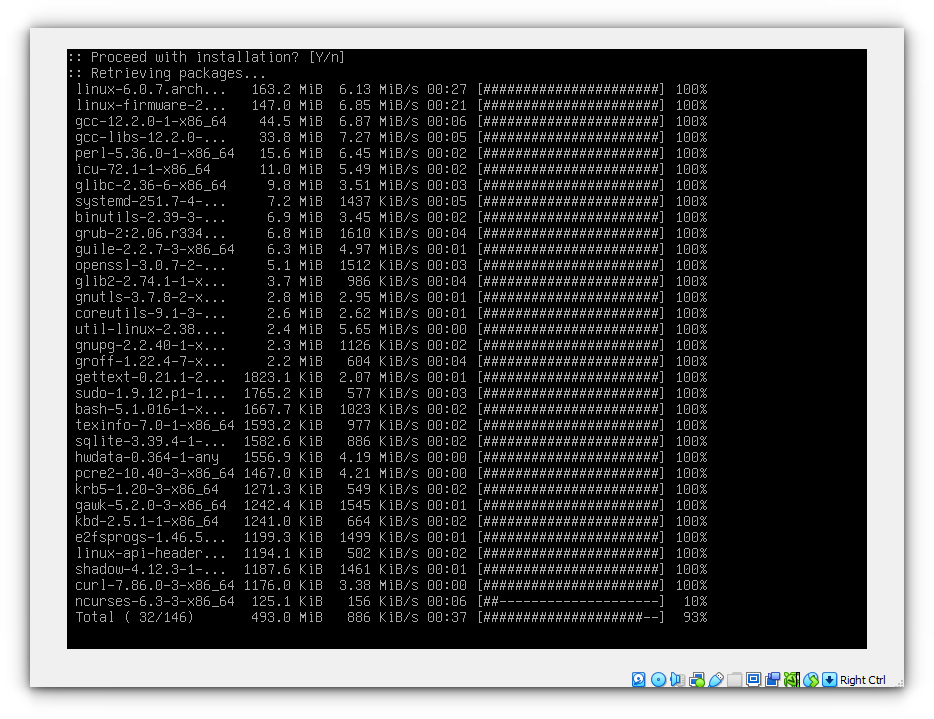
Step 8: Press the install button on the bottom. This will start the installation process. If you have a fast internet connection/system, the download and install process takes some 5 to 10 minutes.
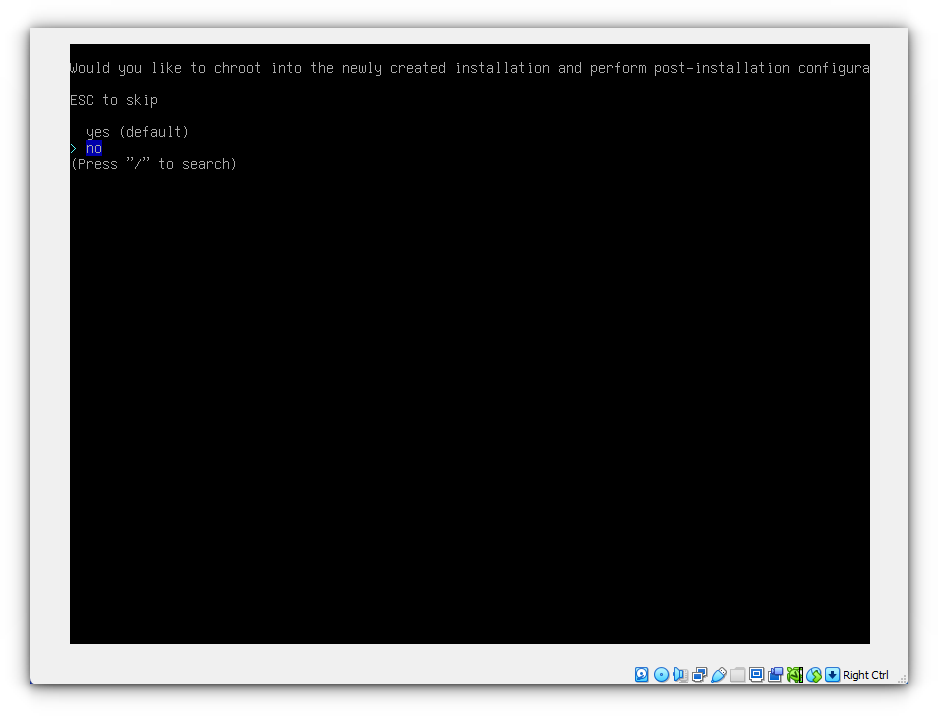
After the installation is complete, it will ask you to chroot into a newly created installation for post-installation configuration, but we don’t need that. So, select No to complete the installation.
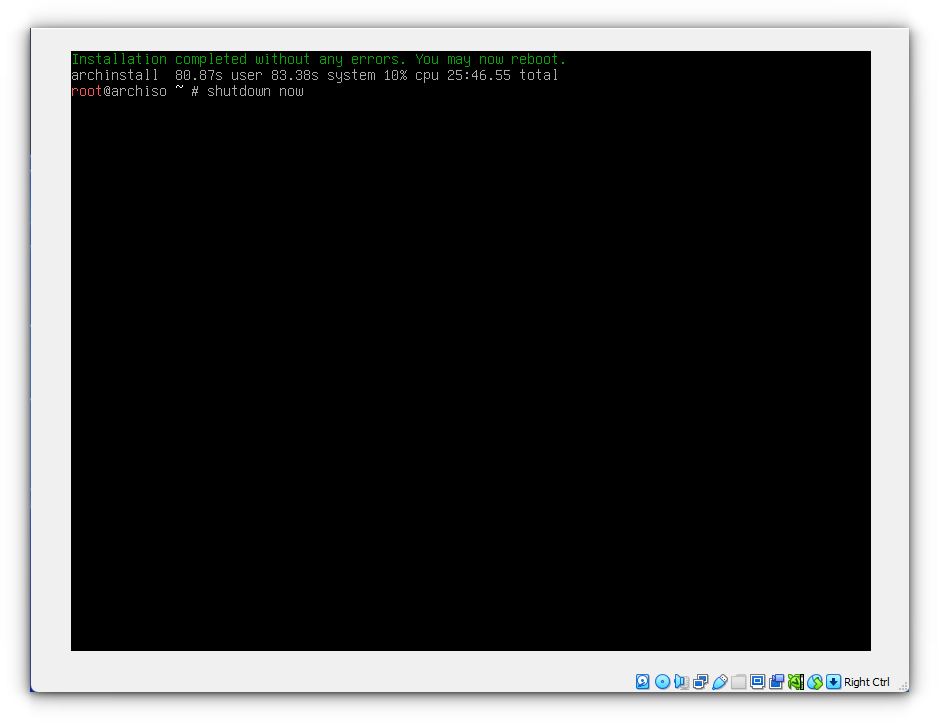
Step 13: Finally, you should see the terminal window again. Type in:
shutdown nowThis will safely exit the installation and close the virtual machine.
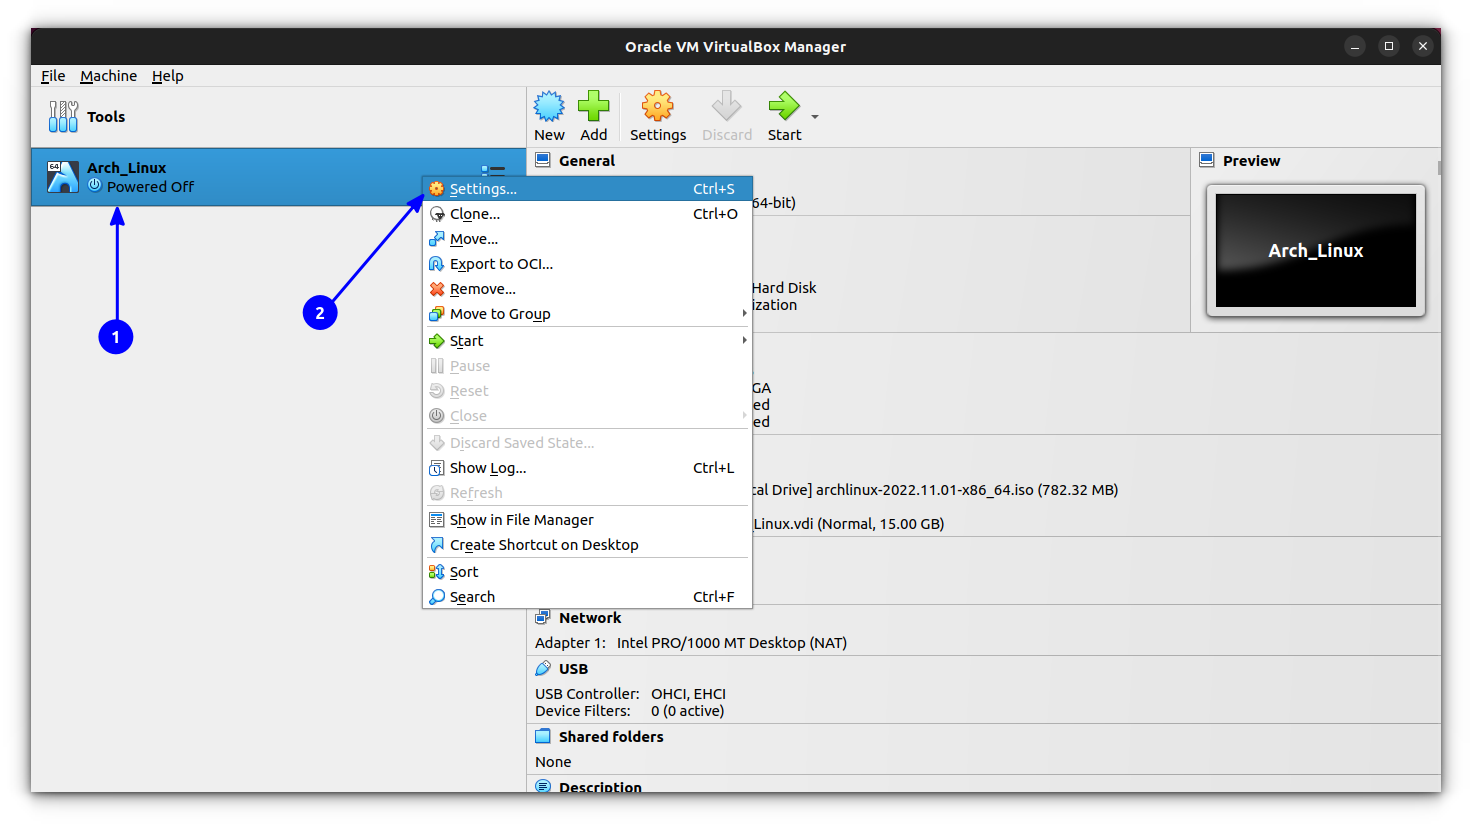
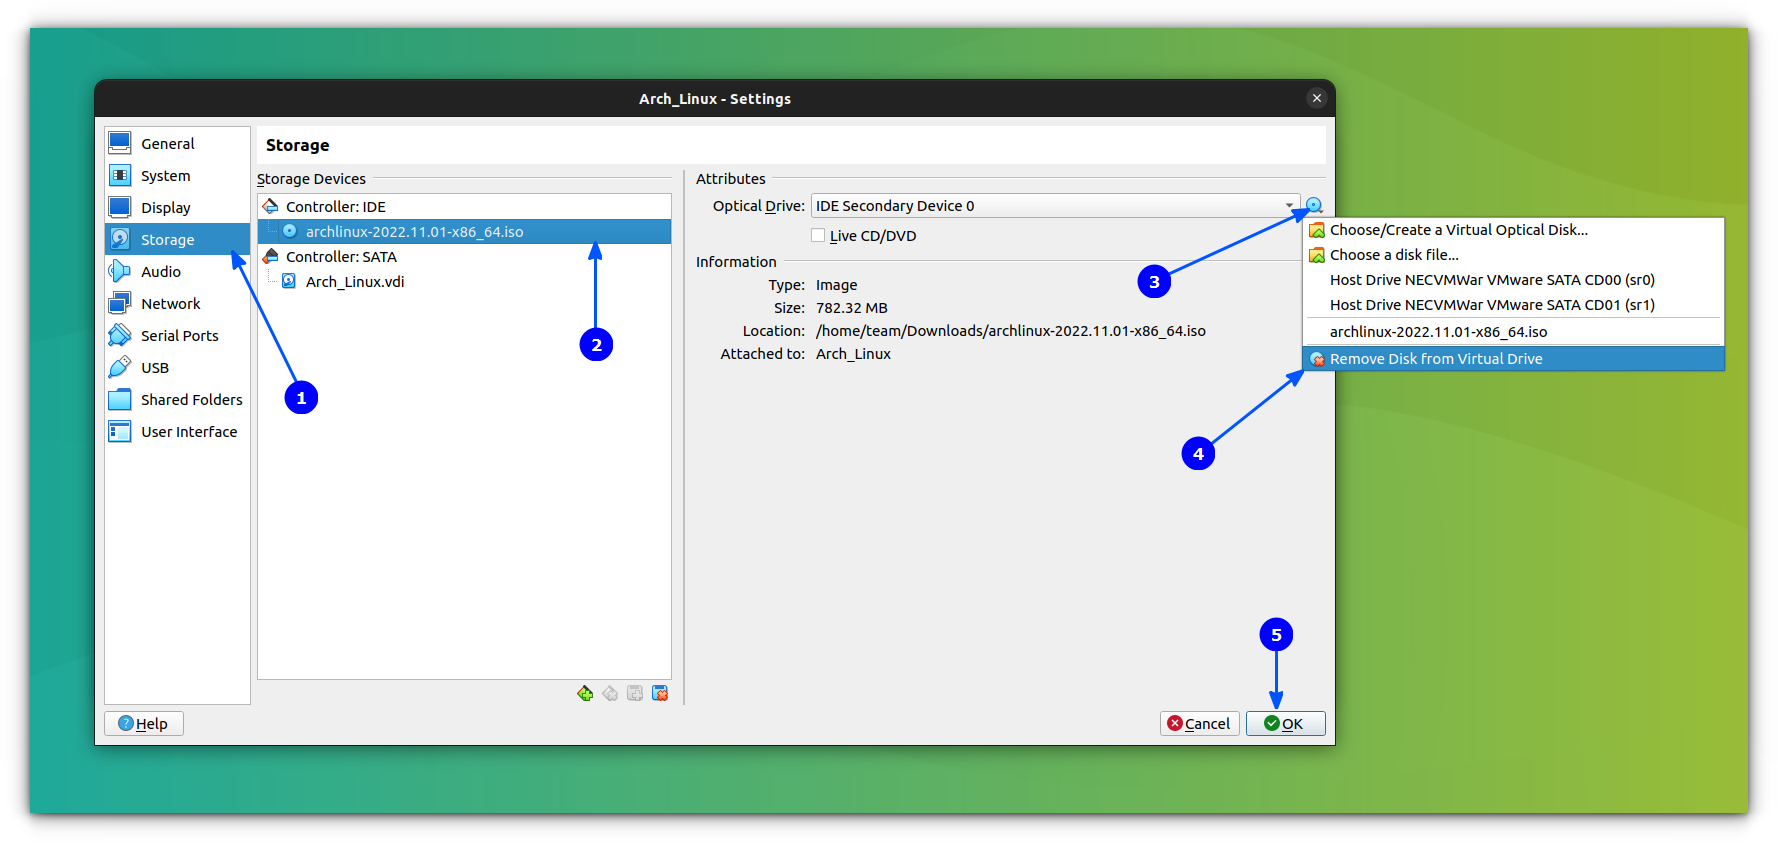
It’s all set! Before starting the virtual machine with Arch installed, you need to do one more thing – remove the ISO disk selected as the optical drive. Similar to how you added the ISO to boot from, you can head to the virtual machine settings and remove it as shown below:
That’s it! You are done installing Arch Linux on VirtualBox.
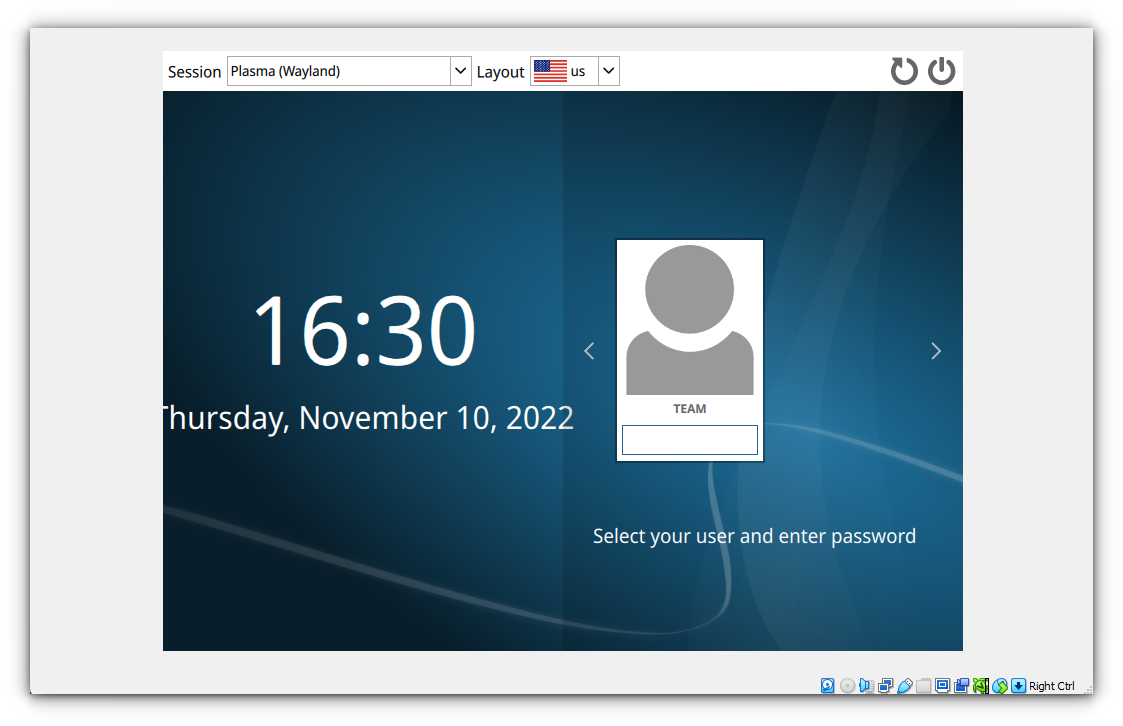
All you have to do is start the virtual machine, and here’s how it looks in my case:
Even though it takes a bit of time to go through the options, the new guided installer on Arch Linux saves a lot of time to get the essentials right.
The same set of steps applies to installing Arch Linux on your computer. You must make a separate bootable USB drive using Etcher with the Arch Linux ISO file.
Wrapping Up
Arch Linux is a popular choice for a variety of reasons. However, if it is your first time installing or if you want to test it out, a virtual machine is the best way to experience it without disrupting your host computer.
I hope this helps you install Arch Linux on VirtualBox. Let me know your thoughts in the comments down below.
