
You’ve got a fresh Ubuntu install and you’re customizing Ubuntu to your liking. You want the best experience and the best apps for your needs.
The only thing missing is a weather app. Luckily for you, we got you covered. Just make sure you have the Universe repository enabled.
8 Ways to Display Weather Information in Ubuntu 18.04
Back in the Unity days, there were a few popular options like My Weather Indicator to display weather on your system. Those options are either discontinued or not available in Ubuntu 18.04 and higher versions anymore.
Fortunately, there are many other options to choose from. Some are minimalist and plain simple to use, some offer detailed information (or even present you with news headlines) and some are made for terminal gurus. Whatever your needs may be, the right app is waiting for you.
Note: The presented apps are in no particular order of ranking.
Top Panel Apps
These applications usually sit on the top panel of your screen. Good for quick look at the temperature.
1. OpenWeather Shell Extension
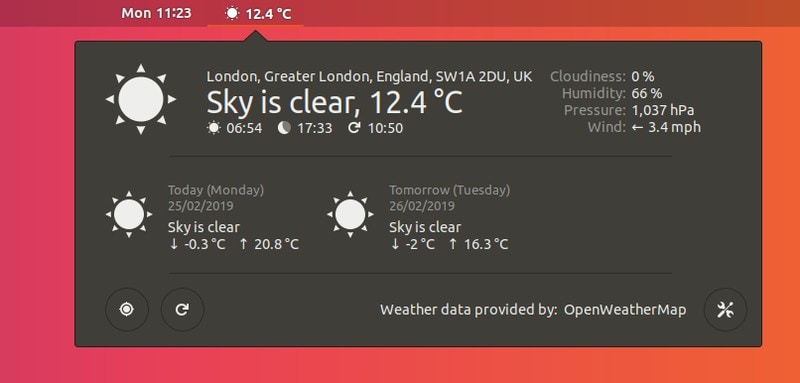
Key features:
- Simple to install and customize
- Uses OpenWeatherMap (by default)
- Many Units and Layout options
- Can save multiple locations (that can easily be changed)
This is a great extension presenting you information in a simple manner. There are multiple ways to install this. It is the weather app that I find myself using the most, because it’s just a simple, no-hassle integrated weather display for the top panel.
How to Install:
I recommend reading this detailed tutorial about using GNOME extensions. The easiest way to install this extension is to open up a terminal and run:
sudo apt install gnome-shell-extension-weather
Then all you have to restart the gnome shell by executing:
Alt+F2
Enter r and press Enter.
Now open up Tweaks (gnome tweak tool) and enable
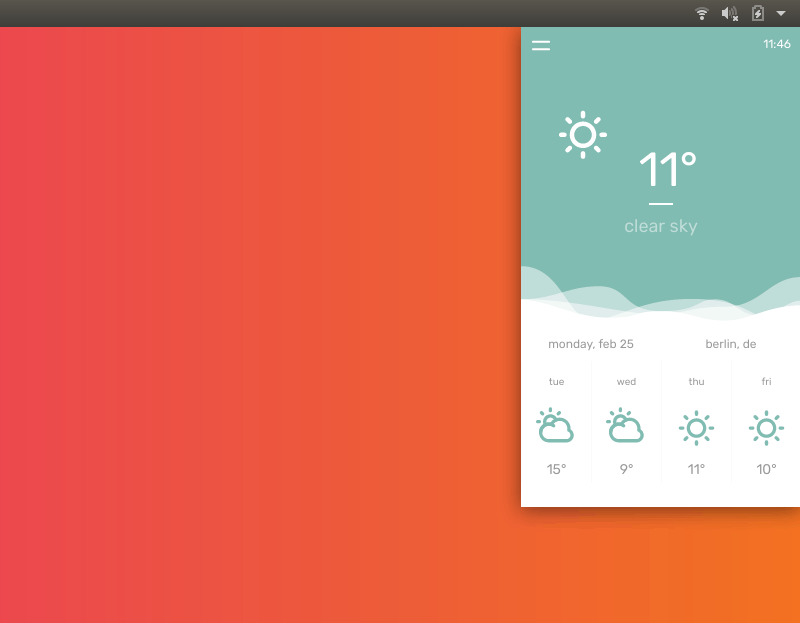
2. gnome-weather
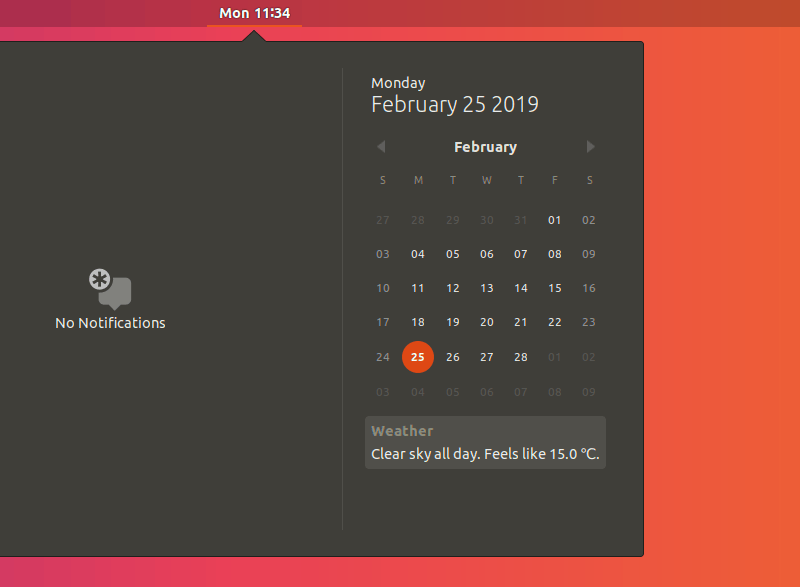
Key features:
- Pleasant Design
- Integrated into Calendar (Top Panel)
- Simple Install
- Flatpak install available
This app is great for new users. The installation is only one command and the app is easy to use. Although it doesn’t have as many features as other apps, it is still great if you don’t want to bother with multiple settings and a complex install procedure.
How to Install:
All you have to do is run:
sudo apt install gnome-weather
Now search for Weather and the app should pop up. After logging out (and logging back in), the Calendar extension will be displayed.
If you prefer, you can get a flatpak version.
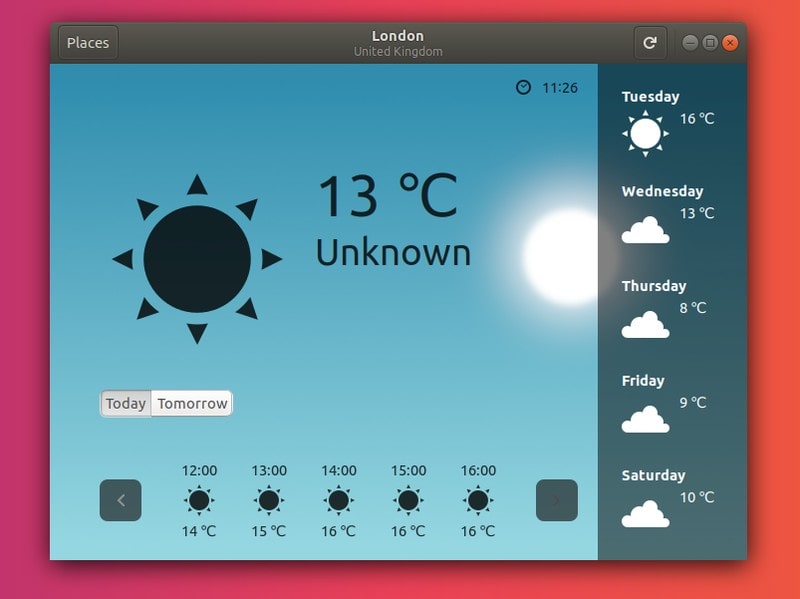
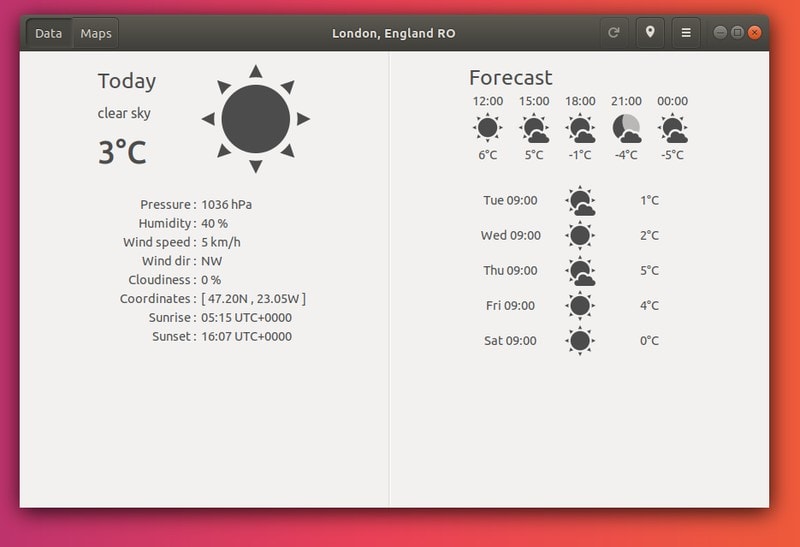
3. Meteo

Key features:
- Great UI
- Integrated into System Tray (Top Panel)
- Simple Install
- Great features (Maps)
Meteo is a snap app on the heavier side. Most of that weight comes from the great Maps features, with maps presenting temperatures, clouds, precipitations, pressure and wind speed. It’s a distinct feature that I haven’t encountered in any other weather app.
Note: After changing location, you might have to quit and restart the app for the changes to be applied in the system tray.
How to Install:
Open up the Ubuntu Software Center and search for Meteo. Install and launch.
Desktop Apps
These are basically desktop widgets. They look good and provide more information at a glance.
4. Temps
Key features:
- Beautiful Design
- Useful Hotkeys
- Hourly Temperature Graph
Temps is an electron app with a beautiful UI (though not exactly “light”). The most unique features are the temperature graphs. The hotkeys might feel unintuitive at first, but they prove to be useful in the long run. The app will minimize when you click somewhere else. Just press Ctrl+Shift+W to bring it back.
This app is Open-Source, and the developer can’t afford the cost of a faster API key, so you might want to create your own API at OpenWeatherMap.
How to Install:
Go to the website and download the version you need (probably 64-bit). Extract the archive. Open the extracted directory and double-click on Temps. Press Ctrl+Shift+W if the window minimizes.
5. Cumulus
Key features:
- Color Selector for background and text
- Re-sizable window
- Tray Icon (temperature only)
- Allows multiple instances with different locations etc.
Cumulus is a greatly customizable weather app, with a backend supporting Yahoo! Weather and OpenWeatherMap. The UI is great and the installer is simple to use. This app has amazing features. It’s one of the few weather apps that allow for multiple instances. You should definitely try it you are looking for an experience tailored to your preferences.
How to Install:
Go to the website and download the (online) installer. Open up a terminal and cd (change directory) to the directory where you downloaded the file.
Then run
chmod +x Cumulus-online-installer-x64
./Cumulus-online-installer-x64
Search for Cumulus and enjoy the app!
Terminal Apps
You are a terminal dweller? You can check the weather right in your terminal.
7. WeGo
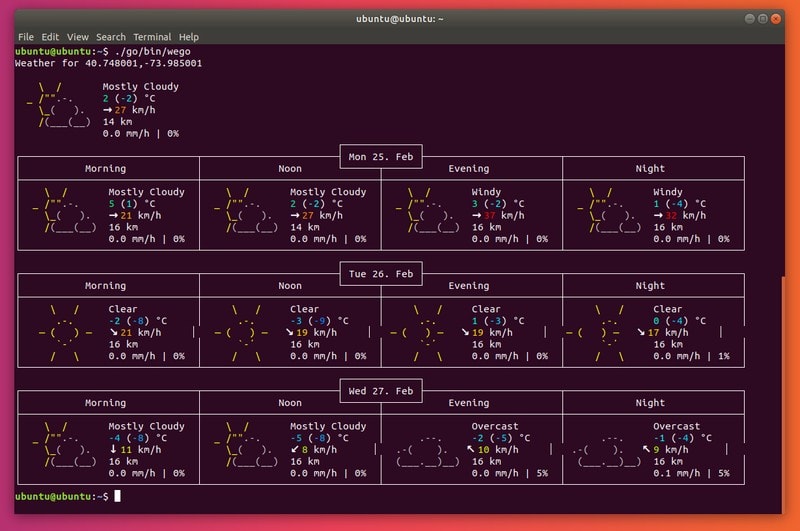
Key features:
- Supports different APIs
- Pretty detailed
- Customizable config
- Multi-language support
- 1 to 7 day forecast
WeGo is a Go app for displaying weather info in the terminal. It’s install can be a little tricky, but it’s easy to set up. You’ll need to register an API Key here (if using forecast.io, which is default). Once you set it up, it’s fairly practical for someone who mostly works in the terminal.
How to Install:
I recommend you to check out the GitHub page for complete information on installation, setup
8. Wttr.in
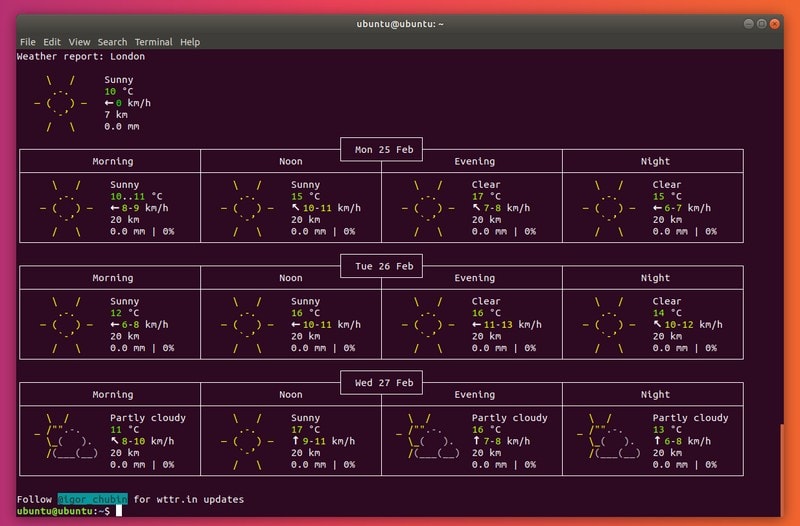
Key features:
- Simple install
- Easy to use
- Lightweight
- 3 day forecast
- Moon phase
If you really live in the terminal, this is the weather app for you. This is as lightweight as it gets. You can specify location (by default the app tries to detect your current location) and a few other parameters (eg. units).
How to Install:
Open up a terminal and install Curl in Ubuntu with this command:
sudo apt install curl
Then:
curl wttr.in
That’s it. You can specify location and parameters like so:
curl wttr.in/london?m
To check out other options type:
curl wttr.in/:help
If you found some settings you enjoy and you find yourself using them frequently, you might want to add an alias. To do so, open ~/.bashrc with your favorite editor (that’s vim, terminal wizard). Go to the end and paste in
alias wttr='curl wttr.in/CITY_NAME?YOUR_PARAMS'
For example:
alias wttr='curl wttr.in/london?m'
Save and close ~/.bashrc and run the command below to source the new file.
source ~/.bashrc
Now, typing wttr in the terminal and pressing Enter should execute your custom command.
Wrapping Up
These are a handful of the weather apps available for Ubuntu. We hope our list helped you discover an app fitting your needs, be that something with pleasant aesthetics or just a quick tool.
What is your favorite weather app? Tell us about what you enjoy and why in the comments section.
