
Cloud-based Backup solutions have the wind in their sails. Today I will review the CloudBerry Backup for Linux. It’s a solution provided by CloudBerry Lab for “corporate and personal use”.
The tool provides both a GUI and a CLI interface. The GUI interface is rather intuitive as you can see by scrolling through the product page. So I decided to focus today on the command-line interface while reviewing that product. Anyway, that’s how I would use it in “corporate” environment to manage backups on a server for example, or when working remotely through ssh.
Getting CloudBerry Backup for Linux
CloudBerry Backup for Linux can be freely downloaded from the editor website. But you will not be able to perform a backup until you’ve obtained a license. But don’t panic: you won’t have to pay for that since there are free licenses available.
The Linux version is much less expensive than its Windows counterpart and even come as a “freeware” for personal use. The currently available versions are (copied straight from the website):
- Freeware version: Designed for personal use only. Comes with most of the features of the PRO version, such as flexible scheduler and retention policies.
- Pro version: Comes with advanced features: compression and encryption. The price is $29.99 for a single perpetual license.
- Ultimate version: Comes without storage limits.
As a complement, worth mentioning the storage limit for the “Free” version is as low as 200GB. But it raises at 5TO for the “Pro” version and is unlimited for the “Ultimate” version. Those limitations are limits enforced by the software. Independently of eventual storage limitations imposed by your storage provider.
Speaking of that, CloudBerry only provides the backup solution. Buying or renting the actual storage is up to you. So, if the license price is “one time fees” per computer— you have to add the storage price to estimate the total cost of ownership of that solution.
With a paid license you gain free access to all updates of the software for one year. After that time, you will have to pay an extra 20% of the price for one more year of upgrades.
For what I understood, you can always use the “free license” to restore your data. So, finally, you only have to pay if you plan to use the product for relatively large backups or if you need advanced features like encryption.
For this review, we’ve obtained a complimentary license. It was for the “CloudBerry Backup for Linux Standard Edition” according to the email containing the license key I received. I can only assume the “Standard Edition” is, in fact, the “Pro version” as described on the website.
Review setup
For this review, I used a fresh and minimal Debian 9.0 system running on a virtual machine with 4GB or RAM. The system was setup as a file server running NFS and holding 6.5GB of data with a typical distribution of files of various size and types.
In addition, I’ve setup a similar restoration target, but without the data in order to check the ability of CloudBerry Backup to recover a data on a different machine after a disaster. We will try that at the end of the article.
For the backup storage, I used both a locally mounted disk and a Google Cloud Storage bucket.
Installation
From the CloudBerry website, you can download the software binary package for Ubuntu 12/14/16, Suse 11/12, Red Hat-CentOS 6.x/7.x and Fedora 12/21.
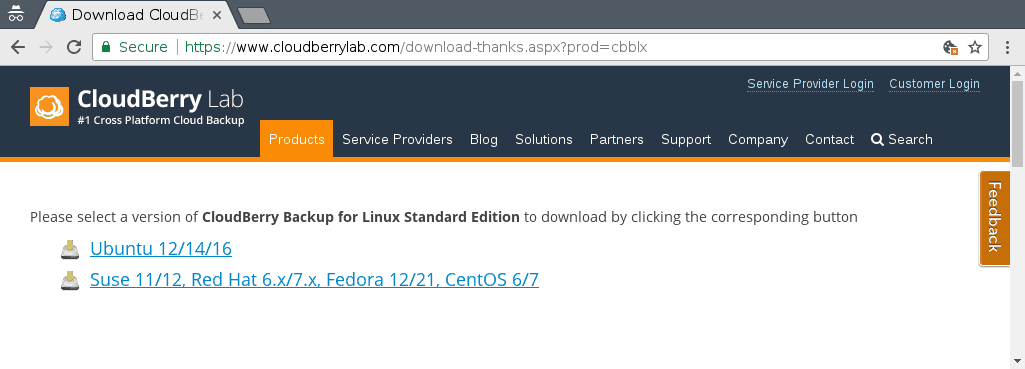
As I’m using a genuine Debian system— my guess was the Ubuntu version will work.
itsfoss:~# dpkg -i ubuntu14_CloudBerryLab_CloudBerryBackup_v2.0.2.39_20170620155447.deb
[...]
/opt/local/CloudBerry Backup/raw_bin/cbbUpdater: error while loading shared libraries: libgthread-2.0.so.0: cannot open shared object file: No such file or directory
Ok: next time I will install CloudBerry Backup on a minimal system, I will have to remember to install libglib2.0-0 first (which contains the missing library file libgthread-2.0.so.0)
itsfoss:~# apt-get install -y libglib2.0-0
itsfoss:~# dpkg -i ubuntu14_CloudBerryLab_CloudBerryBackup_v2.0.2.39_20170620155447.deb
This time it works:
itsfoss:~# ps -edf | grep CloudBerry
root      1301     1  0 15:33 ?        00:00:00 /opt/local/CloudBerry Backup/raw_bin/cbbLocalManagement
root      1328   442  0 15:33 pts/0    00:00:00 grep CloudBerry
Most of the documentation you will find about CloudBerry Backup will present the GUI tool. Including the official Installation and Configuration Guide. And indeed, using the GUI is probably the easiest way to use and configure the tool given the number of options available. But I won’t be able to use the GUI from my test system. Anyway, in a real situation, I wouldn’t install a GUI on a server just to configure my backup strategy. Hopefully, Cloud Berry Backup provides a command-line interface too:
itsfoss:~# ls /opt/local/CloudBerry\ Backup/bin/
cbb  cbbCommandLine  cbbgui  cbbGUI  cbbLocalManagement  cbbUpdater  cbbWorker
I don’t know why, but on my installation, there are two identical scripts to run the CLI:
itsfoss:.../CloudBerry Backup/bin# diff -s cbb cbbCommandLine
Files cbb and cbbCommandLine are identical
Starting from now, I will use cbb as it is implied in the official documentations.
License activation
CloudBerry Lab provides some information about the cbb command line usage on their website. The documentation is not very detailed though. Nevertheless, based on that and a couple of trials and errors, here is how I setup cbb from the command line on my system.
The first thing you must do before being able to use cbb is to obtain and activate your license key.
itsfoss:~# cd /opt/local/CloudBerry\ Backup/bin
itsfoss:.../CloudBerry Backup/bin# ./cbb activatelicense -h
CloudBerry Backup Command Line Interface started
activateLicense -e Email < <-k License key | -t LicenseType >  [-or | -oa ActivationKey] > | -free <-un userName | -oa ActivationKey> >
    -e Email           : Email for license activation
    -k License key     : Key for license activation
    -t License type    : Request trial license. Possible values: pro, ultimate
    -free              : Request free license
    -un userName       : User name to register free license
    -or                : Generate offline license request. Email & key are required. Request should be send via email to support@cloudberrylab.com.
    -oa ActivationKey  : Offline license activation key. You should receive this key via email in response to offline request, or free license registration.
The inline help, as well as the official documentation mentioned above, explain how you can directly request a license from the cbb command line tool. As of myself, I’ve already received the license key by email. So I only had to install that license:
# Use your own license key instead of the X's below:
itsfoss:.../CloudBerry Backup/bin# ./cbb activatelicense \
                                         -k "XXXXXXXX-XXXX-XXXX-XXXX-XXXXXXXXXXXX"

CloudBerry Backup Command Line Interface started
Success
Types of backup
As of today, the Linux version of CloudBerry Backup only supports file-level backups. That means you cannot backup entire disks block by block, but only the files and folders you’ve specified. In other words, you can only backup mounted partition/disk, and you cannot backup non-FS partitions. But for most users, this won’t be an issue. Block device backups are available in the Windows version. But for now on Linux the best you can hope for raw block devices would be to try backing up the corresponding /dev entry. But I didn’t test that, so I’m not even sure this works, and you certainly can’t make an incremental or differential backup of a disk that way. So, if you have more information on that topic, don’t hesitate to share that using the comment section below.
CloudBerry Backup core usage
To work with CloudBerry Backup you have to understand two main concepts:
- accounts
- and plans
An “account” is the generic name given in CloudBerry Backup for a storage service (a file system location, an Amazon S3 or Google Cloud Storage bucket, … ). You must configure at least one “account” before being able to perform backup/restore operations.
A “plan” is a backup/restore strategy, specifying what, when and how to backup or restore your data. Each plan must be associated with one and only one “account”.
Creating a storage area account
So the first thing to do before being able to perform any backup is to create an account. For starting, I used a “File system” account. That is a locally attached storage area. In my case, it was a second (virtual) disk mounted on /backup
itsfoss:.../CloudBerry Backup/bin# ./cbb addAccount \
                                         -st FileSystem \
                                         -d "Local Backup" \
                                         -c "/backup"
CloudBerry Backup Command Line Interface started
Success
Creating a backup plan
Next, I must create a backup plan. The backup plan will specify the various details of a backup operation. Including the target and the schedule.
itsfoss:.../CloudBerry Backup/bin# ./cbb addBackupPlan \
                   -n "NFS files" \
                   -a "Local Backup" \
                   -f /srv/nfs \
 -bef -es no \
                   -every day -at "22:56"
CloudBerry Backup Command Line Interface started
Success
-n "NFS files"is the (arbitrary) name for the backup plan-a "Local Backup"is the name of the account created above and that will be associated with that plan.-f /srv/nfsis the directory I want to backup. You can specify several-foption in the same backup plan, once for each file or directory tree you want to backup.-befis an option to backup empty folders.-es nothis one was tricky to understand: according to the doc I had when writing this article, it was used to not exclude system files. But— and this should be fixed by now in the documentation— if you set-estoyes(its default value) the plan will exclude hidden files as well from the backup. That means files/folders whose name is starting with a dot would not be present in the backup. But with-es nothey will.-every day -at "22:56"is pretty self-explanatory.
And at 22:56 that day … the backup has started. And after long, long, LONG minutes the backup has finally completed.
After that, I somewhat expected to find one large archive file in the /backup folder. But in fact, a CloudBerry backup looks like a simple copy of the source tree:
itsfoss:.../CloudBerry Backup/bin# find /backup | head
/backup
/backup/lost+found
/backup/CBB_itsfoss
/backup/CBB_itsfoss/srv
/backup/CBB_itsfoss/srv/nfs
/backup/CBB_itsfoss/srv/nfs/sample
/backup/CBB_itsfoss/srv/nfs/sample/gcc-4.6.3
But things are a little bit more subtle. In fact in the backup, each file is replaced by a directory containing the various versions of the file as produced by different backups.
I checked that by modifying a file and forcefully restarting the backup:
# Create a dummy file and start a backup
itsfoss:.../CloudBerry Backup/bin# echo hello > /srv/nfs/some_file
itsfoss:.../CloudBerry Backup/bin# ./cbb plan -r "NFS files"
CloudBerry Backup Command Line Interface started
Success

# Wait for completion, then alter the file, and restart the backup
itsfoss:.../CloudBerry Backup/bin# echo world > /srv/nfs/some_file
itsfoss:.../CloudBerry Backup/bin# ./cbb plan -r "NFS files"
CloudBerry Backup Command Line Interface started
Success
Worth mentioning here those backups took much less time to complete than the very first one since CloudBerry Backup only copied the files actually modified. And indeed, I have now the two versions available in the /backup directory, each one being associated with a given timestamp.
itsfoss:.../CloudBerry Backup/bin# find /backup/CBB_itsfoss/srv/nfs/some_file: -type f
/backup/CBB_itsfoss/srv/nfs/some_file:/20170730220336/some_file
world
/backup/CBB_itsfoss/srv/nfs/some_file:/20170730215602/some_file
hello
Restore a backup
To quote a famous wisdom, “you don’t need a backup plan, but a restore plan, including testing”. So, I seriously encourage you to test the various recovery options provided by CloudBerry Backup.
Just like for backups, before running a restore action, you must create a “restore plan”. This time, using the addRestorePlan command. Here are a couple of possible variations:
itsfoss:.../CloudBerry Backup/bin# ./cbb addRestorePlan \
                                         -n "Restore Missing" \
                                         -a "Local Backup" \
                                         -f /srv/nfs \
                                         -se yes \
                                         -ol yes
Most of the command options recall those of the addBackupPlan command. But in addition, you will find here:
- The
-seoption, used to skip existing files when restoring data. - And the
-olflag is used to restore data in their original location.
itsfoss:.../CloudBerry Backup/bin# ./cbb addRestorePlan \
                                         -n "Restore All" \
                                         -a "Local Backup" \
                                         -f /srv/nfs \
                                         -se no \
                                         -ol yes
In that second variation, I set -se to no to … NOT skip existing files. In practice, this will overwrite all files in the destinations by their counterpart in the backup.
itsfoss:.../CloudBerry Backup/bin# ./cbb addRestorePlan \
                                         -n "Restore At" \
                                         -a "Local Backup" \
                                         -rt PointInTime \
                                         -pointintime "30.07.2017 22:00" \
                                         -f /srv/nfs \
                                         -se no \
                                         -ol yes
As a third variation, you can also restore the data as there were at the given date. For that, you need to use the PointInTime mode (the default mode being to restore the latest data). Of course, those are only a couple of examples. All combinations are possible. Including planned restore operations. But I let that to your own experiments.
For now, let’s test and compare the three options above:
# My "Restore Missing" plan will restore deleted files
itsfoss:.../CloudBerry Backup/bin# rm /srv/nfs/some_file
itsfoss:.../CloudBerry Backup/bin# ./cbb plan -r "Restore Missing"
# Wait for completion
itsfoss:.../CloudBerry Backup/bin# cat /srv/nfs/some_file
world
# My "Restore Missing" plan will NOT overwrite existing files
itsfoss:.../CloudBerry Backup/bin# echo modified > /srv/nfs/some_file
itsfoss:.../CloudBerry Backup/bin# ./cbb plan -r "Restore Missing"
# Wait for completion
itsfoss:.../CloudBerry Backup/bin# cat /srv/nfs/some_file
modified# My "Restore All" plan will happily overwrite all modified files
# by the latest version available in the backup
itsfoss:.../CloudBerry Backup/bin# ./cbb plan -r "Restore All"CloudBerry Backup Command Line Interface started
# Wait for completion
itsfoss:.../CloudBerry Backup/bin# cat /srv/nfs/some_file
world# My "Restore At" plan will happily overwrite all modified files
# by the version available at the "Point in Time"
itsfoss:.../CloudBerry Backup/bin# ./cbb plan -r "Restore At"
CloudBerry Backup Command Line Interface started
Success
# Wait for completion
itsfoss:.../CloudBerry Backup/bin# cat /srv/nfs/some_file
helloEncryption
For now, I used only the clear-text backups. It is now time to check the encryption capabilities of the tool. Just like compression, encryption is only available for paying users. And cannot be used with the free version of the tool.
Using encryption is not more work than simply adding the -ea and -ep option when creating the backup plan:
itsfoss:.../CloudBerry Backup/bin# ./cbb addBackupPlan \
                                         -n "Backup Encrypted" \
                                         -a "Local Backup" \
                                         -f /srv/nfs \
                                         -ea AES_256 -ep p@sswd
CloudBerry Backup Command Line Interface started
Success

itsfoss:.../CloudBerry Backup/bin# ./cbb getPlanDetails \
                                         -n "Backup Encrypted"
CloudBerry Backup Command Line Interface started
Name                 : Backup Encrypted
Type                 : Backup
ID                   : {9c00b94c-03b1-4a4b-818a-73abd0eb44e9}
Destination ID       : {1137a608-94bd-48a2-ad0b-018c0e6965e5}
Destination name     : Local Backup
Backup items:
    /srv/nfs
Compress             : false
Exclude system folders: true
Encryption           : true
Encryption algorithm : AES_256
Schedule             : Not specified

itsfoss:.../CloudBerry Backup/bin# ./cbb plan -r "Backup Encrypted"
With encryption enabled, CloudBerry Backup behave mostly the same, but instead of storing the plain data file into the backup directory, it stores the file content using some proprietary binary format. The file content is certainly not clear text, but since I don’t have access to the underlying file format, it is hard to say if it’s properly encoded as AES_256 as I requested it, neither which exact mode was used (EBC, CTC, CTR, … )
I would be confident, since the cbbWorker is linked with libcrypto.so.1.0.0. But since that library is shipped with the product and the product is closed source, I can’t tell for sure.
All I can say is data appears to be encrypted as the resulting files have an entropy very close to 8 bits per bytes:
# Create 1MB file full of NUL bytes
itsfoss:.../CloudBerry Backup/bin# dd if=/dev/zero \
                                      of=/srv/nfs/_zero \
                                      bs=1M count=1
# Perform an encrypted backup
itsfoss:.../CloudBerry Backup/bin# ./cbb plan -r "Backup Encrypted"
# wait, wait, wait until completion, then check ciphertext entropy:
itsfoss:.../CloudBerry Backup/bin# ent /backup/CBB_itsfoss/srv/nfs/_zero\:/20170731133530/_zero
Entropy = 7.999839 bits per byte.
Creating a restore plan for encrypted backups is even simpler, since you only have to add the -ep option to specify the password.
It’s even so simple, I took that opportunity to introduce a couple of other options in the following example:
-f /srv/nfs/_zerorestore just that file-ol no -de /tmp/restore into/tmp/rather than in the original location
itsfoss:.../CloudBerry Backup/bin# ./cbb addRestorePlan \
                                         -n "Restore Encrypted" \
                                         -a "Local Backup" \
                                         -f /srv/nfs/_zero \
                                         -se no \
                                         -ep p@sswd \
                                         -ol no -de /tmp/
CloudBerry Backup Command Line Interface started
Success

itsfoss:.../CloudBerry Backup/bin# ./cbb plan -r "Restore Encrypted"
CloudBerry Backup Command Line Interface started
Success
# Wait for completion
itsfoss:.../CloudBerry Backup/bin# diff -s /tmp/_zero /srv/nfs/_zero
Files /tmp/_zero and /srv/nfs/_zero are identical
Using cloud storage
Up until now, I worked only with local backups. But the real strength of CloudBerry Backup is its integration with a great variety of cloud storage providers:
itsfoss:.../CloudBerry Backup/bin# ./cbb addAccount
CloudBerry Backup Command Line Interface started
addAccount -st StorageType
     -st storageType: for more info select one storage type
         storageTypes:
           - AmazonS3
           - AmazonS3Chinese
           - S3Compatible
           - CenturyLink
           - Cloudian
           - DreamObjects
           - Scality
           - ThinkOn
           - Verizon
           - Wasabi
           - Azure
           - Openstack
           - HPCloud
           - HPHelion
           - Rackspace
           - OracleCloud
           - SoftLayer
           - Google
           - BackBlaze
           - FileSystem
     -h show help
For this article, I used a Google Cloud Storage account:
itsfoss:.../CloudBerry Backup/bin# ./cbb addAccount \
                                         -d "Google Account" \
                                         -st Google \
                                         -ac 'GOOG0123456789012345' \
                                         -sk 'ABCD+01234567890123456789012345678901234' \
                                         -c '69065e24-761d-11e7-ac42-738017d4f6c6' \
                                         -ssl
CloudBerry Backup Command Line Interface started
Success
In that setup: – -ac 'GOOG0123456789012345' is my Google Storage “Interoperable storage access keys”, – -sk 'ABCD+01234567890123456789012345678901234' is the associated secret key, – -c '69065e24-761d-11e7-ac42-738017d4f6c6' is the bucket name (I used a UUID for that since on Google bucket names have to be globally unique)
Once that done, creating a backup and restore plan is exactly the same as when using a local file system:
itsfoss:.../CloudBerry Backup/bin# ./cbb addBackupPlan \
                                         -n "Google Backup" \
                                         -a "Google Account" \
                                         -f /srv/nfs/sample/My\ Courses
CloudBerry Backup Command Line Interface started
Success

itsfoss:.../CloudBerry Backup/bin# ./cbb plan -r "Google Backup"
CloudBerry Backup Command Line Interface started
Success
Restore— on a different computer
Finally, to end that tour of the CloudBerry Backup features, I wanted to test a quite common scenario if you have to recover after a disaster: restoring data on a different machine.
So, on a clean and newly created system, I installed another version of CloudBerry Backup. But this time, it will be the free version. That means I have to obtain a free key first:
yesik:.../CloudBerry Backup/bin# ./cbb activateLicense \
                                       -e "sylvain@yesik.it" \
                                       -free \
                                       -un "Sylvain Leroux"
CloudBerry Backup Command Line Interface started
Success. Your registration key has been sent to the email address sylvain@yesik.it
And indeed, I received an email and copied-pasted the license key onto that next command to activate the license:
# Of course, you will have to use your own key in the command below
# This one is just a fake example
yesik:.../CloudBerry Backup/bin# ./cbb activateLicense \
                                       -e "sylvain@yesik.it" \
                                       -free \
                                       -oa 'ljLXMSocj5Gwx8IsmKxxXlHjIpeu6w4p/4akKOP75IVQLtaw8bOvioxLtOSAdzHtiSQUU6jvU5WS1eWaRp/2deiWMyWvvKrydahnF8yiM604GxR5s4gfR87edVmWsY0gVwK+J48Xx0ScQ8f+ou8e6wmwBK6+k+hj0lfRfC9Fzg4='
CloudBerry Backup Command Line Interface started
Success
Stating from now, the workflow is almost exactly the same as the one used to restore data on the original host:
yesik:.../CloudBerry Backup/bin# ./cbb addAccount \
                                       -d "Google Account" \
                                       -st Google \
                                       -ac 'GOOG0123456789012345' \
                                       -sk 'ABCD+01234567890123456789012345678901234' \
                                       -c '69065e24-761d-11e7-ac42-738017d4f6c6' \
                                       -ssl
CloudBerry Backup Command Line Interface started
Success

yesik:.../CloudBerry Backup/bin# ./cbb addRestorePlan \
                                       -n "Google Restore" \
                                       -a "Google Account" \
                                       -f /srv \
                                       -sy yes \
                                       -ol yes
CloudBerry Backup Command Line Interface started
Success
The only difference is the -sy yes option. According to the documentation, “You need to sync prior to restoring if you set up a restore plan on a computer that is different from the one you have run a backup on.” For what I understood, this has nothing to do with the sync system call but is rather about CloudBerry Backup to update its local database with the data available in the remote storage (more on that database later). Or am I wrong? In that case, don’t hesitate to leave a comment!
yesik:.../CloudBerry Backup/bin# ./cbb plan -r "Google Restore"
CloudBerry Backup Command Line Interface started
Success
If you wait until completion, you can check the backup is an exact replica of the original folder using the following ad-hoc command. It’s far from being perfect since, for example, it doesn’t check the file permissions. But it is enough to give me confidence all files and their content were restored:
yesik:.../CloudBerry Backup/bin# (cd /srv/nfs/sample/My\ Courses/ ; find . -print -type f -exec cat {} \;) | md5sum
273510dd43e0e631822d0c48b7f9bbf6  -

itsfoss:.../CloudBerry Backup/bin# (cd /srv/nfs/sample/My\ Courses/ ; find . -print -type f -exec cat {} \;) | md5sum
273510dd43e0e631822d0c48b7f9bbf6  -
Interoperability
It is certainly much less a concern in the Windows world where CloudBerry Backup is originating from. But interoperability is an important part of the *nix philosophy.
From what I see, the command line interface does not provide import/export feature for plans or accounts. Nor direct access to the log history. But there are still hope since by exploring the /opt/local/CloudBerry Backup/etc/config folder, you will discover the plans and account settings stored as XML files.
In addition, you will find the cbbackup.db file which is an SQLite database exposing some information, notably about the backup history. Certainly, this is the file that has to be updated by CloudBerry Backup when you restore on a different host (do you remember the -sy yes option above?)
I wouldn’t encourage you to modify those files as they are not documented. But certainly, you can read them. And I would find that very useful for auditing or monitoring purpose notably.
Who is CloudBerry Lab?
CloudBerry Backup is packed with features and the engineer in me is rather seduced. And maybe you are too. But I know some of you will have to “sell” that software to their management, so you may need some information about its editor.
CloudBerry Lab is a California-based software company, and, according to their LinkedIn page, they aim at providing “cloud-based backup and file management services to small and mid-sized businesses (SMBs).”
CloudBerry Lab was founded in 2008 and initially targetted the Windows world. It’s only in July 2015, the first version of their Cloud Berry Backup solution was released for Linux and MacOS X. That means at the time of this writing, CloudBerry Backup for Linux is just two years old. No doubt the software will still evolve and mature in the upcoming years.
My opinion
After this test, I must say I’m quite pleased with CloudBerry Backup for Linux. This article was already very long so I didn’t have the room to test the graphical user interface. But anyway, the command-line tools give you full access to the features of the software, something mandatory for me. Definitely, the CLI shows its Windows origins and certainly could be tailored for a better usability from shell scripts (c’mon, saying “Success” after each and every command is sooooo Windowish ;) But it works. And the backup software by itself seems to be very reliable. If I had to choose a backup solution, certainly CloudBerry Backup would be among the candidates I would consider.
My main regret is the software being closed-source. I will not judge that choice since I can understand a company would like to protect its expertise. But it would be great if at least some parts of the product were open-sourced or if the software did provide some kind of API for independent developers to enrich the ecosystem around that product. For example, I’m pretty sure this simple move would have prevented some issues or limitations I encountered while using the CLI and could improve the overall “scriptability” of the tool.
But I will not complain. It remains a great product. Fully usable from the command line as well as from the Graphical User interface. And I would not conclude this article without thanking the support team at CloudBerry Lab, and especially Sergey. While writing this review I’ve opened a bunch of tickets. Not only they answered my questions, but they forwarded my messages so the docs and even the software were patched in response to my remarks. All that in less than 48h. If only all supports were that responsive!
As a very last word, remember you can download, try, and even use— if you accept some limitations— the product for free. So, if you’re still hesitant, do that. And please, reports your feedbacks in the comment section below!
