
Beginner or advanced, a Linux user will, at some point, find the need for a backup solution.
All it takes is one sudo command to go wrong, and you’ll be sent back to the Stone Age. Linux shows you no mercy when you don’t have a solid backup.
There are lots of impressive backup software available for Linux. Almost all distros come with an easy-to-use backup tool like Deja Dup. It backs up and keeps your docs, music and other important stuff safe. When you reinstall Linux, you can get your important data back thanks to the backup you created.
However, you'll have to reinstall the software, and drivers and reconfigure the freshly installed system. And that's no less than a nightmare.
This is where tools like Timeshift help.
Backup and restore Linux system settings desktop with Timeshift
When you are in a situation where you messed up the system settings and want to get back to the previous state, Timeshift backup helps.
Heck, it can even get you out of situations where you cannot even log in to your system.
Timeshift doesn’t back up your regular files in the home folder.
At least not by default. You can do that with Deja Dup, the default backup application installed in distros like Ubuntu.
Timeshift is for backing up system files and settings. So when you are configuring your system and making some customization and mess the system up in the process, you could revert to the older system snapshot.
Timeshift is designed to protect system files and settings. It is NOT a backup tool and is not meant to protect user data. Entire contents of users' home directories are excluded by default.
Installing Timeshift in Linux
Let’s see how to install Timeshift in various Linux distributions.
1. For Ubuntu and Linux Mint
Timeshift is available in the Universe repository of Ubuntu 20.04 and higher versions. This means you can install it on Ubuntu 20.04 and Linux Mint 20 using the apt command.
Open the terminal in Ubuntu and enter the following command:
sudo apt install timeshift
2. For Arch Linux and its derivatives
The latest version of Timeshift backup solution is available in the Arch User Repository. Enable AUR and get Timeshift.
The below command uses yay as the AUR helper:
yay -S timeshift
3. For Fedora and its derivatives
Timeshift is available in the repos of Fedora and you can install it using:
sudo dnf install timeshift
How to use Timeshift to backup a Linux system
Now that you have it installed let’s see how to use it.
Well, there’s no command line hassle here. Launch Timeshift from the menu. Put in your sudo password when asked. Click on Create. Done.
Don't worry; I'll show each step in detail.
Creating a system backup
Below, you can find how to create a normal system backup using Timeshift.
Step 1: Open Timeshift
After you have installed Timeshift, launch it from your system menu. It will ask for your user account password.
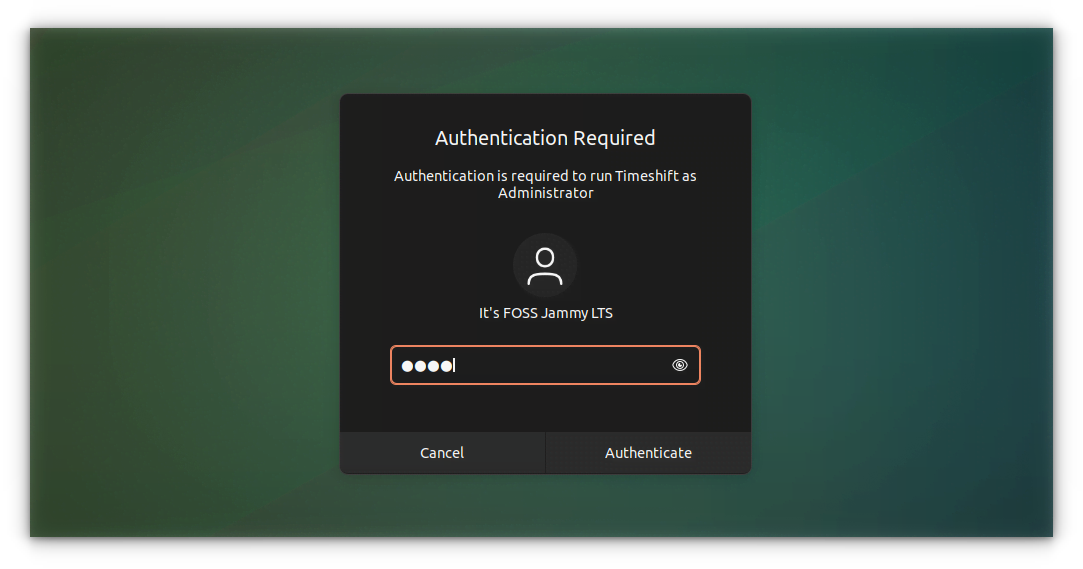
Step 2: Select Snapshot Type
Once Timeshift is opened, select the Snapshot type from the next window. You have two options to choose from:
- RSync: Snapshots are taken using rsync and hard-links. Common files are shared between snapshots, which saves disk space. Each snapshot is a full system backup that can be browsed with a file manager.
- BTRFS: Snapshots are taken using the in-built features of the BTRFS file system. BTRFS snapshots are supported only on BTRFS systems having an Ubuntu-type subvolume layout (with @ and @home subvolumes).
Don't worry, if you select BTRFS in an EXT4 system, it will show this error:
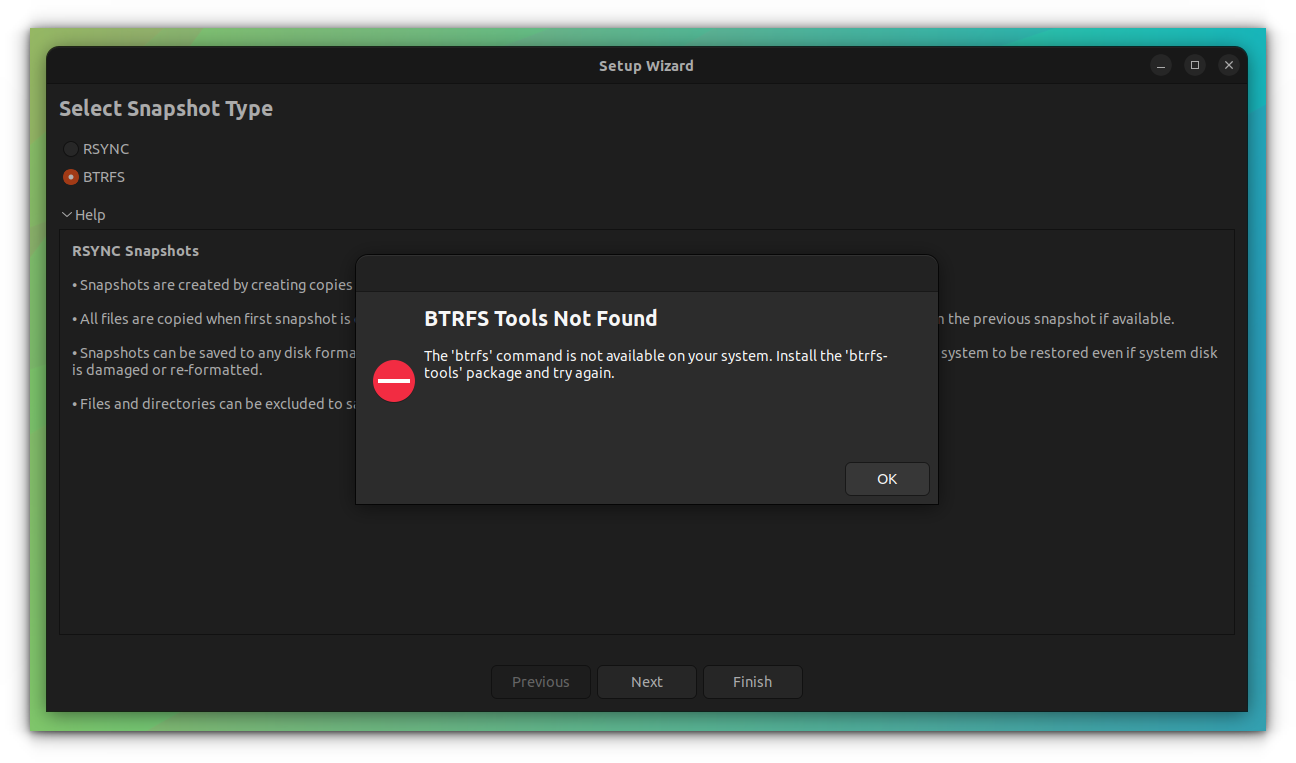
This will start estimating your system size.
Step 3: Select the storage device
In this stage, you need to give the location where the backup will be stored.
You can use your computer's hard disk or an external USB disk for backup storage.
If you use your computer's hard disk, the Timehsift backups can be created automatically on a schedule.
If you use an external USB disk, you have to manually create the backups when you plug it in or keep it plugged in always.
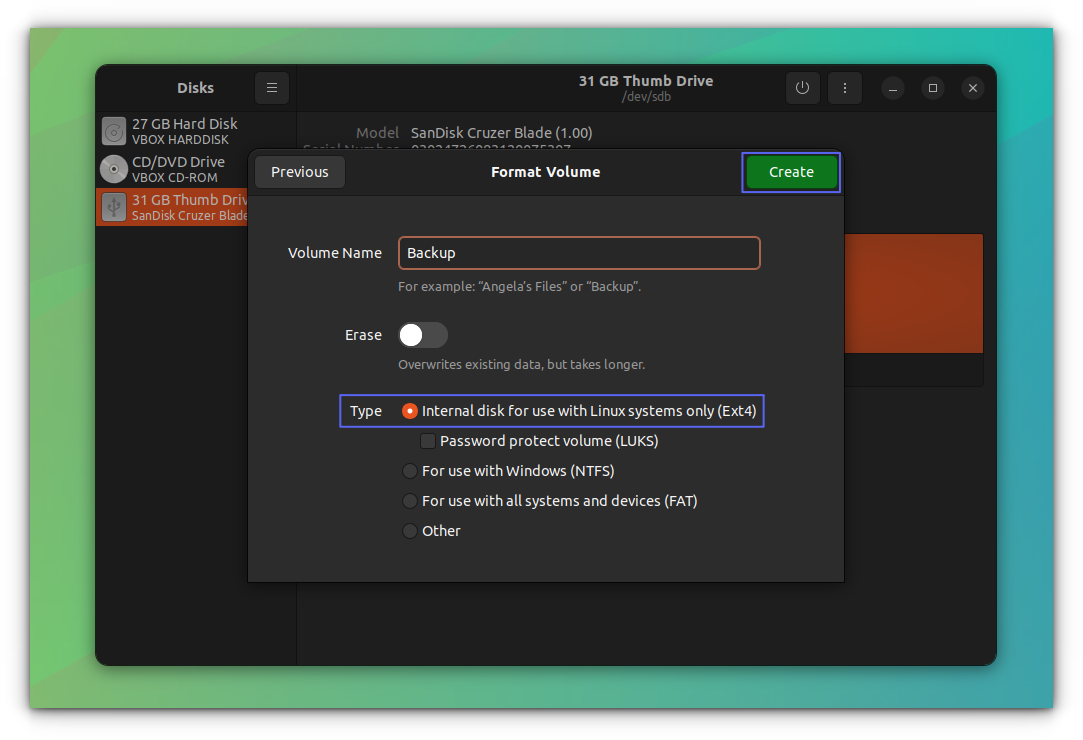
Now, you will be able to view various devices with supported filesystems on the Timeshift window.
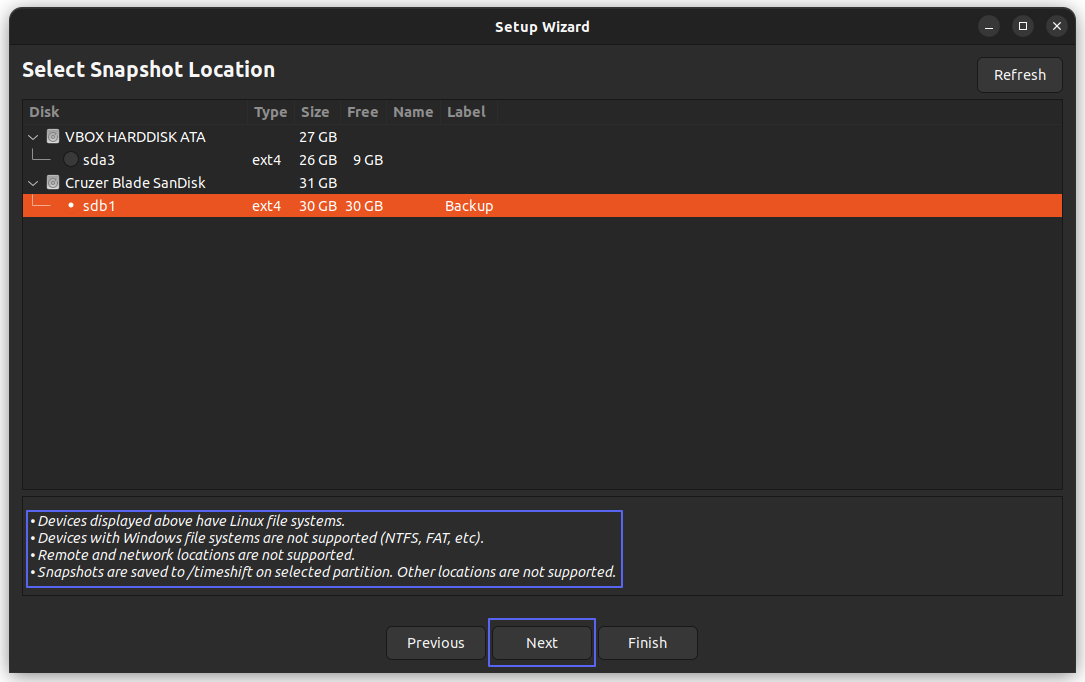
You can see in the above screenshot that, I have selected my formatted external drive. Select your desired location and click Next.
Step 4: Configure Scheduled Snapshots
The next screen will guide you to set up scheduled backups. There are several scheduling options like monthly, weekly, daily, hourly etc.
Select any one of them or multiple of them.
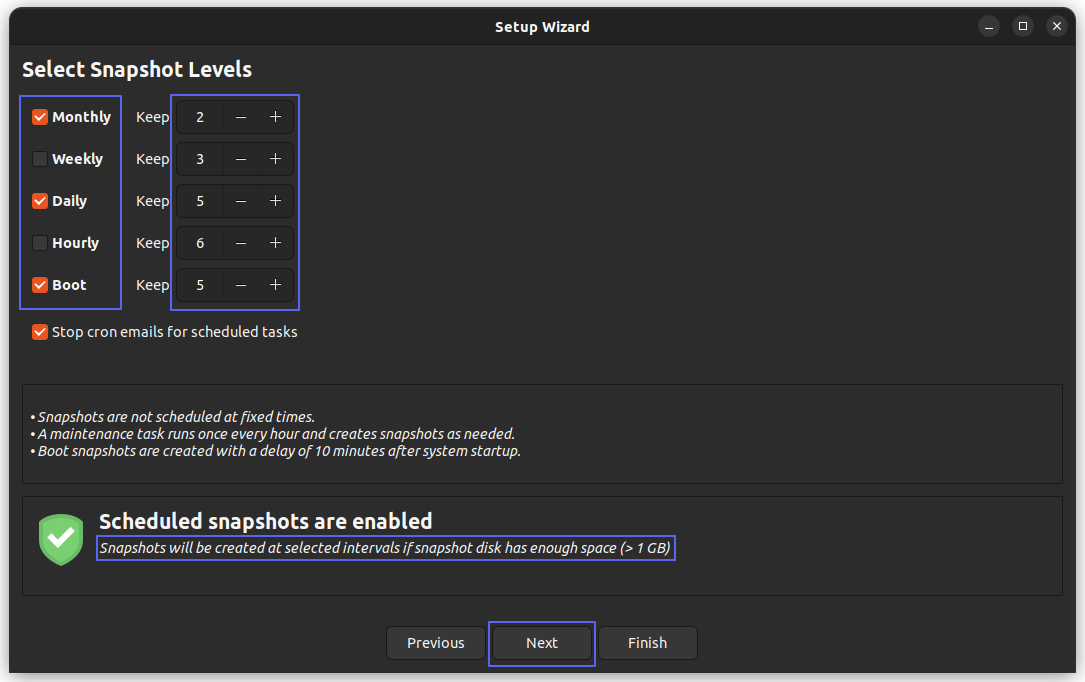
Also, you can set the number of copies you want to keep, of each type of scheduled backups.
Step 5: Select the Files / Folders
In this step, you need to select what parts of your system are going to back up.
By default, the user files are not backed up. Only those files that are needed to make the system up and running, are backed up.
This has several advantages. If you back up the user files, while restoring, those files will be overwritten, and any changes you have made after creating the backup will be gone. So, choose those folders wisely.
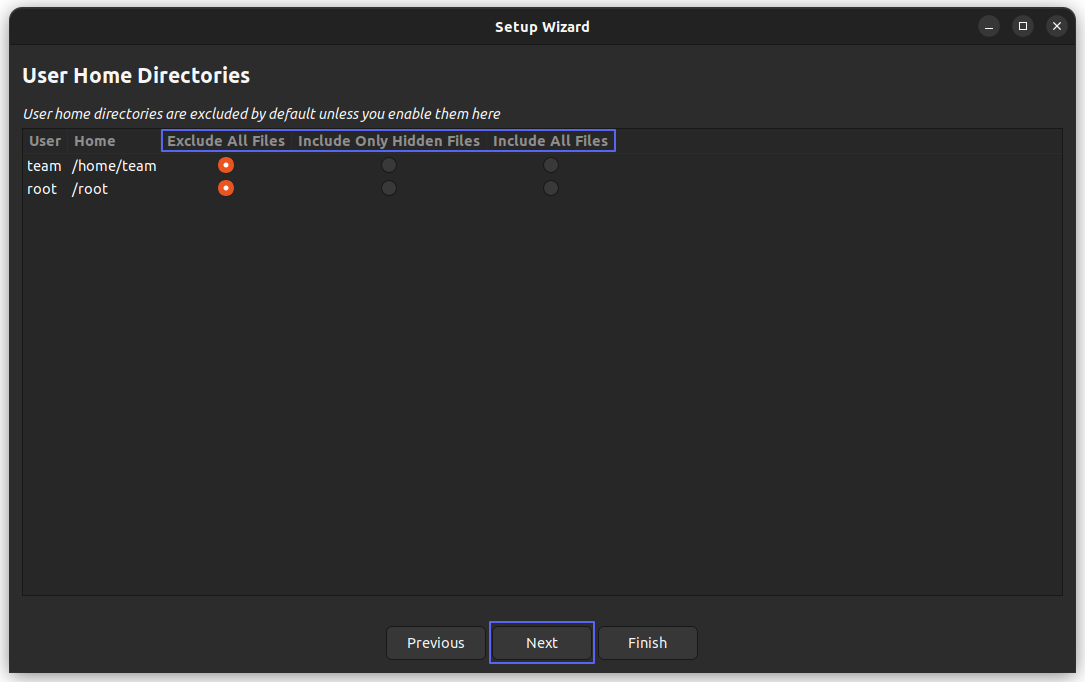
As you can see from the above screenshot, there is an option to back up the hidden files. This means that you can back up your config files also. But keep in mind that, upon restore, the changes that you have made will be overwritten with the old backed up file.
Once done, click Finish to complete the setup.
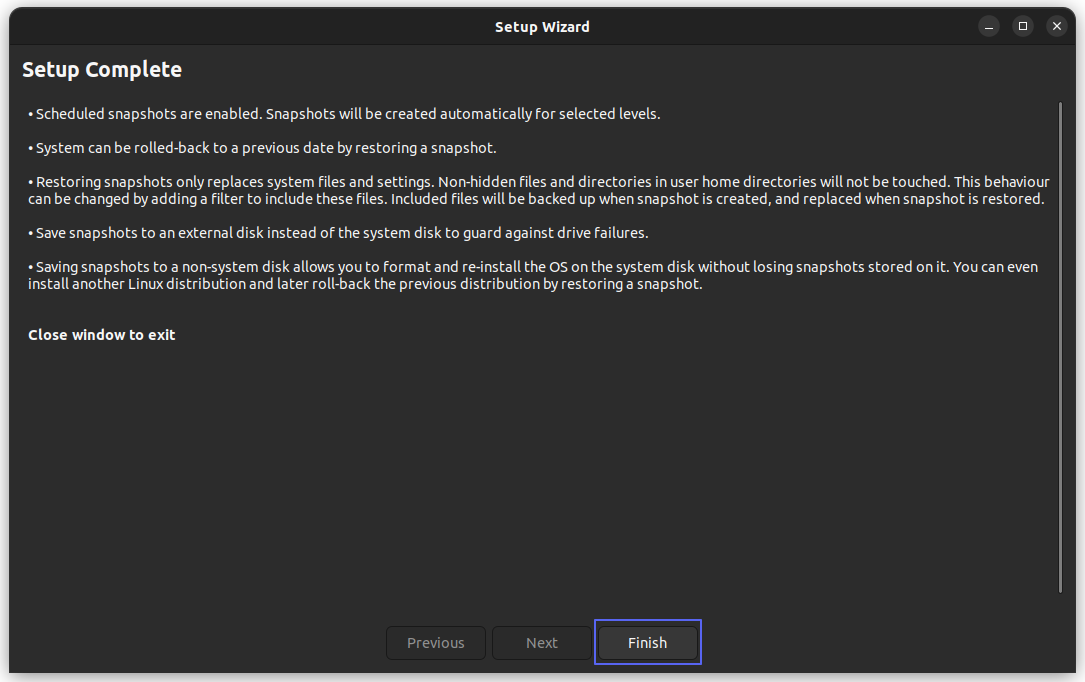
Step 6: Create the backup
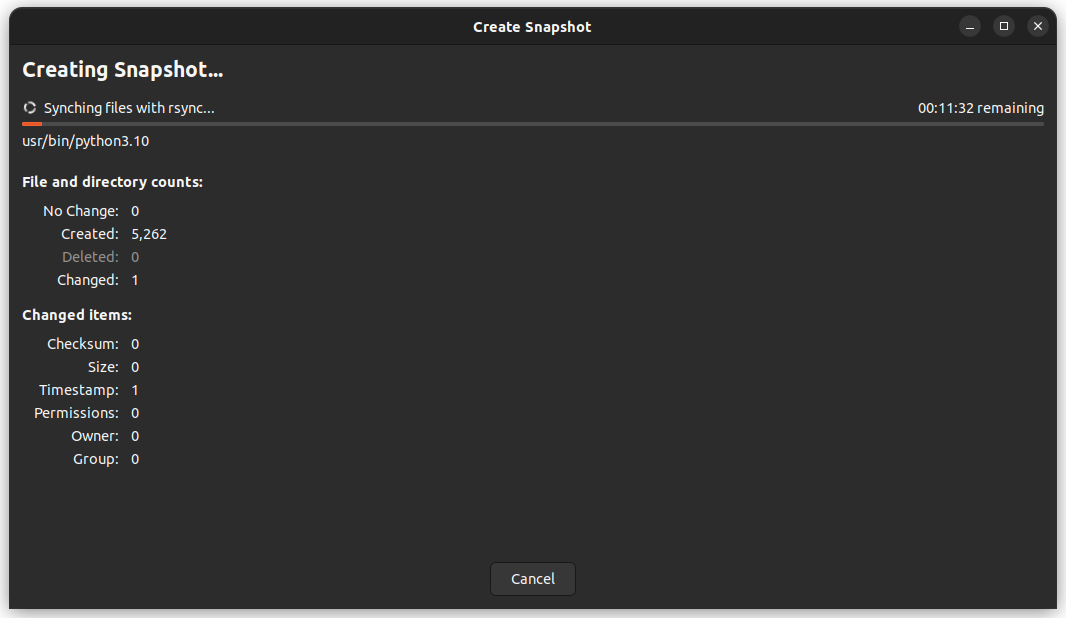
After the initial setup is completed, you will reach to the Timeshift home page, where you can create the first backup by clicking on the Create button.
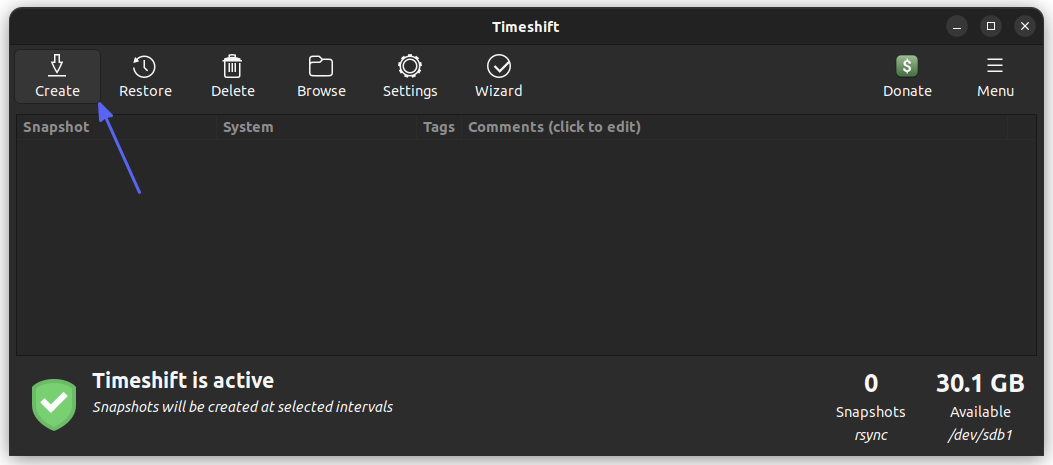
This will start creating the backup for you. Wait for the process to complete.
Use Timeshift to handpick files and folders to backup (if needed)
Timeshift can also be used to back up particular files or folders only, along with your other system backup.
For example, if you want to back up your ~/.bashrc and your Music folder, you can do that.
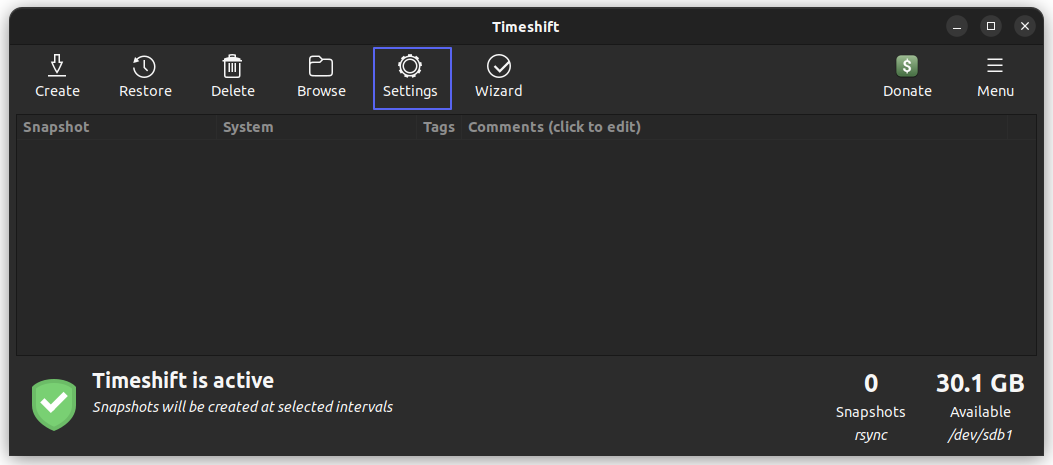
Step 1: Go to Settings
You need to finish the initial setup, that means up to reaching the Create backup page. From there, select the Settings button.
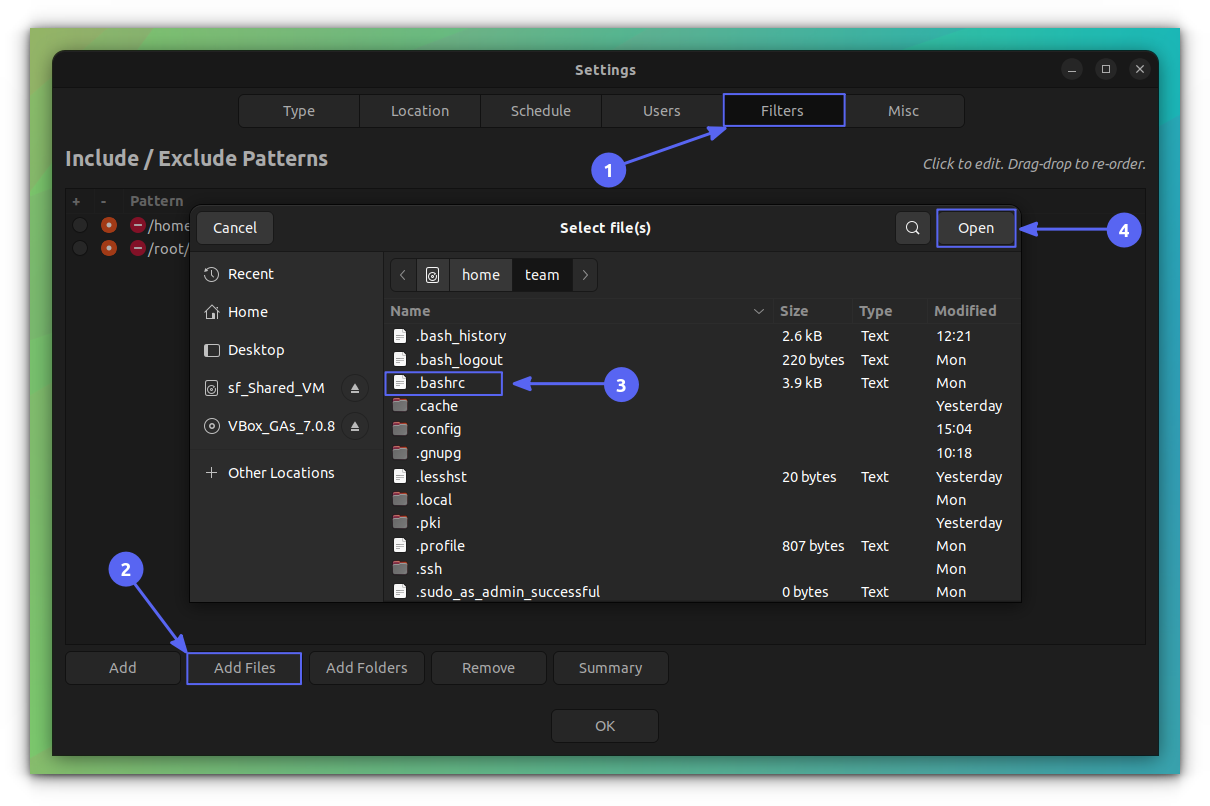
Step 2: Select Files/Folders
On the next dialog box, go to the Filters tab and select Add Files / Add Folders option. This will open the file browser and select the File/Folder accordingly and click on Open.
Step 3: Set the Files/Folder to be included in the backup
Now, you need to make sure that, the files/folders you selected should be included in the backup. By default, they are excluded. For this, change the radio button adjacent to the files/folders towards the "+" sign. Then click OK.
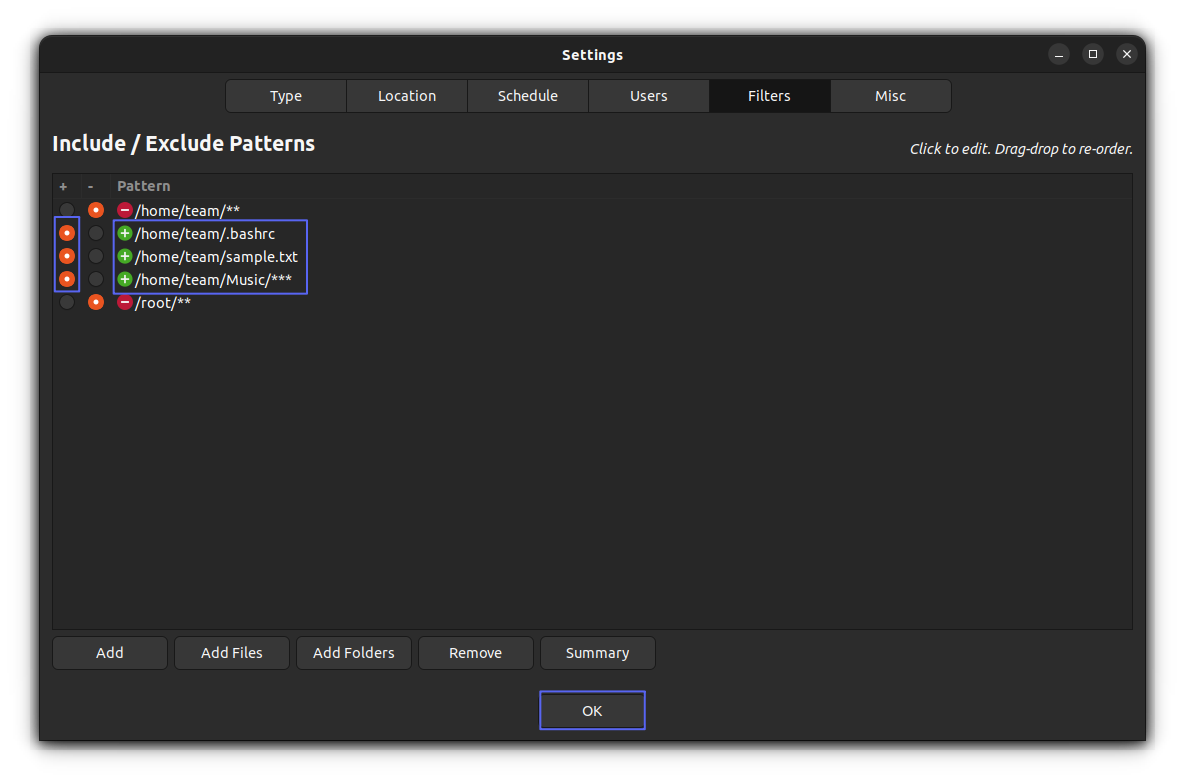
Or you can click on the Summary button to view the summary of files/folders, that are excluded/included on the backup. Files/folders with a preceding "+" sign will be included in the backup.
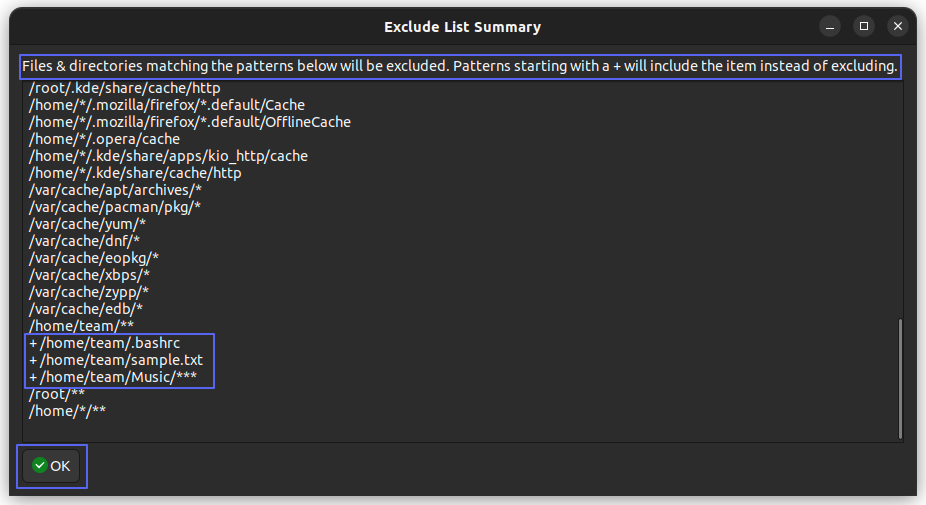
You can create the backup with the selected items by clicking on the Create button.
Use Timeshift to backup files with specific extensions (if needed)
Like the above, you can back up files that have certain extensions using Timeshift. For example, if you want to backup all .mp3 or .pdf files, you can do that.
Step 1: Add Specific Extensions
First, you need to select the Settings and then to Filters tab, as in the previous step. Now, click on the Add button on the bottom and provide the extensions that you want to backup separately.
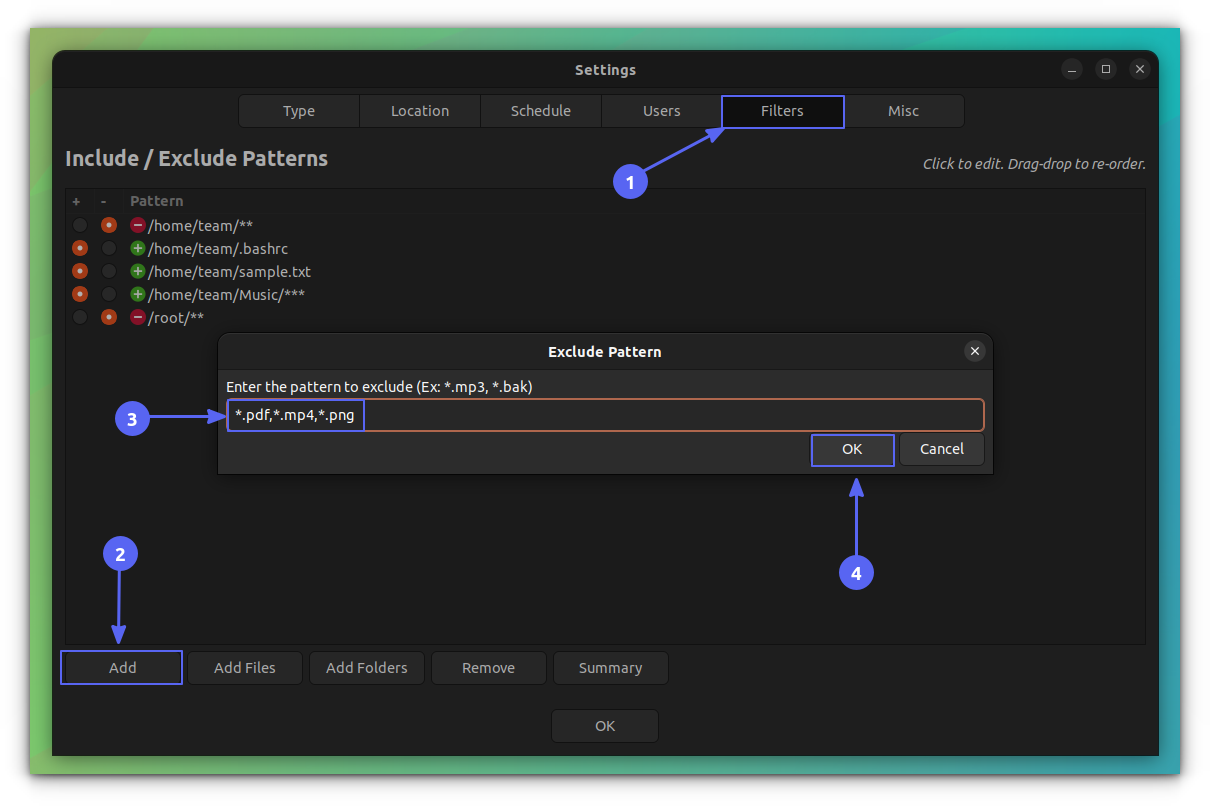
Not that, the extensions should be chained in the format :
*.mp3,*.png,*.pdf
Once done, press okay.
Step 2: Add the list to be included
Make the selected extensions to be included, by turning the adjacent radio button to "+" sign. On the screen, you can see, although I added the extensions, it is not included (toggle the radio to "plus" side).
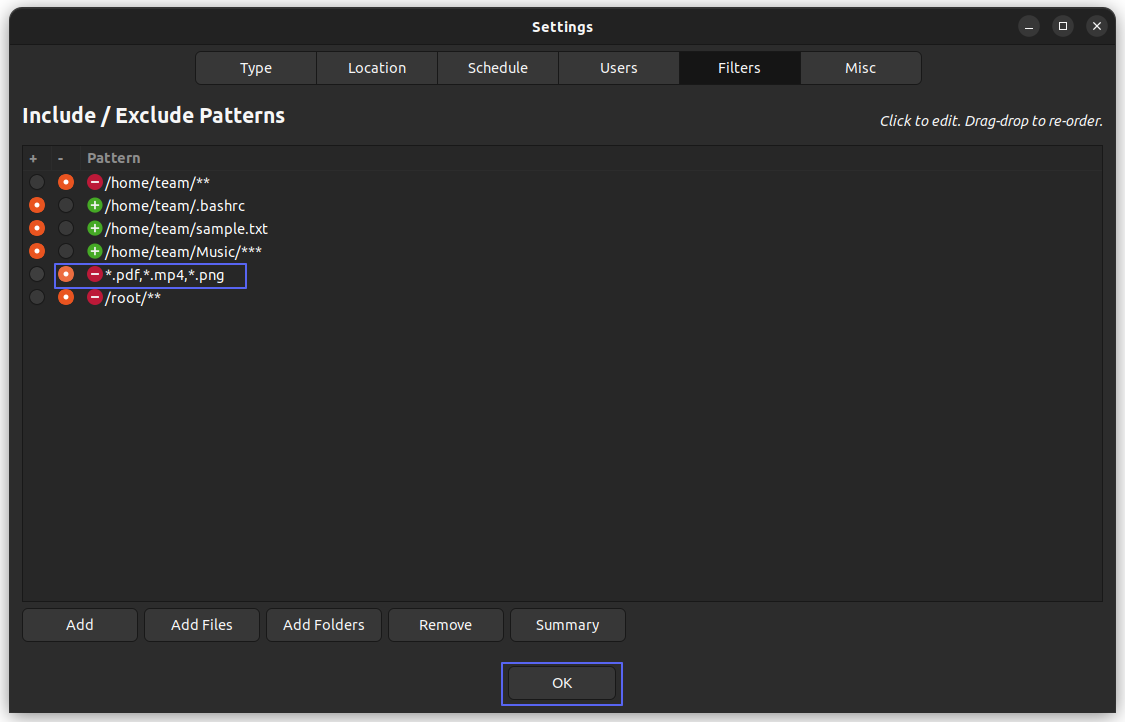
Press OK and then hit the Create button to start the backup process.
How to restore your Linux system from Timeshift backup
In the above sections, you have seen various methods to back up your Linux system using Timeshift. So now, you will be looking at restoring the system using the backup you have.
1. From the same OS
When you can still log onto to your OS and want to go back to a previous state, just launch Timeshift from Menu or Dash and select a Restore Image and hit restore. That’s all.
If your backup is on external USB, you should plug it in, of course.
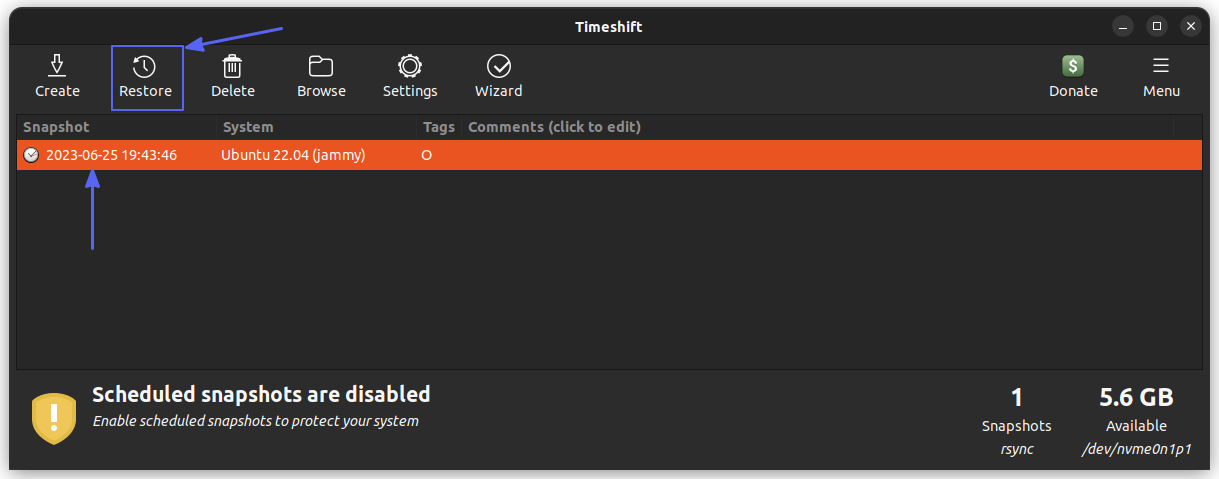
Once you finished the restoration, reboot the system to get the effect.
2. Restoring when you can’t log into your Linux system
This section is for systems that can’t log into a graphical environment. There is still hope to get it back to the normal state.
You’ll need a live Linux USB. Create one using another computer.
I highly recommend keeping an Ubuntu Live USB or any other live Linux USB, as this can be a lifesaver. There is no excuse for not having this.
Step 1: Install Timeshift in Live USB
Boot into the live Linux session and install Timeshift. Yes, you can install applications in live sessions.
In order to install Timeshift in Ubuntu Live USB, you need to first enable the Universe repository, using:
sudo add-apt-repository universe
Once that's done, enter:
sudo apt install timeshift
Now, you can use Timeshift in live USB.
Step 2: Go through the Setup Wizard
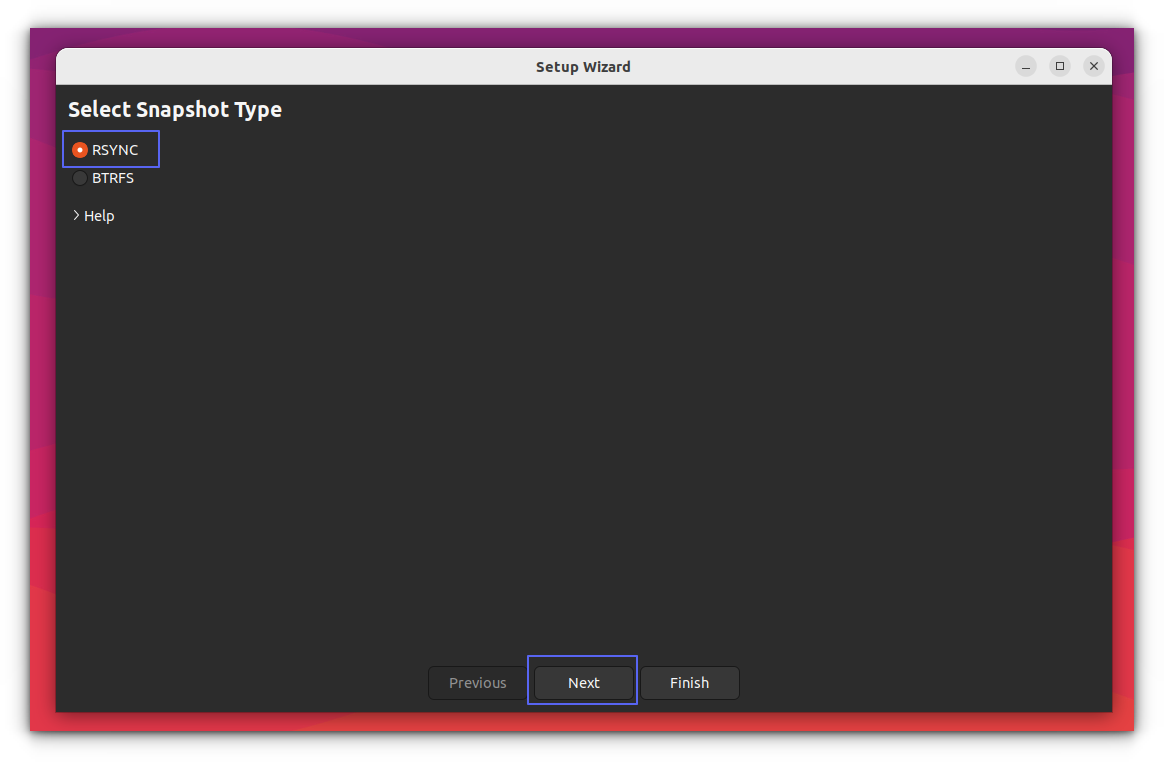
After installation, launch the application and follow the set-up wizard. That is, first select rsync and click Next.
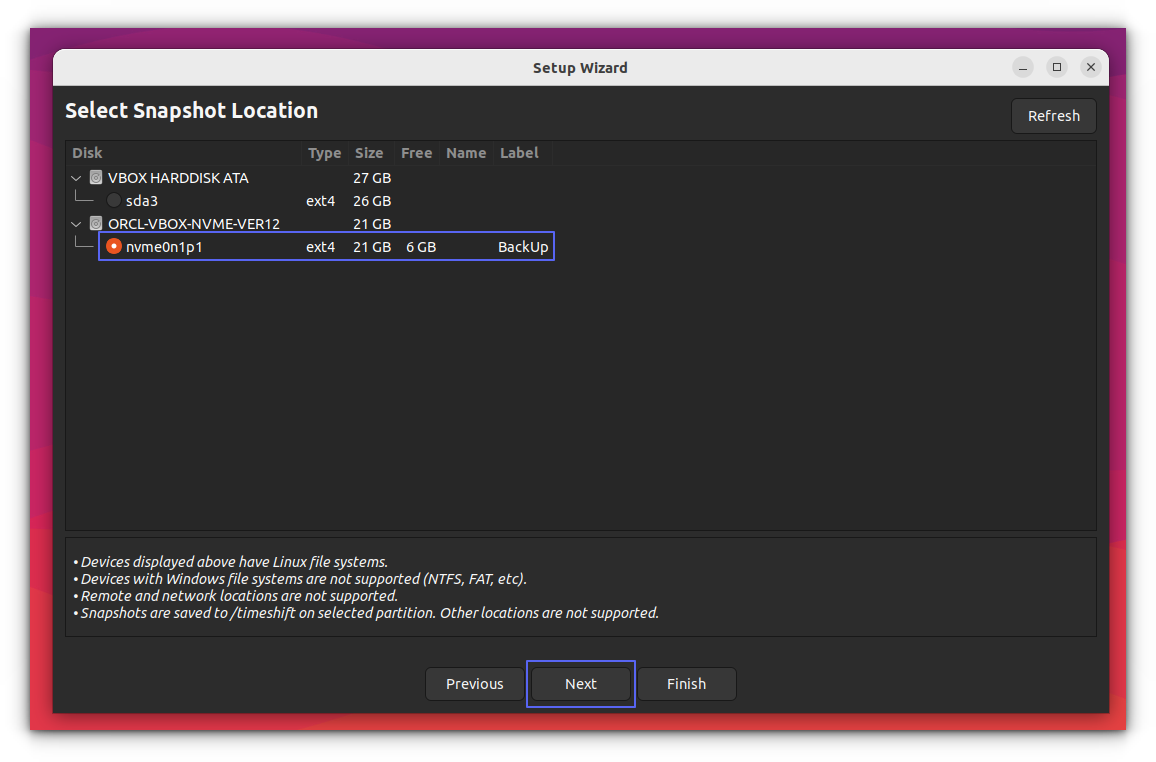
Now, select the backup drive you had used earlier from the list.
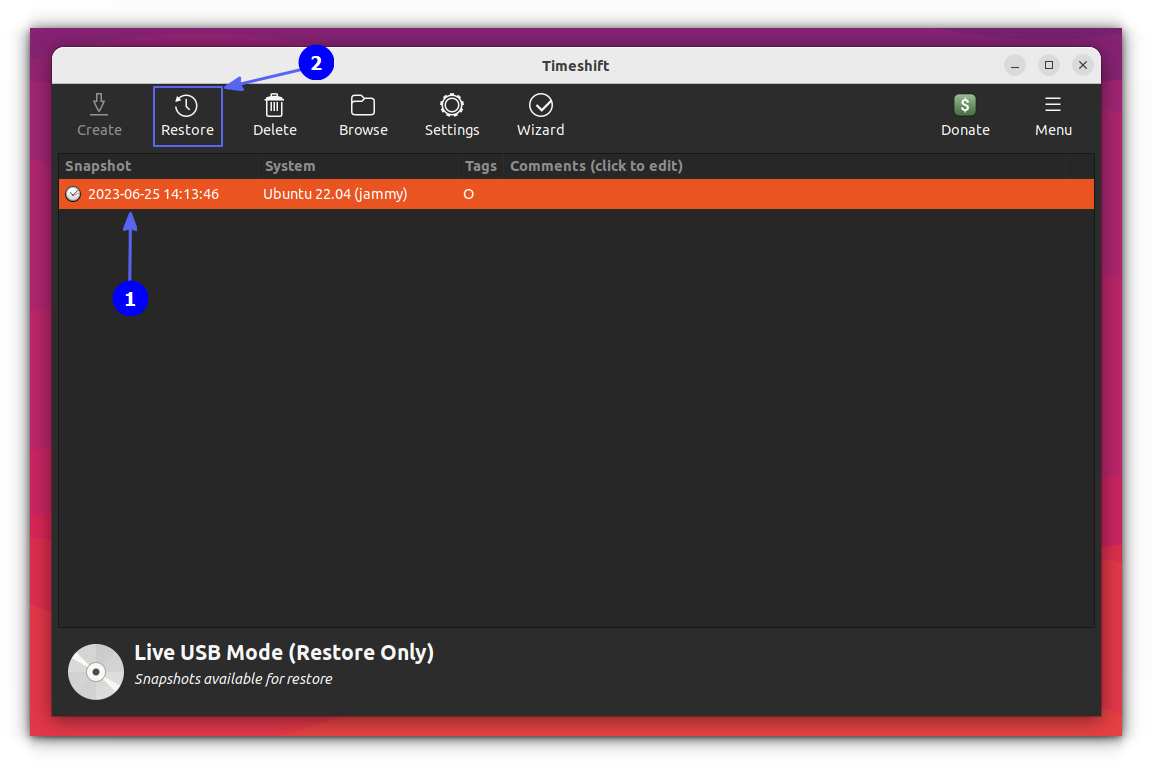
This will bring you to the main Timeshift window, where you can find your backup listed.
Step 3: Restore the backup
Select the backup that you want to restore and click restore.
In the next screen, it will ask about the restore paths. Provide it according to your system.
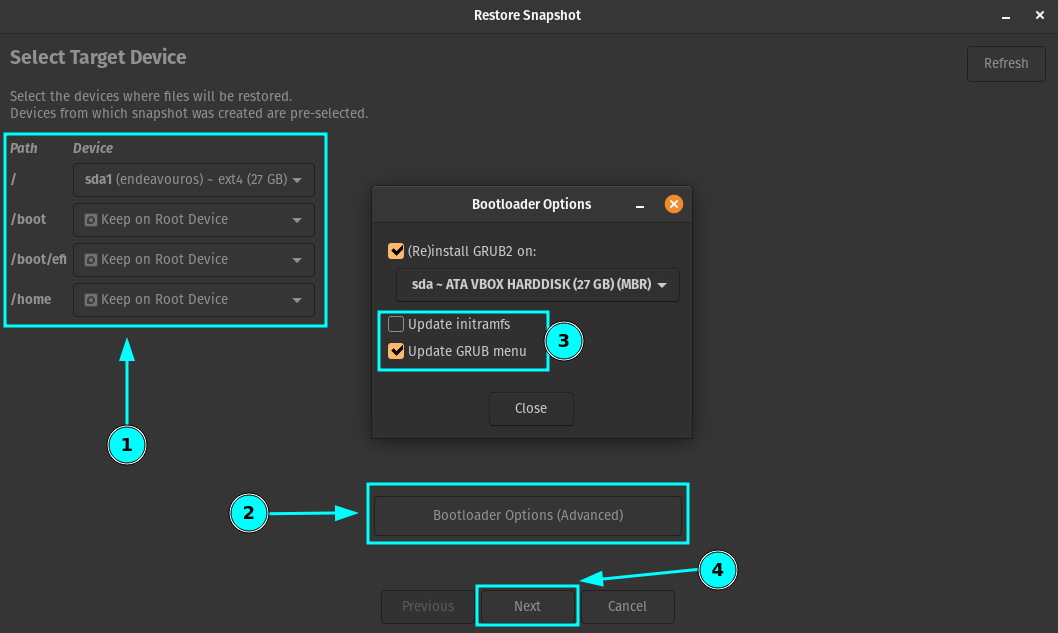
I recommend you let Timeshift install the bootloader again.
If you are facing any issues with the restore, confirm the locations of restore, as this may vary for your system. Also, sometimes, when any error occurs related to 'initramfs', you can solve it by enabling the update initramfs button and retry.
Once Next is pressed, it will start a Dry run.
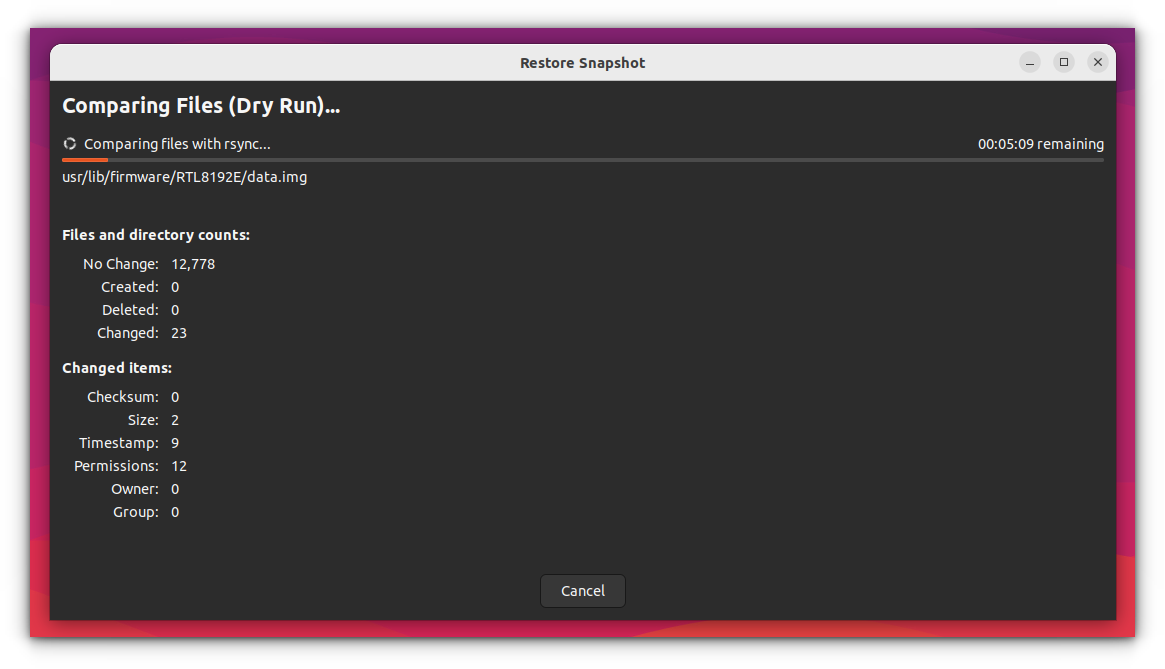
Timeshift will then ask to confirm the actions.
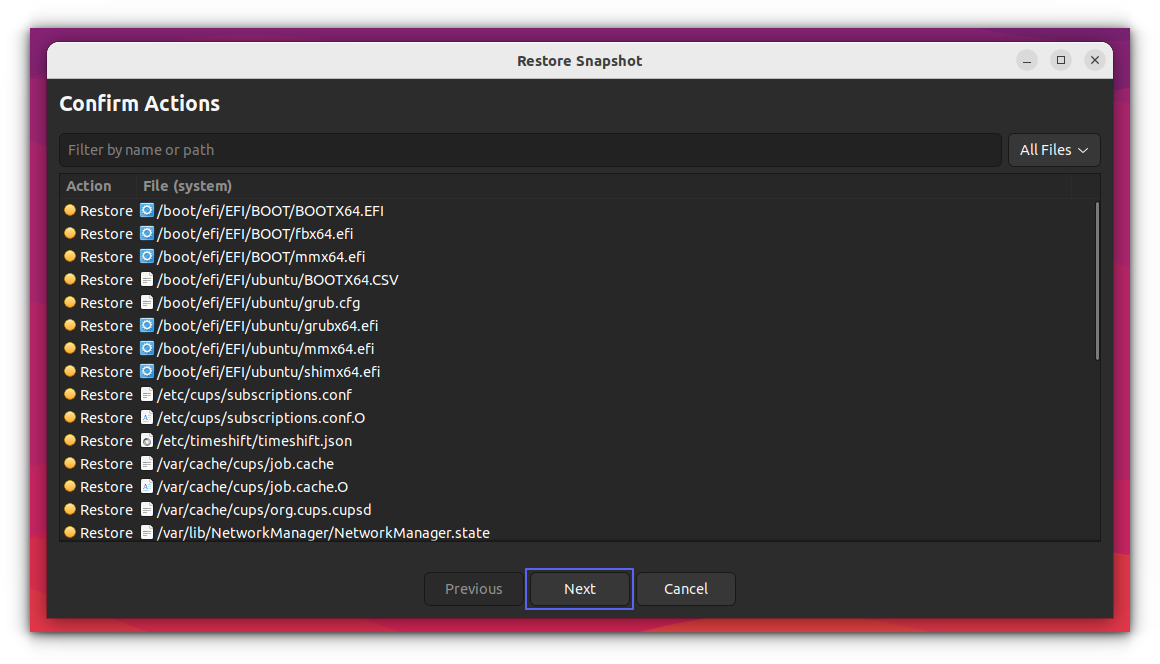
Click on Next, if you are satisfied with the actions to be performed. This will give you a disclaimer about data formatting to be performed. Click Next again.
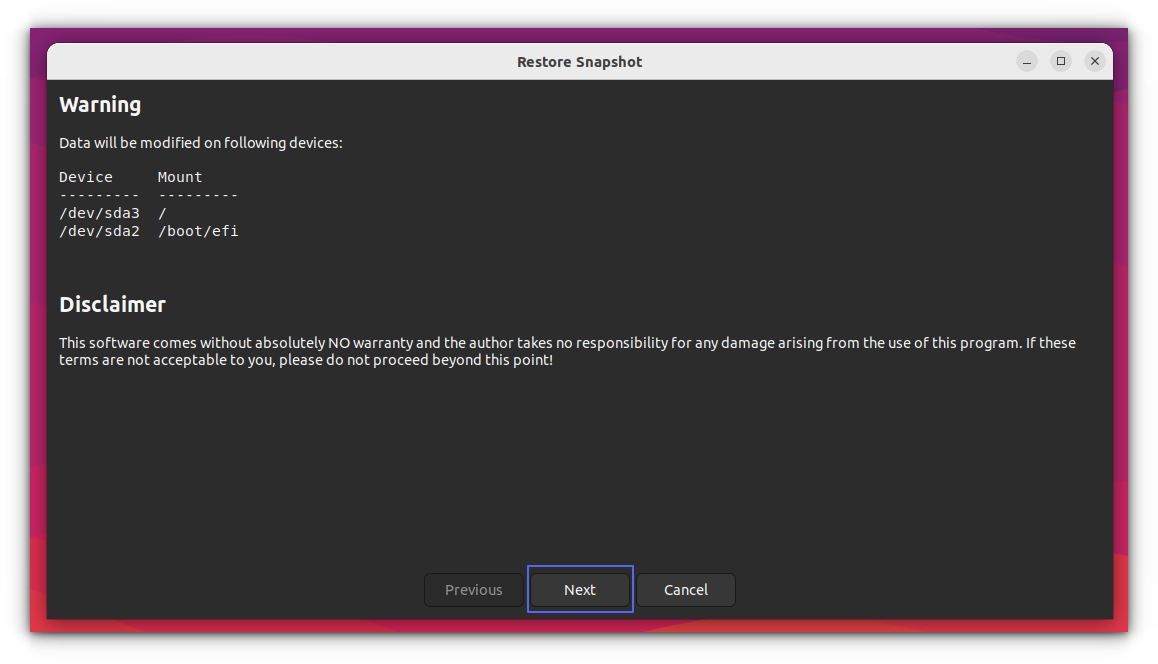
Restoration will be started once you click next.
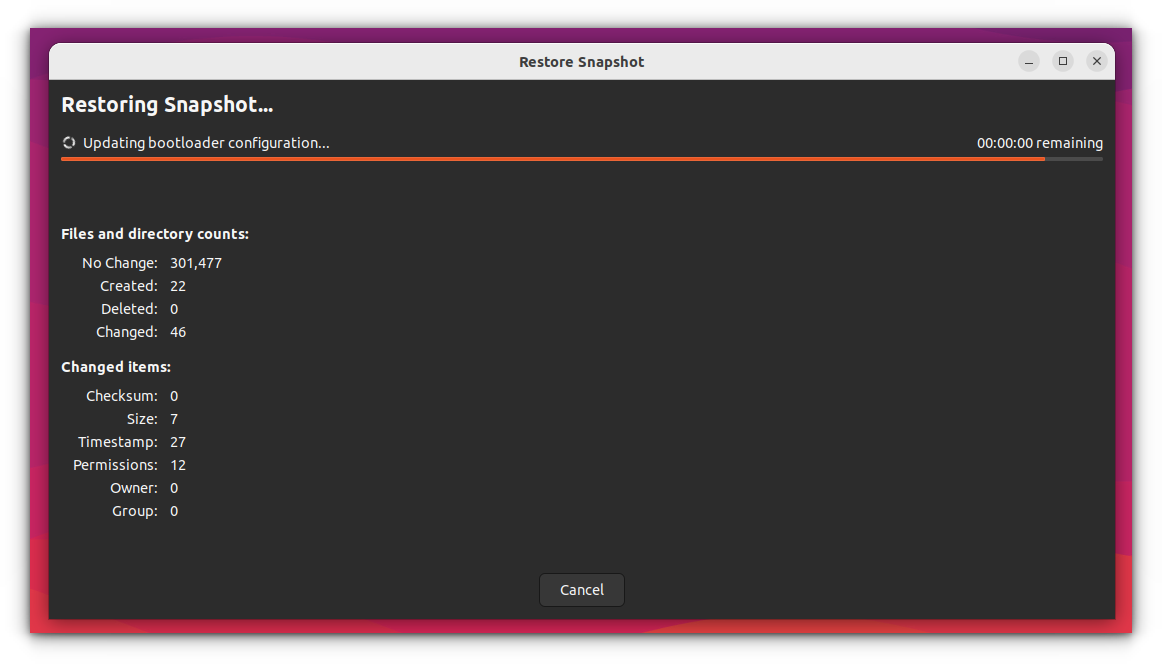
Wait for some time so that the restoration is complete. It will give you a completed window, once everything is OK.
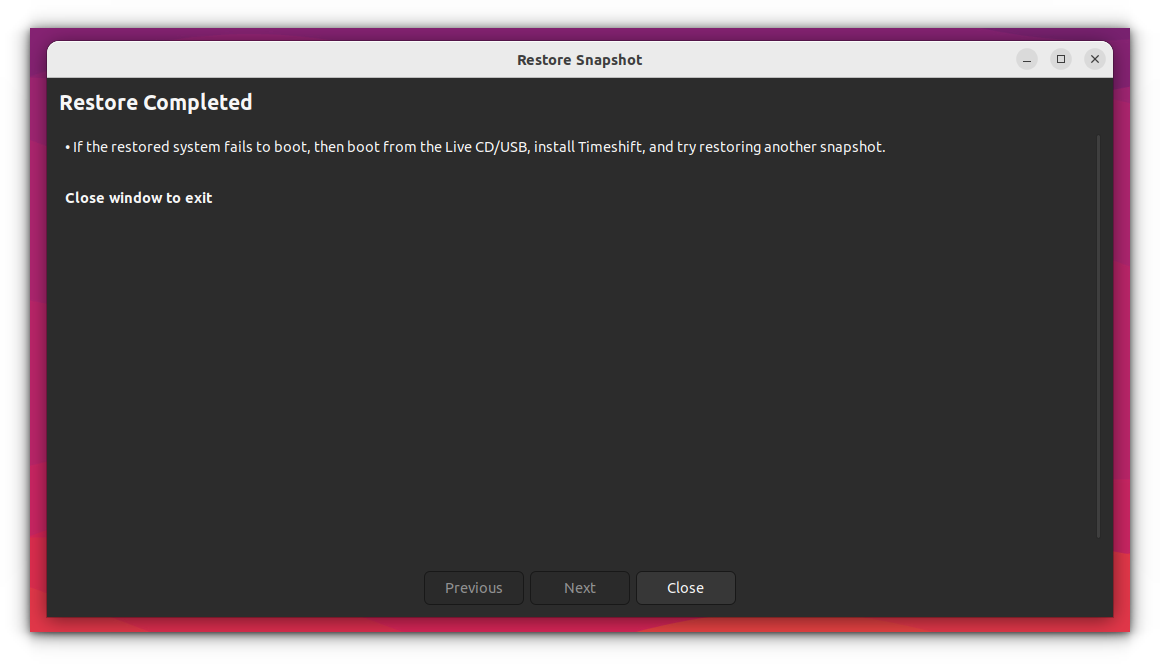
Reboot the system and then remove the Live USB when prompted. Later, boot into your restored Linux system.
Hopefully, things will be back to normal.
Conclusion

Can backup and restore Linux system get any easier? This program gives you the ability to tinker around, mess up and try new stuff without any fear or regret.
An invaluable tool in any Linux user's arsenal. No wonder, Linux Mint has started providing it by default.
What is your view on the amazing Timeshift? How do you back up your Linux system?
Also, do tell us situations where you messed up real bad and timeshift could have been or has been useful. Don’t forget to share. You might save a Linux life :D

