When installing Ubuntu, you’re asked to create a user, and that user gets sudo access by default. That’s good, because you need root privileges to do things like perform updates and install packages(probably wouldn’t be too nice if any user could do that).
But what about new users you created after installing Ubuntu? What if the new user also needs sudo permissions?
In this tutorial, I’ll go over the steps you need for adding a user to sudoers in Ubuntu, from both the command line and a GUI.
The GUI method will work for the desktop version of Ubuntu, while the command line method will work for both the desktop and server versions.
Giving sudo permissions from the command line
Giving a user sudo permission from the command line is just a single command if you know the username of the user:
sudo usermod -aG sudo usernameThe above command adds the user to the sudo group, which is used to track the users who are allowed to have sudo permissions. Just adding the user to the sudo group takes care of everything. Pretty easy, right?
Let’s go over what that command just did:
usermod: The usermod command is used for modifying an existing user in Linux.-aG: Theaoption means append(or add),Gis for groups. So, this adds the specified group to the specified user, without touching the user’s existing groups. If you exclude theaoption, the user would be removed from all its groups except sudo (you don’t want that).sudo: the second sudo in the command represents the sudo group.username: This is the name of the user you want to add to the sudo group.
If you don’t know the exact username, you can list the users on your system using the compgen -u command. You’ll find the username near the end of the command’s output.
How to verify if the user has sudo access
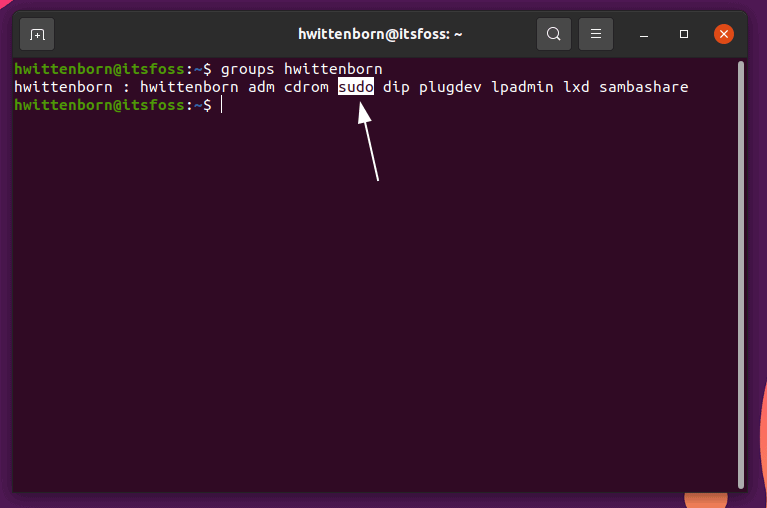
There are various ways you can check if a user has sudo access. You can check if the user is part of sudo group with the following:
groups username
Alternatively, you can log in as the other user you just gave sudo access to and run a command with sudo. For example:
sudo echo "I am root!"If everything’s set up correctly, it’ll output I am root!. If you get an error about the user not being in the sudoers file, try going through the instructions again, or you can use the graphical method below.
Giving sudo access to a user on Ubuntu Desktop
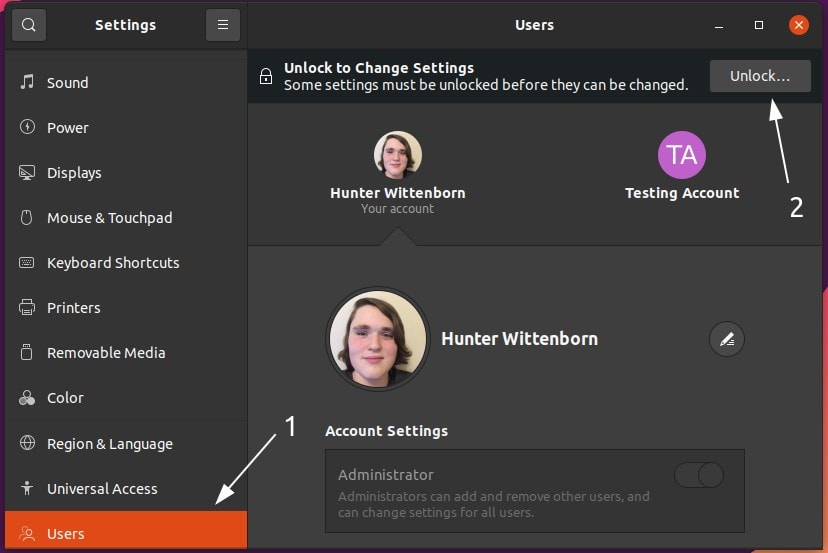
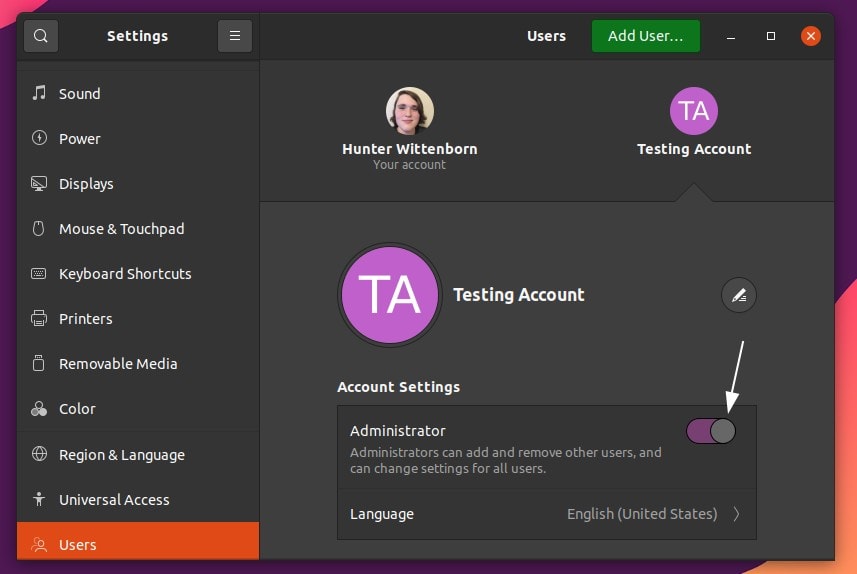
Giving a user sudo permissions on Ubuntu Desktop is a simple two-step process:
Step 1: Open up the Settings application, go to ‘Users’ and click ‘Unlock’. Enter your password when prompted to do so.

Step 2: Toggle the Administrator switch to on.

And that’s it! If you want to see if it worked, log in as the user you gave administrator permissions to and try running the same command as before. Look for the same output as mentioned before.
sudo echo "I am root!"Wrapping up
With that, you’ve given a user sudo permissions! The commands should be mostly, if not completely functional on other distros such as Debian, Fedora, or Arch Linux.
If you have any questions or suggestions, feel free to leave them in the comments.

