When I bought Nexus 7, the first thing on my mind was to install Ubuntu touch on it. But to do that, Nexus 7 has to be rooted first. In this article, I’ll show you how to root Nexus 7 2013 in Ubuntu Linux.
This tutorial was performed with a Dell Inspiron running Ubuntu 13.10 and a Nexus 7 2013 running Android Kitkat. I followed the procedure mentioned on XDA Developer Forum, I am just presenting them in more humane format with clear instructions and screenshots so that even beginners can root their Nexus 7 device.
Before we proceed to root Nexus 7 2013 in Linux, lets see what are the prerequisites.
Prerequisite to root Nexus 7 2013 in Linux:
- A computer running Linux (preferably Ubuntu).
- Nexus 7 2013 and a USB cable.
- Internet connection.
Before you proceed with the rooting, I must warn you that this will violate the warranty of your device. Also, if you mess things up (which you should not), I am not responsible in any ways. When you are ready to take the risk, lets see how to root Nexus 7 2013.
Steps to Root Nexus 7 2013 in Linux:
1. Install Android dev tools
You’ll need adb and fastboot Android dev tools. Open a terminal and use the following commands to install it in Ubuntu:
sudo apt-get install android-tools-adb
sudo apt-get install android-tools-fastboot
2. Enable USB debugging option on Nexus 7
Before you connect your Nexus 7 device, you need to enable USB debugging on it. Go to Settings->About Tablet->Build Number. Tap on build number 7 times. This will enable the developer mode on your tab. You can see Developer Options in the Setting menu. Go in it and enable the USB Debugging option.
If you are facing troubles, refer to this screenshot tutorial to enable debugging option in Nexus 7 2013.
3. Unlock the bootloader
This step is sort of optional but if you skip this step, all the device data will be wiped out. This is why I would suggest you to unlock the bootloader. I have written the steps to unclock Nexus 7 bootloader in Linux in details. You can follow the steps there.
4. Download TWRP recovery and CF-Auto Root
TWRP (TeamWin Recovery Project) is a custom recovery ‘tool’. You can download the image from this official link. You’ll see different version of tool, choose the latest one to download.
Download TWRP recovery tool for Nexus 7 2013.
CF-Auto root installs and enable SuperSU on your device while keeping it as close to stock as possible.
5. Flash TWRP recovery
If you have not already, connect your Nexus 7 2013 to your computer via USB. Now boot in to the bootloader using this command:
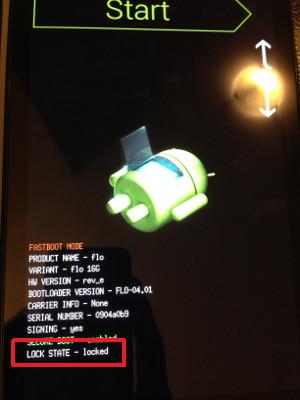
adb reboot bootloaderYou will see that your Nexus has been rebooted in bootloader and looks like the following:
Remember where you downloaded the TWRP image? I presume that you know the basic Linux commands and can use the following command with the path of just downloaded file:
sudo fastboot flash recovery ~/Path-to-TWRP.img
6. Go to recovery mode
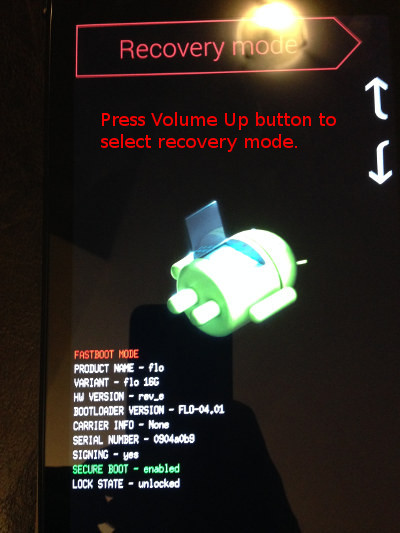
After flashing the TWRP recovery, from the bootloader, press volume up and down button to shuffle between Start, Reboot and Recovery. These options will be displayed in huge fonts at the top of the device. Press power button to confirm your selection:
7. Confirm rooting
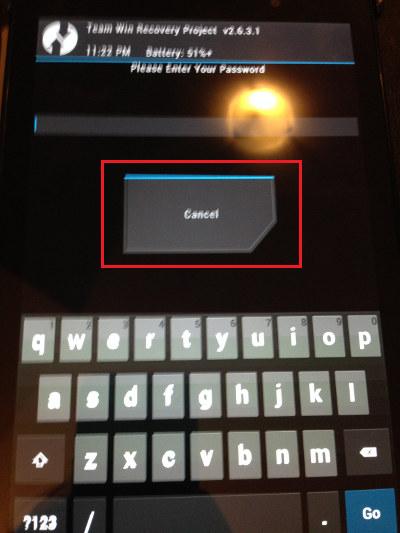
When you enter the TWRP recovery mode, it may greet you with a screen asking for password. Just press Cancel. No need for any password here.
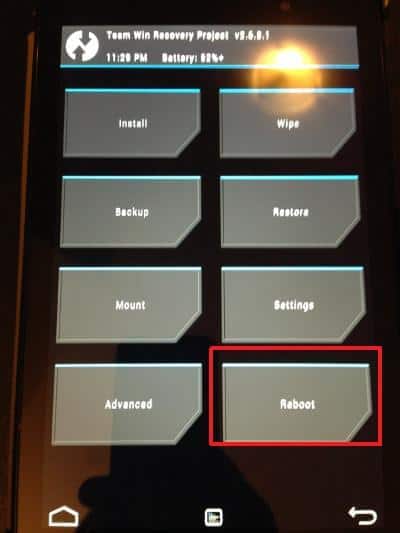
On the next screen, out of several options presented, choose Reboot.
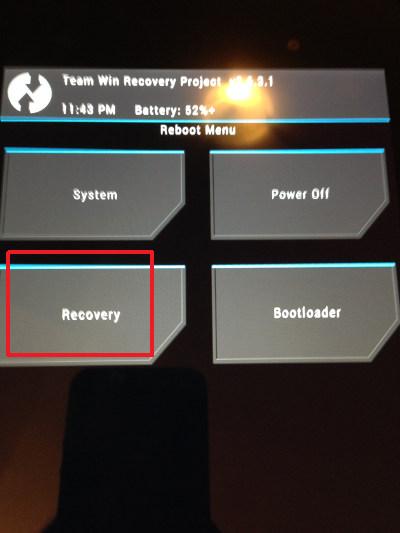
In the Reboot menu, choose Recovery:
The next screen will ask you if you want to enable root or not. Since you have followed so far, it means you do :) Confirm enabling the root. Alas! I forgot to take screenshot of this message. I hope you can manage without it.
8. Lastly, root it
And here comes the final step. If you have been successful so far, now is the time to root with SuperSU. Remember the CF-Auto Root file we downloaded? Extract that zip file and enter the extracted directory. You’ll see an image directory here that contains an image file CF-Auto-Root-flo-razor-nexus7.img. Use the following command and point it to the said image:
fastboot boot ~/Path-To-The-Image/CF-Auto-Root-flo-razor-nexus7.imgIf everything goes fine, you shall be booted normally in Nexus 7. You will be asked to download an SuperSU or something from Google Play Store. That’s an indication that you have been rooted.
Note: If you mess up somewhere, explore TWRP recovery. In case you are stuck in ‘bootloop’ after unlocking the bootloader or rooting the device and you see four bouncing balls and not able to boot in to the device, go back to recovery mode again. Try options in Advance to reset factory settings or as a lost resort Wipe the data and do a complete clean up. Reboot now and it should be fine.
I hope this guide helps you to root Nexus 7 2013 (Flo) in Ubuntu Linux despite of those poor screenshots taken from my phone camera. Please note that this has been written for Nexus 7 2013 version, if you want to use it on Nexus 7 2012 (grouper), download the TWRP image for older version. Rest of steps will be the same.
If you have any questions, suggestions, feel free to hit the comment box.


