

If you are a developer and want to install apps directly to Android for testing purposes, then using adb (Android Debug Bridge) and fastboot will get things done in the most efficient manner possible.
Sure, it can also be useful when you want to access the device shell to execute commands directly which is quite helpful for unlocking the bootloader and installing custom ROMs.
So in this tutorial, I will walk you through how you can install adb and fastboot on various Linux distributions.
How to install ADB and Fastboot on Linux
You get adb and fastboot available in the default repository of almost every modern Linux distribution and it does not require any third-party repository.
So let's take a look at how those two packages can be installed on various Linux distributions.
For Ubuntu/Debian:
sudo apt install adb fastbootFor Fedora Linux:
sudo dnf install android-toolsFor Arch Linux:
sudo pacman -S android-toolsThat's it. Once you are done with the installation, you can check the installed version of adb using the following command:
adb --version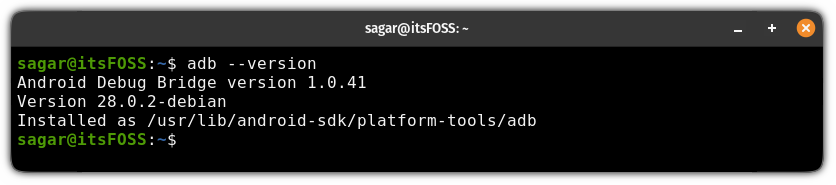
How to use ADB in Linux
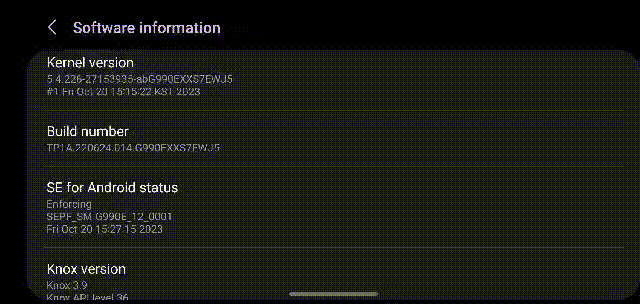
To use adb, the first step is to enable the developer options on your Android device. For that, first, go to Settings and find the software information.
Inside the software information, tap multiple times on the build number and it will enable the developer options for you:
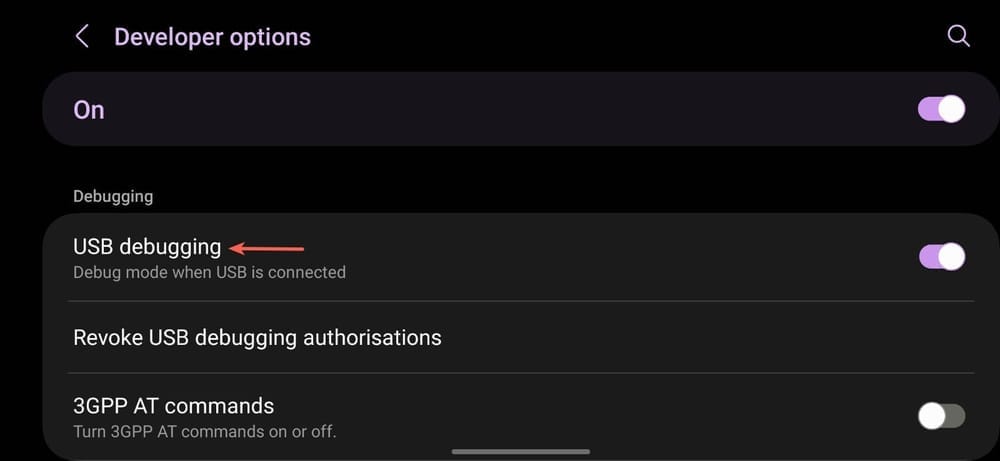
Next, go to the developer options and enable the USB debugging option:
Now, connect your device to your computer and start the adb server using the following command:
sudo adb start-server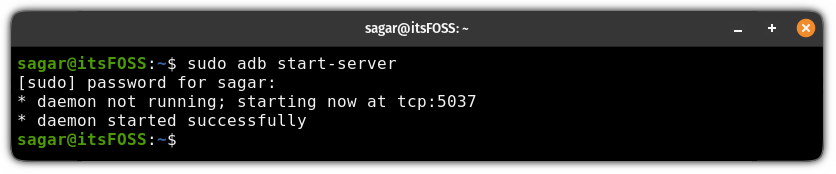
Once you start the adb server, it will prompt you on your phone asking for your permission to allow USB debugging (if you don't see the below prompt, re-enable USB debugging while keeping your phone connected to the computer):
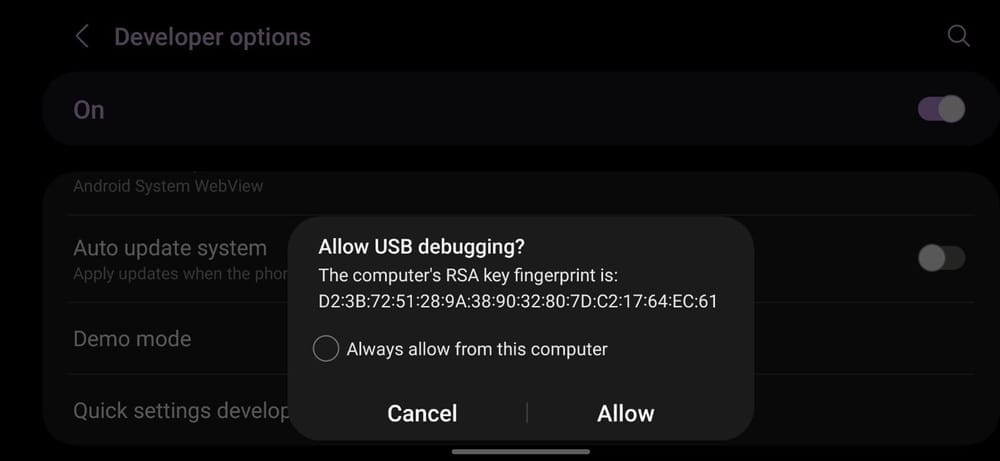
After allowing the USB debugging, check if the device is connected or not using the following:
adb devices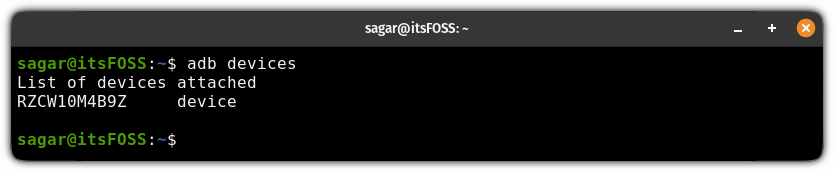
Installing APK using ADB
To install an apk to your Android directly, all you have to do is use the install flag and specify the name or path to the APK you are trying to install:
adb install <apk_name or path/to/apk>For example, here, I want to install the pianoli.apk file which is located inside the home directory, so I will be using the following:
adb install ~/pianoli.apk
Executing shell commands
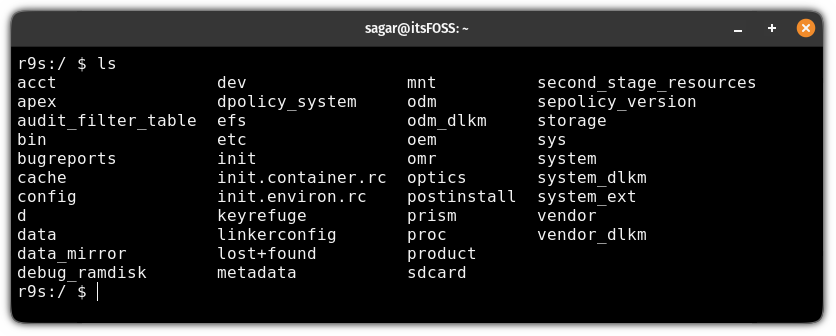
To execute shell commands in a connected device, the first step is to get into the shell using the following command:
adb shellNow, you can use the basic commands. For example, here, I used the ls command to list the content of the current directly:
Sending files from the computer to the Android
To send files to the connected Android, you'd have to use the adb push command by specifying the filename and location where to send the file in Android:
adb push Filename where/to/send/in/AndroidLet's say I want to send Image.jpg to the /storage/emulated/0 directory, so I will be using the following:
adb push Image.jpg /storage/emulated/0
Sending files from Android device to local machine
To send files from the connected Android device to your local computer, you'll have to use the adb pull command as shown here:
adb pull /path/to/file/in/Android /targetFor example, here, I've sent the Image.jpg file located in the /storage/emulated/0 directory of my Android phone to my home directory:
adb pull /storage/emulated/0/Image.jpg ~/
I hope it gave you enough pointers to get started with adb on Ubuntu. Let me know if you have questions.
If this helped you, consider supporting It's FOSS
It's FOSS has been helping people use Linux for the past 14 years. Help us stay independent from big tech. Become a Plus member, enjoy ad-free reading and get 5 eBooks.

