
Privacy is one of the most discussed topics these days, from the NSA spying on citizens and governments alike to the Facebook data scandals. The vicious circle of companies abusing customer/user data will always continue.
So, privacy-concerned users are looking for ways to enhance their digital experience without sharing a lot of personal information.
And, one of the ways to do that is to pick the right browser for a private internet experience. Of course, you can choose to go with the best web browsers for Linux. But, if you want to be extremely cautious?
Tor Browser by the Tor Project will be the ideal choice. Note that the user experience with Tor Browser may not be pleasing, but if you’re laser-focused on privacy protections, it should be a solid option.
If you want more straightforward solutions that do not affect user experiences, you might want to check out our list of the best simple tools to protect privacy.
You should always prefer using the recommended method of installation. But, if you have different requirements, we also have some alternative options.
Method 1. Install latest Tor Browser using official method
Tor project provides an easy to use install method for Tor browser on Linux-based system, no matter what you use.
Download Tor Browser archive file
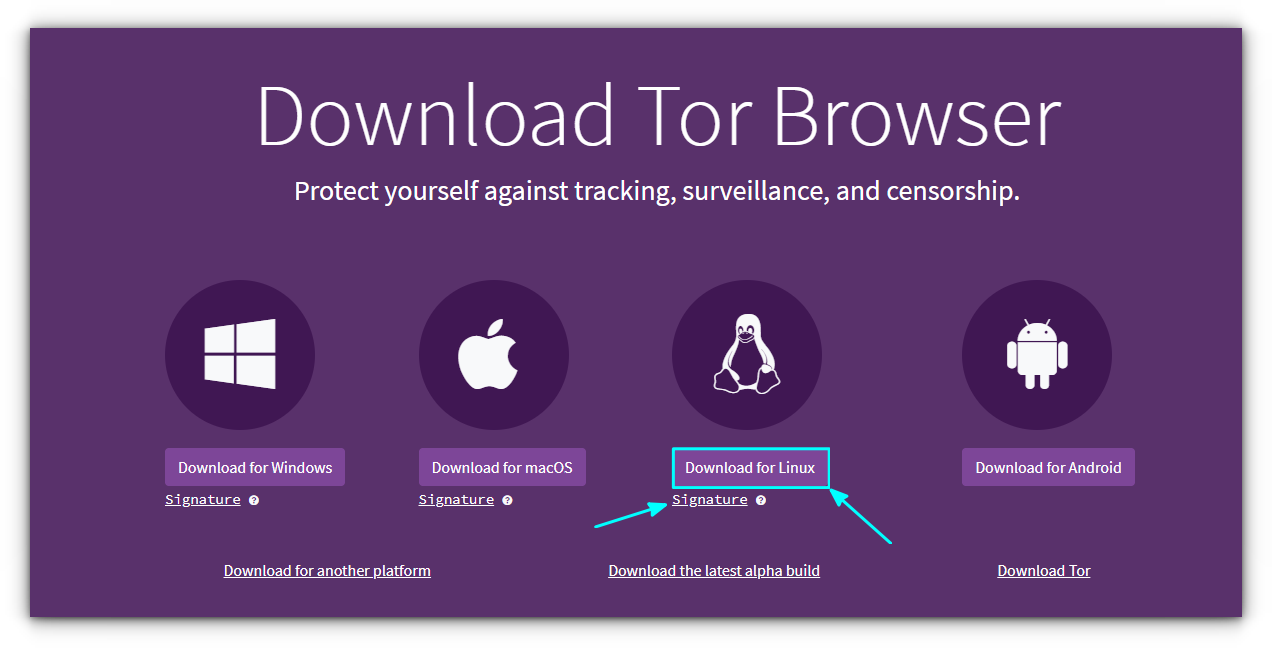
First, download the required archive file for Linux and the signature file from the official download page.
Verify downloaded files (Recommended)
Once downloaded, it's time to verify the file. For this, you need to have GnuPG installed. Then to import the keys run:
gpg --auto-key-locate nodefault,wkd --locate-keys [email protected]
After importing the key, save it to a file using:
gpg --output ./tor.keyring --export 0xEF6E286DDA85EA2A4BA7DE684E2C6E8793298290
Now, verify the files by running the command:
gpgv --keyring ./tor.keyring /path/to/downloaded-tor-signature.tar.xz.asc /path/to/downloaded-tor-browser-file.tar.xz
If you get a Good Signature message, you are good to go, and look below to install Tor browser on your system.
Install Tor Browser
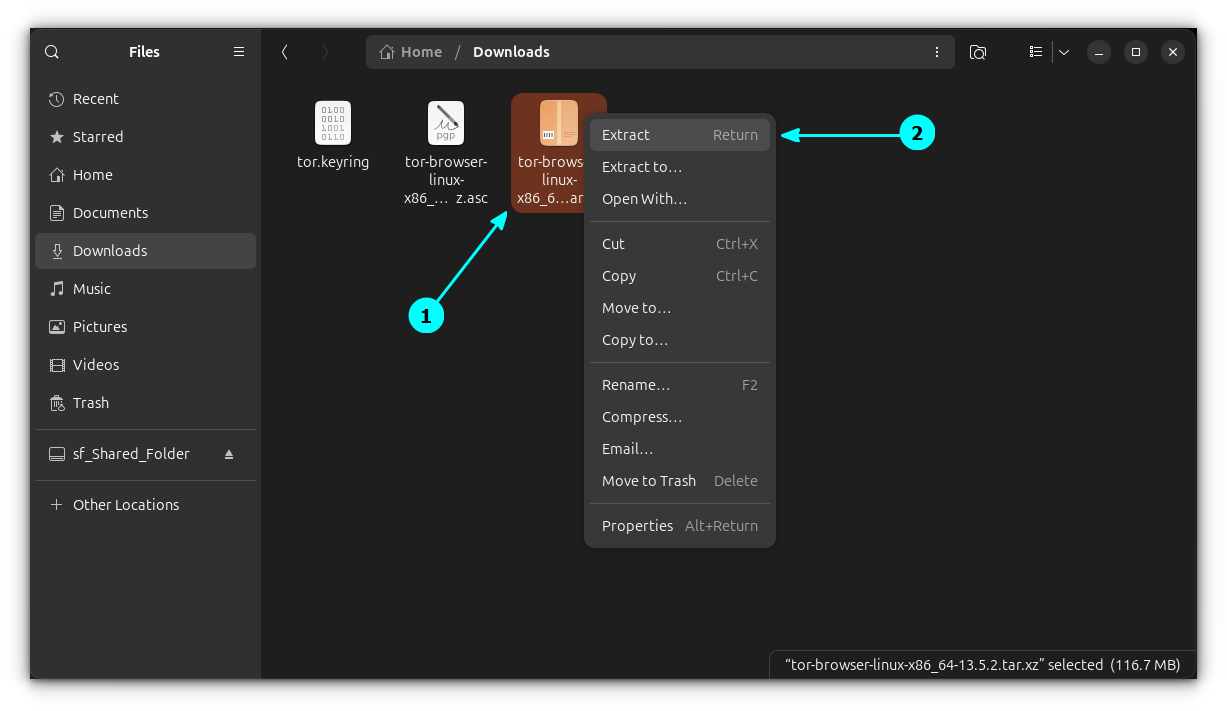
After you verify the file, extract the TAR file. You can use the file manager to extract it by right-clicking and selecting Extract.
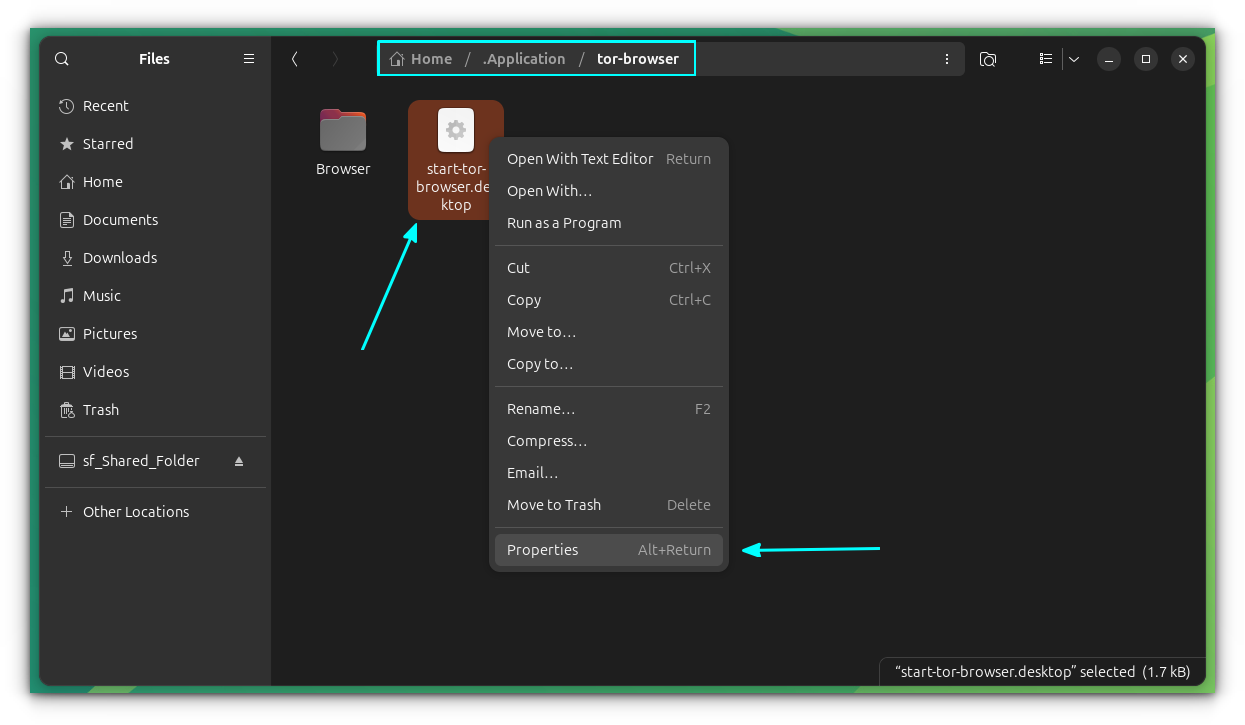
Enter into the extracted folder. Here you can see a start-tor-browser.desktop file. Make this file executable. For this, right-click on the file and go to properties.
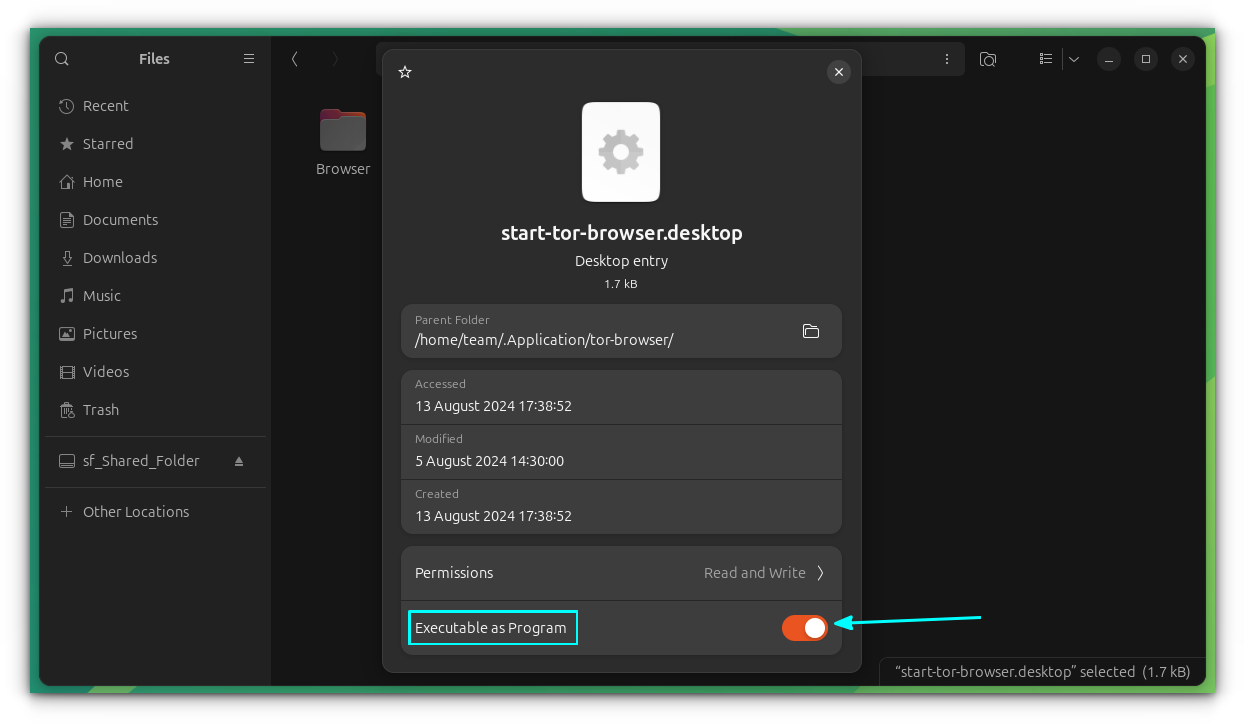
In the latest Ubuntu LTS, toggle the “Executable as Program” button in the properties.
Once the file is executable, open a terminal in that location.
Now, enter the command below to register the Tor browser as a desktop app.
./start-tor-browser.desktop --register-app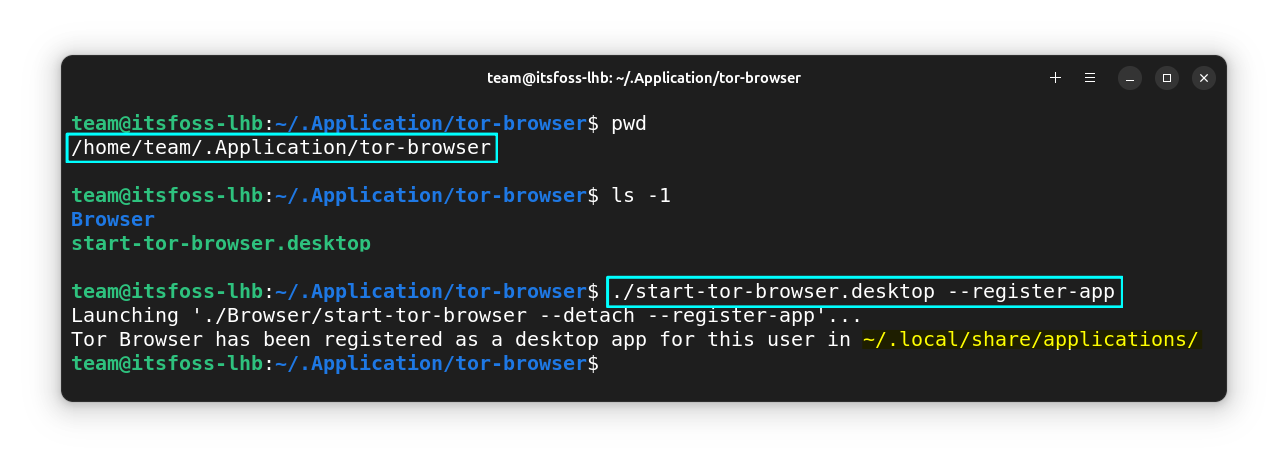
You can now open the app from the system menu.

How to update Tor Browser?
It is important to keep Tor Browser up to date to ensure full security. In the case of installation, you have to perform the update manually.
Manually does not mean that you need to check for updates all the time. When an update is available for the Tor Browser, the browser will notify you about the same in the system menu.
Click on the top-right hamburger menu and you can easily spot it.
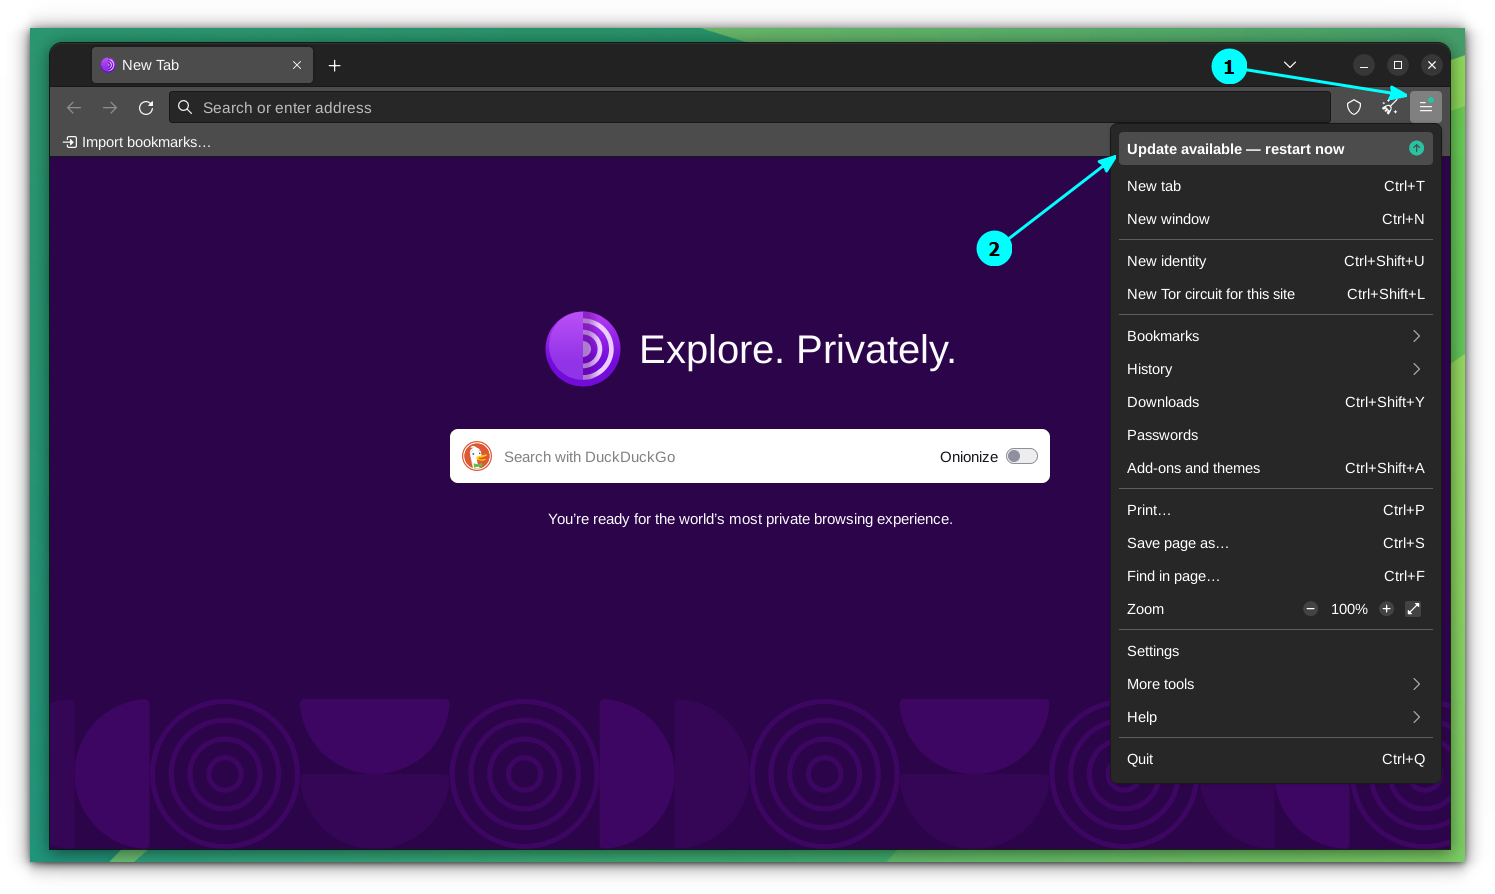
As you can see in the screenshot above, all you have to do is click on the Update Available - restart now button.
It will download and install the updates for you.

Once the update is completed, the browser will restart itself to complete the process.
How to uninstall Tor Browser?
Before uninstalling, you should close the browser completely.
Since we are not integrating anything into our system, you can remove the tor browser folder you earlier extracted to uninstall the browser.
First, remove the desktop file using:
rm ~/.local/share/application/start-tor-browser.desktop
In this case, since we placed the extracted folder in ~/.Application directory, run:
rm -rf ~/.Application/tor-browser
That’s it. You have uninstalled Tor Browser successfully.
Method 2. Install Tor browser with Tor Browser Launcher
There is another package called Tor Browser launcher, which you can use to install Tor Browser. The launcher can be installed either from the system’s software repository or from Flatpak.
Install Tor browser launcher using APT
The Tor browser launcher has been included in the Universe repository of Ubuntu, so you can easily use the apt command to install it.
If you are using Ubuntu, ensure the Universe repository is enabled. It should be the case by default, but if not, you can do it with the command here:
sudo add-apt-repository universe && sudo apt update
Once you have that, you can install the Tor browser launcher:
sudo apt install torbrowser-launcher
Note that this is not the browser itself. It’s just the installer. So, to run the launcher, you need to type in the following in the terminal:
torbrowser-launcher
Or you can search for it in the app menu and launch it.
Install Tor Browser Using Flatpak
The Tor Browser launcher has made things a lot simpler to install the Tor browser on Linux. It does everything for you automatically; you just have to install and run it.
No matter what Linux distribution you have, you can install the latest Tor Browser launcher using Flatpak.
If you have a software store that supports Flatpak (like Pop!_Shop on Pop!_OS), you can effortlessly search for the “Tor Browser launcher” and install it.
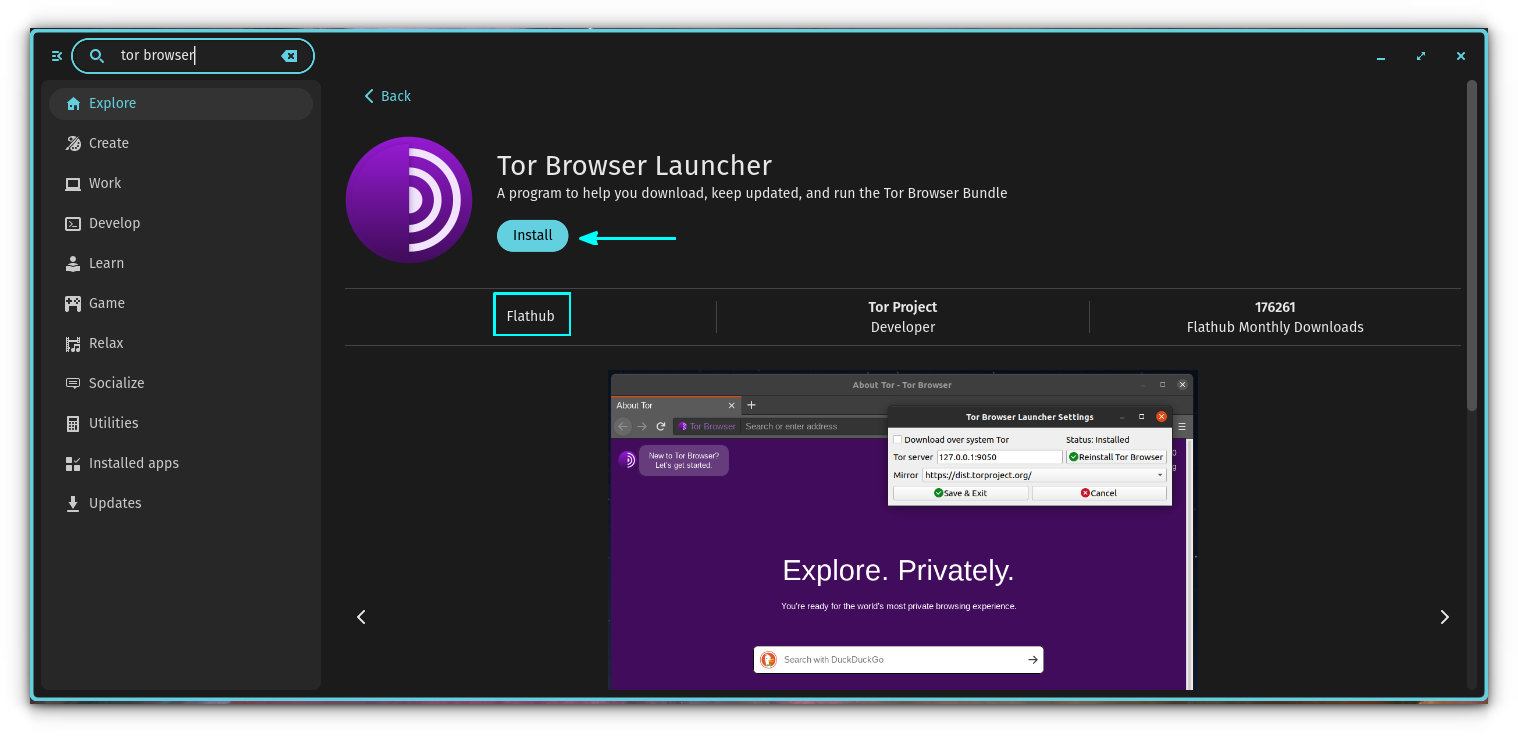
In case you prefer the terminal, you should first set up Flatpak if you haven’t and then type in the following commands:
flatpak install flathub org.torproject.torbrowser-launcher
Now, open the launcher from the system’s app menu. Or you can use the command:
flatpak run org.torproject.torbrowser-launcher
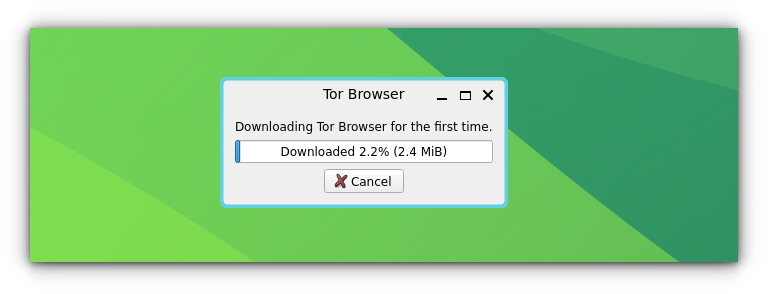
When you run the launcher, it will download the tor browser as shown in the screenshot below. You must follow the on-screen instructions to continue connecting to Tor and launching the browser.
Troubleshooting Tip: Fixing SIGNATURE VERIFICATION FAILED error
When the download finally finishes, you may encounter an error that says, “SIGNATURE VERIFICATION FAILED”. The error code being GENERIC_VERIFY_FAIL as shown below.
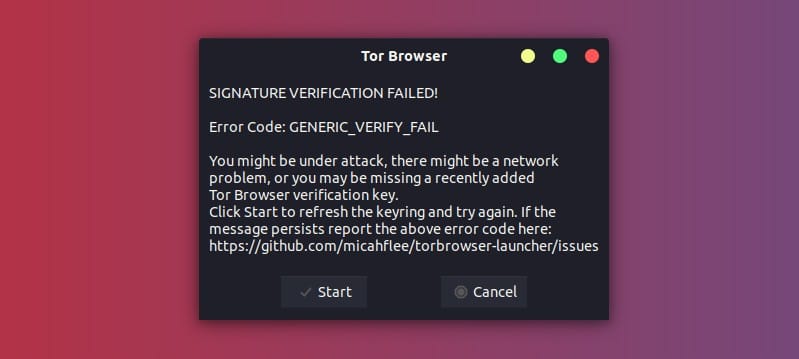
To fix this, you need to refresh the outdated GPG key bundled in the Tor launcher with a new one from Ubuntu’s key server.
You can simply click “Start” to try again and that should fix it. If that still hasn’t fixed the issue, you may use the command below to do that:
gpg --homedir "$HOME/.local/share/torbrowser/gnupg_homedir" --refresh-keys --keyserver keyserver.ubuntu.com
Normally, it should show that the key has been refreshed as follows:
gpg --homedir "$HOME/.local/share/torbrowser/gnupg_homedir" --refresh-keys --keyserver keyserver.ubuntu.com

gpg: refreshing 1 key from hkp://keyserver.ubuntu.com

gpg: key 4E2C6E8793298290: 70 duplicate signatures removed

gpg: key 4E2C6E8793298290: 216 signatures not checked due to missing keys

gpg: key 4E2C6E8793298290: 2 signatures reordered

gpg: key 4E2C6E8793298290: "Tor Browser Developers (signing key) [email protected]" 283 new signatures

gpg: key 4E2C6E8793298290: "Tor Browser Developers (signing key) [email protected]" 1 new subkey

gpg: Total number processed: 1

gpg:            new subkeys: 1

gpg:         new signatures: 283

gpg: no ultimately trusted keys found
Now you need to click on Tor browser from your app menu again to restart the download and installation. It should be quicker than before.
Tor browser is now successfully installed, and you have resolved the error.
Enjoy browsing the internet anonymously and privately now!
How to Uninstall Tor Browser?
If you are not happy with the Tor browser (installed via APT), you can remove it using the command below:
sudo apt purge torbrowser-launcher
If you installed it using Flatpak, you can easily uninstall it using the software center or the terminal
flatpak uninstall com.github.micahflee.torbrowser-launcher
Connecting to the Tor Network
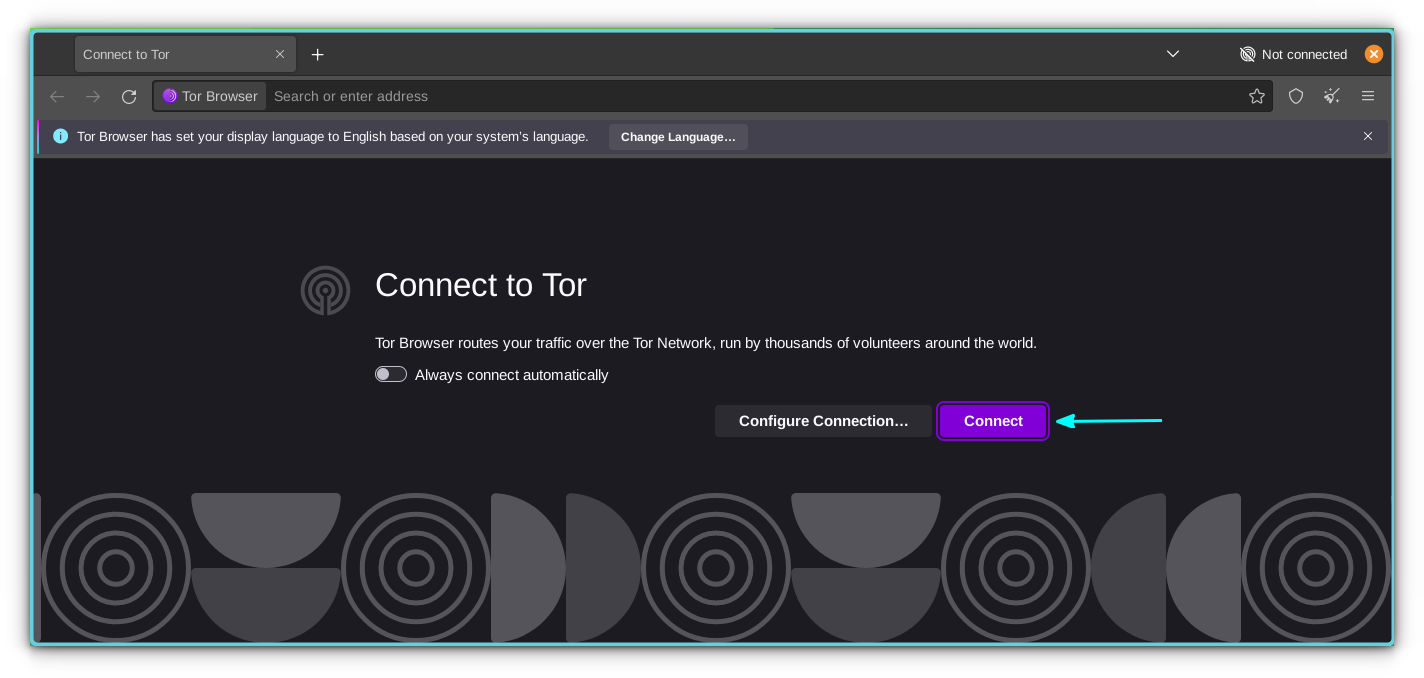
After the download is done, you will be greeted with a connection screen as shown below. Click on the “Connect” button to start the browser with the Tor session.
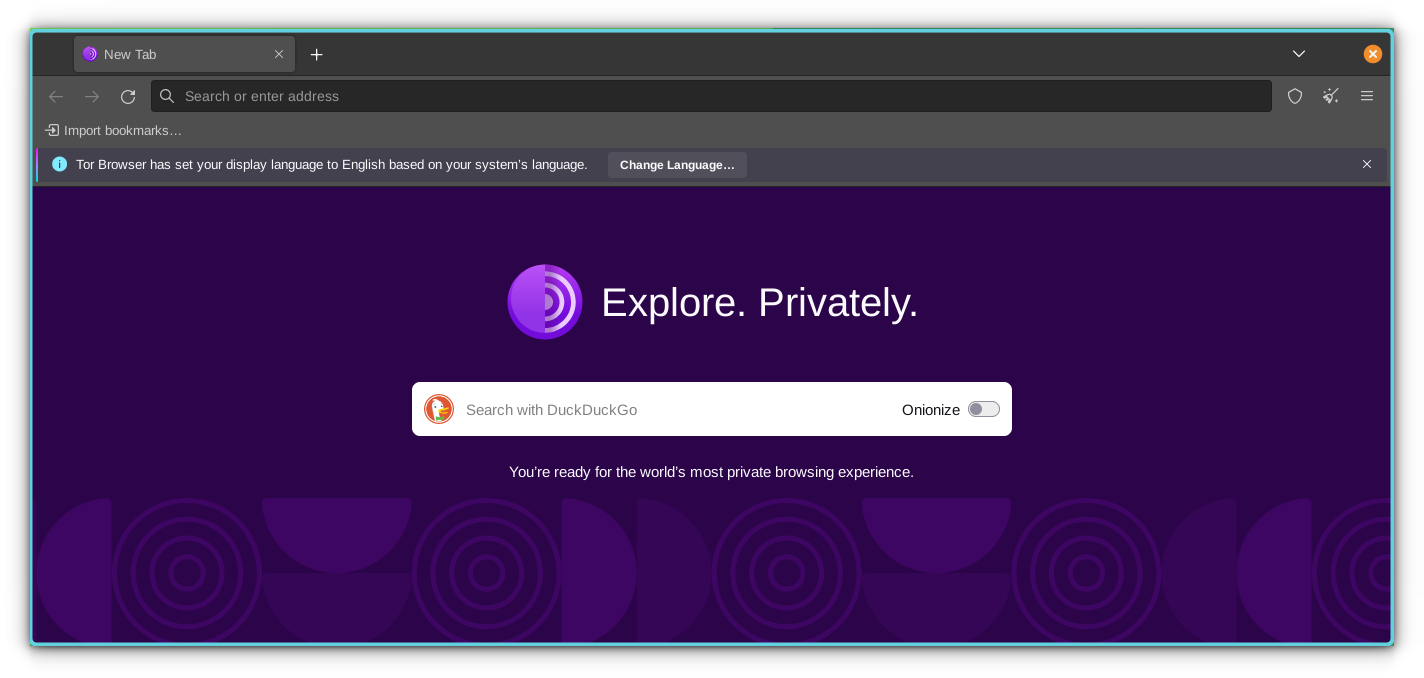
Once it is up and running, you’ll be at the home screen of the browser:
Enjoy browsing the internet anonymously and privately now!
A few tips for using the Tor Browser
Now that you have installed the Tor browser, let me tell you a few tips about using it. It’s up to you if you want to use some or all of these tips.
1. Check if you are properly connected to the Tor Network
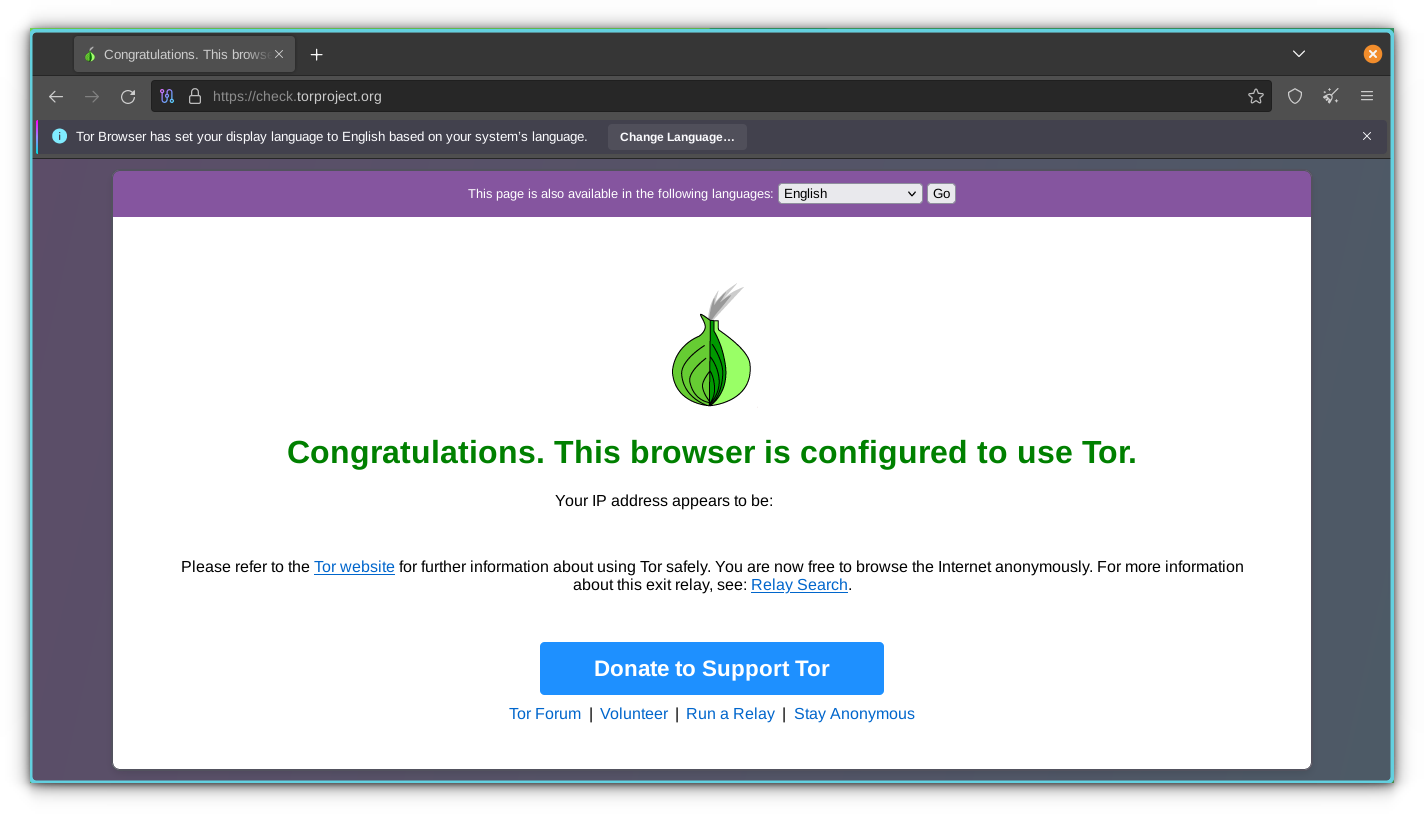
Go to the Tor network check page to see if your browser is properly connected to the network.
2. Avoid using the browser maximized
Maximizing the browser allows websites to access device info such as screen size and resolution. If you’re concerned about this, do not maximize the browser. The Tor browser comes with this letterboxing feature by default. For most of the time, do not try to circumvent this setting.
3. Choose your security level
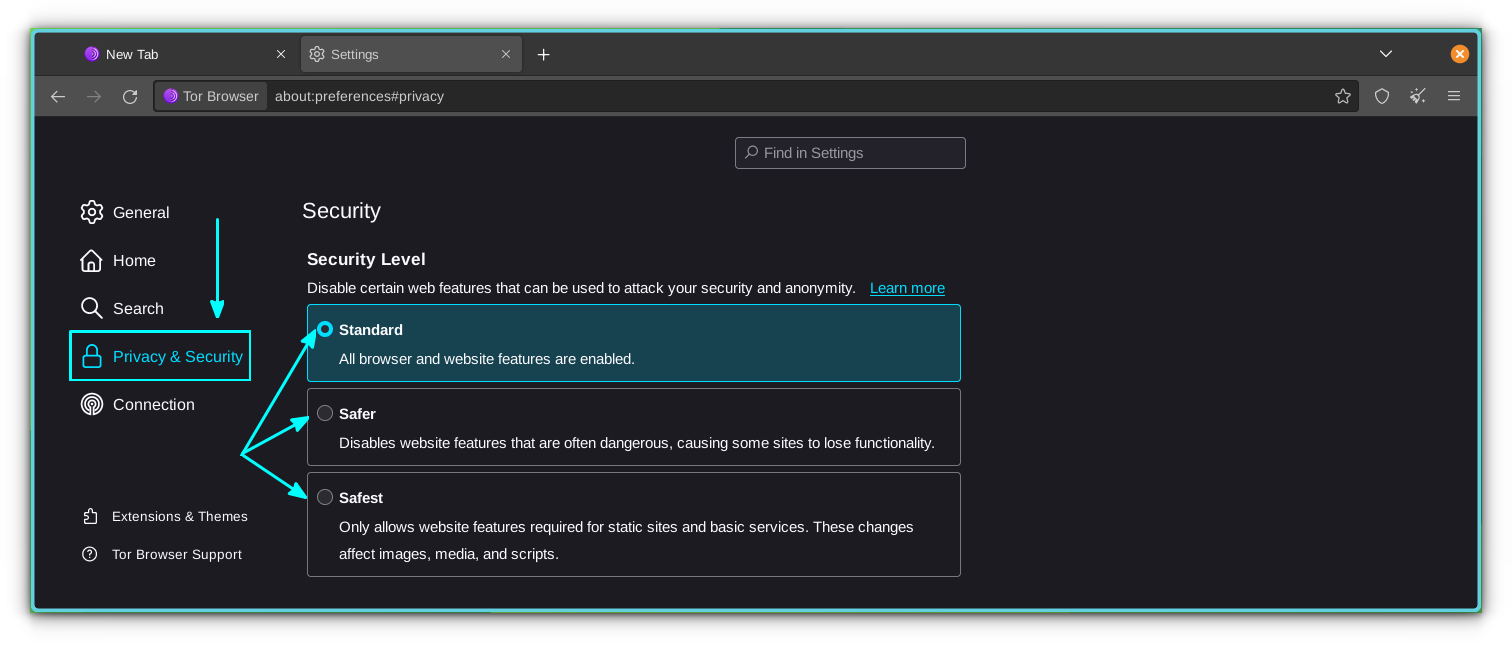
By default, Tor Browser chooses the standard security level. However, you can select ‘Safer’ and ‘Safest’ levels. You can learn more about the levels here.
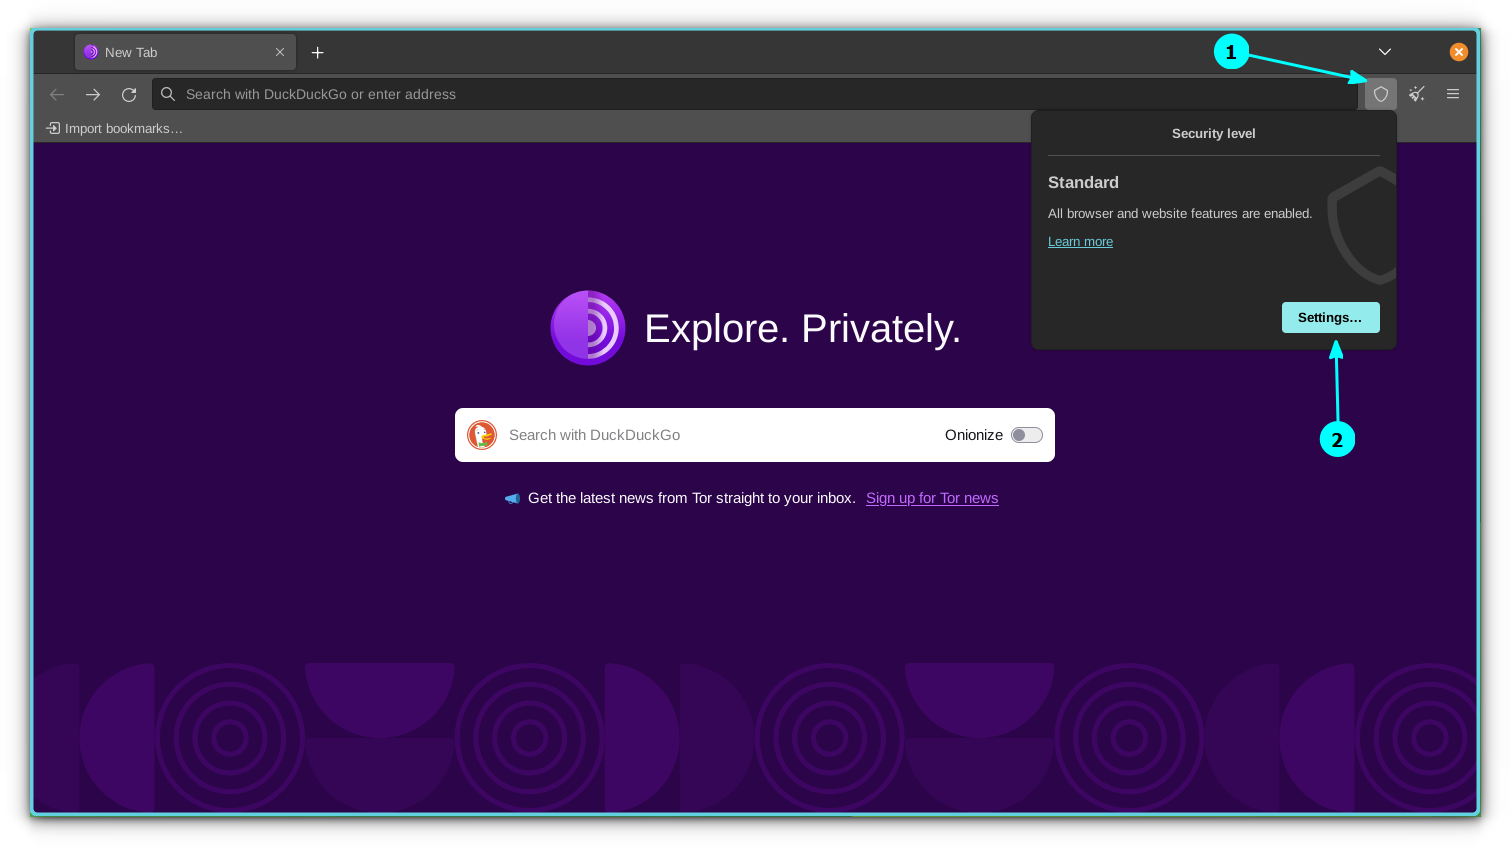
To access security settings, click on the Shield icon next to the Tor Browser URL bar. To view and adjust security settings, click the Settings button in the shield menu.
4. Change a few browsing habits
Try to use search engines that do not track you. Tor even sets DuckDuckGo as the default search engine. Also avoid installing browser extensions as they may track you.
5. Stay away from illegal sites
As Tor is a hidden network, so you may come across a few sites that are illegal or promote shady/illegal activities. Try to stay away from these kinds of websites.
6. Understand Tor Circuits
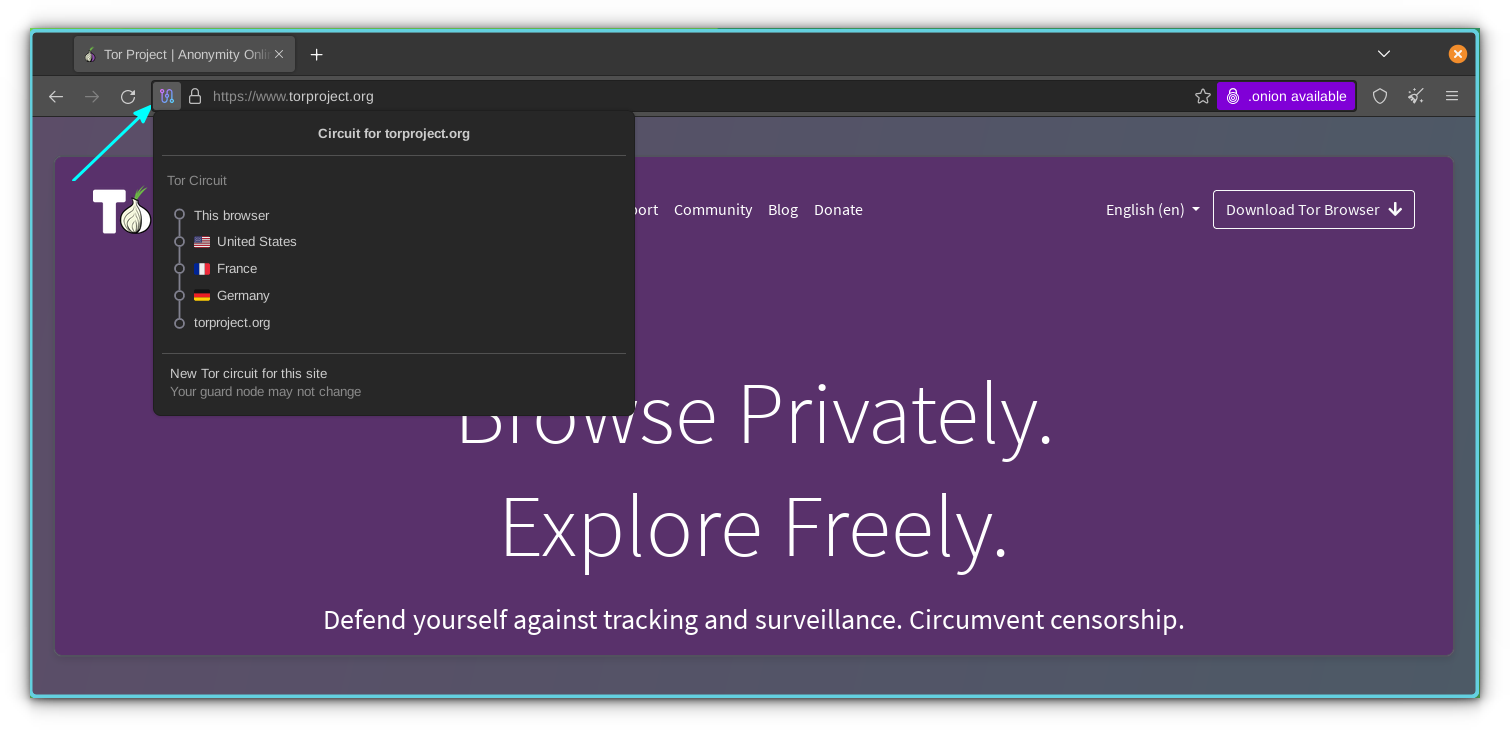
Unlike a traditional VPN, Tor doesn’t just relay your connection through a single location. Instead, your data is relayed and transferred through a number of locations. This is called a Tor Circuit. You can view your current circuit by pressing the lock icon on the left of your address bar.
7. Use Onion services
Instead of using normal websites, you can use Onion services, which are part of the Tor network. Some websites are available in this form. They use a .onion address. A few of them are:
- The New York Times
- DuckDuckGo
- ProtonMail
I must emphasize: Beware of the shady and illegal ones, most of them are available only as a .onion service.
You can read more much Tor browsing tips in a blog post by Whonix.
Do you like using Tor?
I hope this article helps you in installing the Tor browser on Ubuntu and other Linux distributions and thus enabling you to protect your privacy.
Speaking of privacy, VPNs are another popular tool for protecting privacy. Switzerland-based privacy company ProtonMail provides an excellent secure and private VPN service, ProtonVPN (affiliate link). If you are not choosing Tor Browser, you can use these solutions paired with other browsers.
What other privacy-related tools do you use?

