

Remmina is an open-source desktop client written in GTK that lets you connect to remote computers.
It is a simpler alternative to tools like AnyDesk and TeamViewer. You can connect through various protocols like RDP, VNC, SSH, X2GO, HTTP(S), and more. The feature-set can be extended with the help of available plugins if you need.
Note that Remmina is only available for Linux users. So, if you have a Linux machine and want to connect to any other remote system, Remmina is perfect.
I should also mention that it is one of the best remote desktop tools for Linux.
 Ankush Das
Now that you know about Remmina as a capable remote desktop tool. How do you use it?
Let me tell you more about it:
Get Started by Installing Remmina on Ubuntu
Remmina comes pre-installed in many Linux distributions, including the latest releases of Ubuntu and Fedora.
In either case, you can find it available in the official repositories for most Linux distributions.
If you want to install the latest version, I recommend installing the Flatpak or the Snap package.
For this article, I installed the Snap package from the Ubuntu's Software Center. You can choose to get the Flatpak package from Flathub as well.
Using Remmina to Connect to a Linux Remote Machine (Ubuntu)
To test this use-case, I tried connecting to my Linux laptop from my Linux desktop computer.
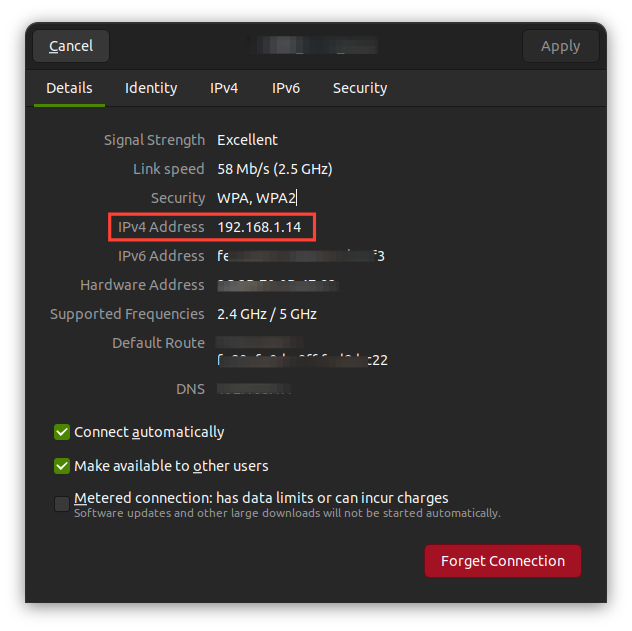
Before connecting, you need to know the IP address of the remote system. In my case, I went to system settings and utilized the graphical user interface Wi-Fi→ Connection settings (gear icon next to the network connected) to check the IP address.
You can also use the terminal and type in the following to get the IP address:
ip a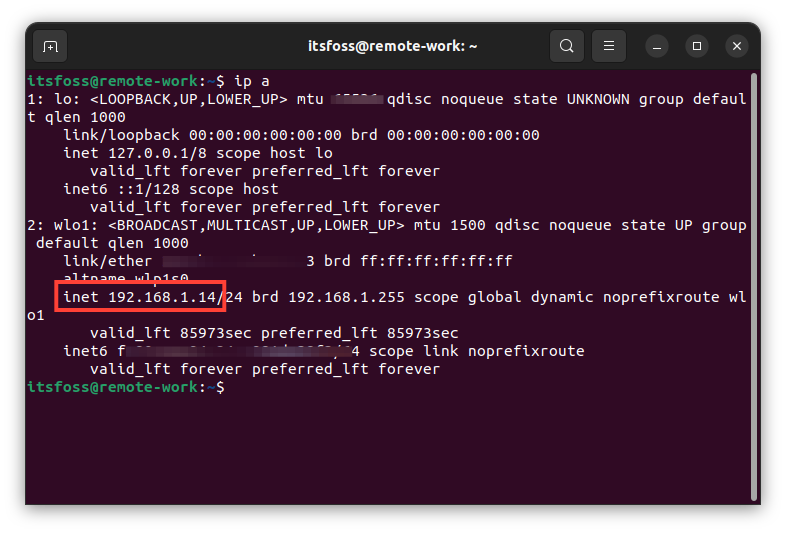
You might have more things listed here, but the IP address right to "inet" under an Ethernet connection (you can spot that by the text field link/ether) is what we need.
In my case, the IP address is 192.168.1.14
Next, you need two more things before you can connect to the remote machine:
- Enable remote desktop in the remote system you wish to connect.
- The username and the password for remote connection.
Enable remote connection on the remote system
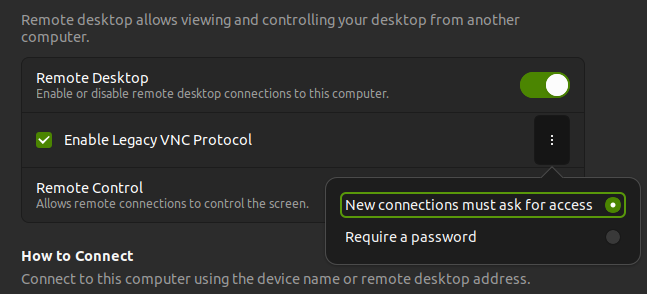
To get that, navigate through Settings → Sharing → Remote Desktop.
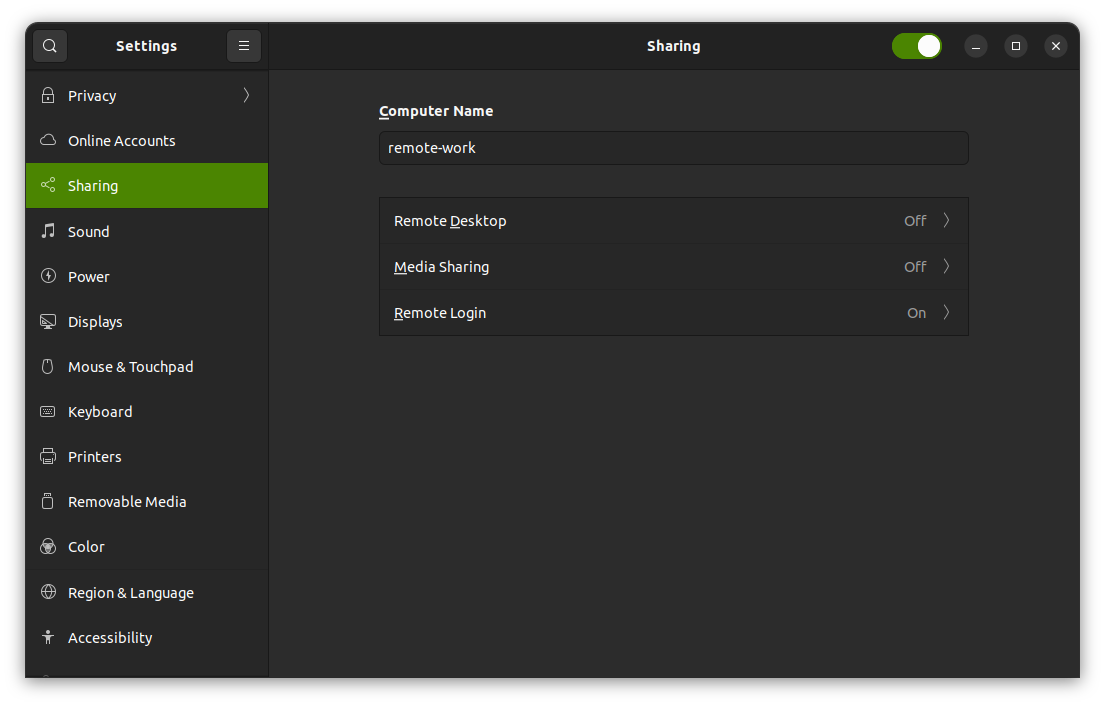
Here, you need to toggle (enable) Remote Desktop, check "Enable Legacy VNC Protocol", and then Remote Control as shown in the screenshot below.
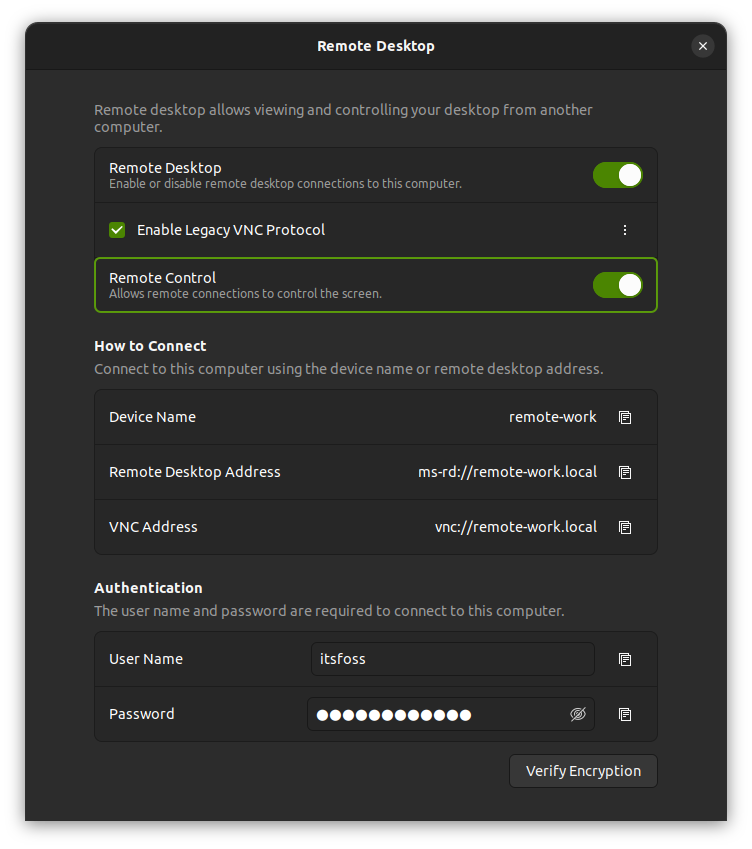
We utilize the Virtual Network Computing (VNC) protocol to connect, which is the preferred way to connect to Linux computers for most.
As you can notice, you can find the username and the password under the "Authentication" section in the image above.
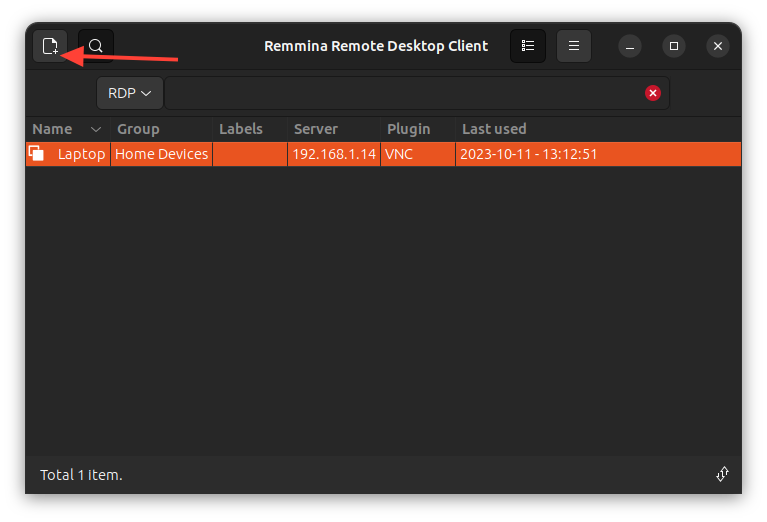
Once you have the IP, authentication details, and enabled remote sharing, you just need to add a new connection profile and fill up the details.
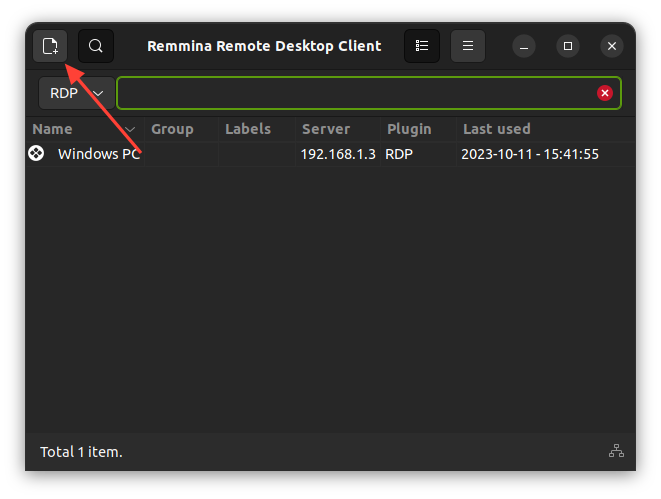
Here's how that looks like:
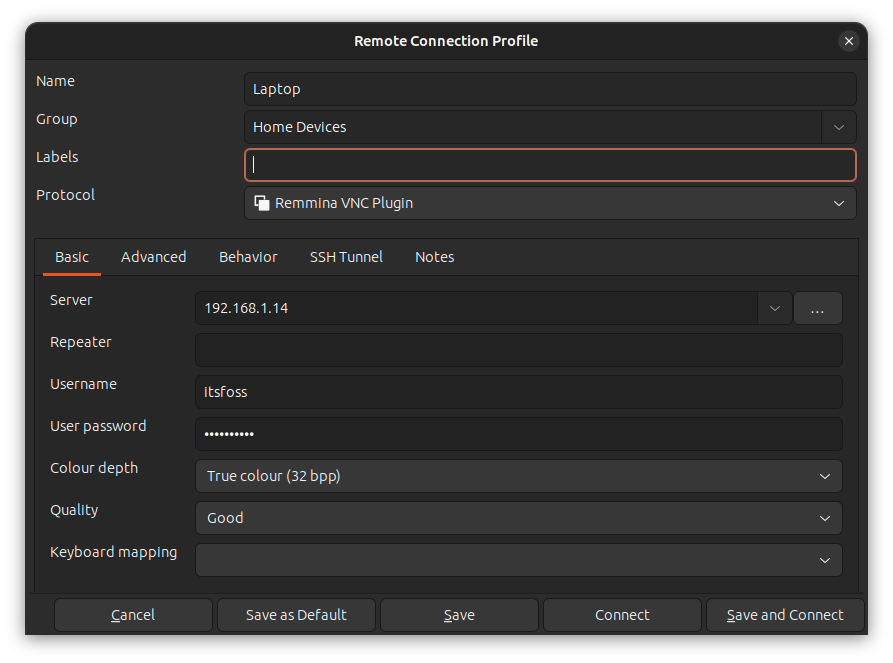
You can give it any name, and create a Group (if you need). For instance, I can have a group of home devices from a workplace, and keep it organized separately to identify remote computers easily.
For the protocol, use "Remmina VNC Plugin".
The rest of the settings remain default, and ensure that the Quality is set to good. So, you can have a good user experience without requiring a superfast internet connection.
However, you can choose to change it if you think you have poor network connectivity.
Once you are done with setting the options, hit "Save and Connect".
Of course, if you want to connect to a machine once from a guest computer, and do not want to save the details, you can avoid saving and hit "Connect".
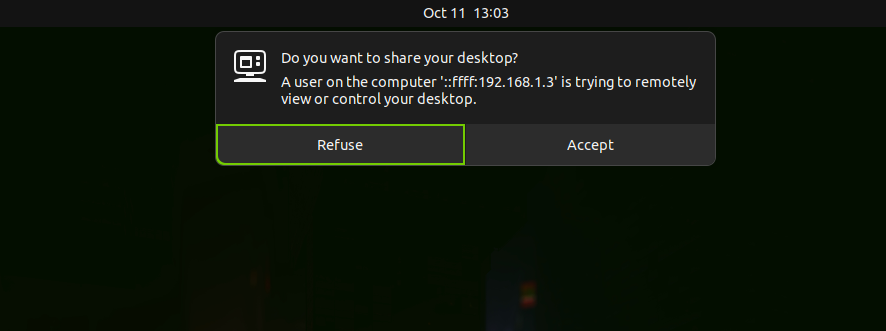
You might be prompted for the connection for the first time. If you do not want this, you can change the authentication technique to "Require a password" in the remote desktop settings:
And, voilà! You are now connected to the remote system.
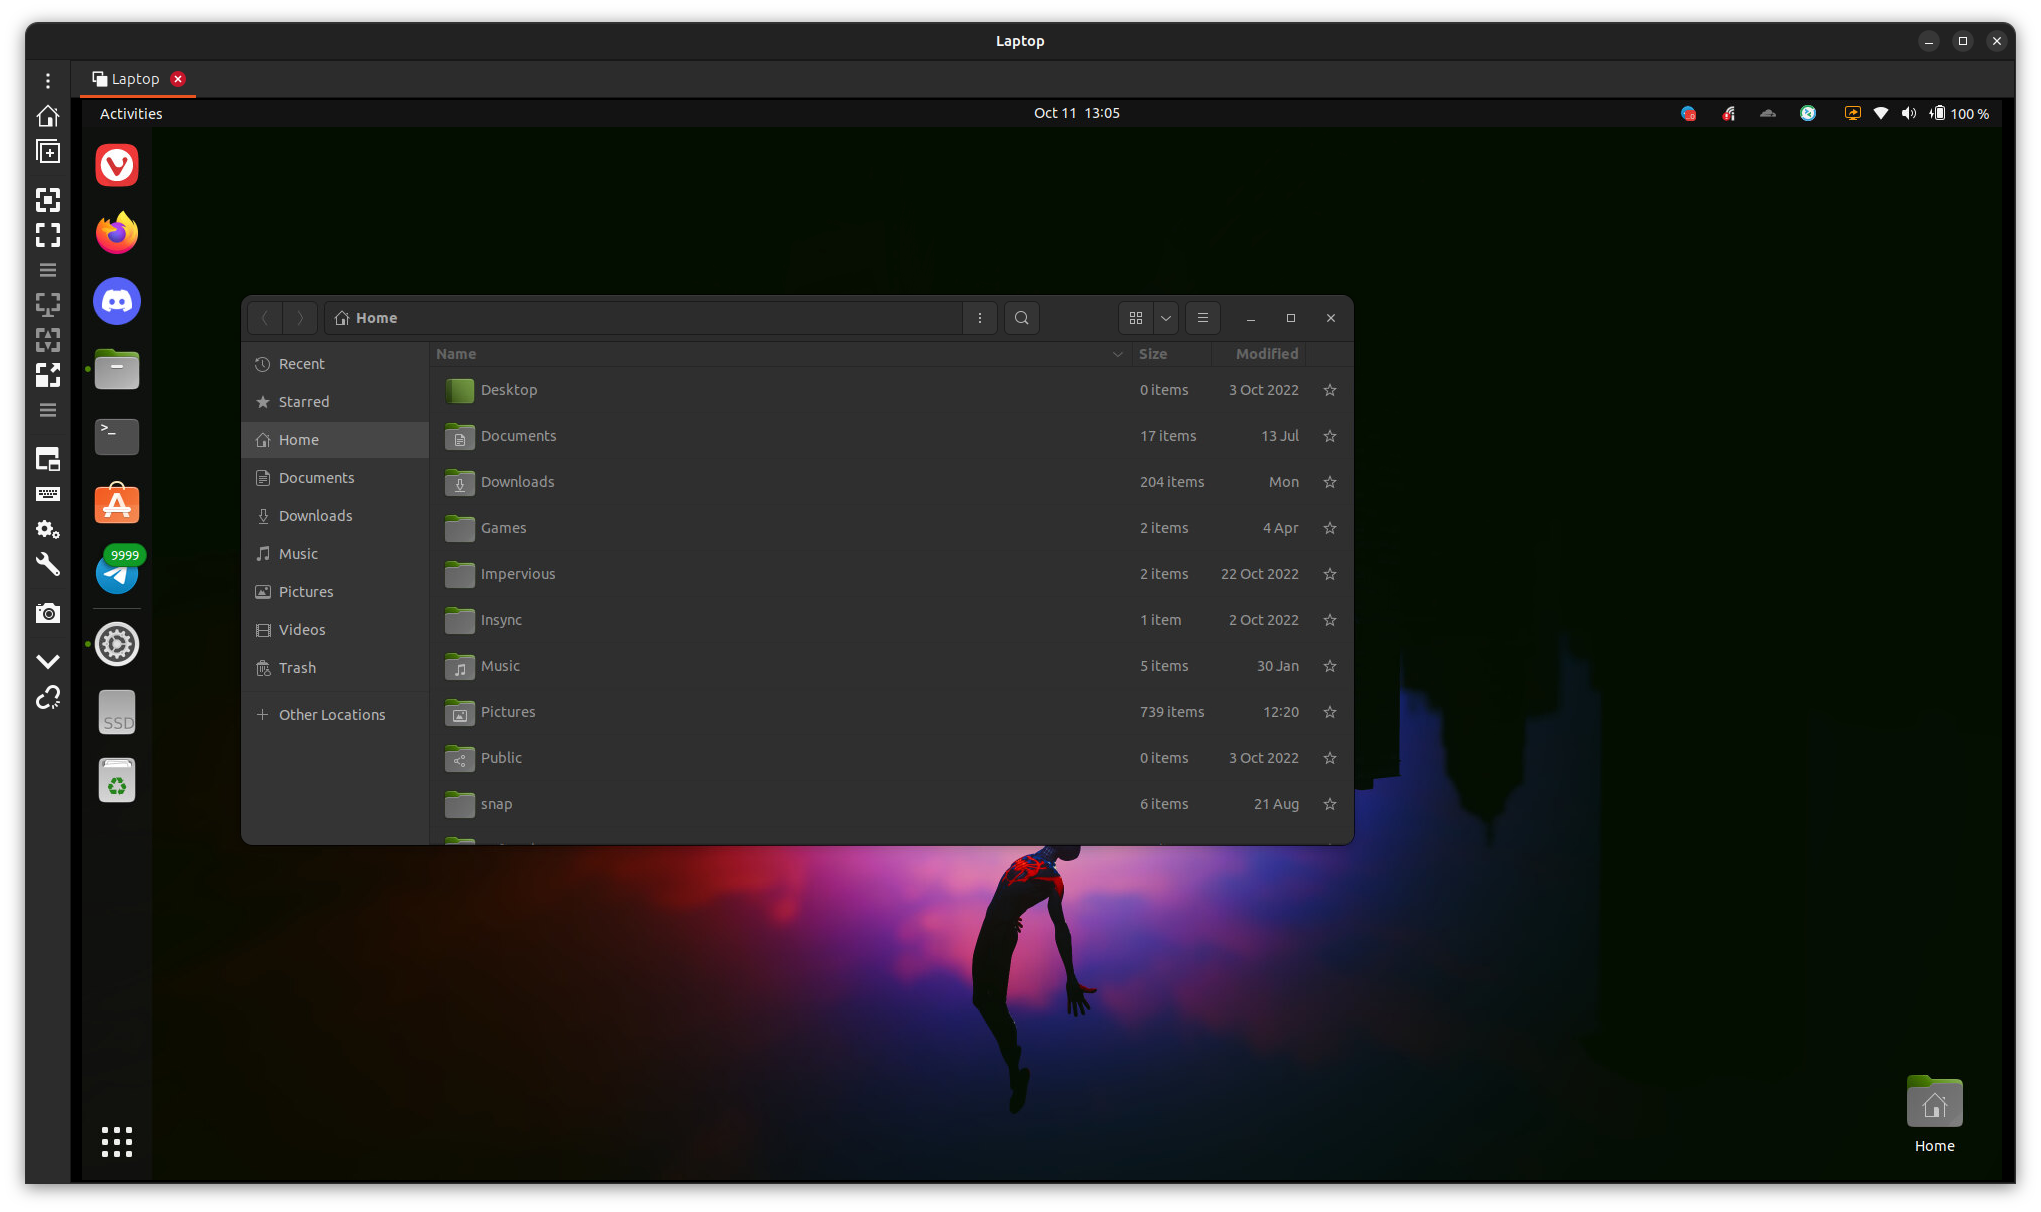
While you are connected to the remote machine, you can take a screenshot, scale the window size, duplicate the connection, and do several more useful things from the left sidebar.
Now, let us move on to a Windows system.
Using Remmina to Connect to a Windows Remote System
Just like a Linux (Ubuntu in our example) system, you have to enable remote desktop sharing before trying to connect to a Windows computer.
So, if you have Windows 10/11 Home edition, you cannot enable Remote Desktop unless you upgrade it to the professional edition.
Considering you have a license to Windows pro edition on your remote system.
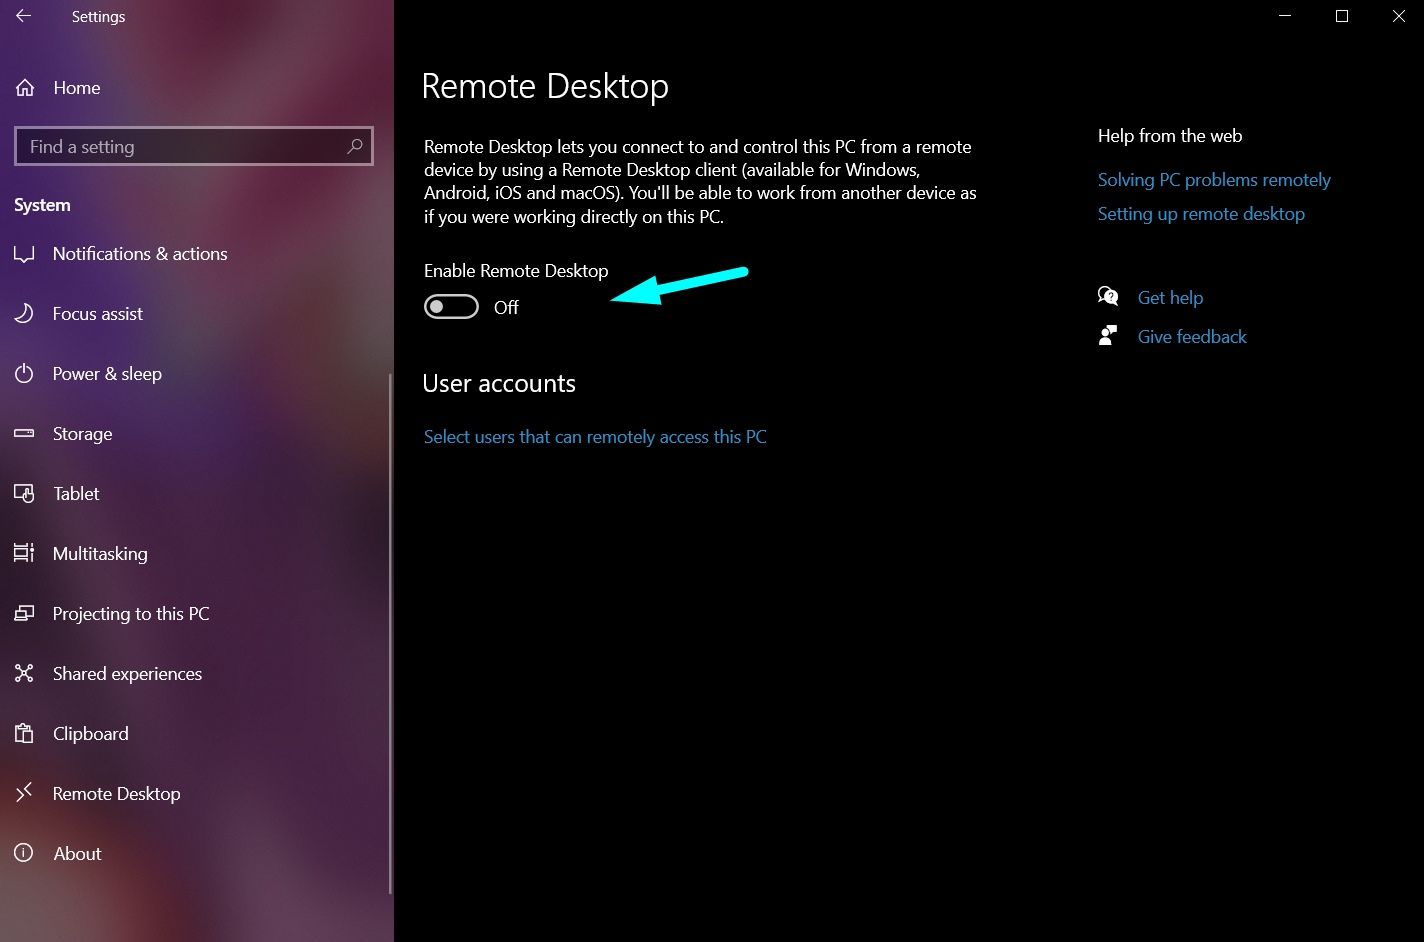
Here's how to enable Remote Desktop sharing:
- Head to Settings → System → Remote Desktop. Now, enable the option as shown below:
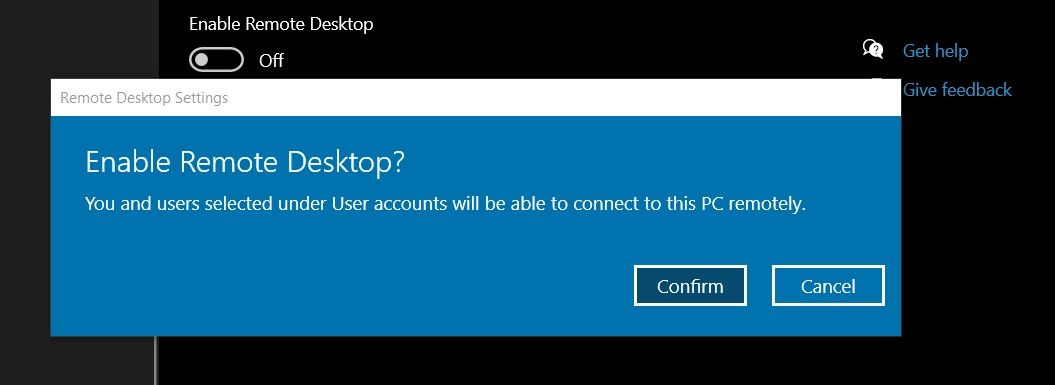
You will get a prompt to confirm the action. Proceed with it.
- Next, we need information to connect to this Windows device. For that, you need to your network settings, and hit "Properties" to get network information (IP address).
In this case, we have a wired connection.
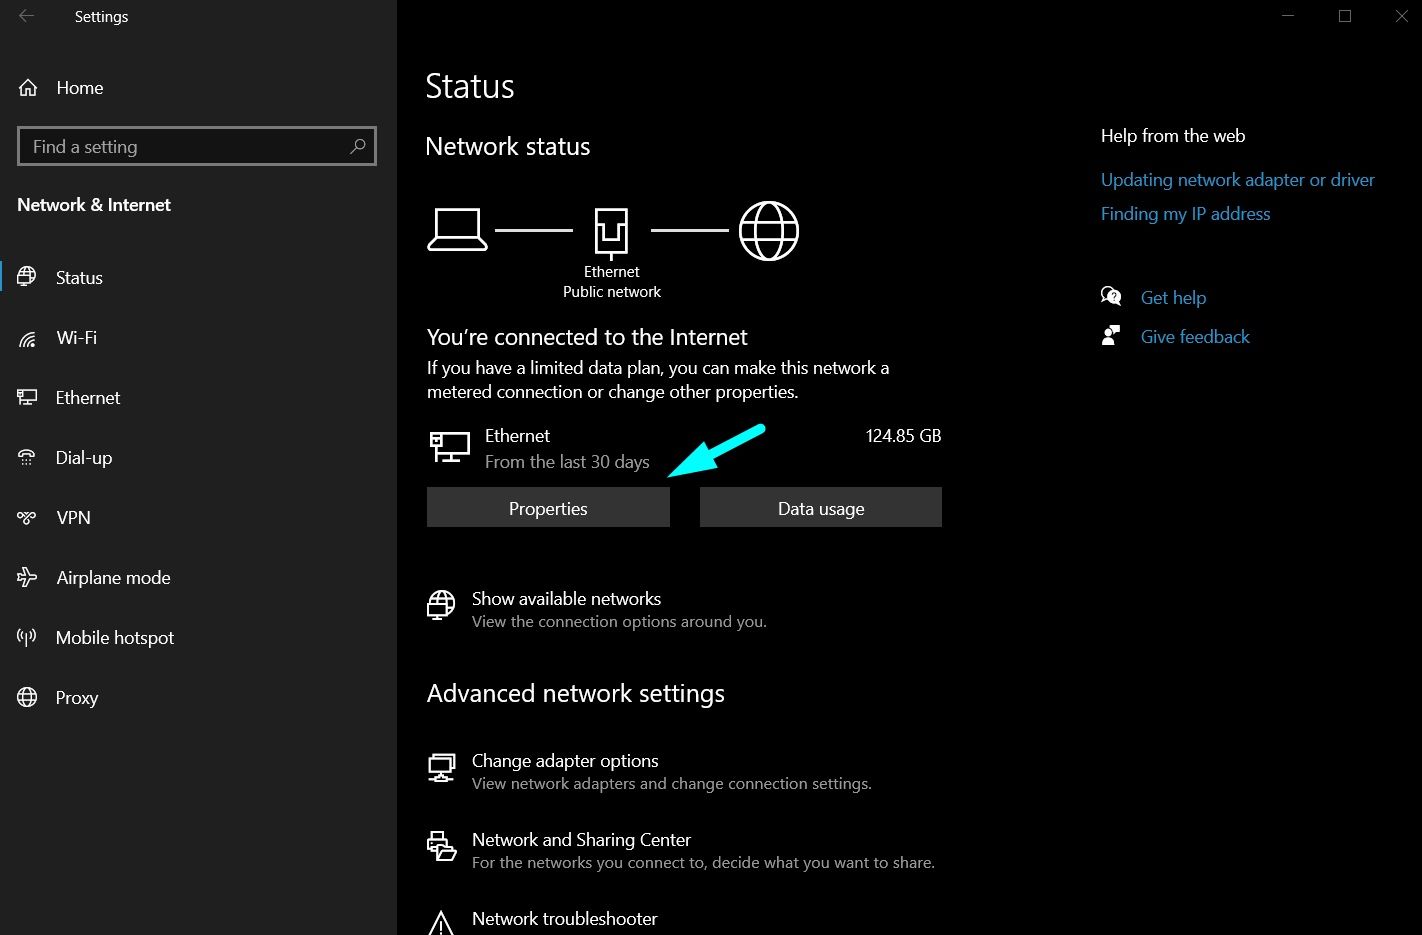
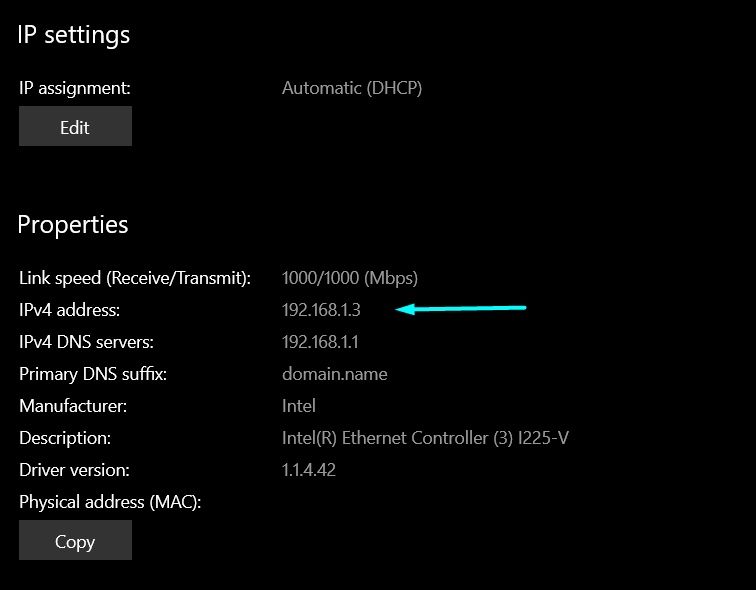
On the next screen, you will have the IP address of your system as shown below:
In case you have a wireless connection, you will have to navigate to "Change adapter options" in the network status screen and then right-click on the Wi-Fi adapter connected to your computer.
Now, check the status of the Wi-Fi network and click on "Details" to get the IP address, as shown in the screenshots below:
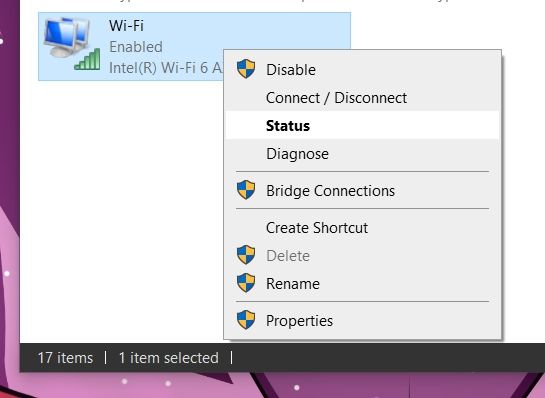
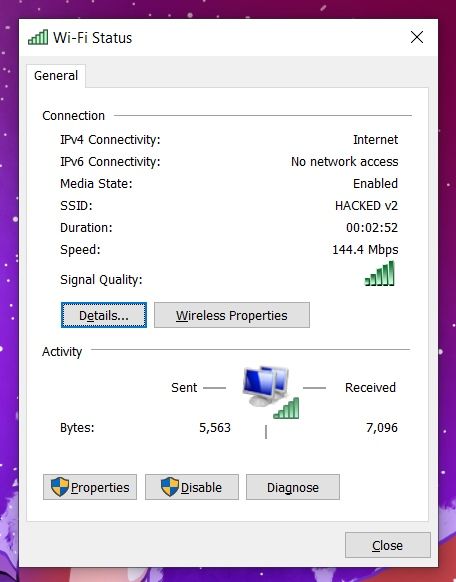
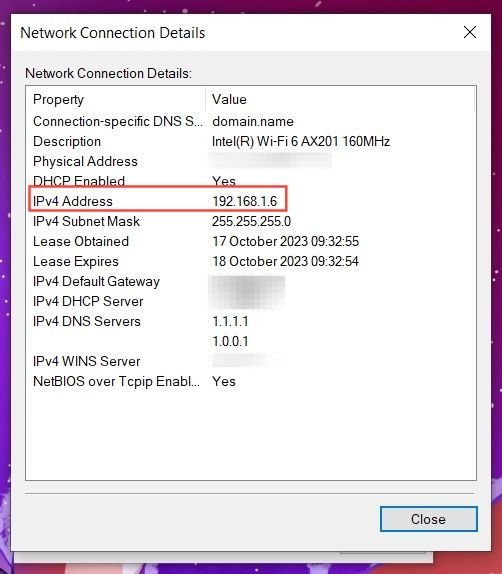
Checking Wi-Fi network details on Windows
For the tutorial, I used the wired connection. So, the IP address for me remains:
192.168.1.3
I created a new remote connection profile with the above IP address and its protocol as RDP (Remote Desktop Protocol).
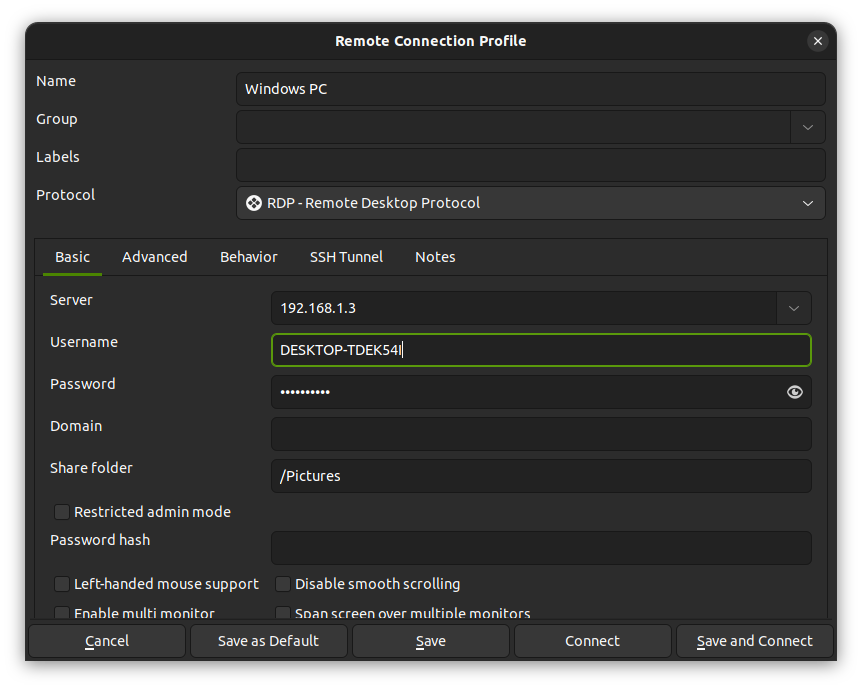
The username and password are the same as your Windows computer credentials.
For me, it was my Microsoft account credentials linked to my Windows system. If you do not have a Microsoft account linked, it will be your local username and password.
Of course, you can choose to add a new user just for remote desktop if you like.
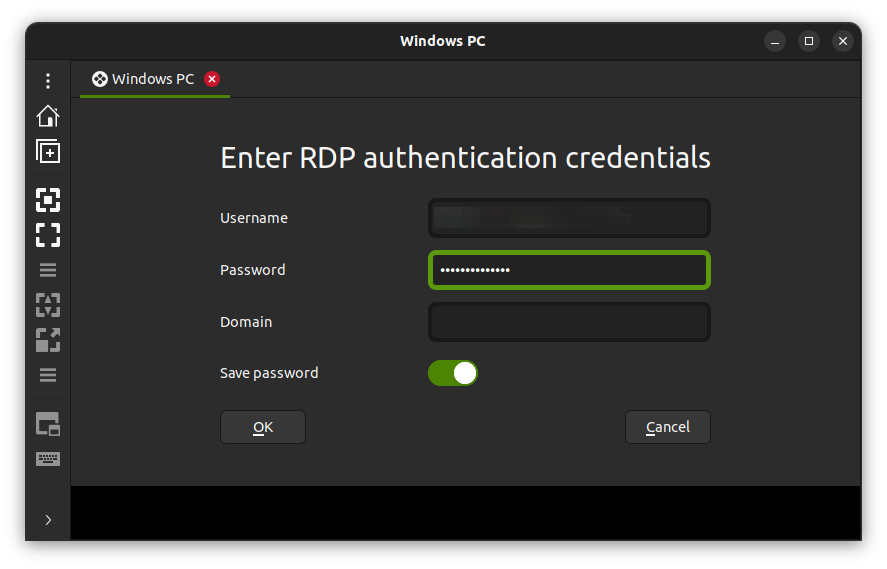
Considering I accidentally entered the local credentials instead of my microsoft@outlook.com details, it prompted me again for authentication.
Once you are done authenticating, you will get another prompt asking you to verify the certificate where your desktop name will also show up as follows:
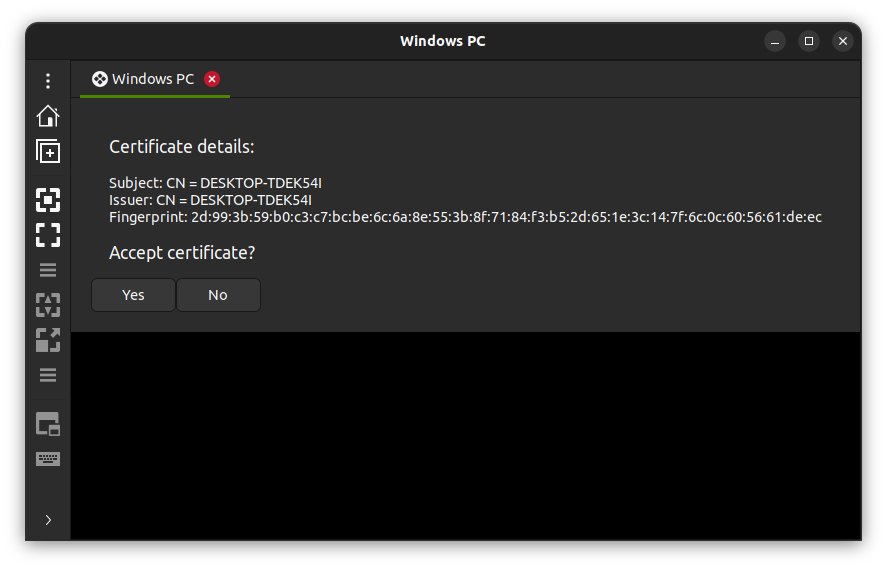
Accept the certificate. If you are incredibly cautious about the connection, you can pick to view the installed certificates on your system and verify by following Microsoft's documentation.

And, that is it! You are connected to the Windows remote machine.
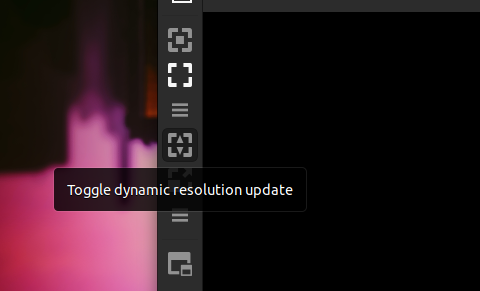
One important bit here: you should enable the dynamic resolution update from the sidebar to make the resolution adapt to your screen size.
For the tutorial, I have tested a Linux remote machine and a Windows system, which are the two most popular use-cases.
You need a static IP and IP forwarding to test the SSH connection protocol.
For the rest of the options in the sidebar, you get re-sizing the window, taking a screenshot of the remote machine, duplicating a connection, tweaking the connection quality for slow/fast performance, and more.
Wrapping Up
Remmina works well for simple remote desktop connection, with advanced abilities for users who require it.
You can customize your remote connection with advanced options and SSH connection. However, if you do not know what you are doing, you probably do not need those options.
How else do you use the Remmina app for remote connections? Let me know in the comments below.
If this helped you, consider supporting It's FOSS
It's FOSS has been helping people use Linux for the past 14 years. Help us stay independent from big tech. Become a Plus member, enjoy ad-free reading and get 5 eBooks.
