

By default, Ubuntu disables the root account. You must use the sudo command for any tasks requiring root privileges.
This is for your own security, of course. Using the system as root all the time is like running around with a sword in your hand. It increases the chances of messing up things.
Logging in as root is still common in the servers. On the desktop side, it's quite rare to log in as root. Even Kali Linux has changed it.
And yet, a few desktop users want to log in as root. This is not something advisable but surely doable.
in this guide, I will show you how to log in as a root in your GNOME desktop using Ubuntu.
How to login as a root in the GNOME desktop
Step 1: Enable root account
You want to log in as root. But the root account is disabled by default. The first step is to enable it.
Change the root account password that will eventually enable the root account for you:
sudo passwd root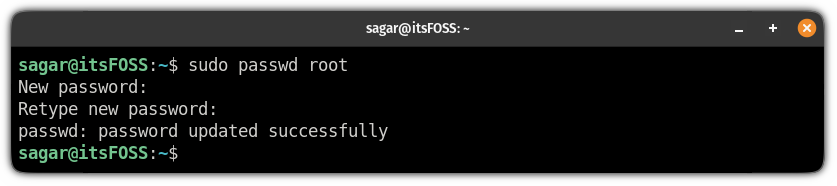
It goes without saying that you should not forget the root password.
Step 2: Change GDM configuration
Ubuntu uses GNOME by default and GNOME uses the GDM display manager.
To allow log in as root into GNOME, you need to make some changes in the GDM configuration file located at /etc/gdm3/custom.conf.
Make a backup of the config file:
cp /etc/gdm3/custom.conf /etc/gdm3/custom.conf~
In the worst case, if you somehow mess things up, the back up file can be used to replace the existing one from the TTY.
Now, open the GDM file with the following command:
sudo nano /etc/gdm3/custom.conf
And add the following line to allow the root login:
AllowRoot=true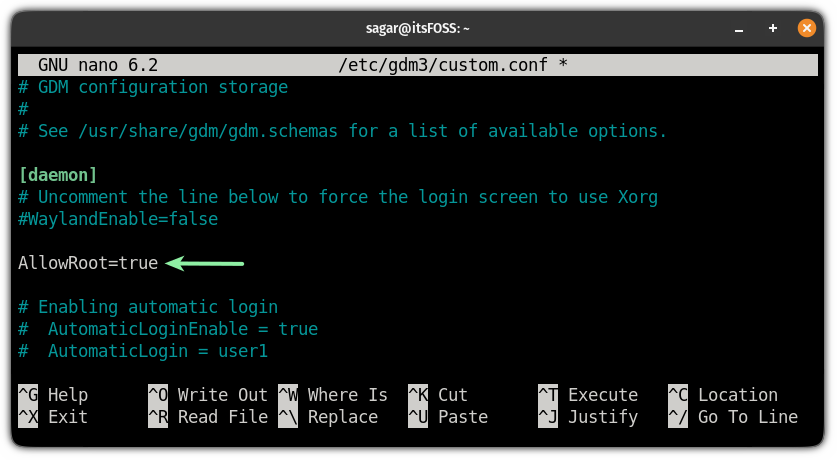
Press Ctrl+X to exit Nano while saving it.
Step 3: Configure PAM authentication
Now, you will have to configure the PAM authentication daemon file, which can be opened by the following command:
sudo nano /etc/pam.d/gdm-passwordIn this file, you will have to comment out the following line with the # symbol that denies the root access in GUI:
auth required pam_succeed_if.so user != root quiet_success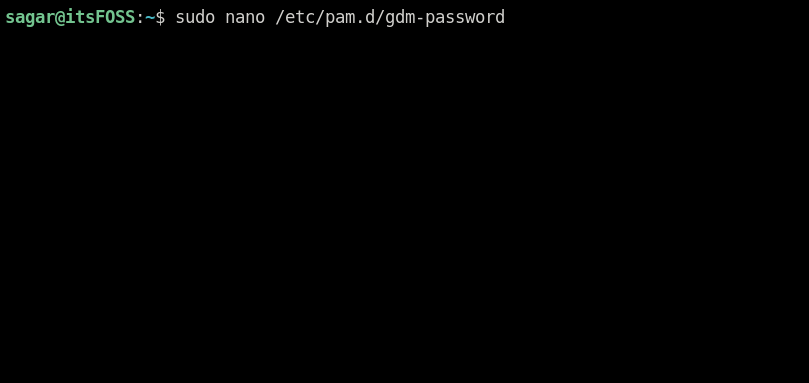
Save changes and exit from the nano text editor.
Step 4: Log in as root
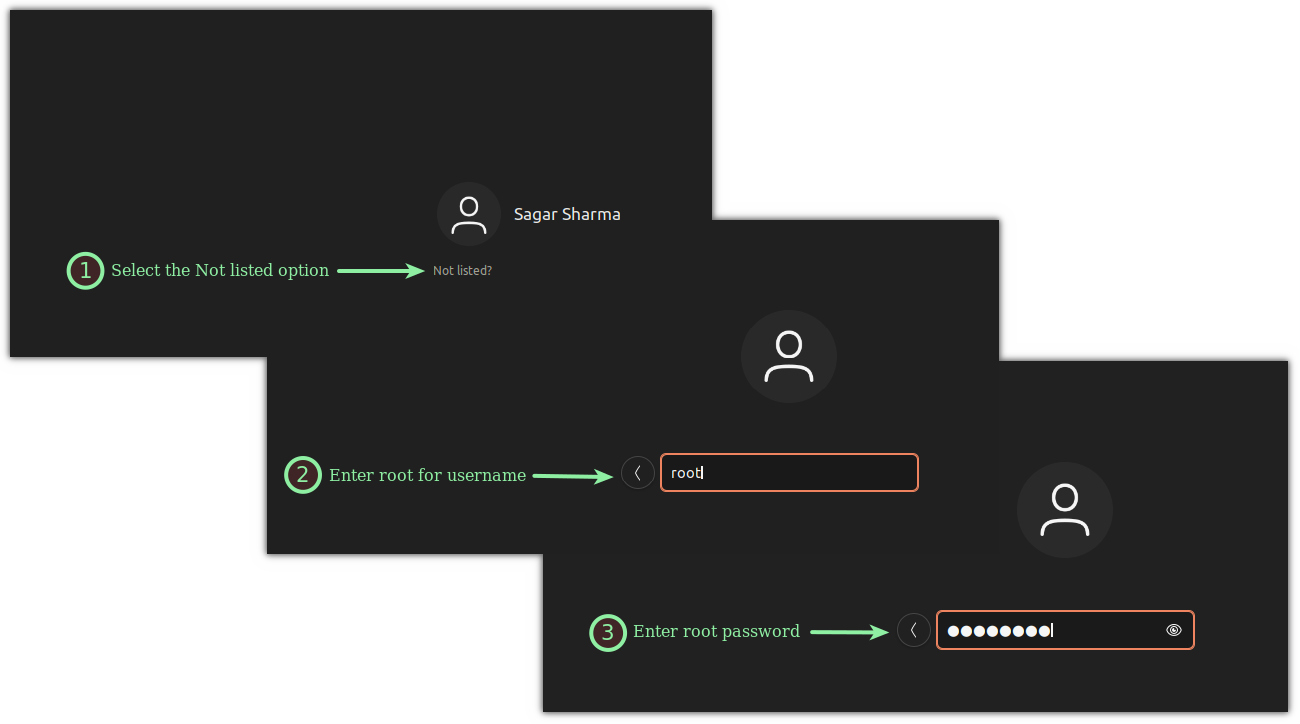
Now, reboot your system:
rebootAt the login screen, select the Not listed option, enter root in username and enter the password that you configured at the beginning of this guide:
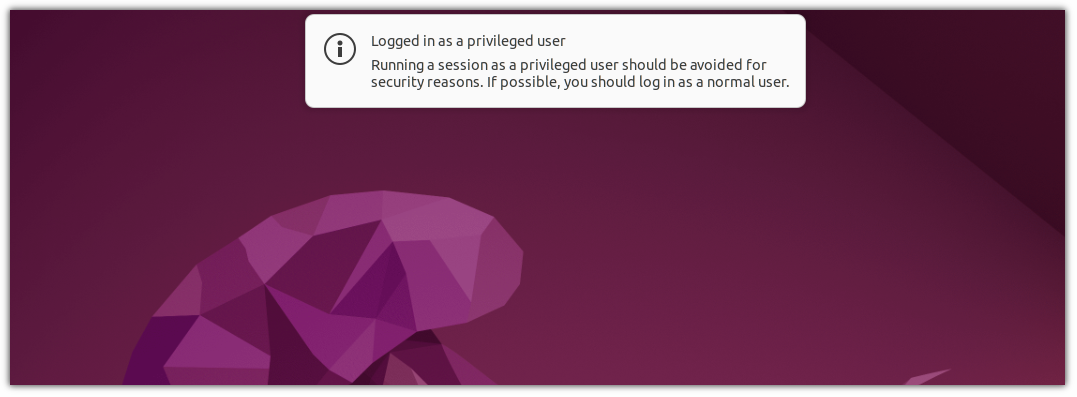
Once you log in, it will notify you by saying, "logged in as a privileged user":
That's it! Now, you are running your Ubuntu system as a root.
Things you should know when running the system as a root user
There is a reason why Ubuntu disables a root account by default. Want to know why? Here you have it:
 Abhishek Prakash
And again, it is not advisable to log in a s root in your desktop Linux system. Please follow the norms and stay away from such (mis) adventures.
If this helped you, consider supporting It's FOSS
It's FOSS has been helping people use Linux for the past 14 years. Help us stay independent from big tech. Become a Plus member, enjoy ad-free reading and get 5 eBooks.

