Dual booting Linux and Windows is pretty common. You have Linux and Windows in the same system and you can choose which one to use at the boot time.
Did you know that you have more than two operating systems in your computer? It’s called multi-booting. In this article, I’m going to show how to triple boot Windows with two Linux distributions.
Just to be clear,when you dual boot you get two operating systems when you start the computer. In the same way, you’ll get three operating systems when you’re trying to triple boot.
For this tutorial, I assume that you have already installed Windows while ensuring enough disk space for two more operating systems It’s safe to have 25 GB of storage free for each Linux distribution.
Here, we triple boot Windows with Lubuntu and Debian in this example but you could use the same procedure to install any two Linux distributions. We are using Debian as installer is somewhat different from many other distros.
Note: This tutorial is created on a system with BIOS settings. If you have UEFI system, you should have one ESP partition for the UEFI boot. The steps would remain the same apart from that as most modern Linux distributions can recognize ESP partition at install time. This guide also assumes that you are a tad bit familiar with dual booting.
First, Dual boot Windows and Lubuntu
First, save your important files. In case you commit any mistake you will not lose your important data. You can save data in usb drive, external hard-drive or traditionally in DVD.
Step 1: Boot in to live USB
Create a bootable USB drive of Lubuntu. You can try using Etcher or Ventoy or your favorite live USB creator.
Now plug it in your machine. In case you are using a bootable USB please make sure you set your BIOS setting for booting from USB.
You can do this in two ways.
- Set “Boot device” to USB. To do so, you first need to connect USB, restart machine, and open BIOS.
- Other way is, connect USB restart the machine and press key (mostly F12 or DEL or F10) for choosing bootable device for current session. It won’t change the setting but selected boot device for this time. You can refer to your motherboard’s manual or the system’s manual to know more about it.
If you’ve completed above steps correctly and machine detects your bootable device, it will show you a screen like this:
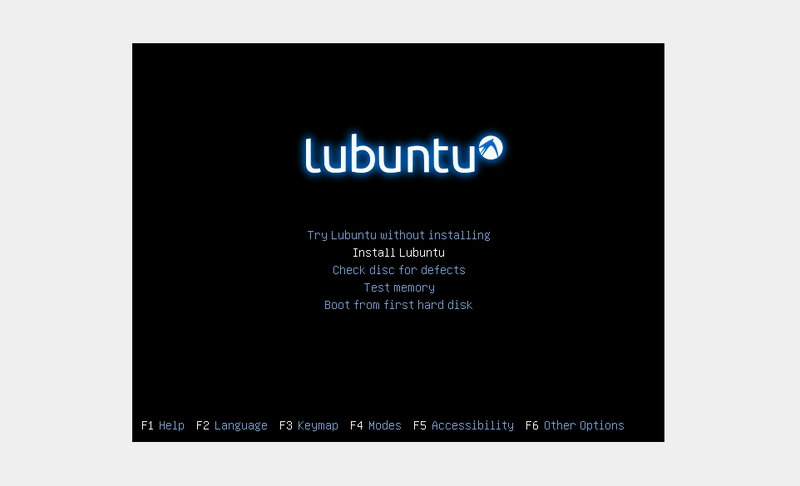
Here, you need to select “Install Lubuntu”.
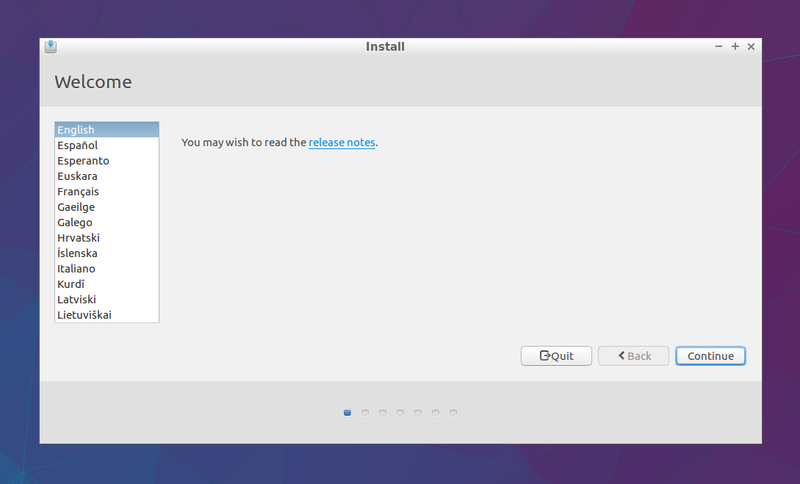
Then after booting, you will be greeted with welcome screen and the installation of Lubuntu starts.
Click “Continue” to proceed installing.
Step 2: Configure install options
Next step is choosing what to install additionally in your new OS. If you have good internet connection, you can select the option “Download updates while installing Lubuntu”.
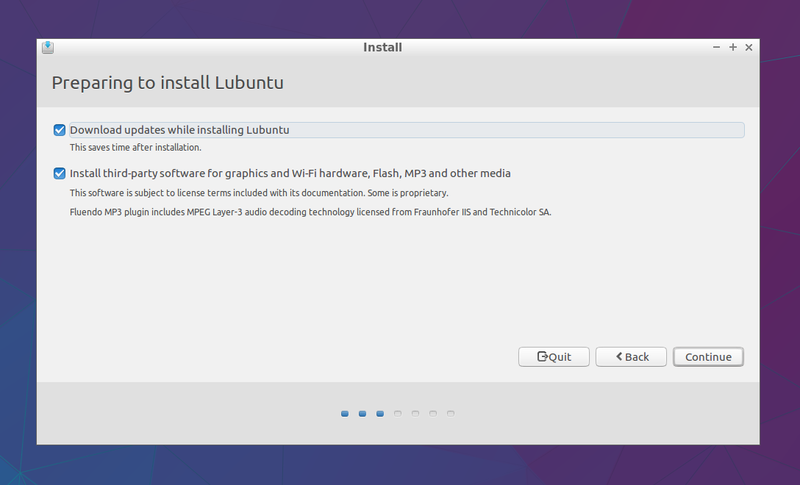
I recommend you to select option for installing third party software, so that after installation you will have all your drivers and media codec installed.
In next screen, you will see options for partitioning, select option “something else”, so that you could manually partition HDD.
Step 3: Partitioning HDD
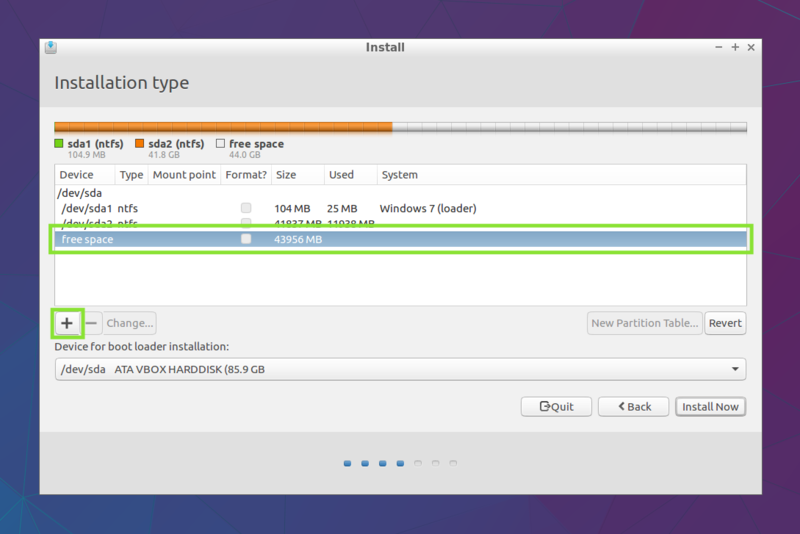
You will see something like the screenshot above. We can see two (you could have more) partitions with type NTFS, they are used by Windows. Make sure you don’t do anything with it.
Down that we can see free partition with around 43 GB (43K MB = 43 GB). We will use some part of this free space to install Lubuntu.
Select free space and click on “+” button.
After clicking on ‘+’ button you will see dialog box showing you options for partitioning that space.
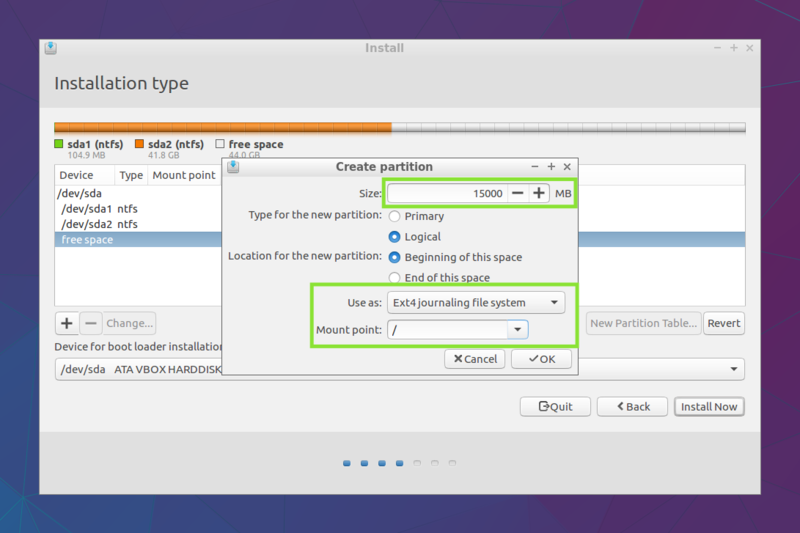
In this dialog box you’ll see options like size, use as, mount point.
In brief “Size” is box where you can enter size of new partition in MB, so for example if you want 1 GB you have to enter 10,000 there.
In “use as” column you have to choose what the name suggests. You set your drive as Ext4, Ext3, SWAP, EFI (In case of UEFI). But if you don’t know all these, and just want to create partition for your root directory select “Ext4 Journaling file system”, indicating we are creating “Ext4” partition.
Next option to choose is “Mount point ”. This is the location where we want to mount this drive. Here we are only creating root (/) partition, and not creating separate partition for “/home”.
If you want to create separate partition for home, you can. You just have to give some space to new partition and mount it to “/home” in “Mount type”.
Keep in mind we have to install another OS, so make sure you keep fair amount of space for that another OS. Here you can see I am using out of nearly 40 GB we are using 15 GB for first Lubuntu.
After that, click “OK”.
After partitioning, click on “Install now button”.
You may be prompted for warning about not creating SWAP partition. You can create a swap file if you want as shown in the image below:
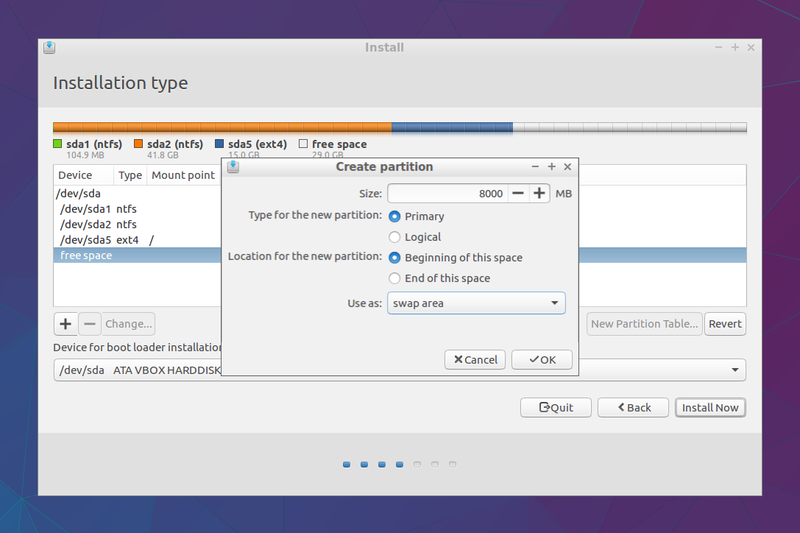
If you don’t want to create swap, you can Click “Continue” to proceed. You can always follow our guide to create swap file on Linux later.
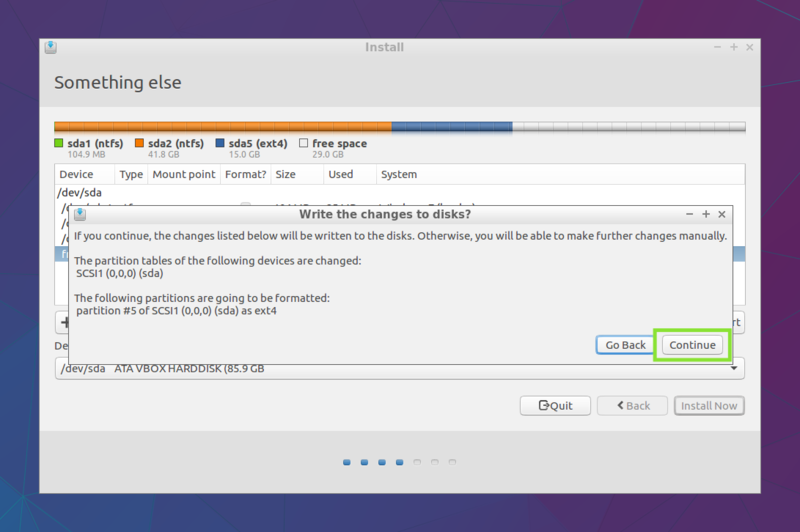
You will also see a prompt for, “Write changes to disk?”, click “Continue” to proceed.
In next step you have to select for the location and time, and then hit “Continue”.
After that you have to select “Keyboard layout”. Depending on what you prefer, select the keyboard layout and test it.
Step 4: Setting user details
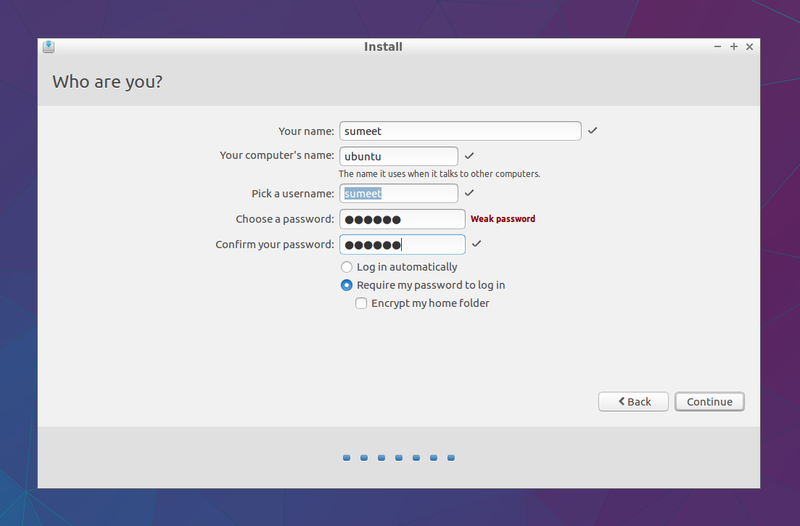
In next screen, you have to enter user details.
First enter name. It’s a name for your user account. Then enter computer’s name, this will be a name for the host machine. And, then the username. You can change this anytime after installation.
Everything else should be self-explanatory.
This is the basic settings you require continuing, hit “Continue”.
Now, your work is done, wait for some time, Lubuntu will now be installed.
After installation completes, you will get a dialog box with message “Installation complete”, click on “Restart”.

You’ve guessed it right, we’ve installed Lubuntu alongside Windows.
Now It’s time to install next Linux distribution (the third operating system).
Now, Triple boot Debian with Lubuntu and Windows
While this step should be essentially the same as installing Lubuntu. But, just because we’re installing Debian, you might want to follow the steps below to complete the triple boot setup of your machine.
Step 1: Boot in to live USB
You can create the bootable USB using any OS on your machine.
You’ll see screen like this:
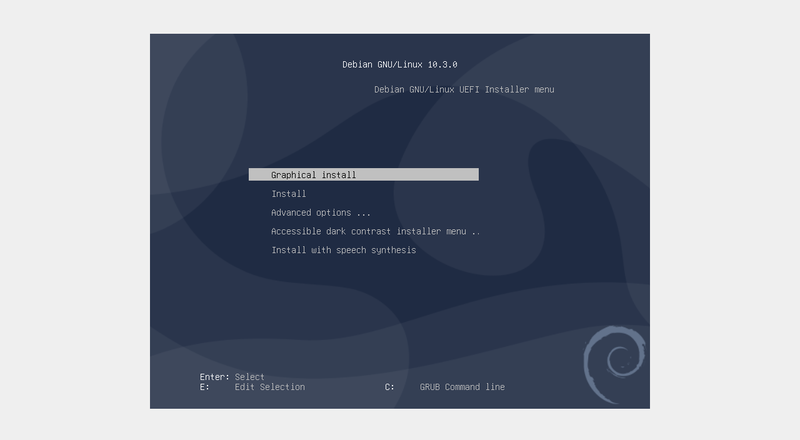
Now, you can select the “Graphical install” option to proceed.
After that you will have your Debian installer opened. Keep in mind that Debian’s installer is different from many other distros, so you have to be careful about what you do.
In case you’re not installing Debian, you should be good to go.
Step 2: Configure install options
In the next screen, you have to select “Language”, “Keyboard layout”, and Click “Continue”.
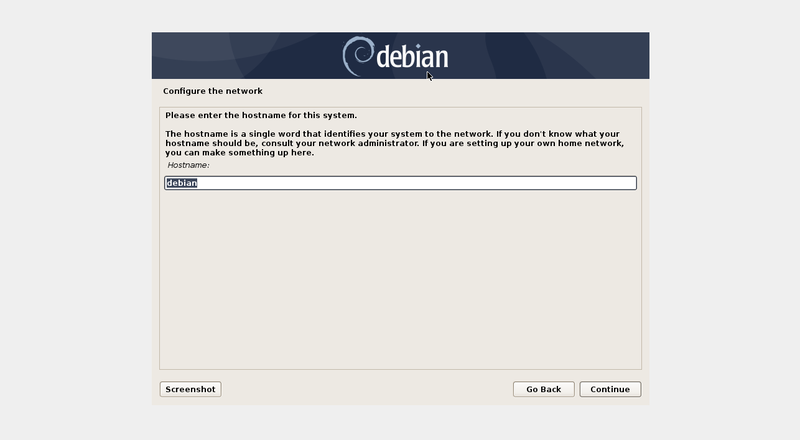
Step 3: Set host name
Host name is the name for your machine, it’s same as “Computer name” for Lubuntu.
After entering host name click “Continue”.
Step 4: Setup user details
Now you have to enter password for root account.
(This was not the case with Lubuntu. In Lubuntu you don’t have to set password for root user separately, but that does not mean there is no root user in Lubuntu.)

Next you have to enter name for new user. After that click “Continue”.
Then according to your Name username will automatically will be filled in. You can edit if you want.

Now set password for newly created user:

Step 4: Partitioning HDD
After previous step, you’ll see the screen:
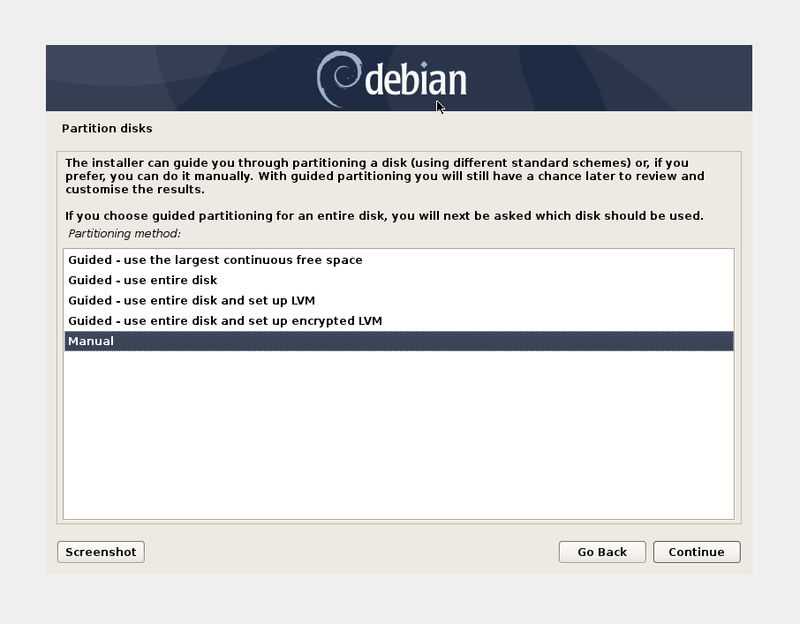
Here, we need to do manual partitioning. Click on “Manual” to proceed.
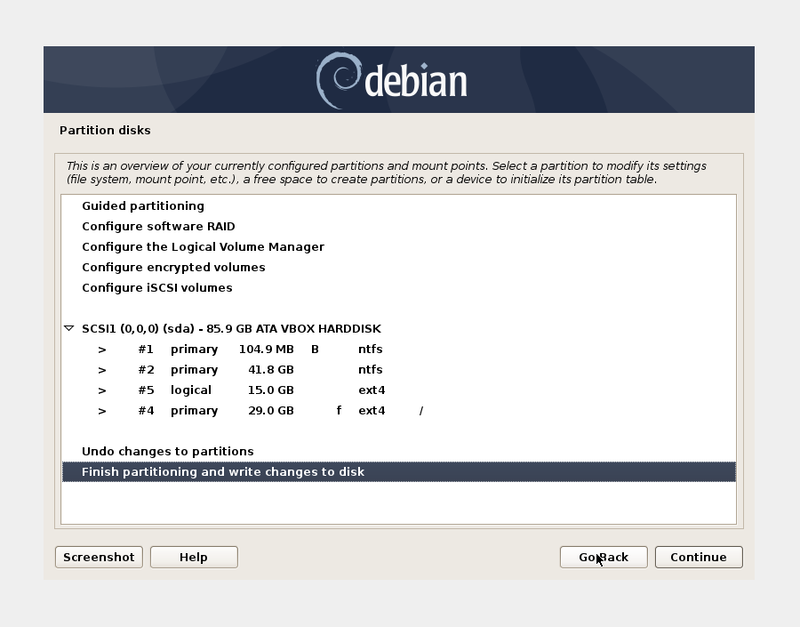
After you select “Manual”, you will find that you already have partitions for windows and Lubuntu.
In my case, my first two partition with “NTFS” file system are for Windows, third partition with “ext4” is for Lubuntu and have 29 GB free space.
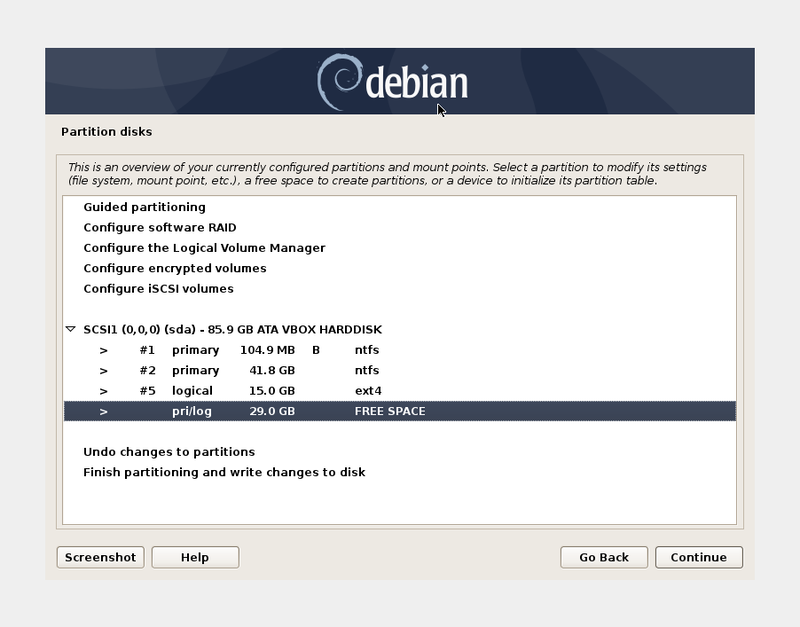
Double-click on that free space. Make sure you don’t do anything else to other partitions, they belong to Windows and Lubuntu.
Next, you should see something like this:

Double-click on “Create a new partition”.
Then you have to enter size for new partition. In that text box, already the largest size possible is filled in. You should keep that as it is because we want to give all the free space available to the Debian partition.
Next, you’ll be asked to select “primary” or “logical” partition, select primary and click “continue”.
Next you’ll see the options to configure newly created partition.
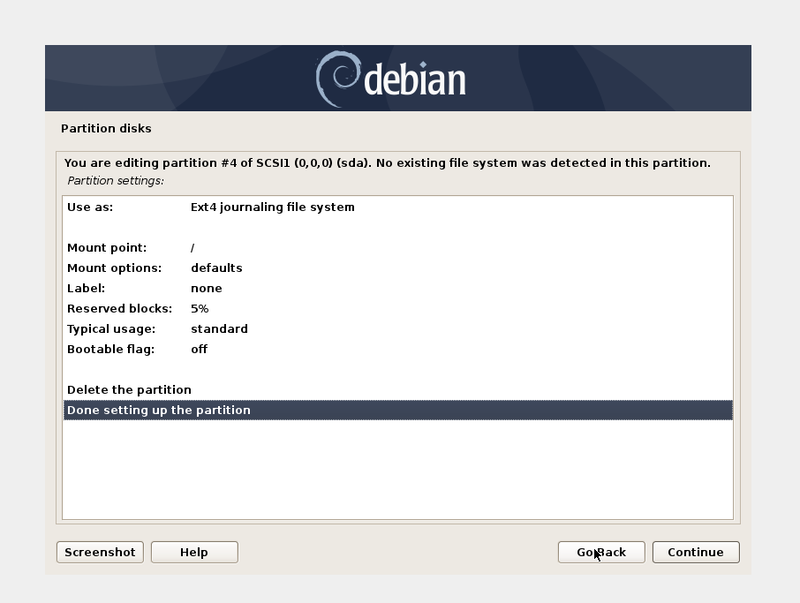
Make sure you have following settings:
- Use as: Ext4 journaling file system.
- Mount point: /
Now, double-click on “Done setting up the partition”.
Then click “Finish partitioning and write changes to disk”.
You may get a warning for not having SWAP space, you can choose to create it just like you did for Lubuntu. If you don’t want to do that, click on “No” and click “Continue”.
You can always follow our guide to create swap file on Linux later.
And then on this next screen, select yes to make changes on disk and click “Continue”

You may be prompted for participating in package survey, choose “yes” or “no”, it’s your call.
You may also get prompted for “Scanning another CD/DVD” click “no” and then “Continue”.
Then you’ll get scree for using network mirror or not. I am going to select “No”, if you want to use Network Mirror you should have Internet connection.

Step 5: Select software to install
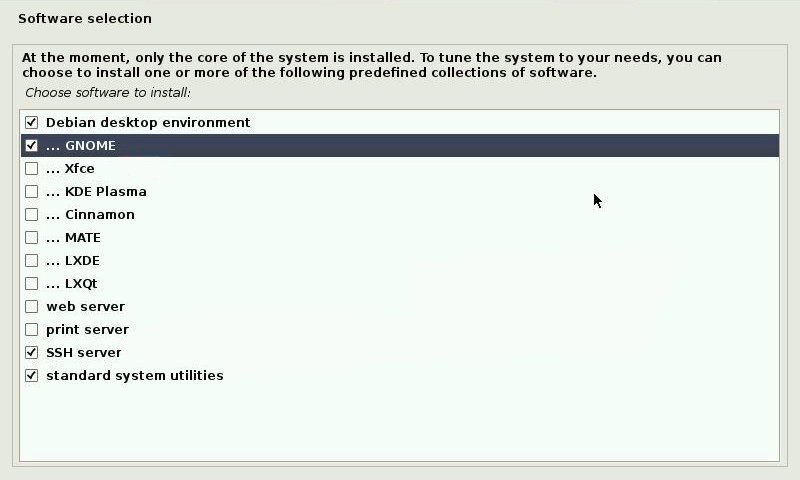
Now you have to choose which software you want in your newly installed OS. I recommend you to select any desktop environment you want “SSH server”, “Standard system utilities”.
I am going to choose GNOME as my desktop environment. If you don’t know what are desktop environment, I suggest use GNOME, I think it’s more user-friendly for new users.
Select all the packages you want and hit “Continue”.
After that you may need to wait for some time for it to complete the installation.
Step 6: Installing GRUB
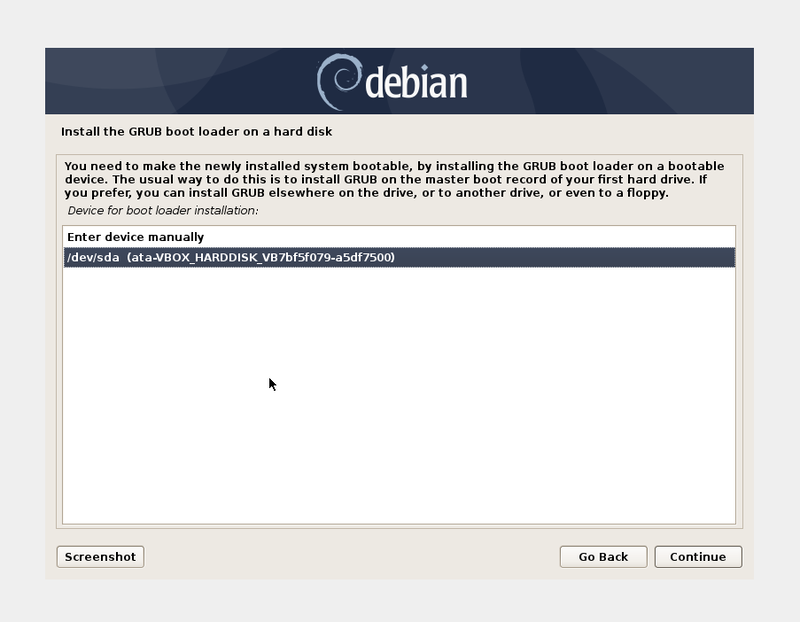
When it asks for if you want to install GRUB bootloader on disk? Click “Yes” and “Continue”

Select disk where you want to install GRUB. It will show list of storage drives you have in your system. If you have many, make sure you choose the one on which you have all three OS installed.
After finishing installation, you’ll see this screen:
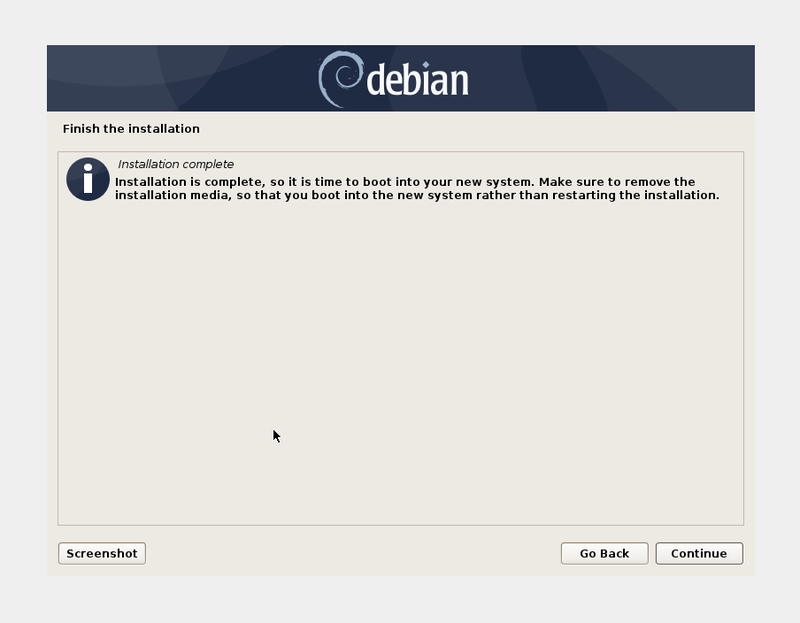
Click “Continue”, it will restart your machine, and make sure you’ve removed your USB or any bootable device you are using and have your hard disk (on which you’ve installed your GRUB bootloader) as your bootable device.
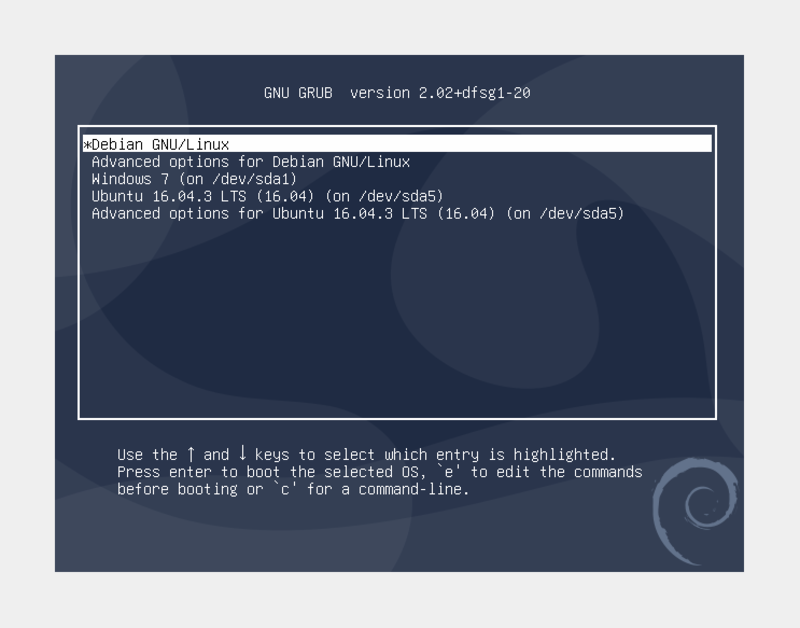
After restarting, you’ll see GRUB screen to choose from available OS to boot. In our case we will see three OS.
Troubleshooting
If you don’t see the three OS, open the last installed distribution and update grub:
sudo update-grubThat was all, we’ve installed three operating systems on our machine. Hope you find this tutorial useful, if you have any problem following this please let me know in the comments below.

