

Imagine you found a cool text editor like Pulsar and downloaded it in the AppImage format. You enjoy using it and now want to make it the default application for markdown files.
You right-click on the file and click 'open with' option, but here, you don't see the Pulsar listed here.
That's a problem, right? But it can be easily fixed by creating a desktop entry for that AppImage application.
Let me show you how to do that.
Step 1: Create a desktop entry for AppImage
The very first step is to create a desktop file for the AppImage application. Here, we will use the Gear Lever app to create the desktop entry.
Gear Lever is available as a Flatpak package from FlatHub. I know. Another package format, but that's how it is.
Anyway, if you have Flatpak support enabled, install Gear Lever with this command:
flatpak install flathub it.mijorus.gearleverNow, right-click on the AppImage file you downloaded and select Open With Gear Lever.
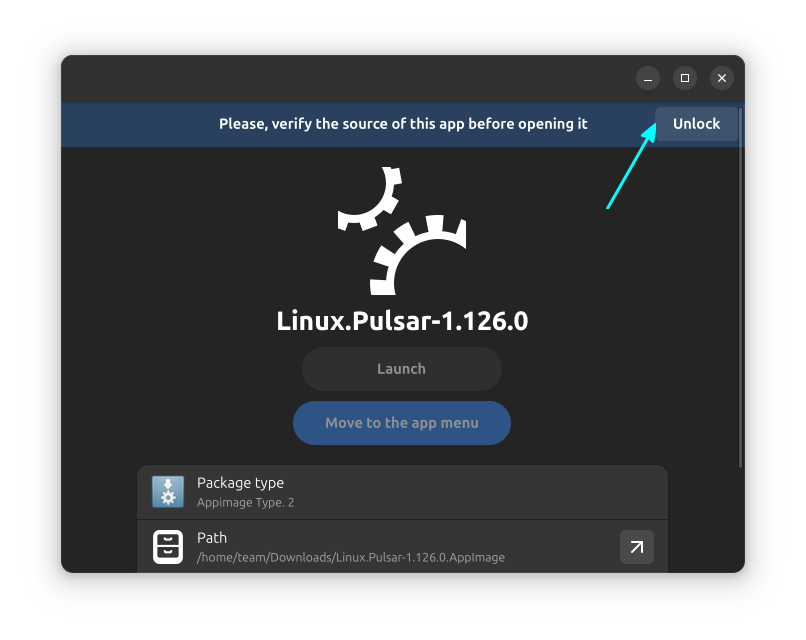
Click on the Unlock button in Gear Lever.
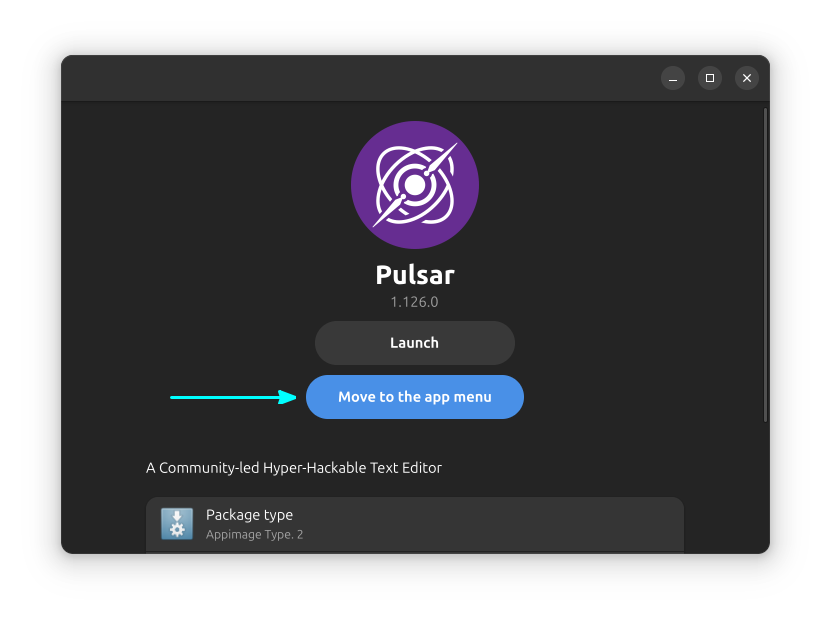
Now click on the "Move to app menu" button.
Verify everything is ok by searching for the app in the system menu.
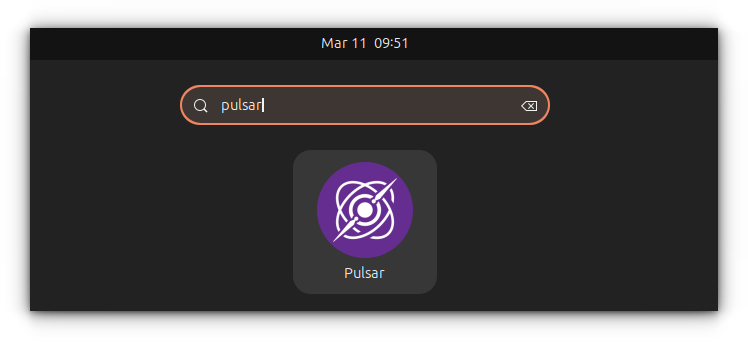
Great! So we have the application integrated in the desktop. Let's move to the second step.
Step 2: Setting default app through file manager
Let's say you want to open all your .txt text files in the Pulsar editor.
The easiest way to achieve is through the File Manager.
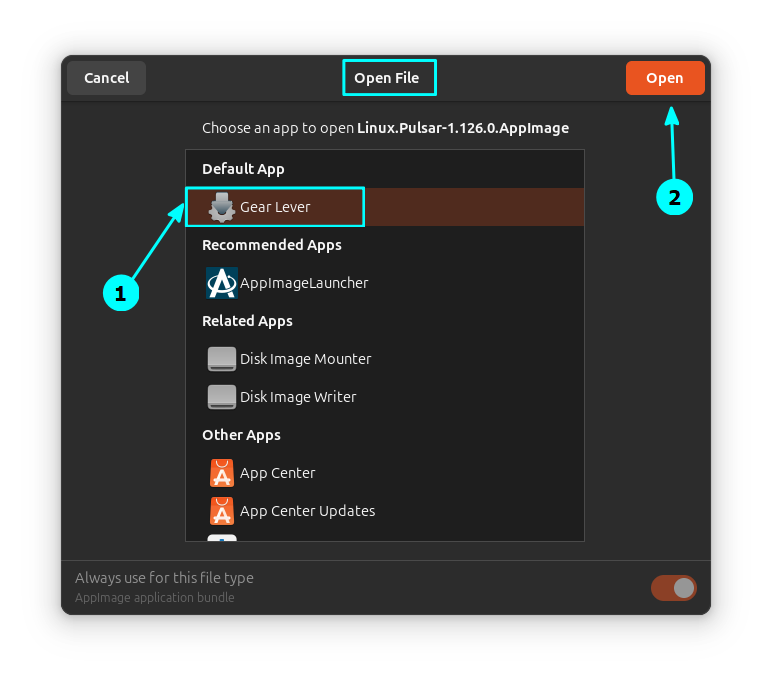
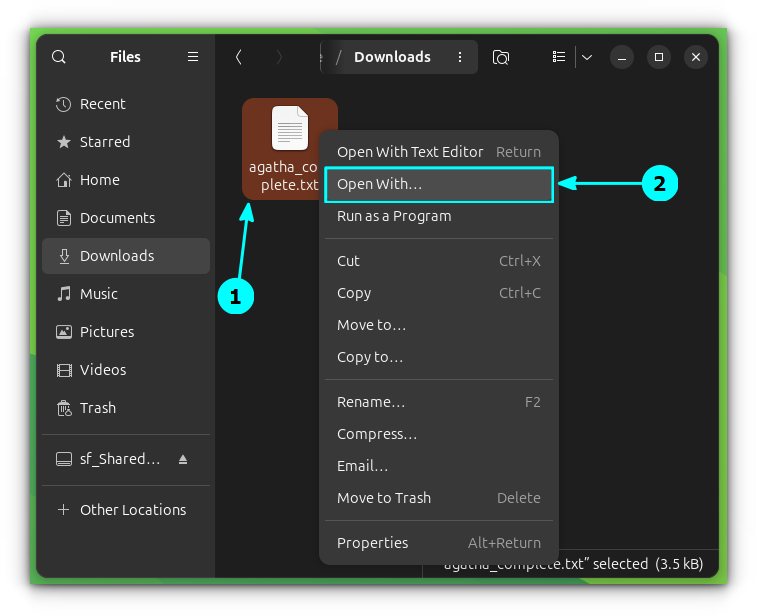
Open the file manager and right-click on the file of your choice. Now select the Open With option.
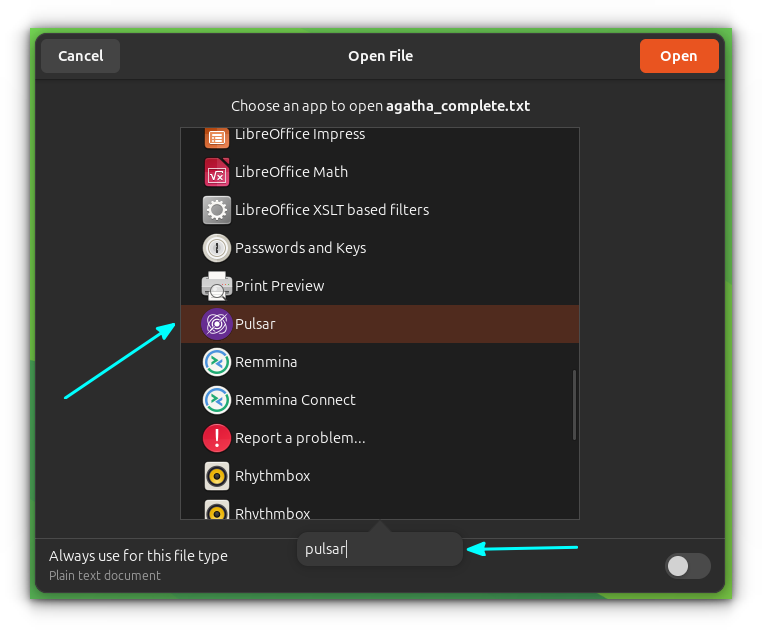
In the next window, you can start typing the name of the application to begin a search. It will also show you the AppImage program you integrated with the desktop previously.
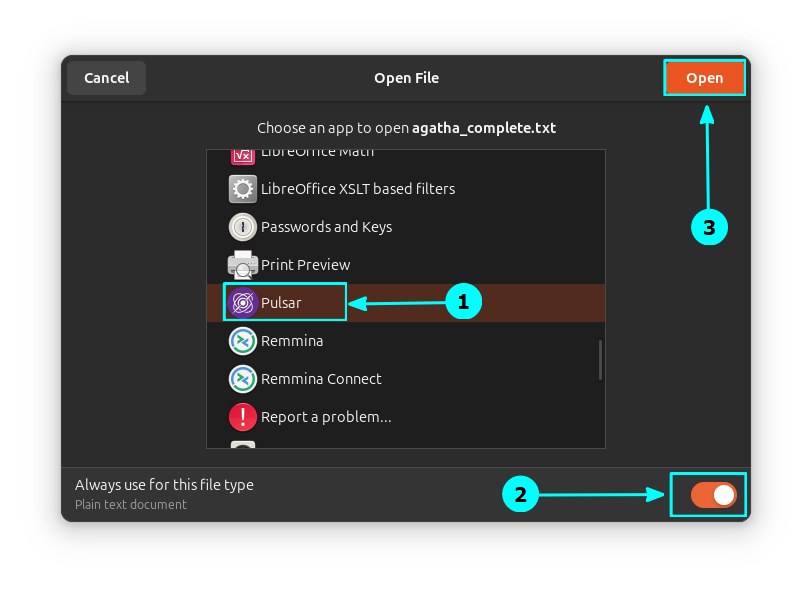
Once you spot the app, click on it to select and then enable the "Always use for this file type" toggle button. Then click Open as shown in the screenshot below.
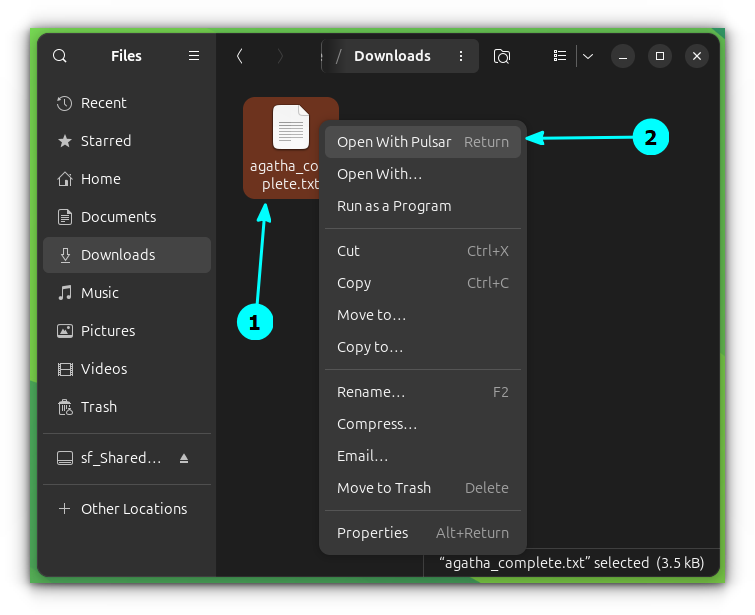
That's it. From now on, your file will be opened in the AppImage of your choice. To verify this, you can right-click on the file. The first entry on the context menu will be the name of your AppImage application. In this case, Pulsar.
Alternative method: Change apps from settings
Let's say you have an AppImage for applications like Web Browser, Music Player, etc. These can be changed from the system settings.
Given you have created the AppImage desktop entry following the first step, open the system settings in Ubuntu.
Go to Apps → Default Apps.
Here, set the apps for categories you want.
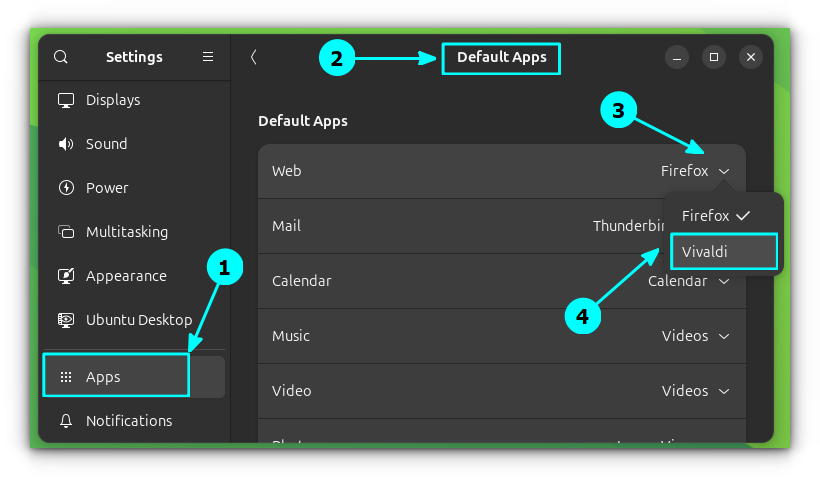
If you click on the drop-down menu corresponding to a category in settings, you can select an app. The AppImage app will also be listed here. In the screenshot above, you can see Vivaldi AppImage is set as the default browser.
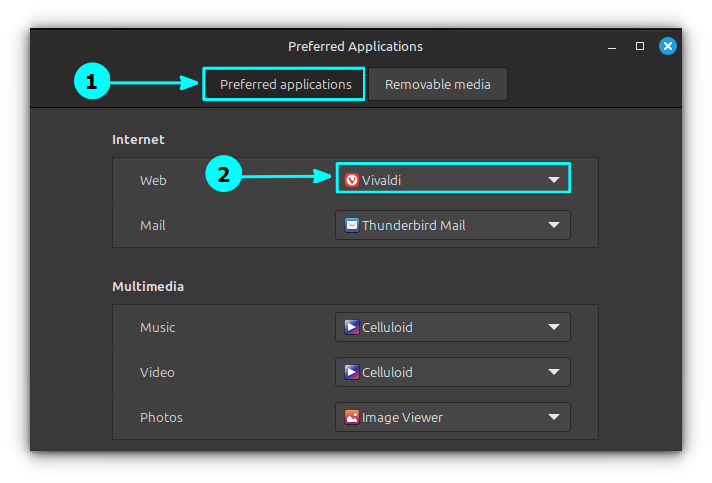
For Linux Mint users, you can set it using the Preferred Application settings.
Conclusion
A lot of AppImage 'issue' or should I say shortcomings, can be solved by desktop integration. It surprises me that AppImage doesn't provide an official way of doing these things.
Well, we have the wonderful open source developers that help us by creating helpful utilities like Gear Lever here.
I hope this quick little tip helps you enjoy your AppImages 😄
