How do you resize an image on Linux? Do you use GIMP or Shutter? Or perhaps you use ImageMagick in the terminal.
As I often need to resize the image before uploading them on It’s FOSS, Shutter was my favorite tool for this task until now. Shutter is an excellent screenshot tool that allows some quick editing features.
However, if you just need to change the size, length and width of an image, opening an entire tool and going through menu options can be saved if you are using GNOME desktop's file manager, Nautilus.
There are several Nautilus plugins available that enhance its capability. They are not installed by default as they serve specific purposes and users can choose to install them as per their needs.
One such Nautilus plugin is called Image Manipulator and it allows you to rotate or resize images by right-clicking on an image and choosing the option of rotating or resizing.
Quickly resize images with right click in Linux
Before you try to install the Nautilus plugin for quickly resizing images, I advise that you verify if your Linux system uses Nautilus file manager or not. To check that, use the command below:
nautilus --versionIf you get an output with version numbers, you have Nautilus file manager on your system. Else, your Linux distribution is using some other file manager.

You would also need to install ImageMagick because this plugin uses basically uses ImageMagick for image manipulation:
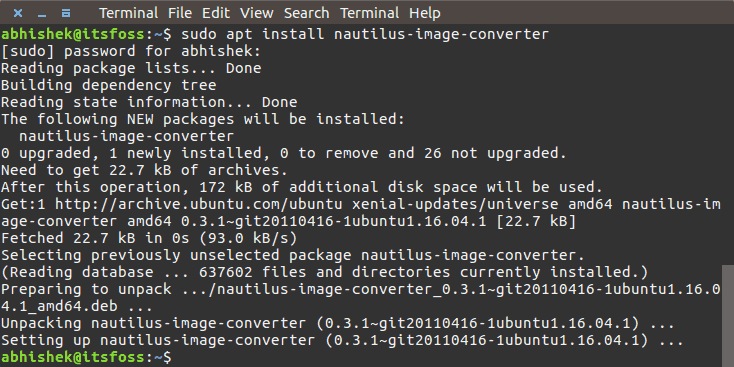
sudo apt install imagemagickOnce you have made sure that you have Nautilus file manager on your system, you can install the plugin using the command below:
sudo apt install nautilus-image-converter
If you are using Fedora, Arch, or other non-Debian Linux, you can use your distribution’s package installing command.
Once installed, restart Nautilus using the command below:
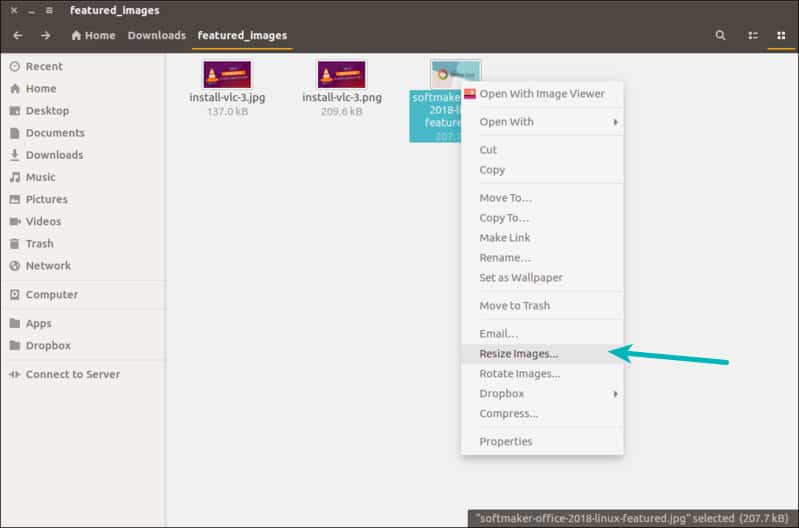
nautilus -qNow if you right click on an image, you’ll see two new options of resizing and rotating in the context menu.

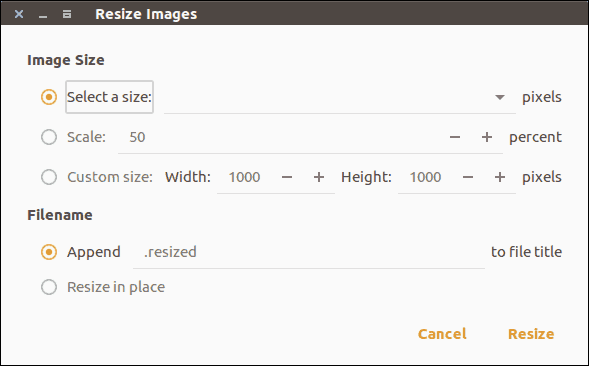
You can choose the resize option to resize the image right from the right-click menu quickly. It will present you with a few options for resizing the image.
As far as the custom size goes, though it doesn’t show, it retains the aspect ratio based on the width. So if you have a 1000×500 px image and you are trying to assign it a custom size of 800×300, the converted image will be 800×400, maintaining the original 2:1 ratio.

By default, it adds “.resized” to the name of the original image. This way your original image is not impacted and you get an additional resized image. You can change this behavior by choosing the ‘Resize in place’ option and the resized image will replace the original image.
It might not be a path-breaking trick but it does save you a few clicks.
To remove the plugin, you can use the command below:
sudo apt remove nautilus-image-converterAnd then restart the Nautilus. Simple!

More such Nautilus tweaks
This article inspired It’s FOSS reader Peter Uithoven to create a similar plugin for elementary OS users. You can get it from elementary OS app center.
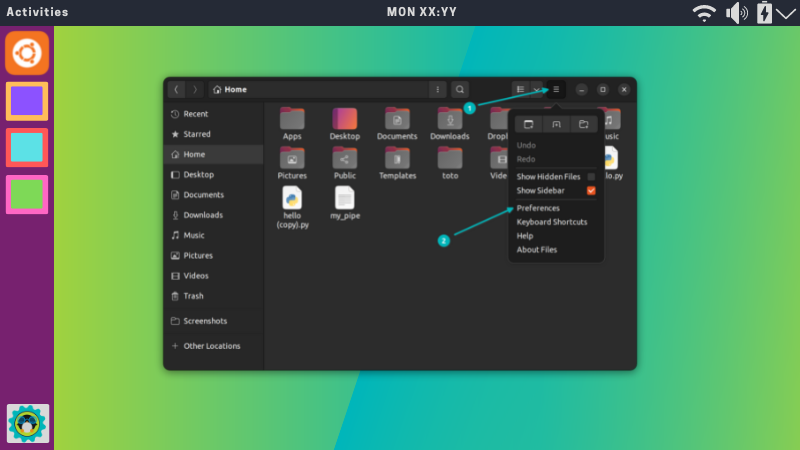
There are other Nautilus tweaks you may enjoy as well.

I hope you liked this quick tip.


