

When it comes to screen recording in Linux or any other operating system, OBS Studio becomes he go-to choice.
It offers all the features baked in for users, ranging from casual screen recorders to advanced streamers.
One such useful feature is to record a part of the screen in OBS Studio. I'll share the detailed steps for Linux users in this tutorial.
Record an application window in OBS Studio
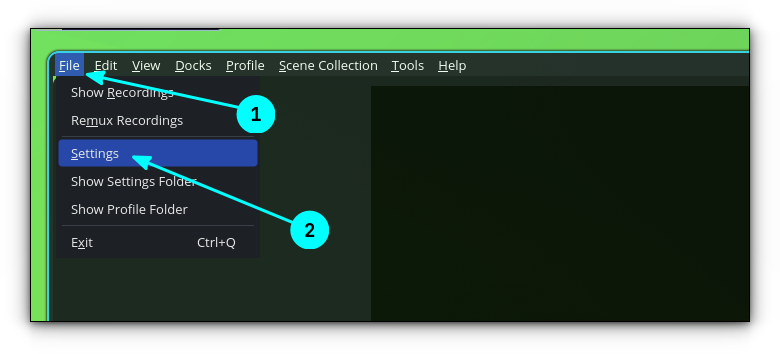
Before starting, first click on File → Settings from OBS Studio main menu. Here, in the Settings window, go to the Video section and note the Canvas resolution and Output scale resolution for your system.
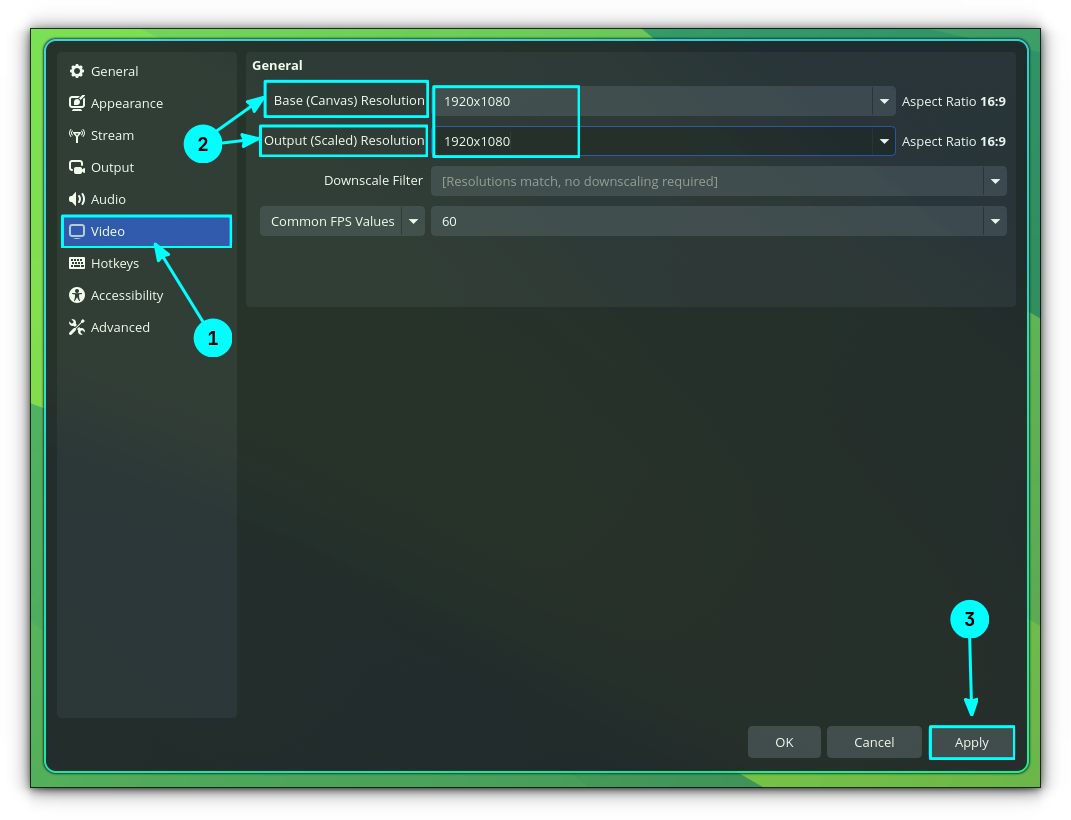
This will be helpful when you are reverting in a later step.
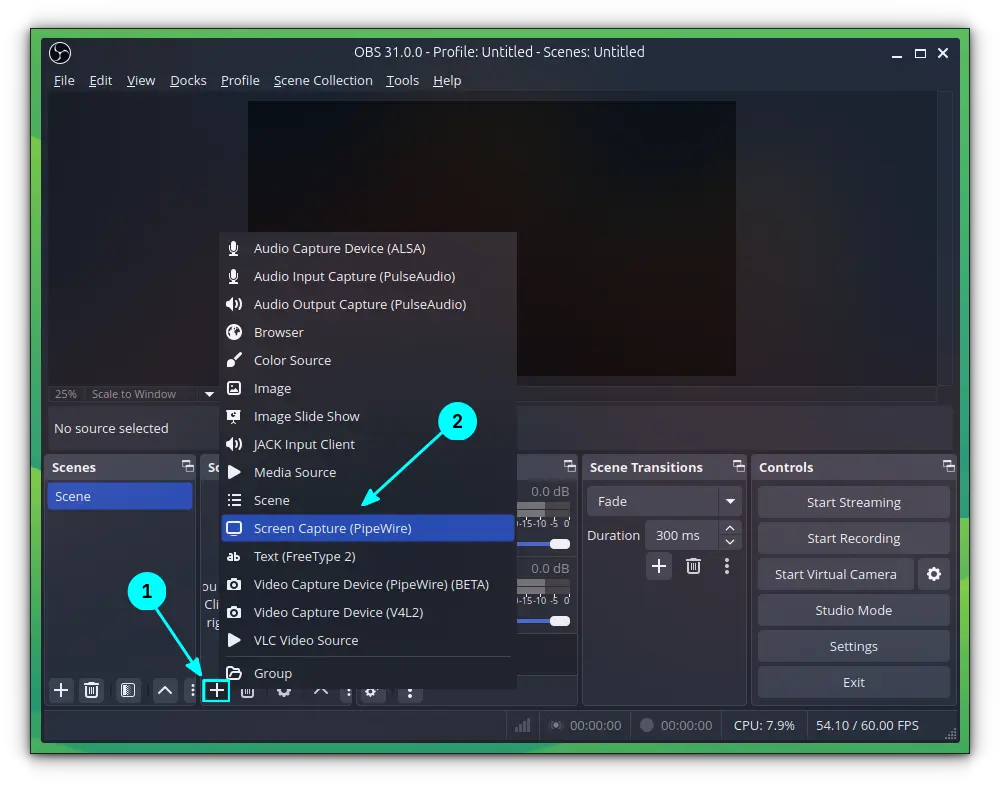
Step 1: Create a new source
First, let's create a new source for our recording. Click on the “+” icon on the OBS Studio home screen as shown in the screenshot below. Select “Screen Capture (Pipewire)” option.
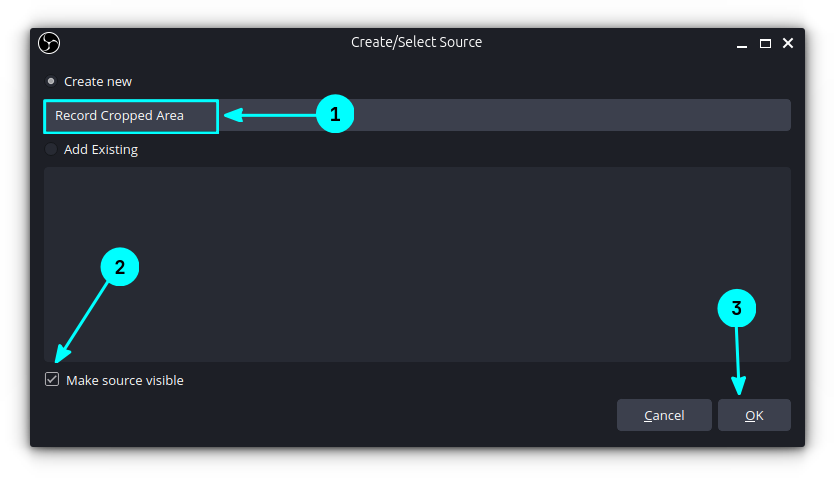
On the resulting window, give a name to the source and then click OK.
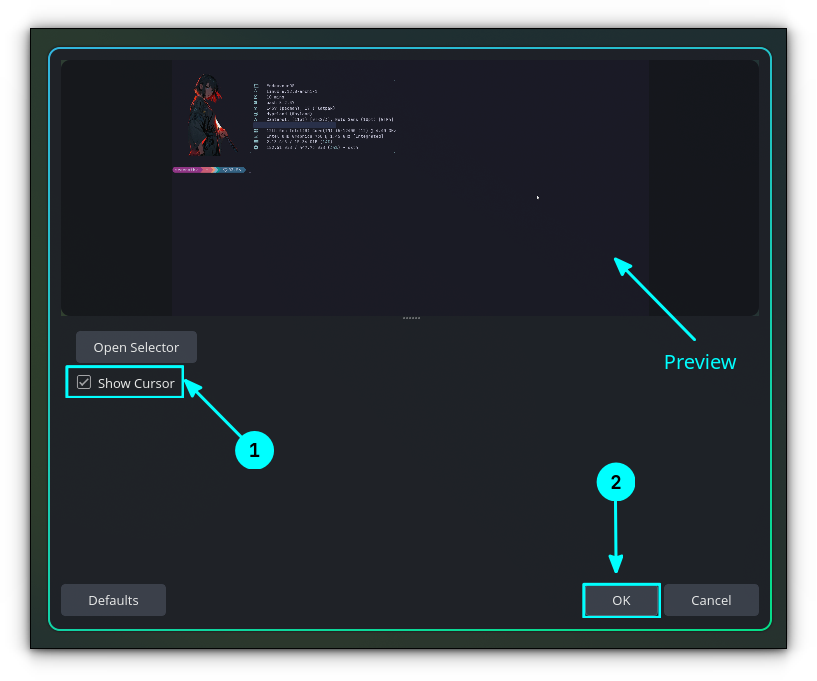
Once you press OK, you will be shown a dialog box to select the record area.
Step 2: Select the window to record
Here, select the Window option from the top bar.
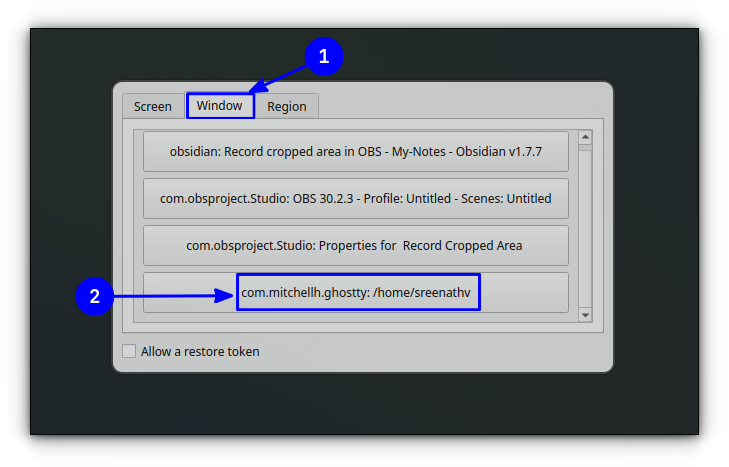
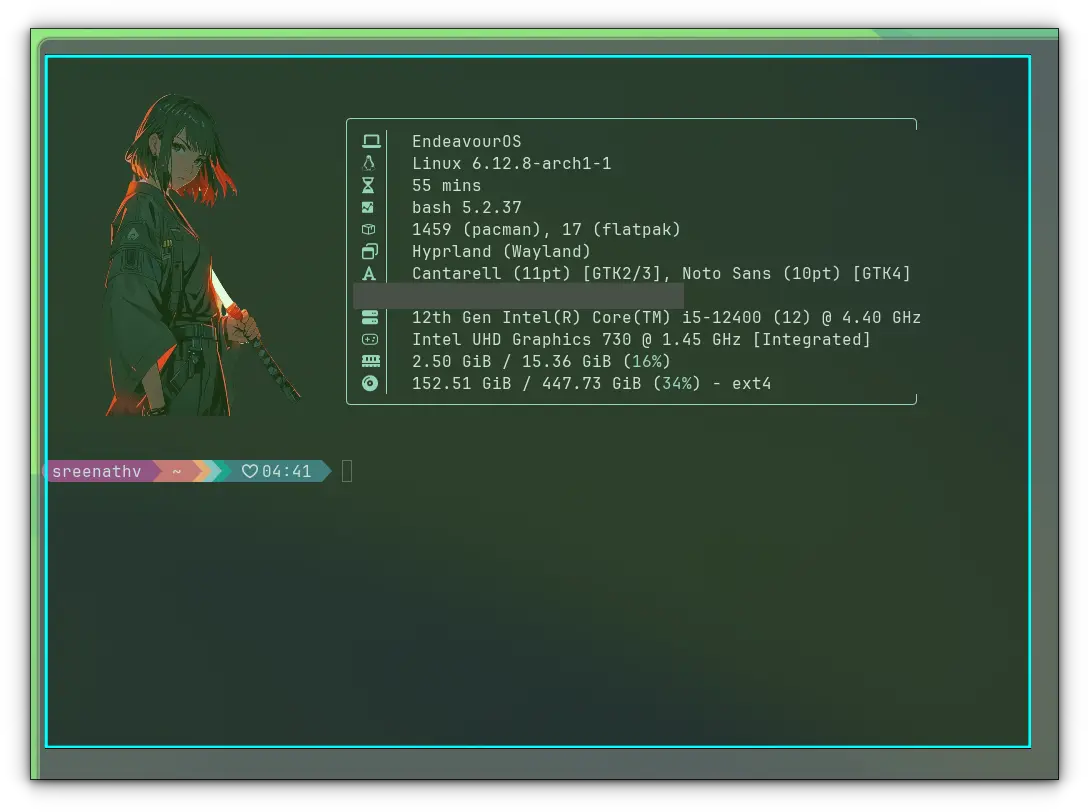
Once you click on the Window option, you will be able to see all the open windows listed. Select a window that you want to record from the list, as shown in the screenshot above.
This will give you a dialog box, with a preview of the window being recorded.
Enable the cursor recording (if needed) and click OK.
Step 3: Crop the video to window size
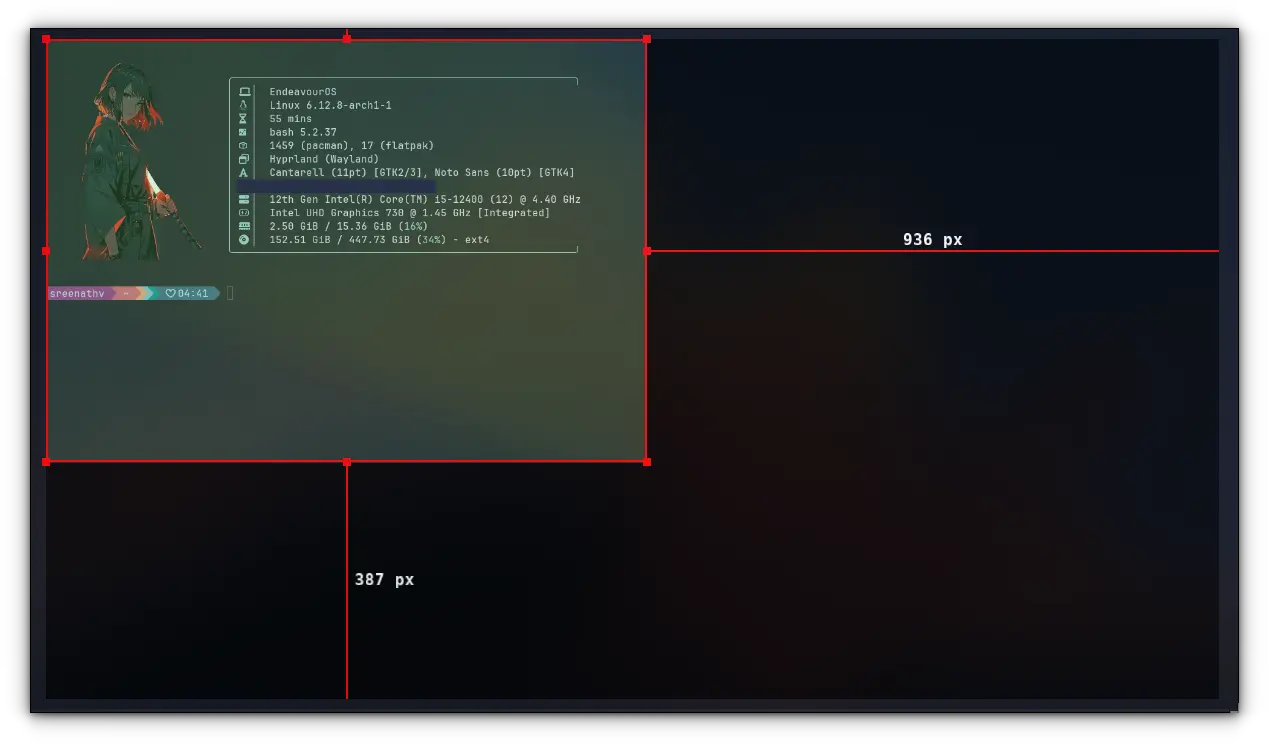
Now, in the main OBS window, you can see that the application you have selected is not filling the full canvas, in my case 1920×1080.
The output will contain this window and the rest of the canvas in black if you keep recording with this setting.
You need to crop the area so that only the necessary part is present on the output file.
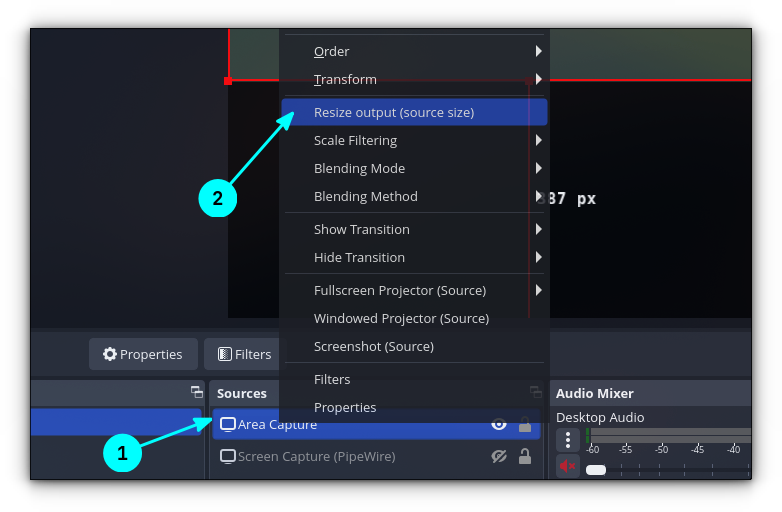
For this, right-click on our source and select Resize Output (Source Size) option, as shown below:
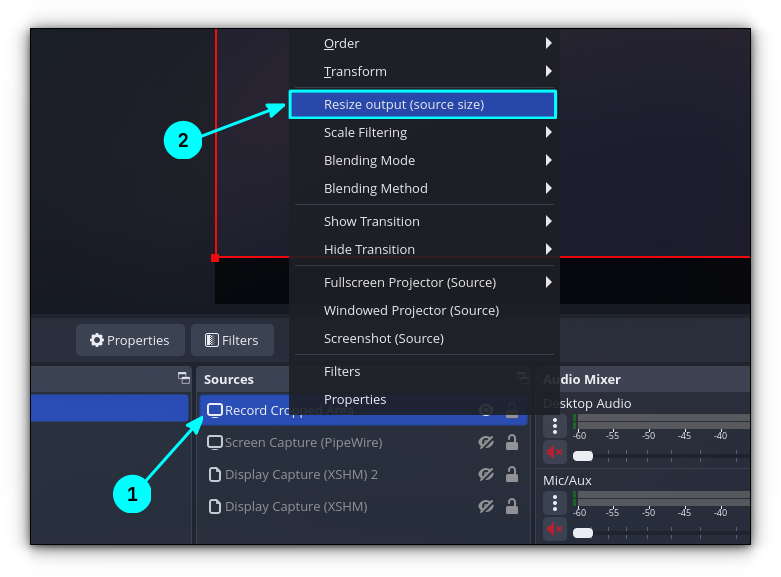
Click on Yes, when prompted.

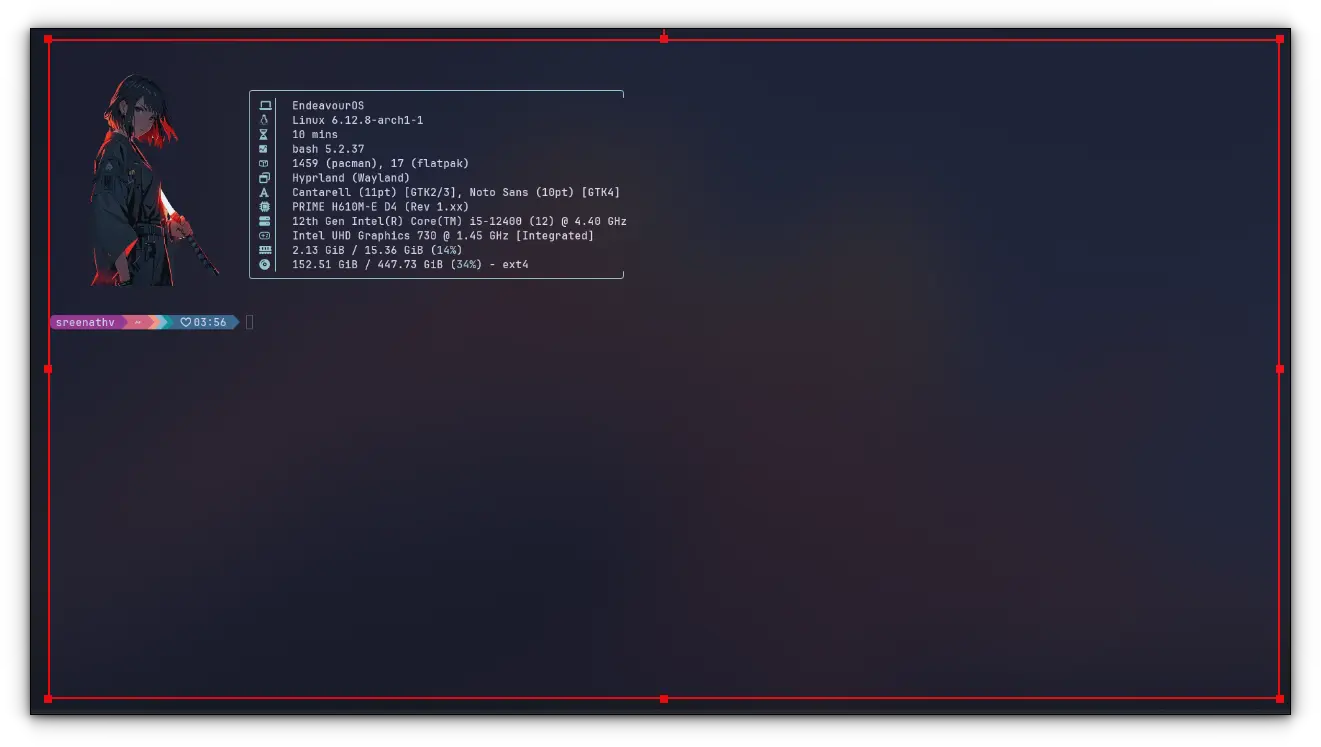
As soon as you click Yes, you can see that the canvas is now reduced to the size of the window.
Step 4: Record the video
You can now start recording the video using the Record button.
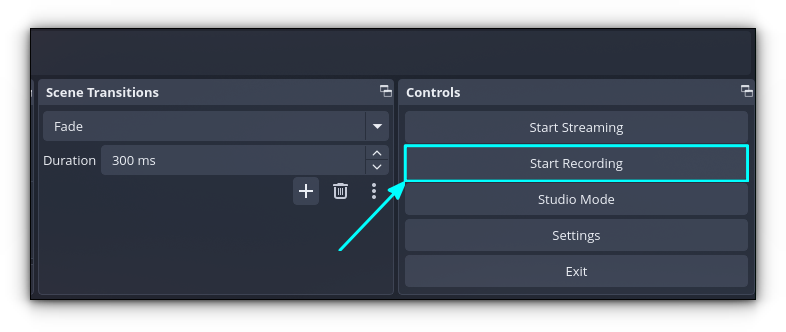
Once finished, stop recording, and the saved video file won't contain any other part, except the window.
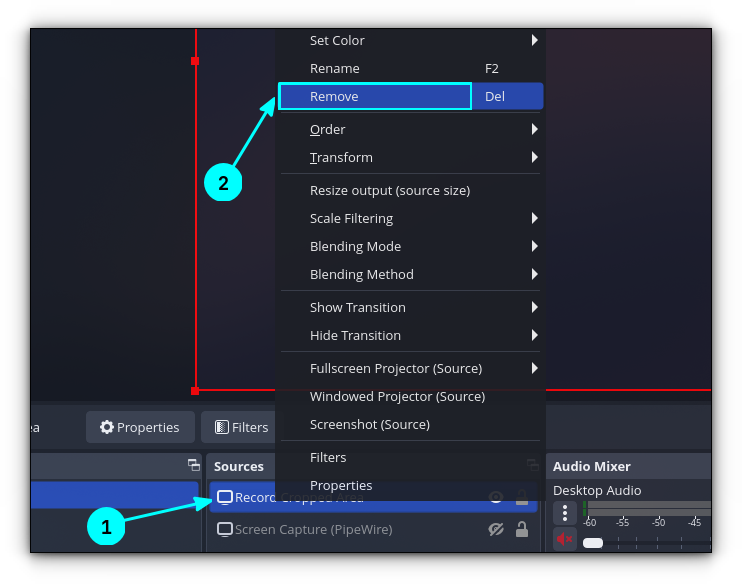
Step 5: Delete the video source
Now that you have recorded the video, let's remove this particular source.
Right-click on the source and select Remove.
Step 6: Revert the canvas and output scale
While we were resizing the canvas to the window, the setting has been also changed on your OBS Studio video settings. If left unchanged, your future videos will also be recorded with the reduced size.
So, click on File in the OBS Studio main menu and select Settings.
On the Settings window, go to Videos and revert the Base Canvas Resolution and Output Scaled Resolution to your preferred normal values. Then click Apply.

Record an area on the screen in OBS Studio
This is the same process as the one described above, except for the area selection.
Step 1: Create a new source
Click on the plus button on the Sources section in OBS Studio and select Screen Capture.

Name the source and click OK.
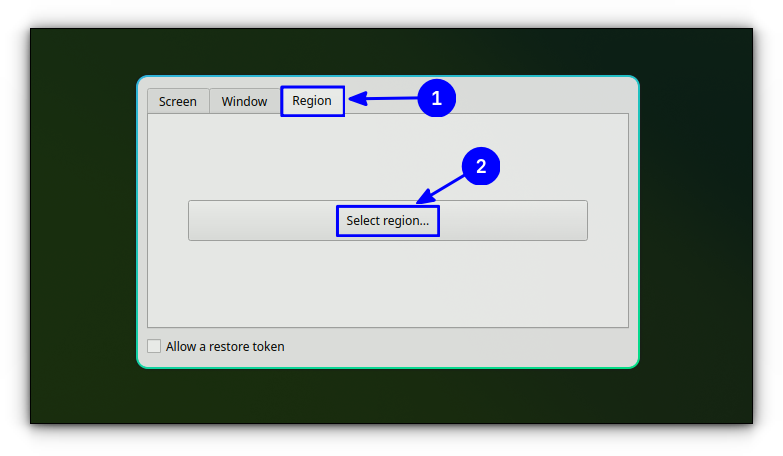
Step 2: Select a region
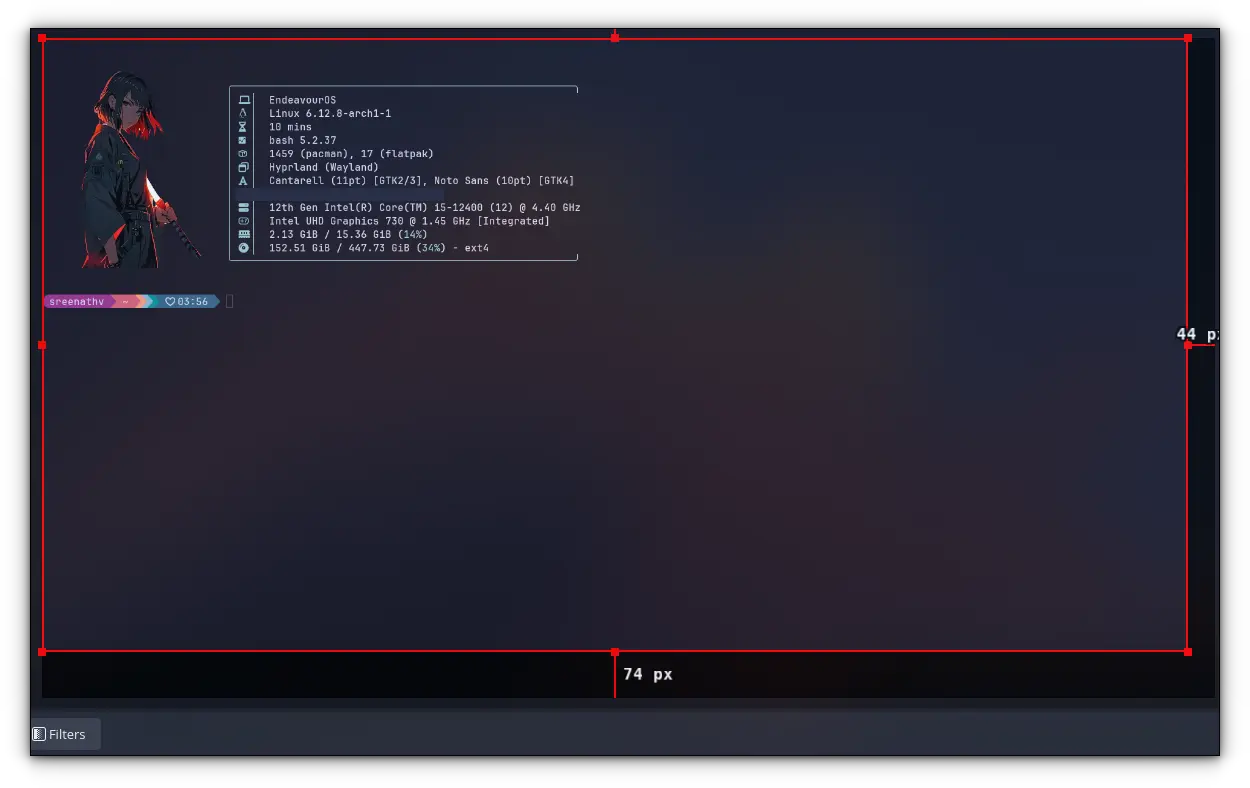
On the area selection dialog box, click on Region. From the section, select Select Region option.
Notice the cursor has now changed to a plus sign. Drag the area you want to record.
You can see that the preview now has the selected area. Don't forget to enable the cursors, if needed.
It is normal that the canvas is way too big and your video occupies only a part of it.
Step 3: Resize the source
Like in the previous section, right-click on the source and select Resize output option.
Step 4: Record and revert the settings
Start recording the video. Once it is completed, save the recording and remove the source. Revert the canvas and output scale settings, as shown in step 6 of the previous section.
💬 Hope this guide has helped you record with OBS Studio. Please let me know if this tutorial helped you or if you need further help.

