

Nemo is the default file manager of the Cinnamon Desktop. You get it in Linux Mint and other distributions with the Cinnamon desktop.
It’s a powerful file manager with plenty of features you might not know. Some tweaks are hidden inside the Nemo settings while some require installing additional extension packages.
I have included commands for installing extensions for Ubuntu and Debian-based distributions.
Note: Please don’t go and install all the extensions. Only use the ones you would use.
1. Enable quick file preview
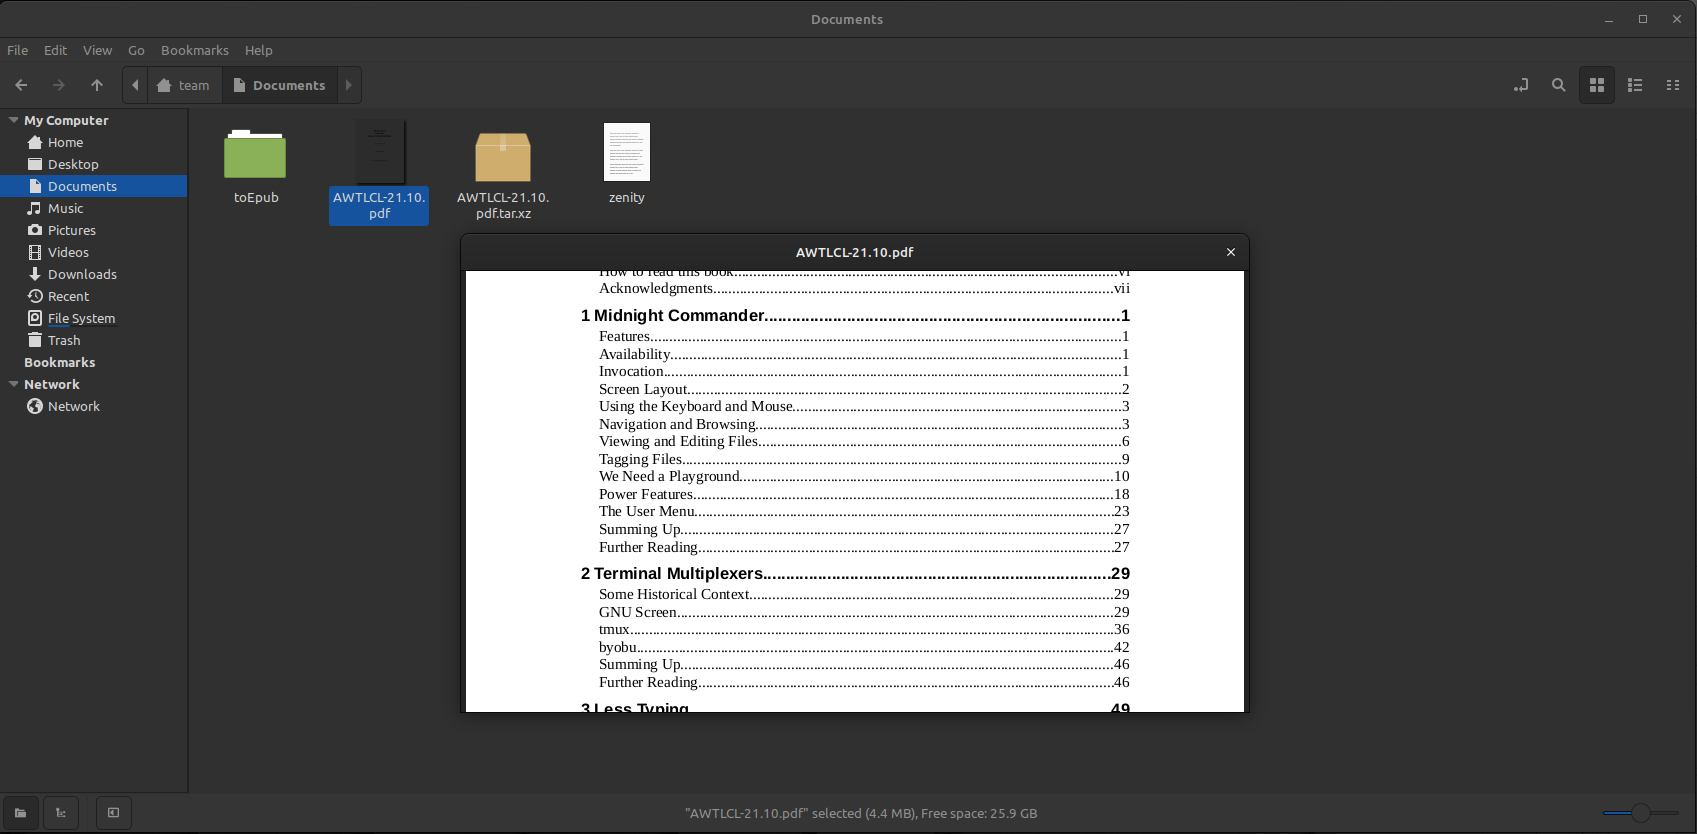
Nemo Preview is a cool feature that comes in handy if you want to peek into some files on the go. You can access the preview feature for images, audio, video, PDF, etc.
It also allows scrolling the documents in preview mode and adds a floating control with a seek par in audio/video preview.
You can get the preview feature by installing the following extension:
sudo apt install nemo-previewOnce installed, you may need to restart the Nemo file manager.
To activate the preview, select the file and press the Space key. Pressing the space key again will close the preview.
2. Click twice to rename
This is one of the iconic features of Nemo file manager, which is already offered in Dolphin File Manager of KDE, but absent in Nautilus of Gnome.
To enable this setting, you need to go to Edit > Preferences > Behaviour and toggle the option as shown below:
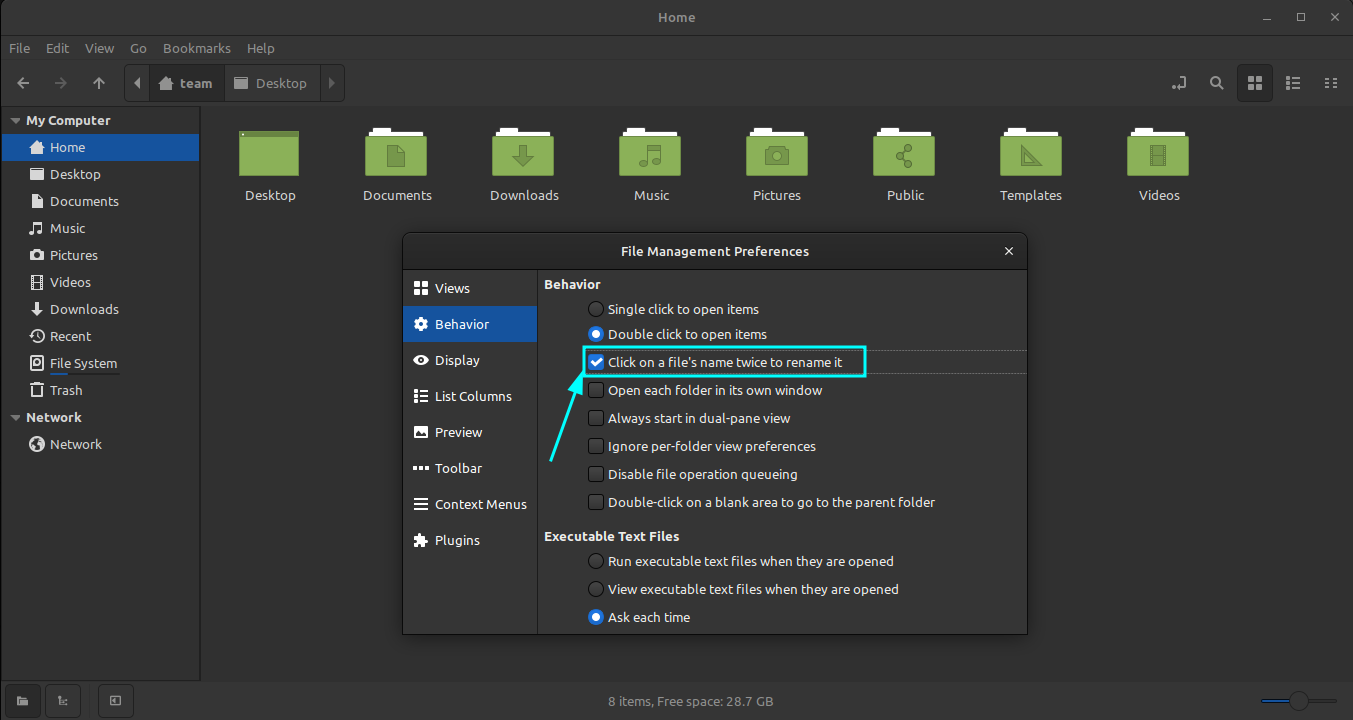
Once done, you can now click twice on a file/folder and an inline rename option appears to rename the respective selection.
3. Bulk rename files
Nemo also offers a bulk rename feature that many Linux users are not aware of.
What you have to do is, select the files and select rename from the right click. You’ll get different kinds of options to tweak the names of the selected group of files.
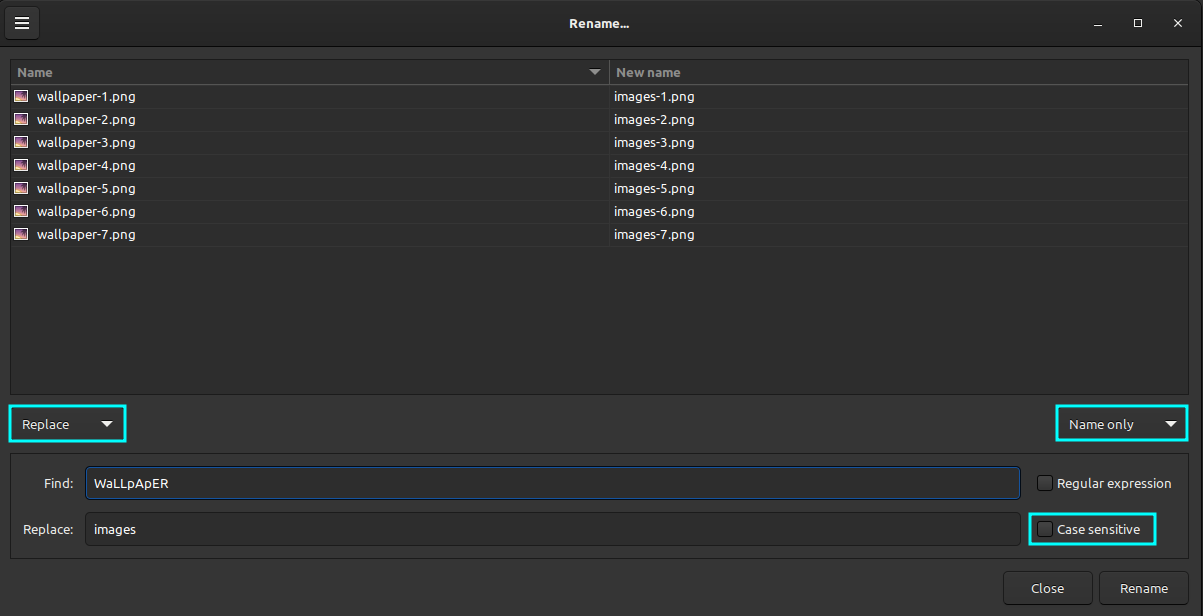
You can find and replace, remove certain parts of the name among many other things.
4. Double click anywhere to go to the parent folder
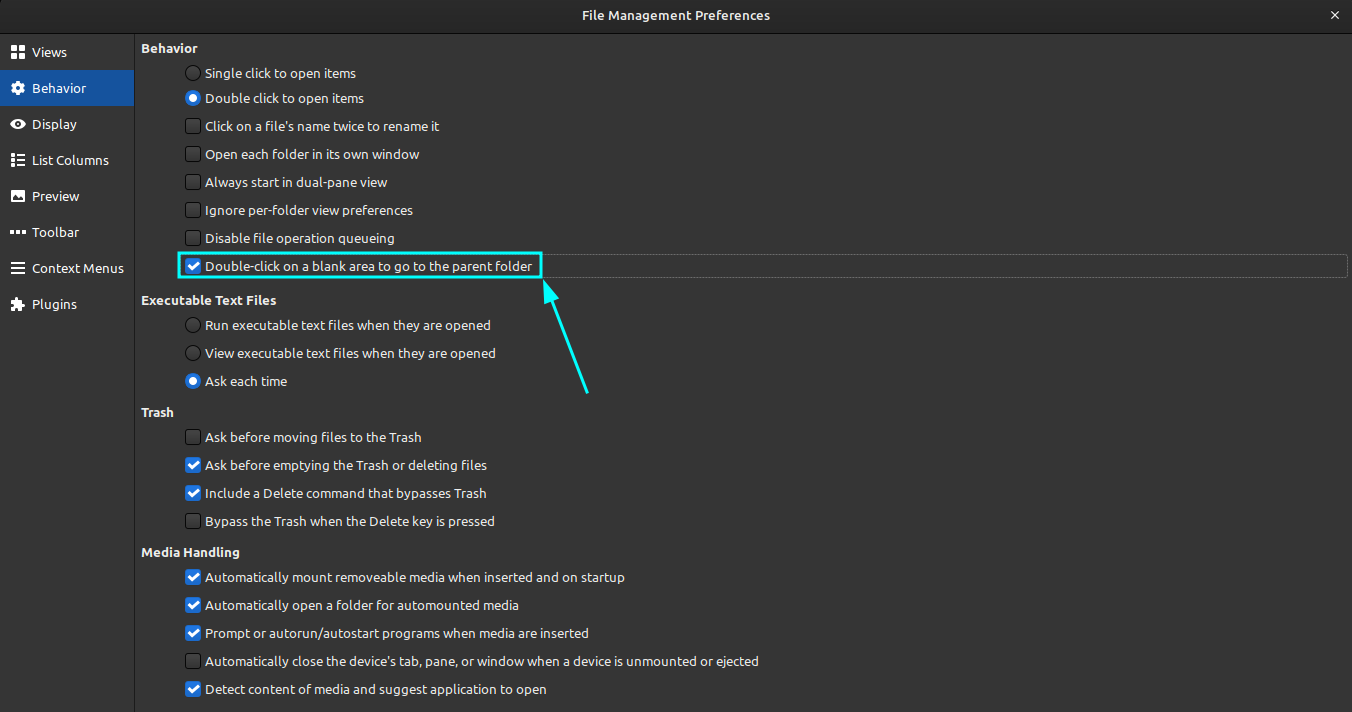
This is rather an accessibility setting. Instead of pressing the back button or clicking on the places tree, you can simply double-click anywhere in the empty space in the window to go to the parent folder.
To enable this feature, go to Edit > Preferences > Behaviour and toggle on the option as shown in the screenshot below.
5. Compress files and folders
This is not a secret really. Almost all file managers have this option as far as I know.
Right click on a file or folder and you get the Compress option to create an archive file.

You can choose between formats like .7z, .tar, .zip to .apk, .epub. etc. Some compression methods like epub requires their own defined formats to succeed.
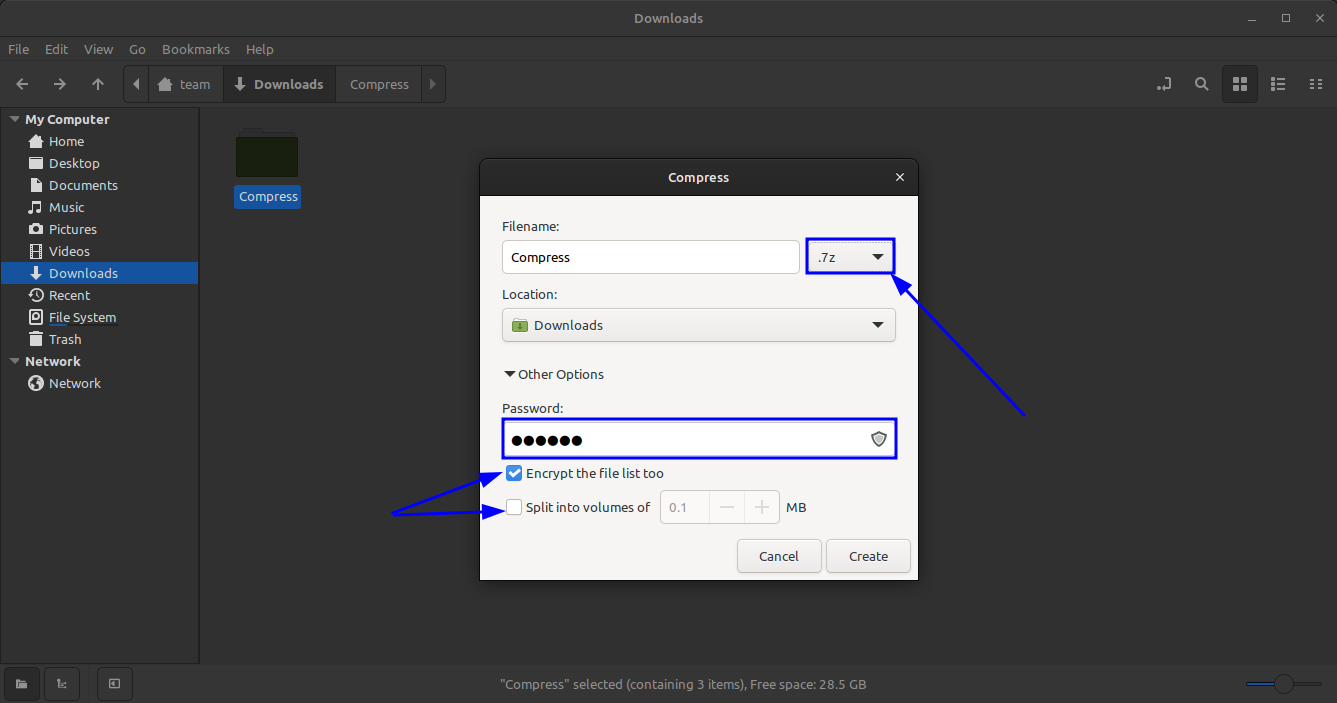
Some compression formats support password protection, encryption and splitting, as shown in the above screenshot.
If you did not find this option, you could install the package nemo-fileroller:
sudo apt install nemo-fileroller6. Configure the right-click context menu
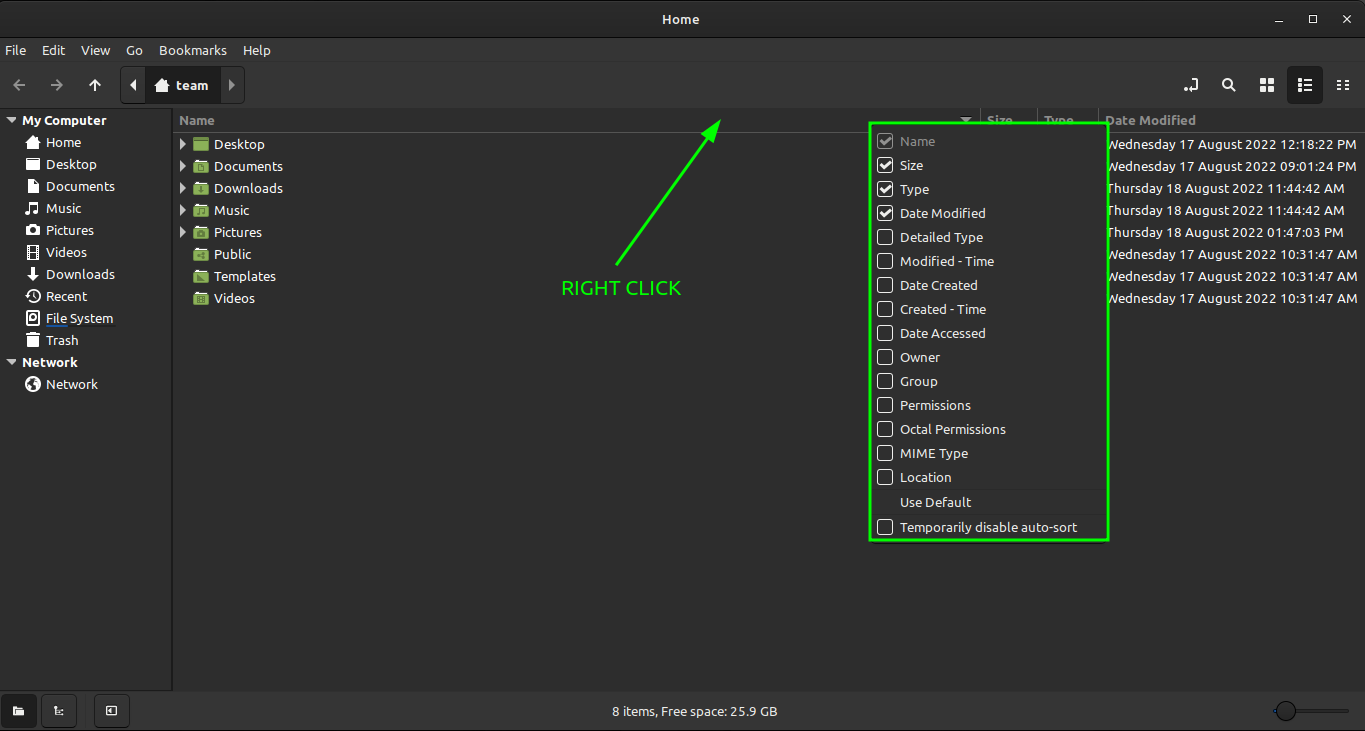
By default, there are many options in the right-click context menu. If you are one of those users who want to control what appears on your right-click menu, this is the feature for you.
You can access this setting from Edit > Preferences > Context Menus:

Here you can toggle on or off various options you want to appear when you right-click anywhere. You can now populate your right-click menu with features you use frequently.
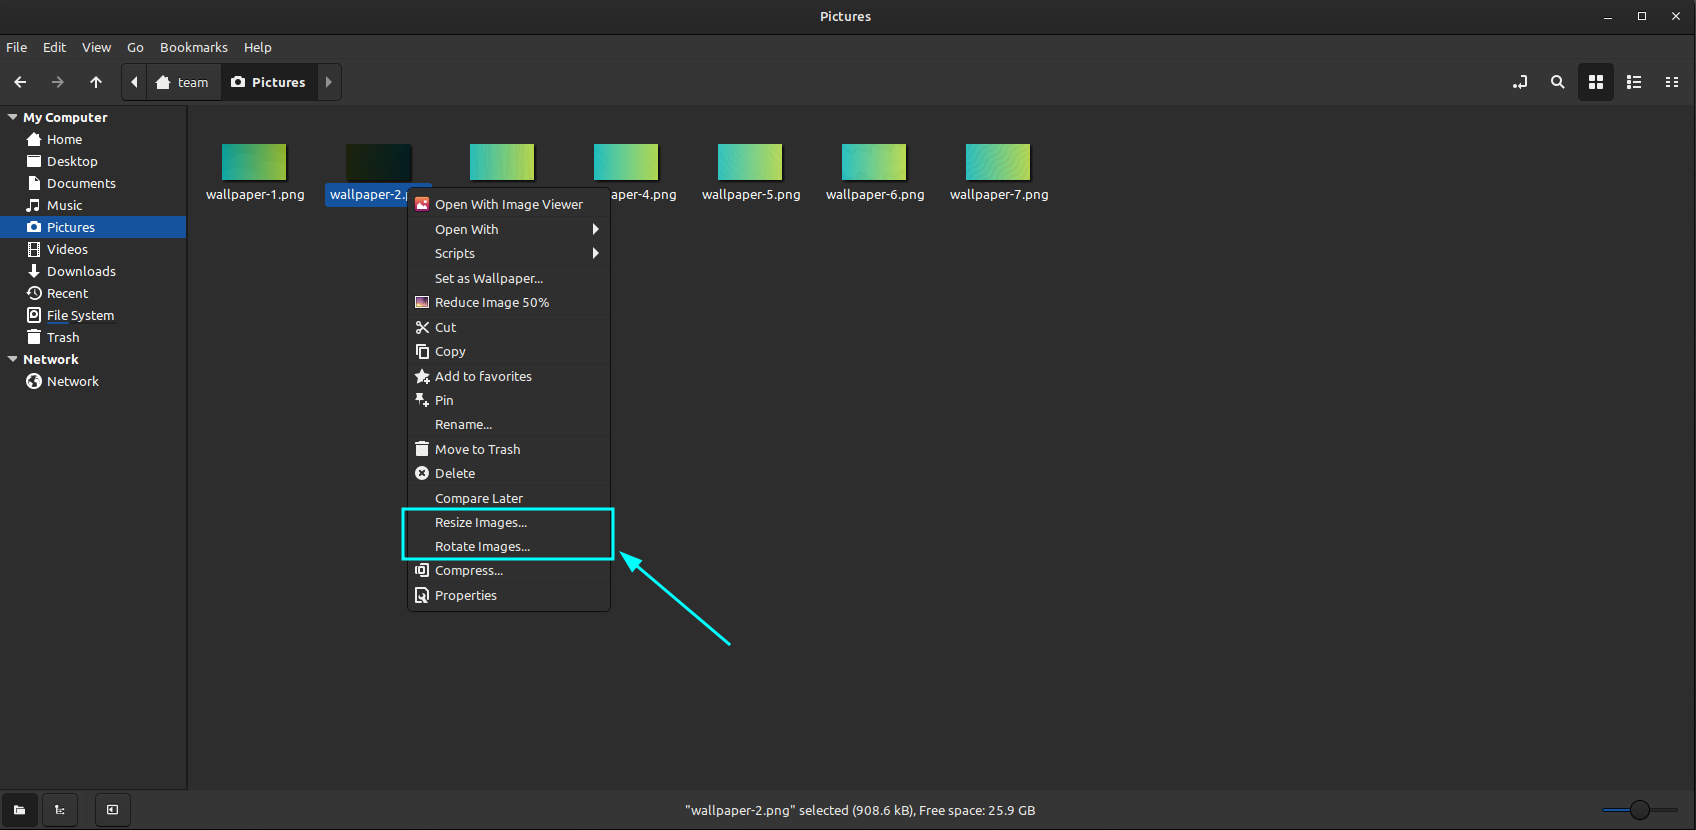
7. Rotate and resize images with right click
To enable this feature, you need to install nemo-image-converter package.
sudo apt install nemo-image-converterRestart Nemo and you can access the additional options right within the right-click context menu.
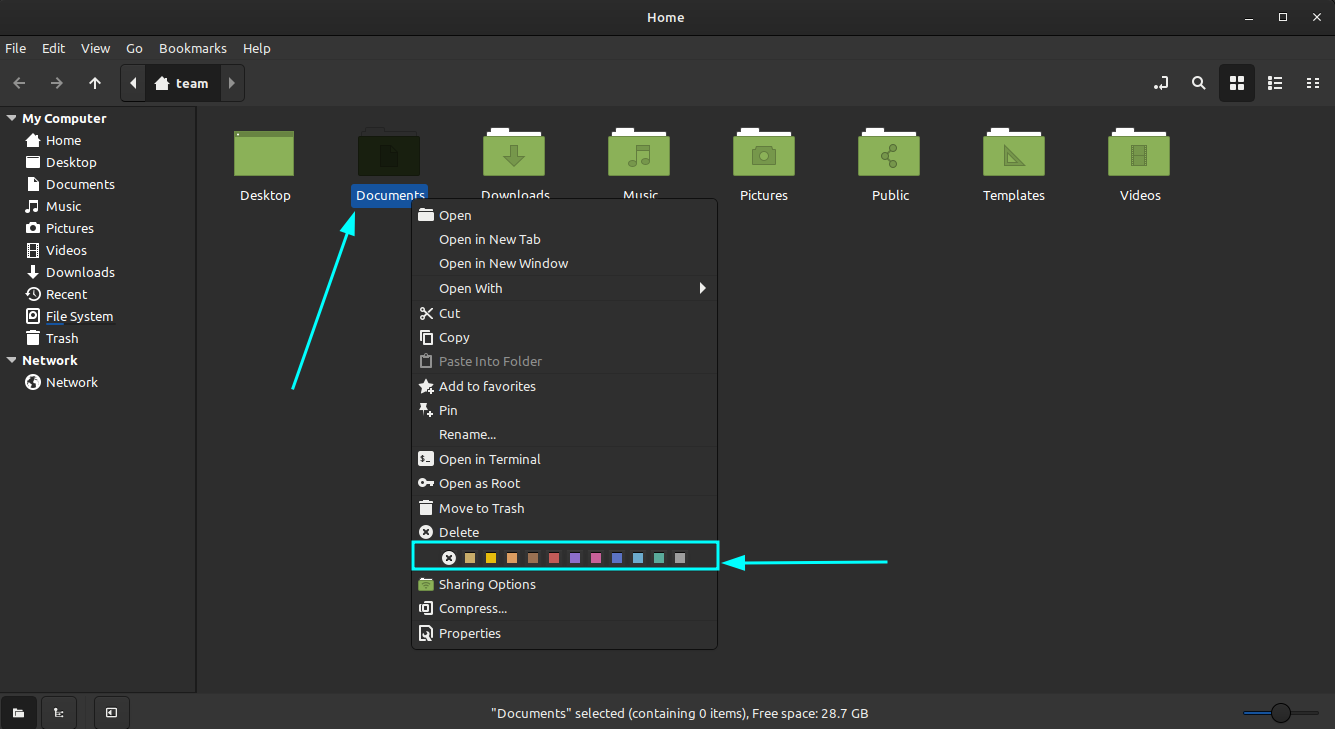
8. Change folder colours and add emblems
The feature to change folder colour was preinstalled on my Linux Mint 21. To change individual folder colour, right-click on the file and change colour from the context menu.
If you don’t see it, you can install the extension:
sudo apt install folder-color-switcherAnother cool feature is to add emblems to files and folders. To give an emblem to a file or folder, right-click and go to the properties dialog box.
From this, select the emblems tab and add whatever emblem you like.

If it’s not installed by default, you can install it by:
sudo apt install nemo-emblems9. Verify checksum of files
There are dedicated tools to verify checksum of files in Linux. You can also check hashes in the Nemo file manager with nemo-gtkhash extension.
sudo apt install nemo-gtkhashNow quit nemo and re-open. Select the file to check hash and go to the Digests tab in properties.
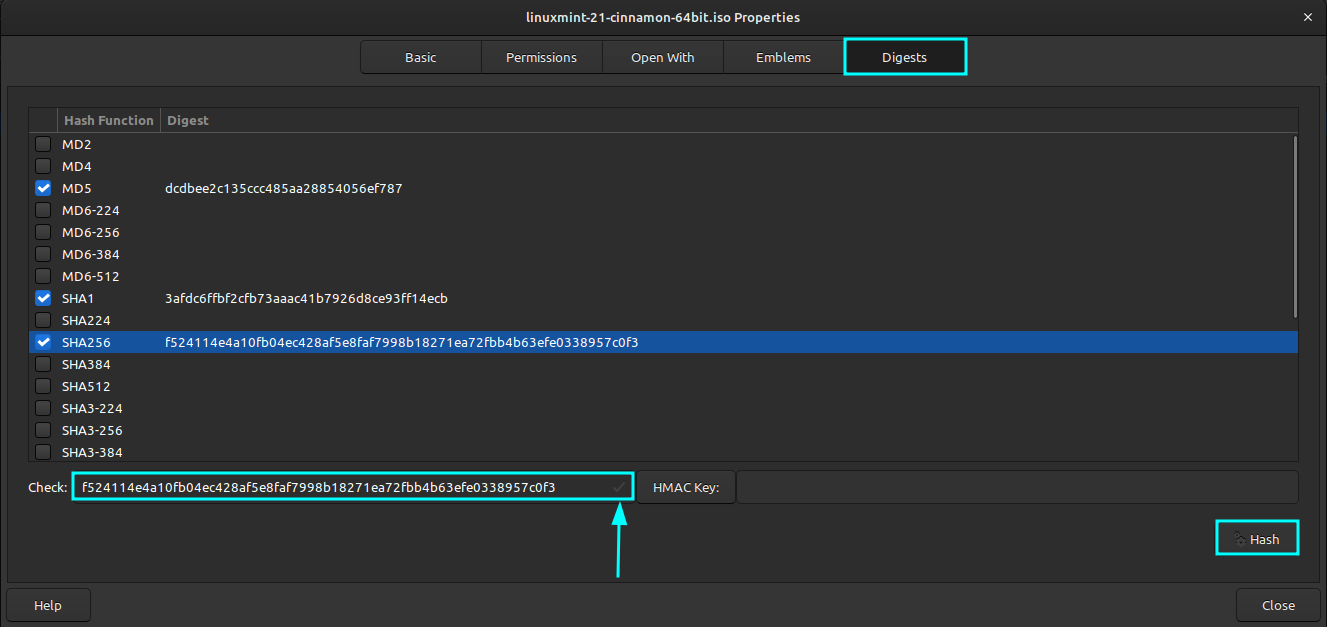
It will take some time to check the hash and a tick mark, as shown in the above screenshot, indicates a successful result.
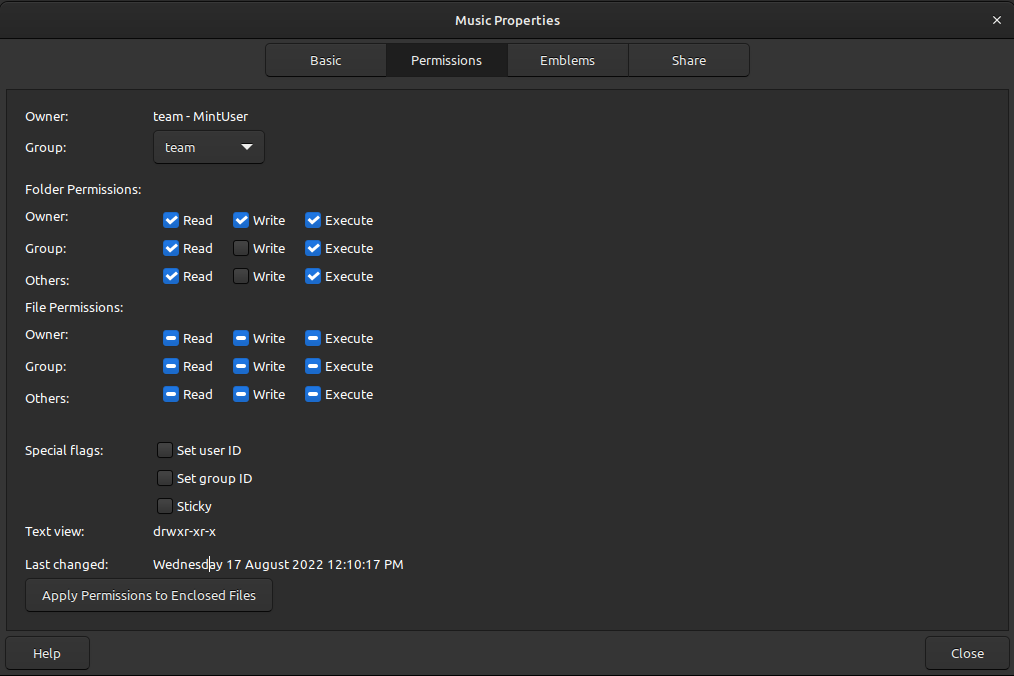
10. Use advanced permissions in properties dialog box
Now, you can view amore detailed an an intuitive permission dialog box for folders and file. To get this, you need to go to Edit > Preferences > Display and toggle the button on as shown below:
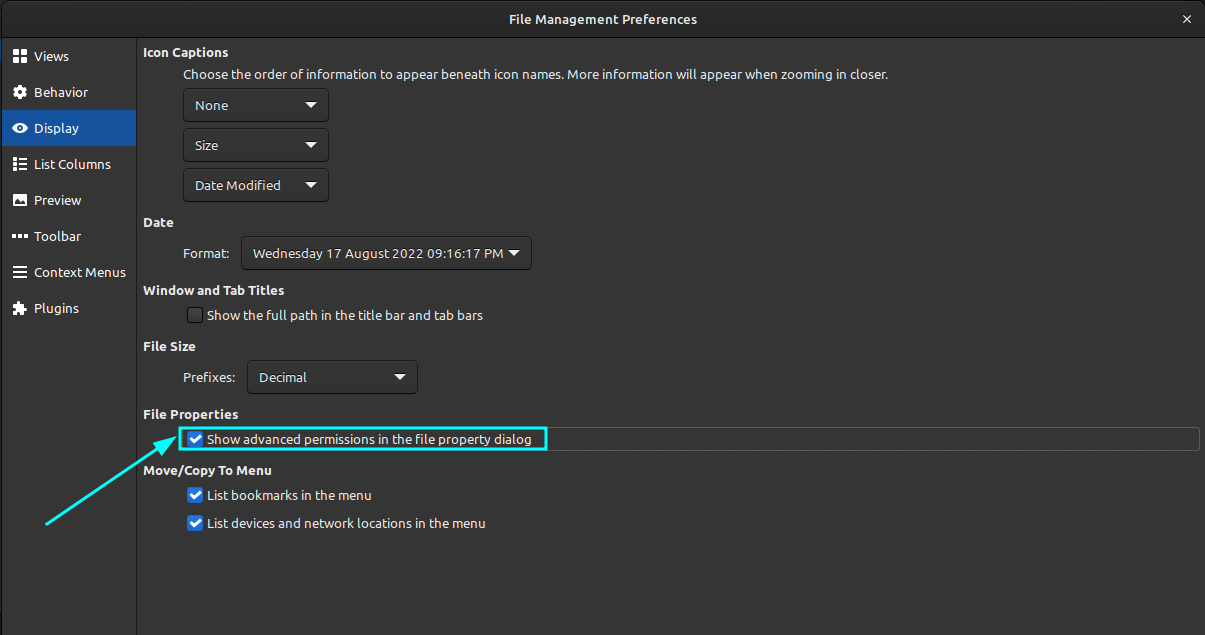
Now, instead of the old, drop-down menu interface, you get a neat-looking permission manager with a toggle button interface and more options to tweak.
11. Embed a terminal
Fancy a terminal? You can get it right inside the Nemo file manager.
Each time you change directories, a cd command is initiated and the location in the embedded terminal is also changed.
To get this function, you need to install nemo-terminal package.
sudo apt install nemo-terminalNow restart Nemo and you get an embed terminal on the top side.
12. Get the list of recently visited directories
There is the “Recent” option in the places section, where you can see the recently accessed files. But what about the recently visited folders?
In Nemo, on the top left, right-click on the back arrow to get the list of previously visited folders.
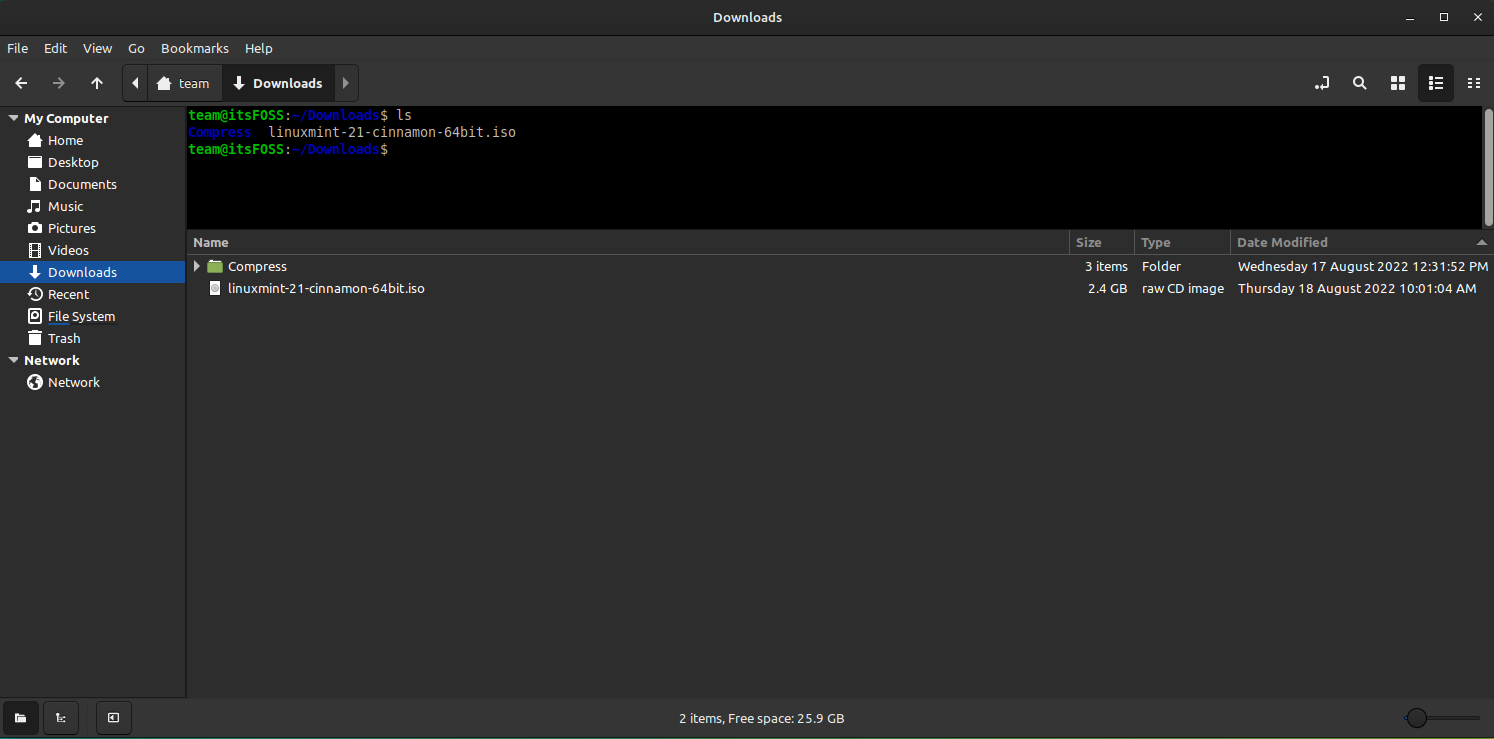
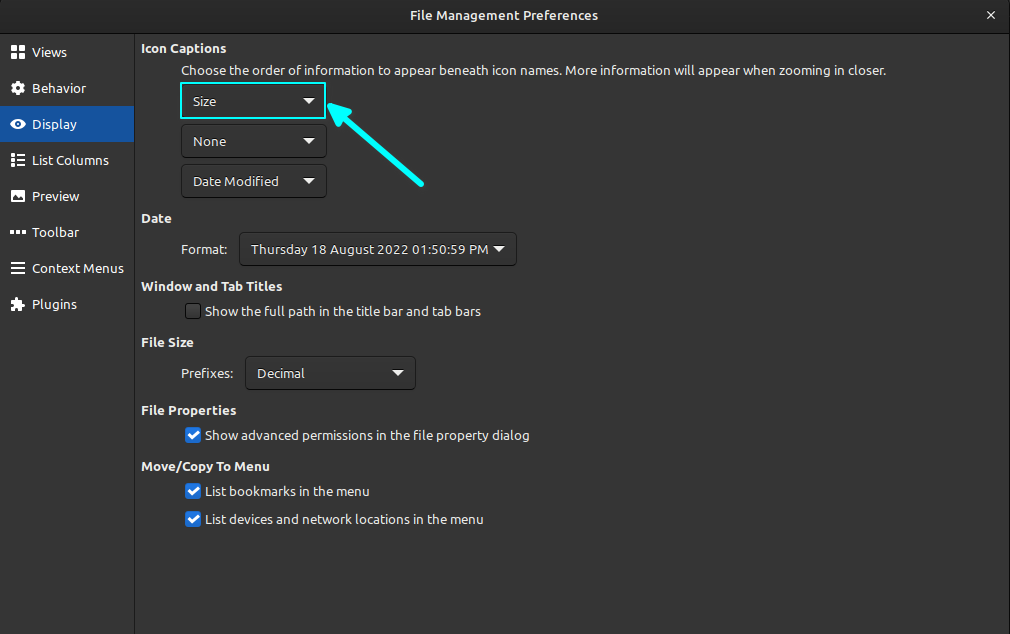
13. Show the number of items in folders
You can show how many files and folders are inside a folder in Nemo File Manager.

It is a built-in feature. Go to Edit > Preferences > Display and select Size as shown in the screenshot below:
14. Nemo media columns
This is a small addition, useful only if you use the ‘List View’ in Nemo. It provides additional column options in the list view.
To get this feature, you need to install nemo-media-columns:
sudo apt install nemo-media-columns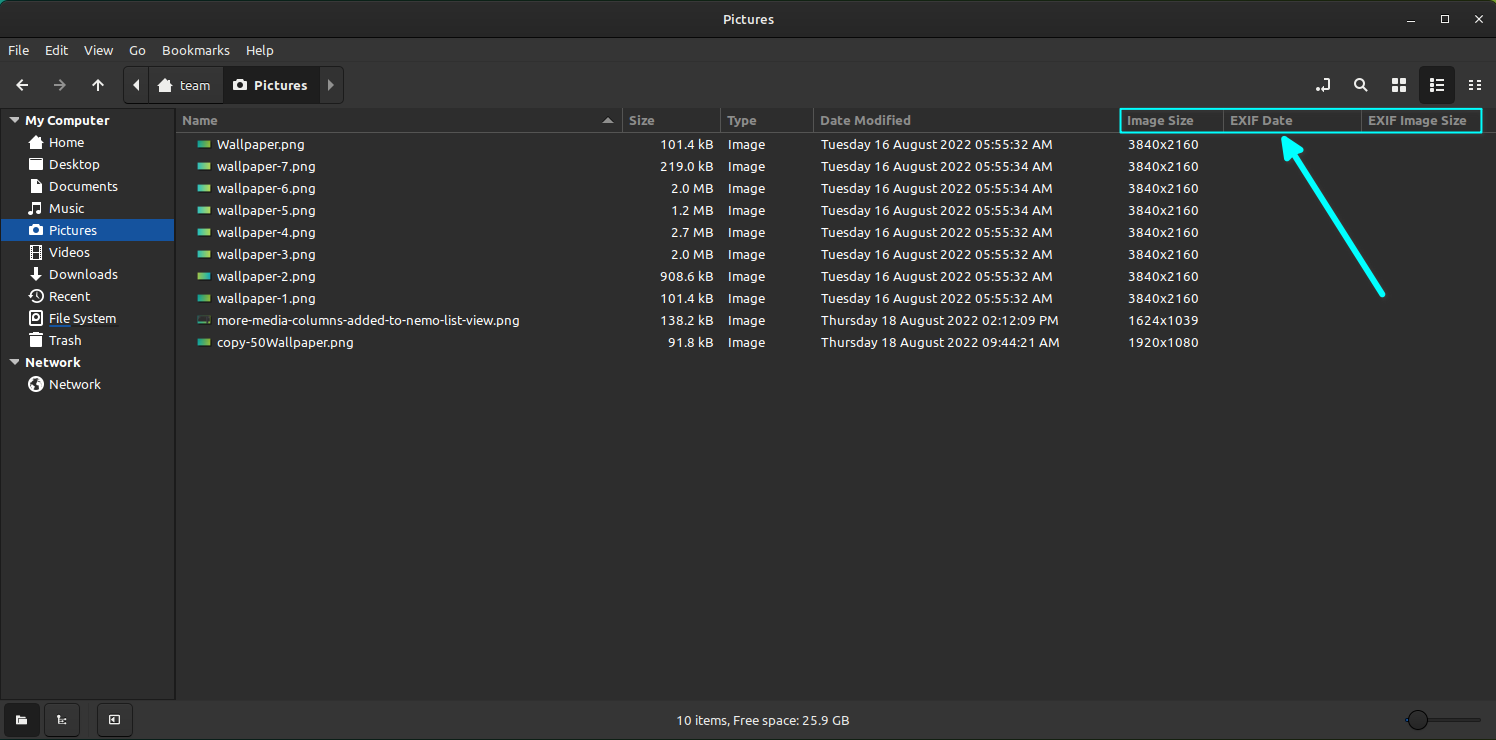
15. Nemo Scripts and Actions (for expert users)
Here are a few advanced features that enhances the overall function of nemo file manager by adding user defined functions.
Nemo Scripts
With this feature, users can create their own shell scripts for certain functionality they wish and embed them into the right-click context menu.
You need to save your shell scripts in ~/.local/share/nemo/scripts directory. With the help of tools like zenity, you can even give a GTK interface for your script.
Let me show an example.
Below is a script adding a color palette to select colour and copy the colour to copyq clipboard manager. Save the file with name Color in the above-mentioned directory and give it executable permission. Copyq and Zenity should be installed.
#!/bin/bash
name=$(zenity --color-selection --show-palette --title Color\ Select)
copyq add $name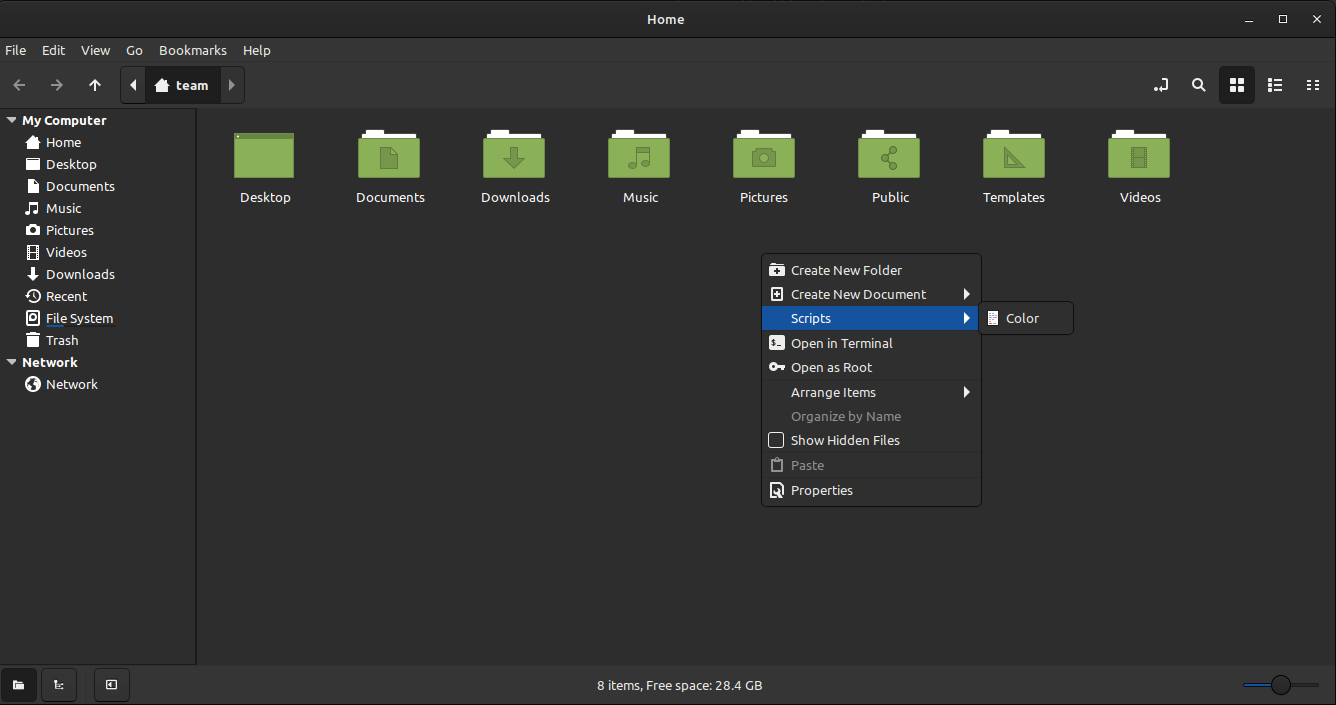
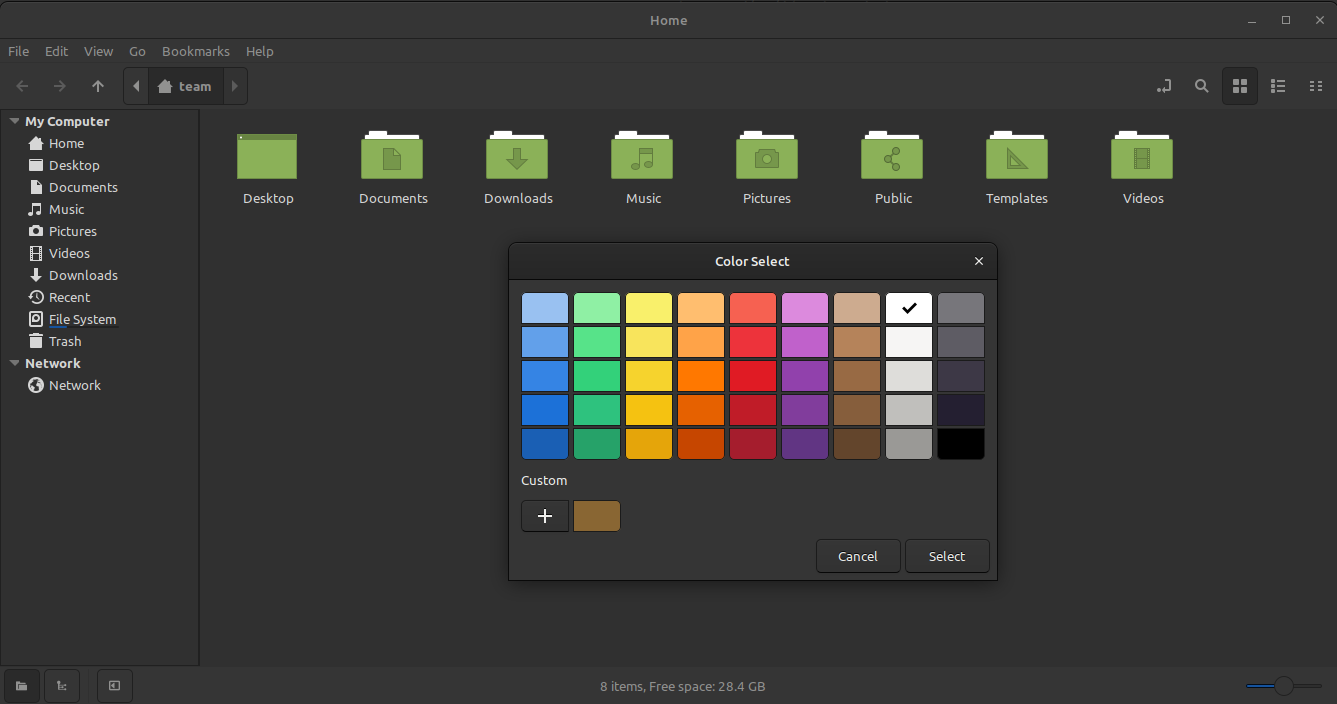
The selected color code will now be accessible from the clipboard.
Nemo Actions
This is similar to Nemo Scripts. Here, you can define a script in the form of a key-value pair for additional functions over selected files.
The files should have extension .nemo_action and they should be located in ~/.local/share/nemo/actions
Here is a snippet of code provided in the Linux Mint Community. It creates an option to reduce the image size by 50%.
Save this script as reduce_50.nemo_action in the above-mentioned directory and you will find the option in right-click context menu
[Nemo Action]
Active=true
Name=Reduce Image 50%
Comment=Reduce the size of the image by 50%
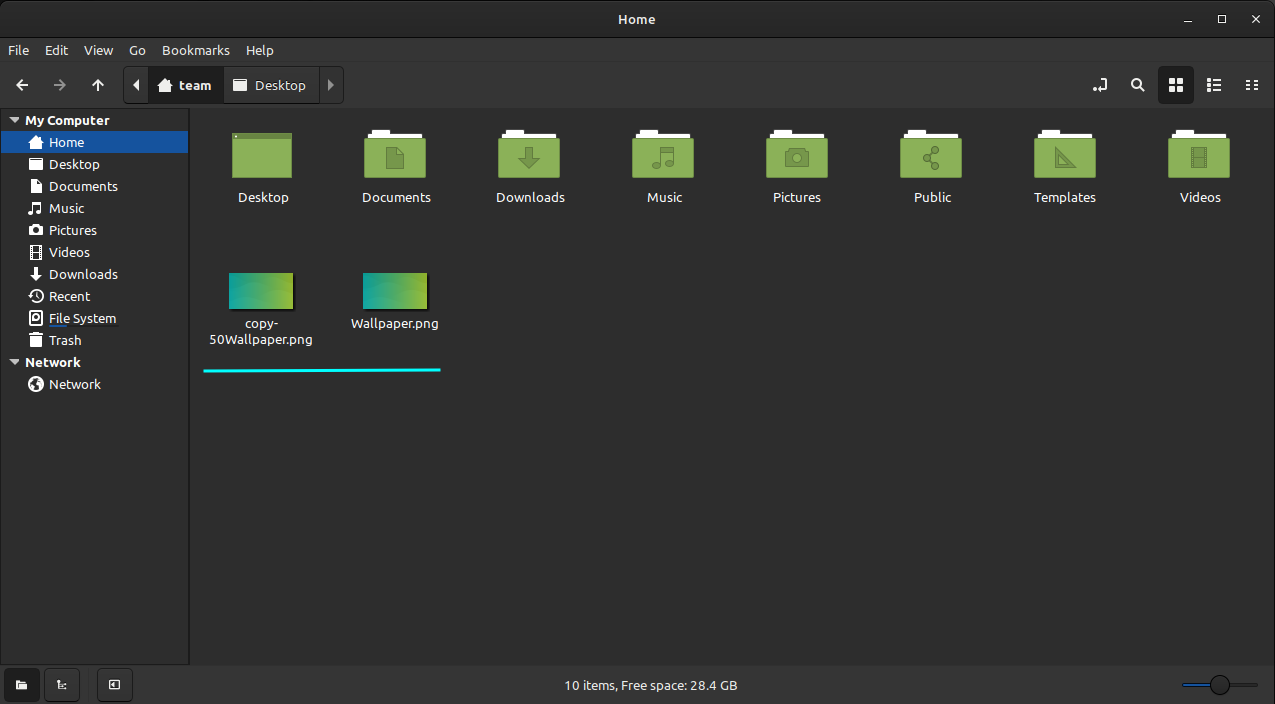
Exec=ffmpeg -i %F -vf scale=iw/2:-1 %P/copy-50%f
Icon-Name=image
Selection=any;
Extensions=jpg;jpeg;png;bmp;gif;tiff;raw;
Terminal=true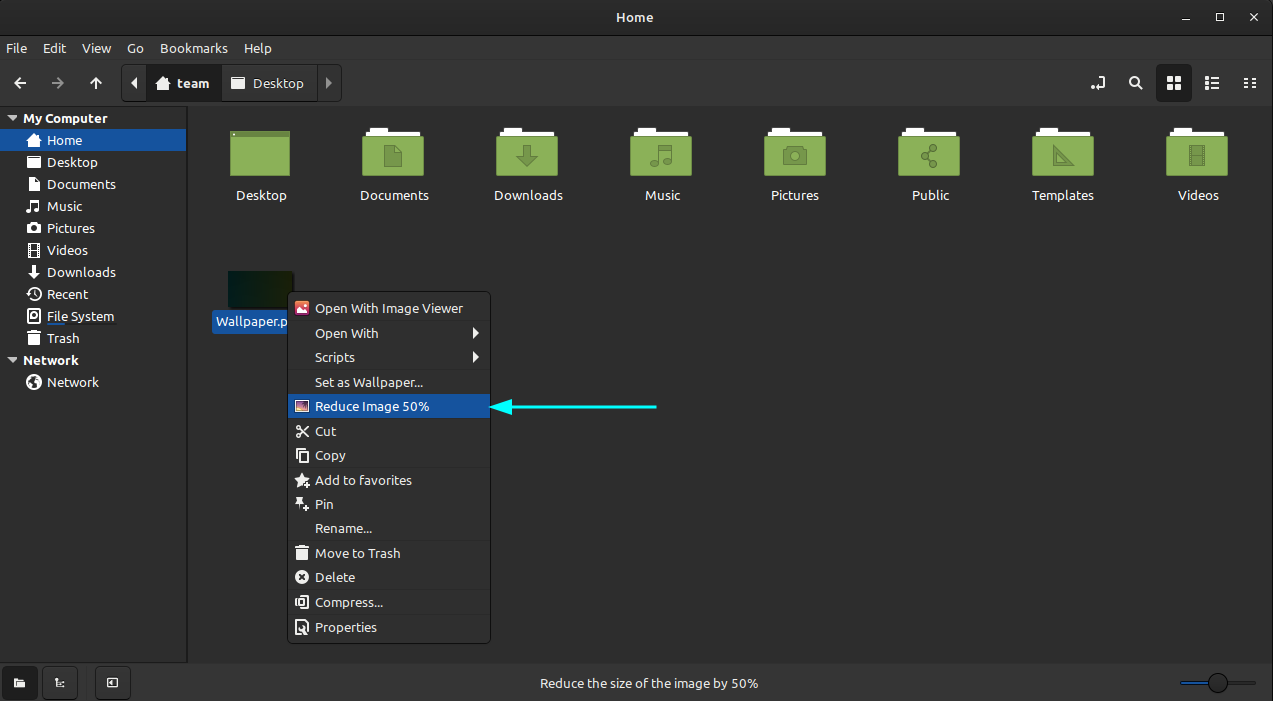
You can see the resultant file with the slightly modified name.
This way, you effectively enhance Nemo file manager functionality as per your requirement.
More tweaks and extensions
Apart from numerous extensions, there are other built-in features in Nemo like integrations with cloud services, other handy right-click menu items etc.
It is not necessary for you to install and use all of the features mentioned above. You can handpick those that suit your needs.
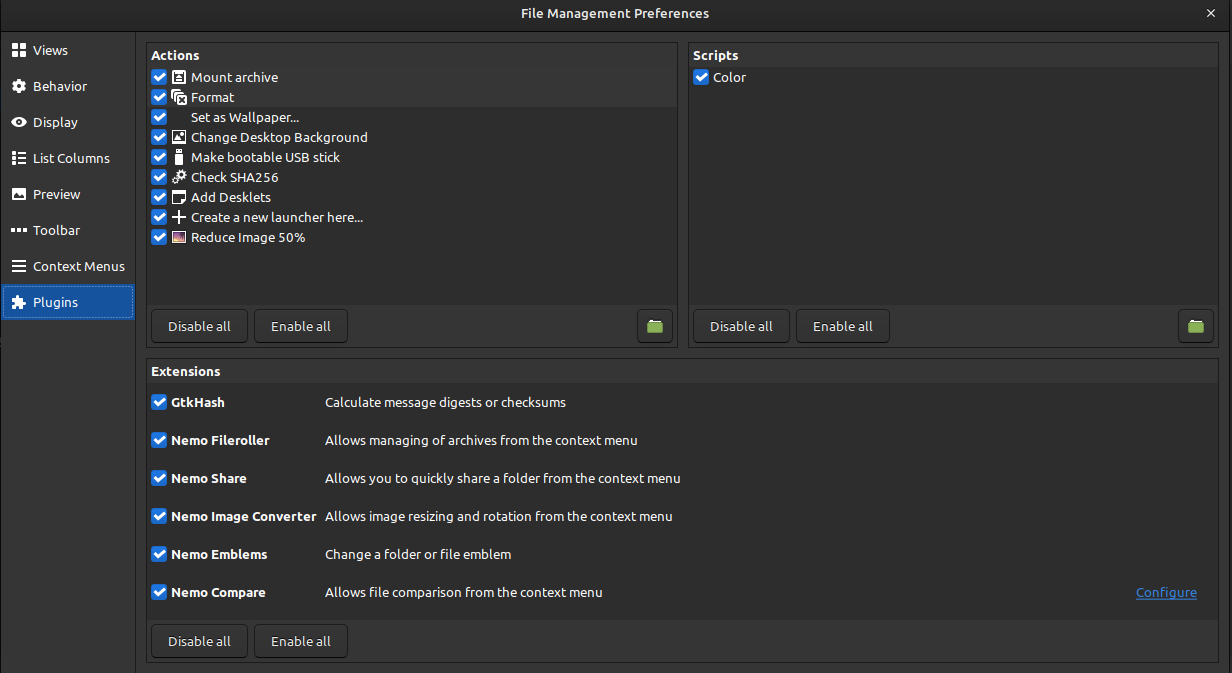
You can also toggle on/off any of the installed extensions by going to Edit > Plugins (or Alt + P).
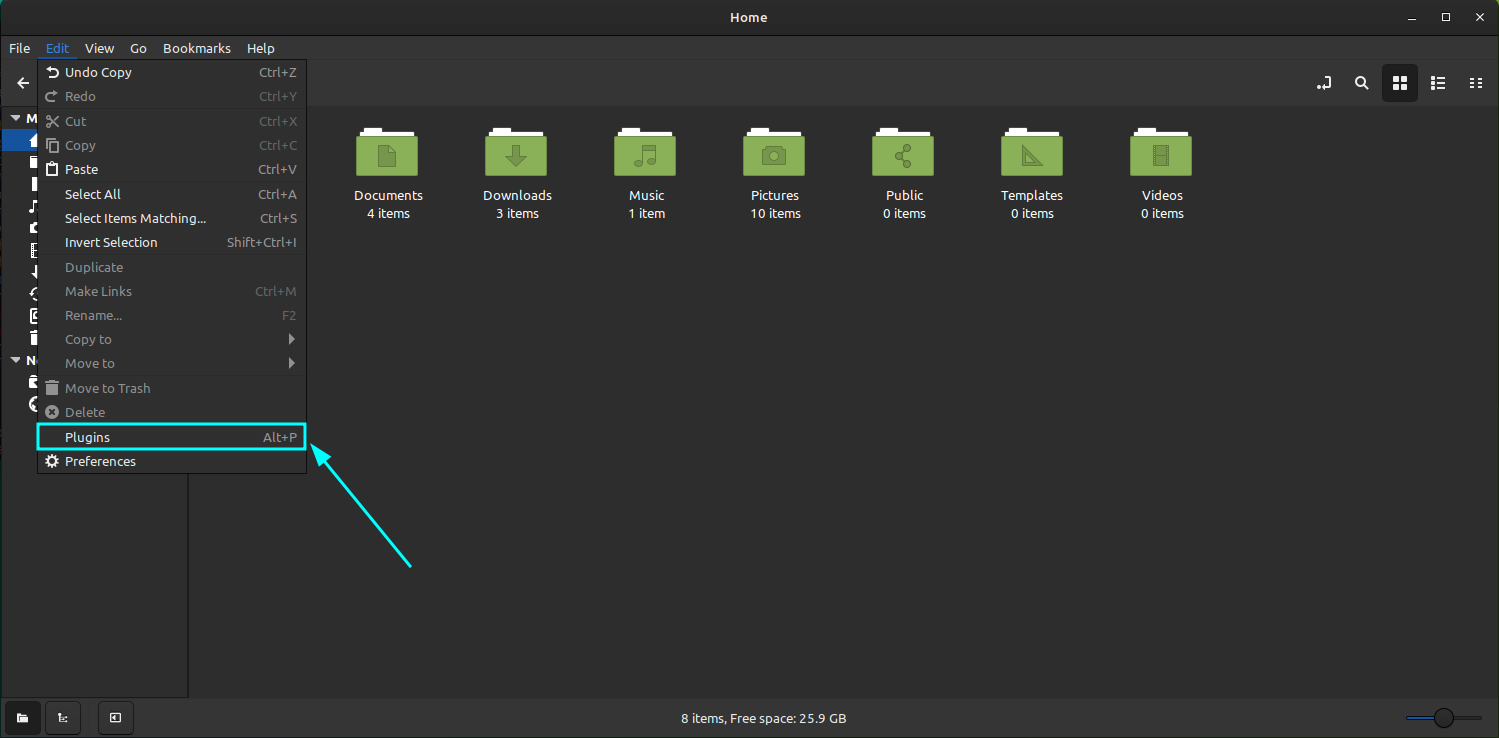
Here, you can manage your installed plugins, actions, scripts etc. This enables you to activate or deactivate certain features without the hassle of installing/uninstalling packages. Every feature can be toggled on or off as needed. Just restart Nemo to get the effect.
When we last published the Nautilus tweak article, a few readers requested a similar one for Nemo. And hence this article came into existence.
 Abhishek Prakash
I hope you find the tweaks interesting. If you have suggestions or questions, please leave a comment.
It's FOSS turns 13! 13 years of helping people use Linux ❤️
And we need your help to go on for 13 more years. Support us with a Plus membership and enjoy an ad-free reading experience and get a Linux eBook for free.
To celebrate 13 years of It's FOSS, we have a lifetime membership option with reduced pricing of just $76. This is valid until 25th June only.
If you ever wanted to appreciate our work with Plus membership but didn't like the recurring subscription, this is your chance 😃

