

There is little doubt that LibreOffice is the best open source office product. While you might use it for writing documents, creating spreadsheets or making presentations, you can use a few tricks to get more out of it.
Some of these ‘tricks’ might be obvious to you, while some might be surprising. It all depends on if you have used them in the past or not.
1. Extract all images from a document at once
If you have a document with multiple images then saving all those images one by one would be a tedious and time-taking task.
To extract all the images from a document quickly, save the document as HTML.
All you have to do is to click on the Save As option and then save the document as HTML, preferably in a new folder.
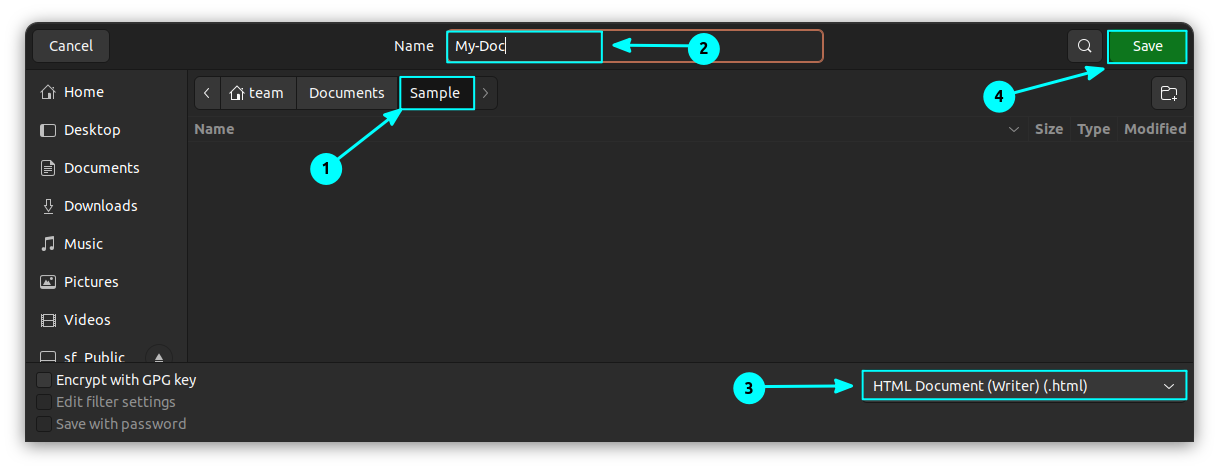
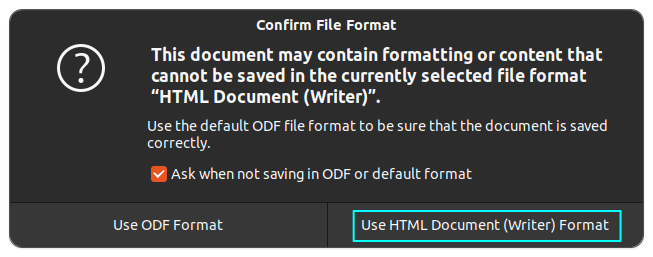
It will give you a warning but you can ignore it.
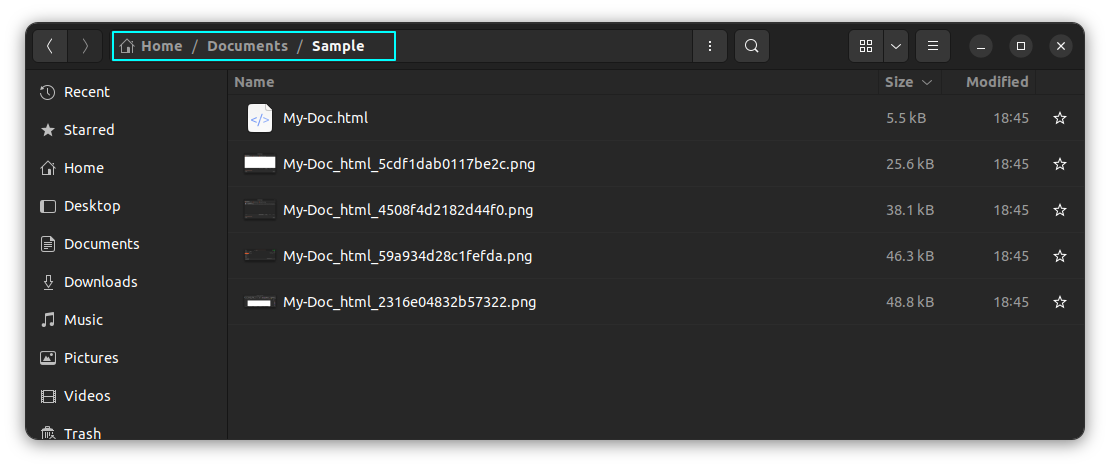
Once you save the word document as HTML, you’ll see that all the images have been extracted in the folder where you saved the HTML document.
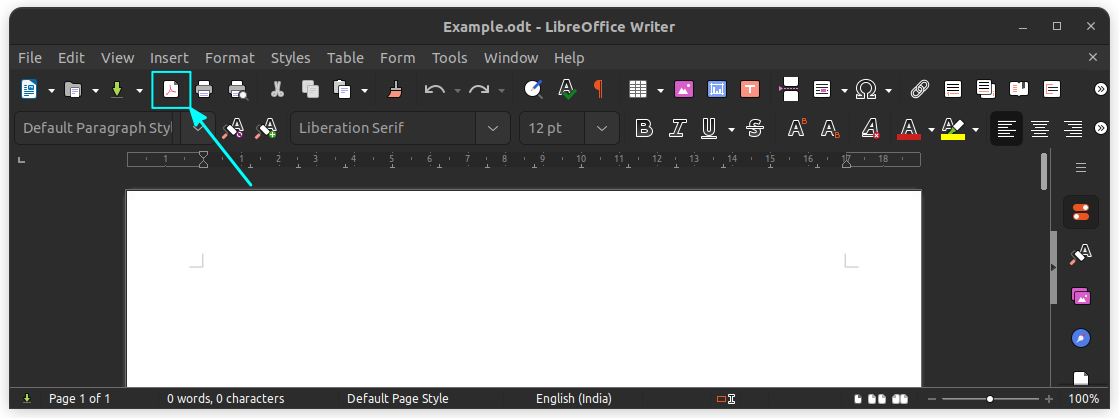
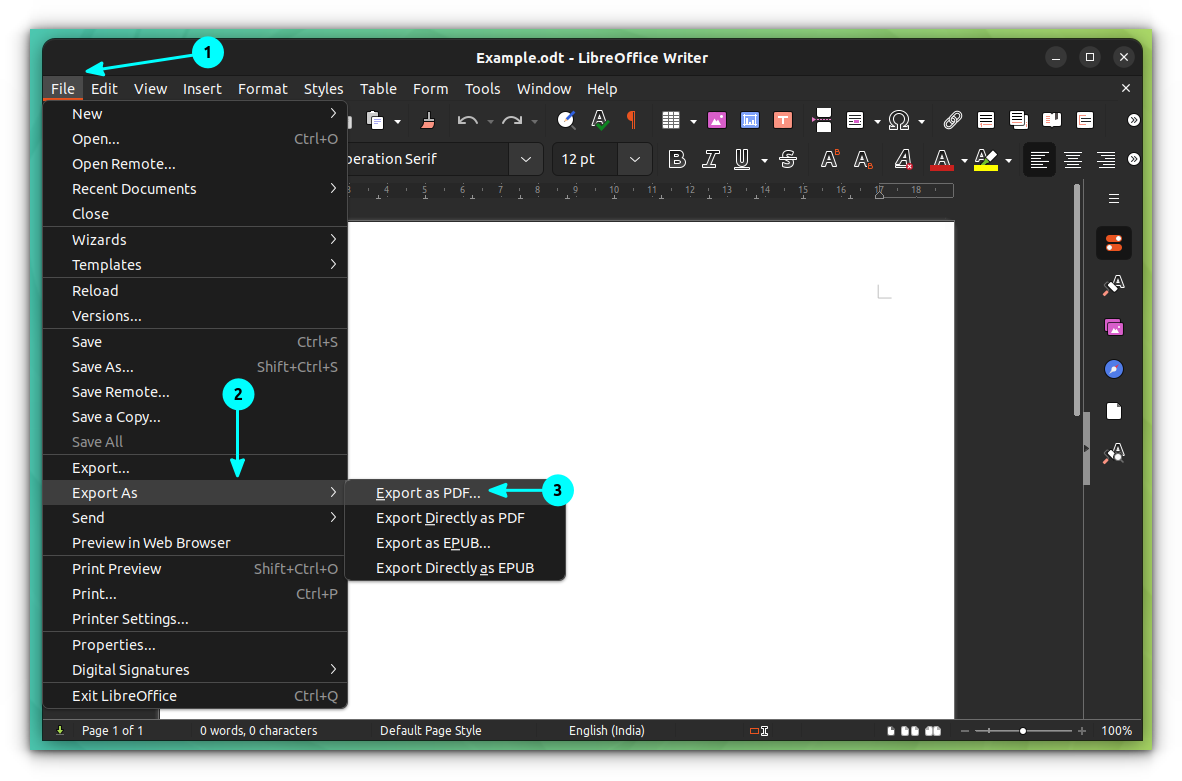
2. Save files as editable PDFs
This is a no-brainer. If you have a Word document, you can save it as PDF in one click. No external tool required for it. You can also export your presentation slides in LibreOffice Impress as PDF.
In fact, if you have to share the document with someone else who won’t edit it, use the PDF format. The main reason here is that document format gets messed up between LibreOffice and Microsoft Office. If you are sending an important document like your CV, always use PDF.
Of course, you should also save a copy in the regular document format for future editing. And this is where you can save some time by opting for the Hybrid PDF.
A Hybrid PDF embeds the ODF file (your document in LibreOffice format) in the PDF. It will look like a normal PDF, but you can open it in LibreOffice Writer and edit it like normal ODF document.
To enable this option, go to File Menu → Export as PDF.
Then check the option to Embed Open Document File.
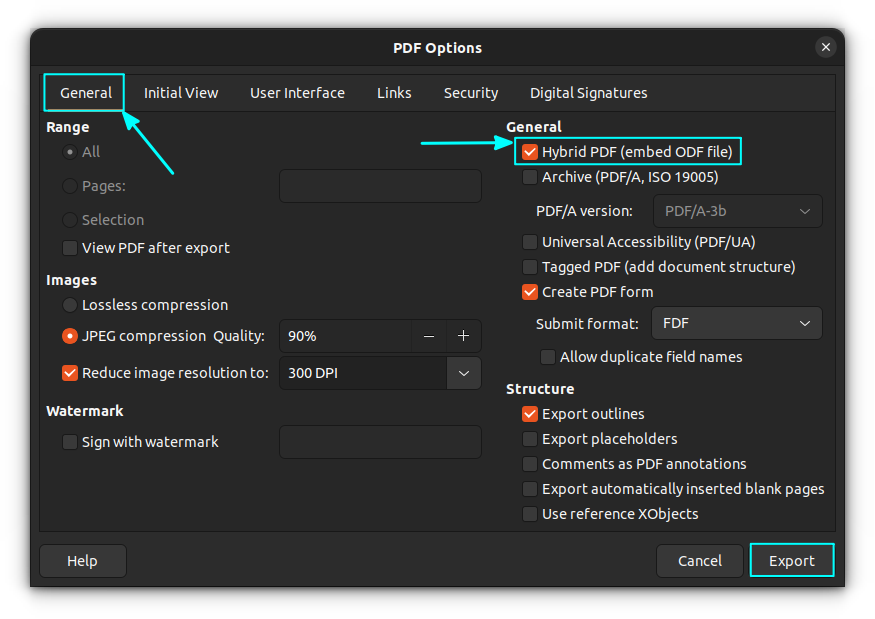
The size of the hybrid PDF will be more than that of the normal PDF file. However, you don't need to save files separately in ODF and PDF formats. You have one single file and that can be easily editable.
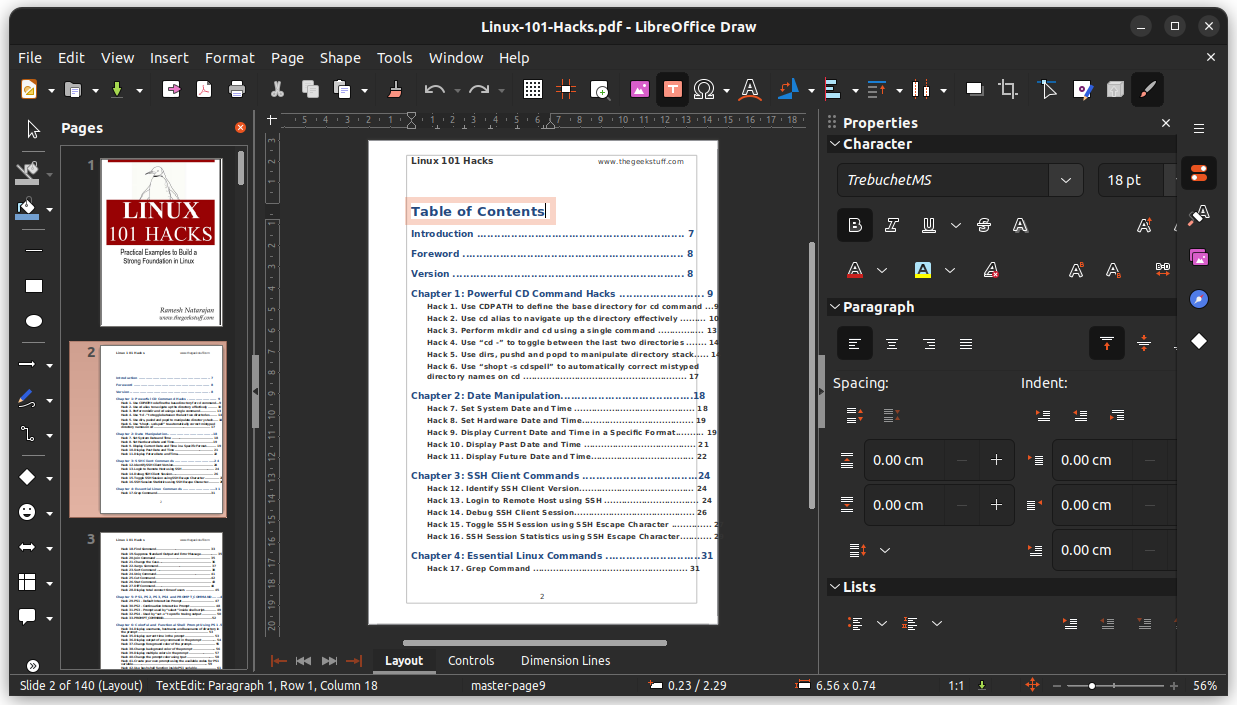
3. Edit PDF files in LibreOffice
Yes, you can totally do that even if it is not the Hybrid PDF you saw in the previous section.
The PDF editing works quite good if the PDF was generated from a text file.
You can use LibreOffice Draw tool for this task. It comes bundled with LibreOffice suite. Just open the PDF file in Draw, and you’ll see the option to edit the text.
You can also edit PDFs in LibreOffice Writer using OCR extension. The next entry explains what are extensions in LibreOffice.
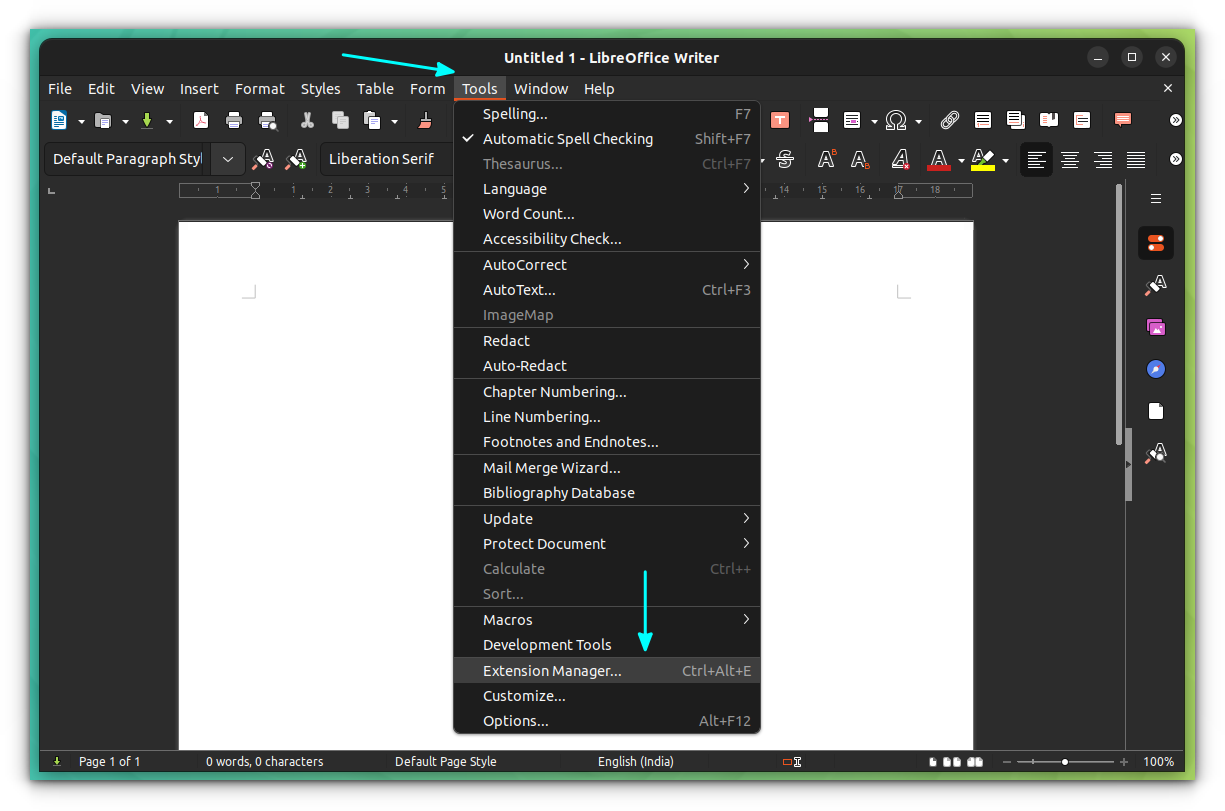
4. Find and use extensions to enhance your LibreOffice experience
An extension is basically a tiny piece of code that you can install in LibreOffice to get additional features.
For example, you can install MultiSave extension to save a document in OpenDocument, MS Office and PDF formats in a single click. Saves you time in exporting them one by one in different formats.
Extensions are often the overlooked part of LibreOffice. Perhaps because people are just not aware that such a thing even exist.
You can go to LibreOffice website and browse through the available extensions. You can download the extension in OXT file format.
In LibreOffice go to Menu ⇾ Tools ⇾ Extensions Manager.
You’ll see if there are already installed extensions here. Click on Add and browse to the downloaded extension file. It will be added and enabled immediately.
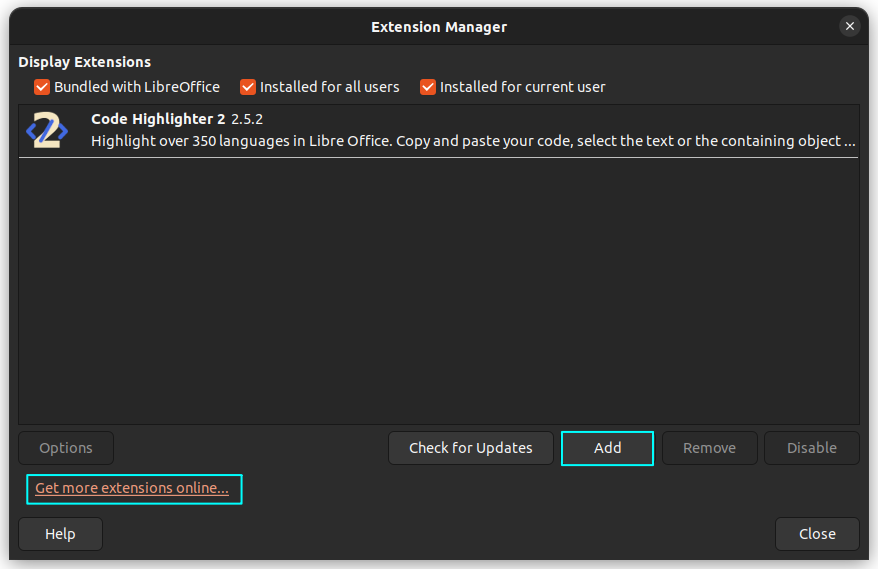
Also, you can click on “Get more extensions online” to download from official website.
However, to see the changes in effect, you’ll have to restart LibreOffice.
5. Password protect a document
Password protecting a folder in Linux might be a tricky task but password protecting a document in LibreOffice is literally a child’s play.
All you have to do is to use the ‘save as’ option while saving the document.
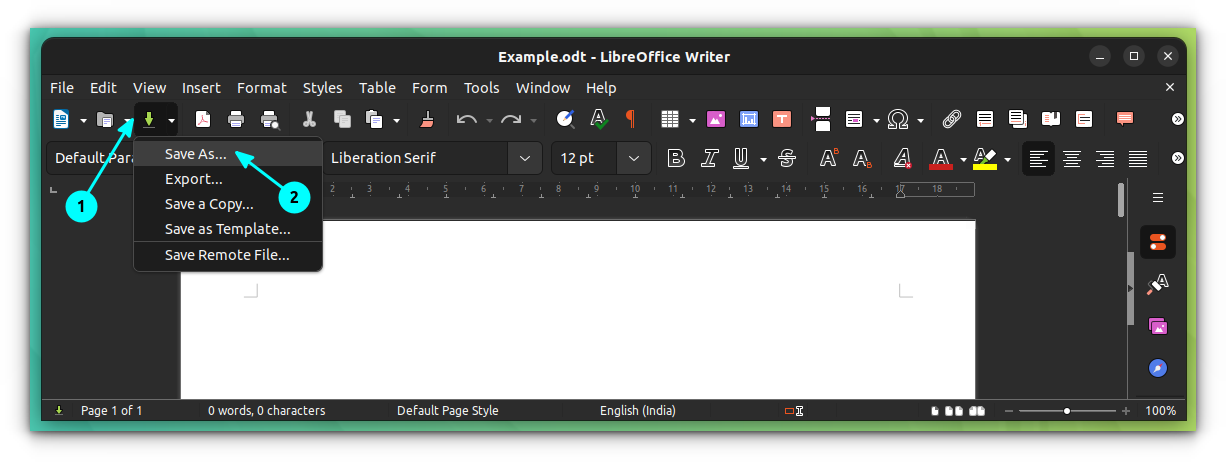
And when you are doing that, just check the option of ‘save with password’.
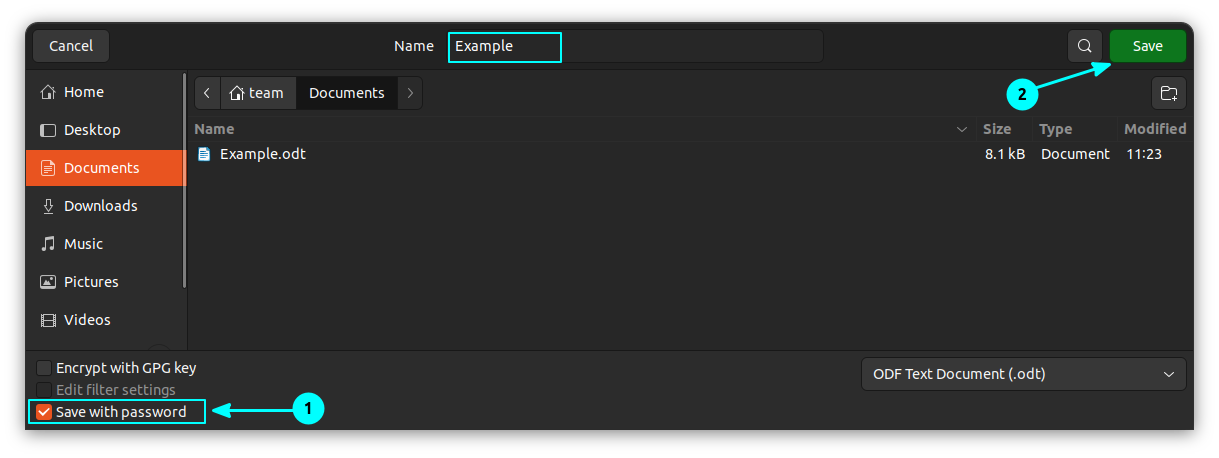
It will ask you to enter a password and confirm it.
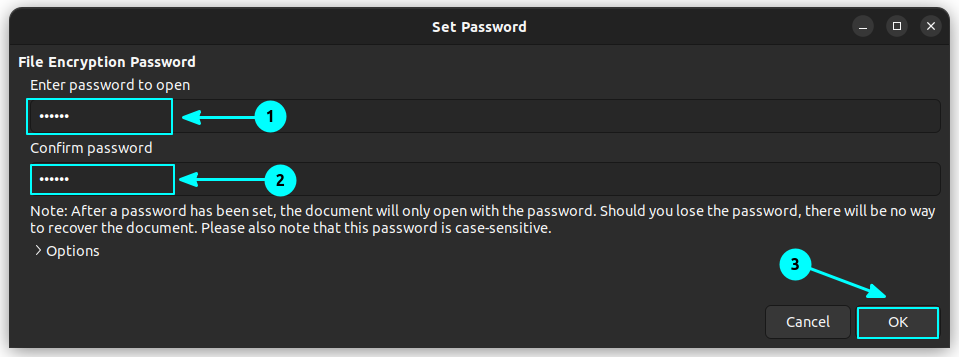
Now when you try to open this file, it will ask you to enter the password. This will be the same if you send this to someone who doesn’t use Linux or LibreOffice.
6. Create read-only documents in LibreOffice
If you don’t want others to edit the document, you can create the document in read-only format.
Additionally, you can password protect it so that anyone can read it but not edit it without the password. You can also create a read-only document without a password.
To create a read-only document, you’ll have to follow the exact same steps as you did with password protecting a file.
Select ‘save as’ and then check ‘save with password’ option. In here, click on the Options to show more options.
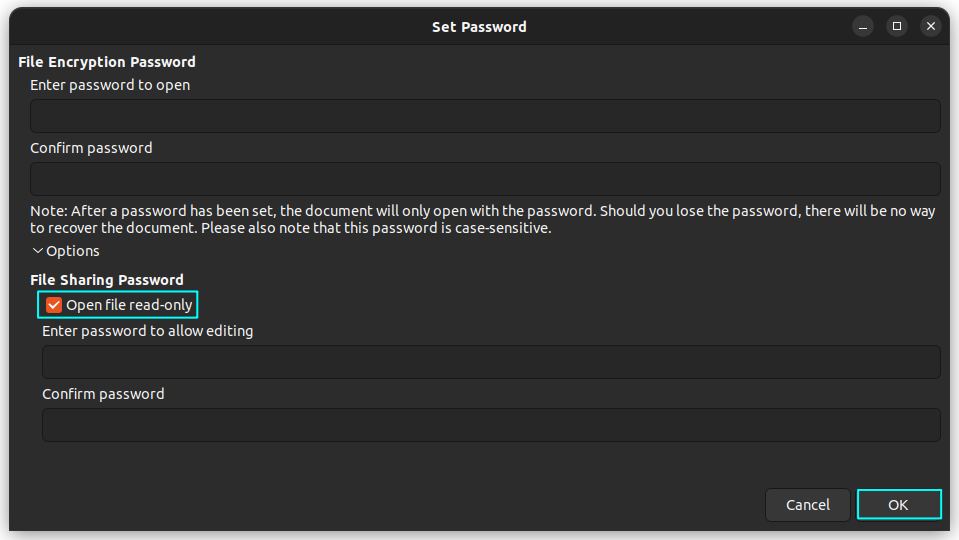
The first password field (under File Encryption Password) is to lock the file from opening altogether (as you saw in the last point). The second password field (under File Sharing Password) is to lock the file from editing.
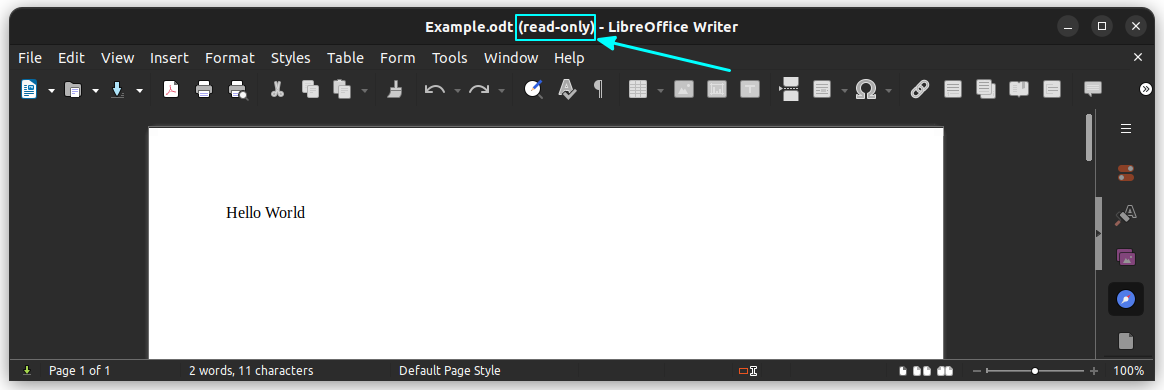
You can choose to not set any passwords at this step. This way your document will show the “read-only” notification.
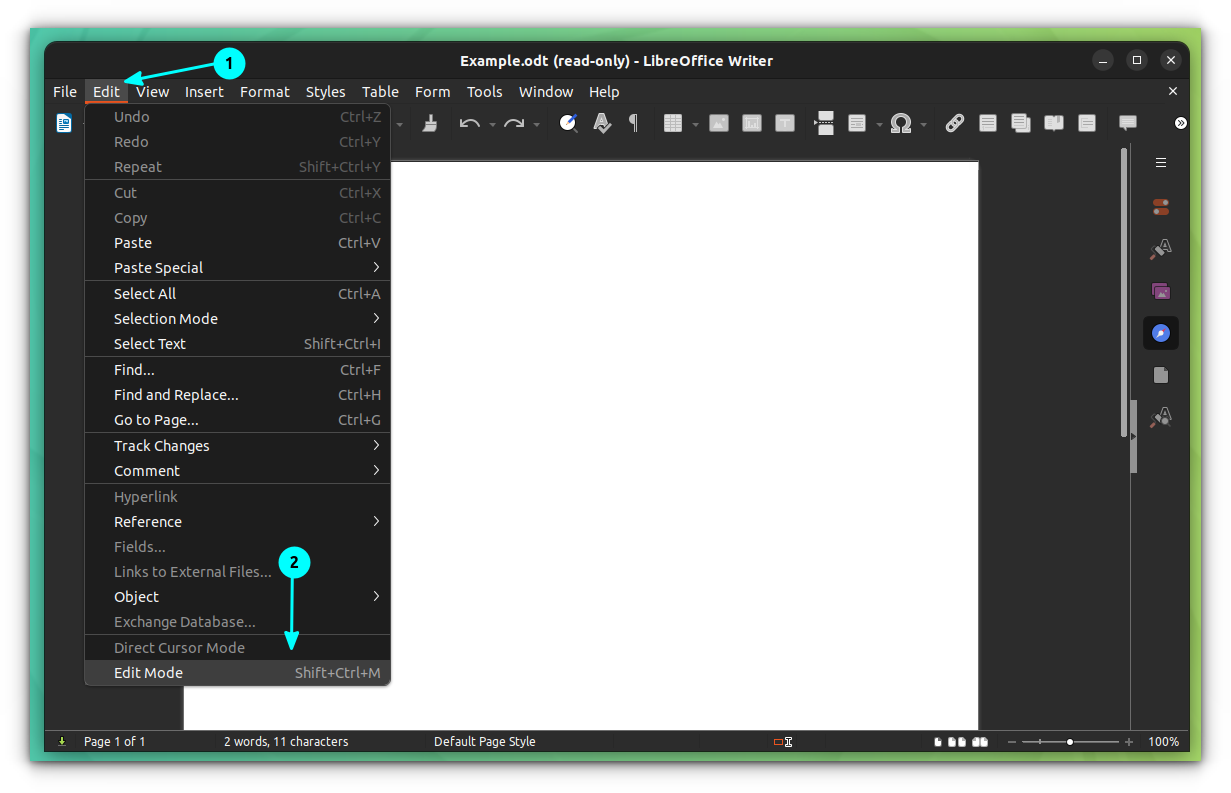
To edit a read-only document, you either press SHIFT + CTRL + M, or click on Edit ⇾ Edit Mode.
7. Make LibreOffice Writer remember your last cursor position
By default, LibreOffice Writer opens at the beginning of every document. It’s not a big deal unless you are working with long documents where it helps to know where you were editing the last time.
With a simple trick, you can make LibreOffice remember the last cursor position in a document.
Here are the steps to make LibreOffice remember last cursor position:
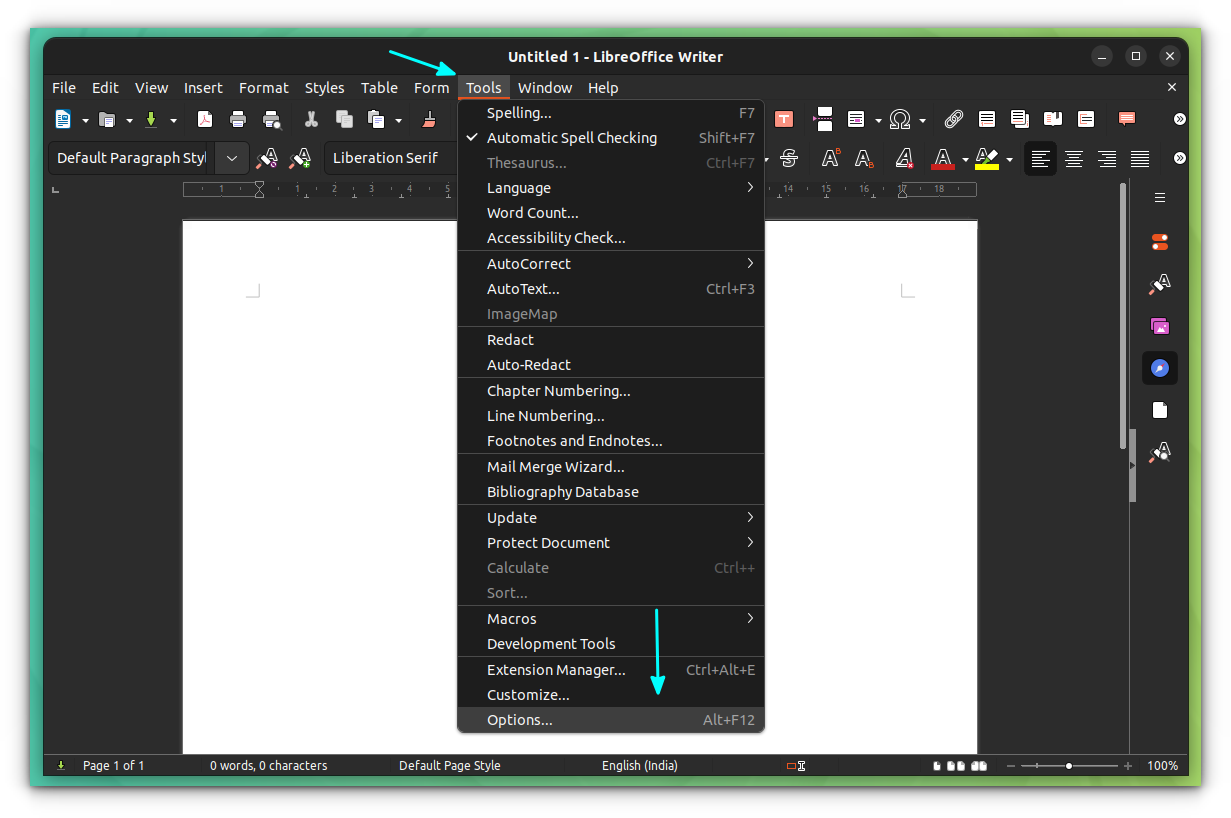
In the menu, go to Tools ⇾ Options.
From the left pane, select User Data. In here, add your first name and last name. It could be anything. You don’t have to match it with your account name.
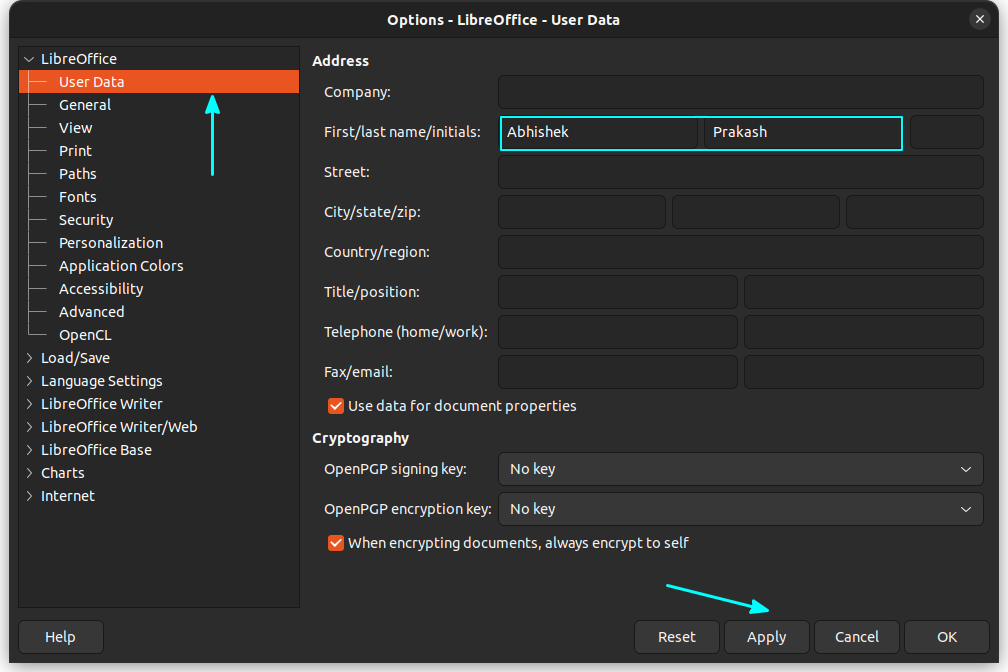
Once done, save and exit. That’s it.
Now when you open a document in open document format, you’ll see that it opens at the last editing point instead of the beginning of the document.
But what difference does the user data make here? Well, it’s a way for LibreOffice to know that the document is being opened by the same user who was editing it last time. This helps in the scenario where there are multiple user accounts on the same computer.
8. Convert existing text into table
Most people add table first and then enter the data. But, you can do the opposite too.
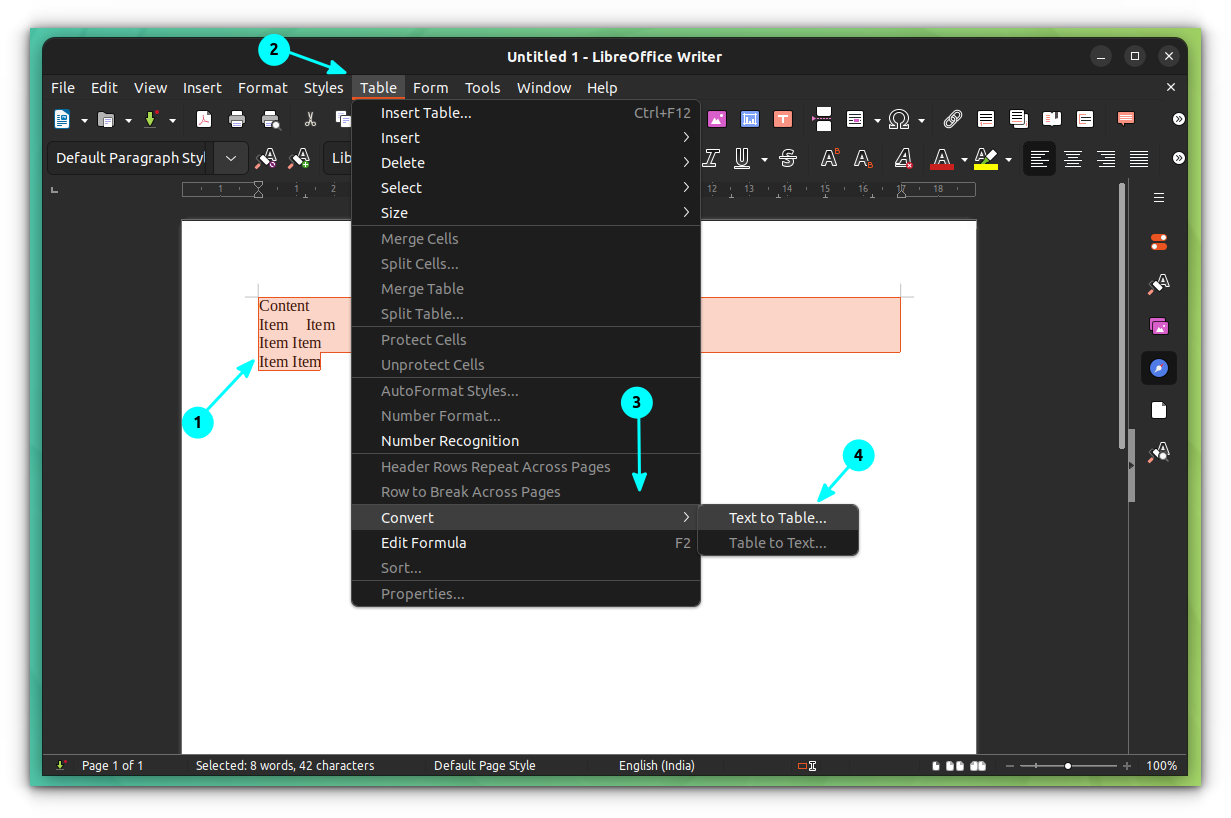
First, enter the data that you want to convert to a table. The separator can be anything, like tab space, semicolon etc.
Once ready, select the whole text. Go to the Table menu on the top and then go to Convert and choose Text to Table.
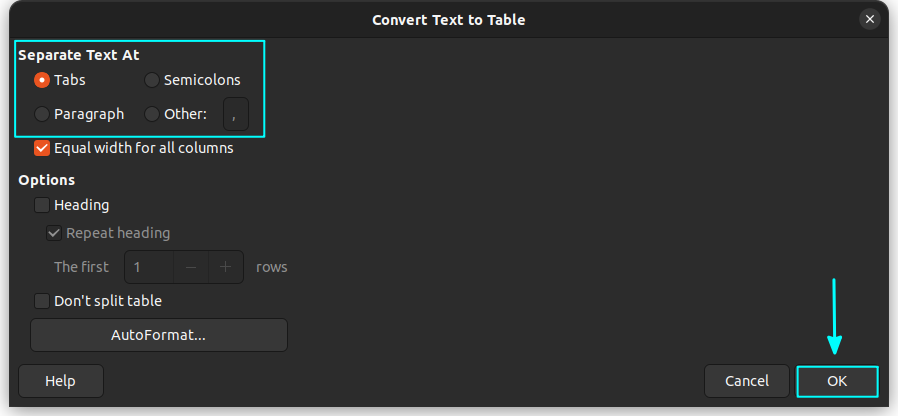
From the dialog box, select the required separator and press OK.
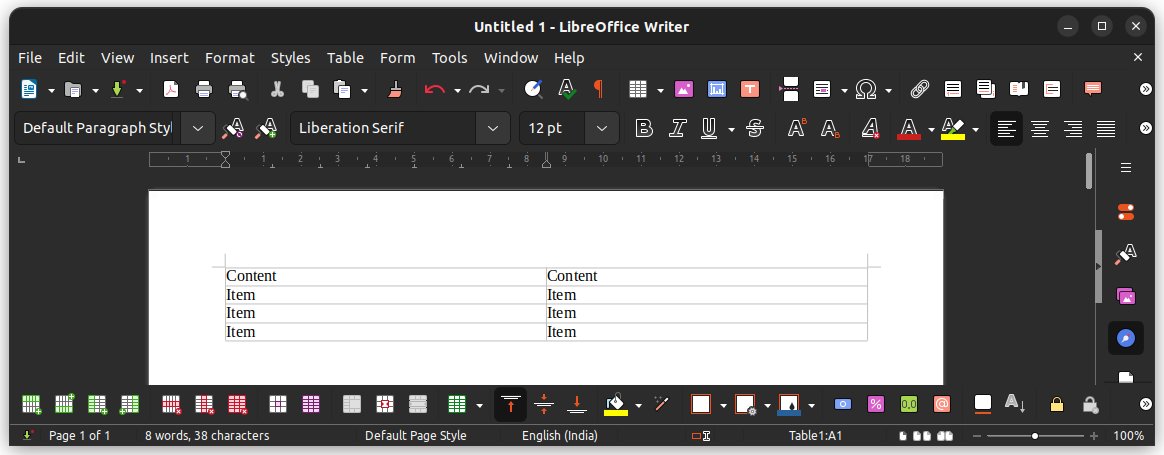
That's it. The text you have entered will be a neat table now. Try experimenting with the other options like, heading row etc.
9. Embed fonts in documents
Say, you have created a document using a special type of font. If you want another person to view that file, exactly like you do, then that person should have the font you used installed in their system. It's not convenient.
So, LibreOffice can embed the font along with the document, so that anybody, who has the document will see it exactly like you intended.
First, on the document, click on File ⇾ Properties.
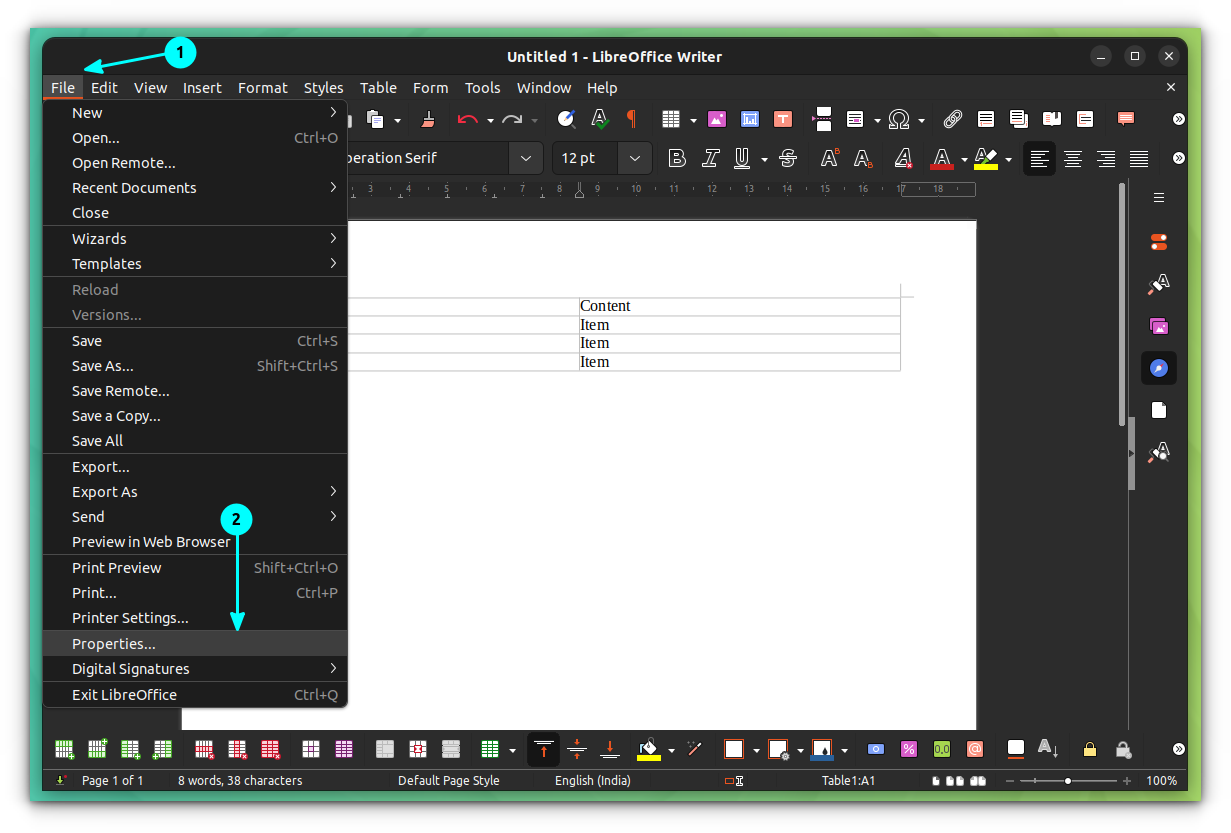
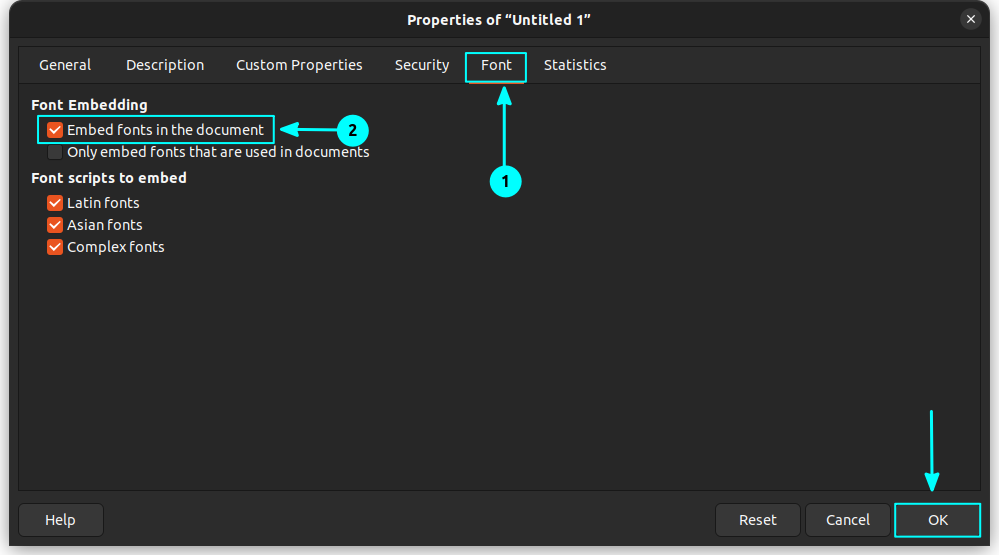
Now, go to the fonts tab. Here, you can embed either all the fonts available in LibreOffice, or just embed the fonts that are used in that particular document.
If you want to select all the fonts to embed, check on the “Embed fonts in the document” option.
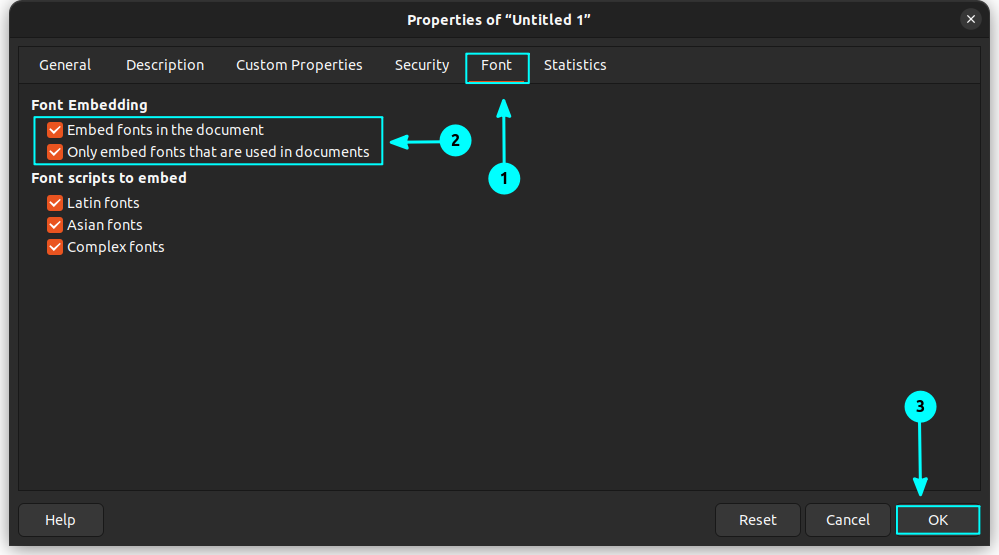
Or, if you want to embed only the used fonts, select both options.
Save the document, of course.
10. Check accessibility in LibreOffice
Accessibility in documents is very crucial. A screen reader friendly document is essential for the visually impaired people.
In LibreOffice, you can check if your document does not have accessibility issues.
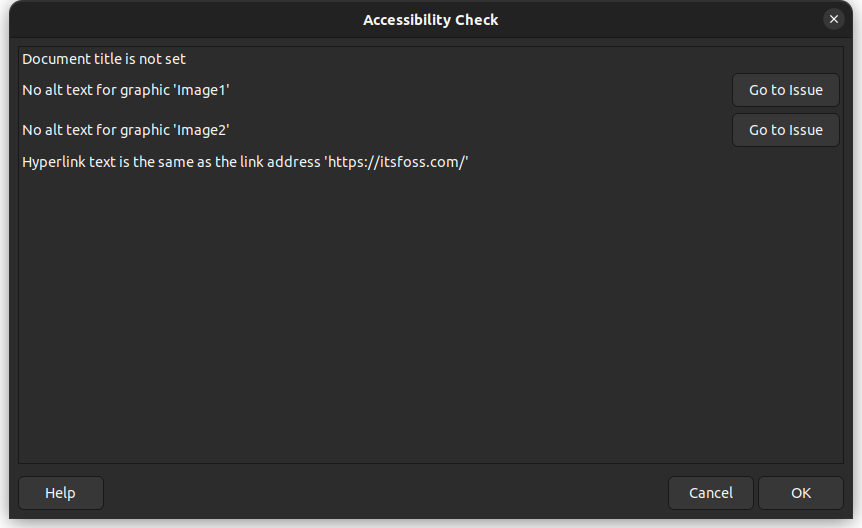
In a document, go to Tools ⇾ Accessibility Check.
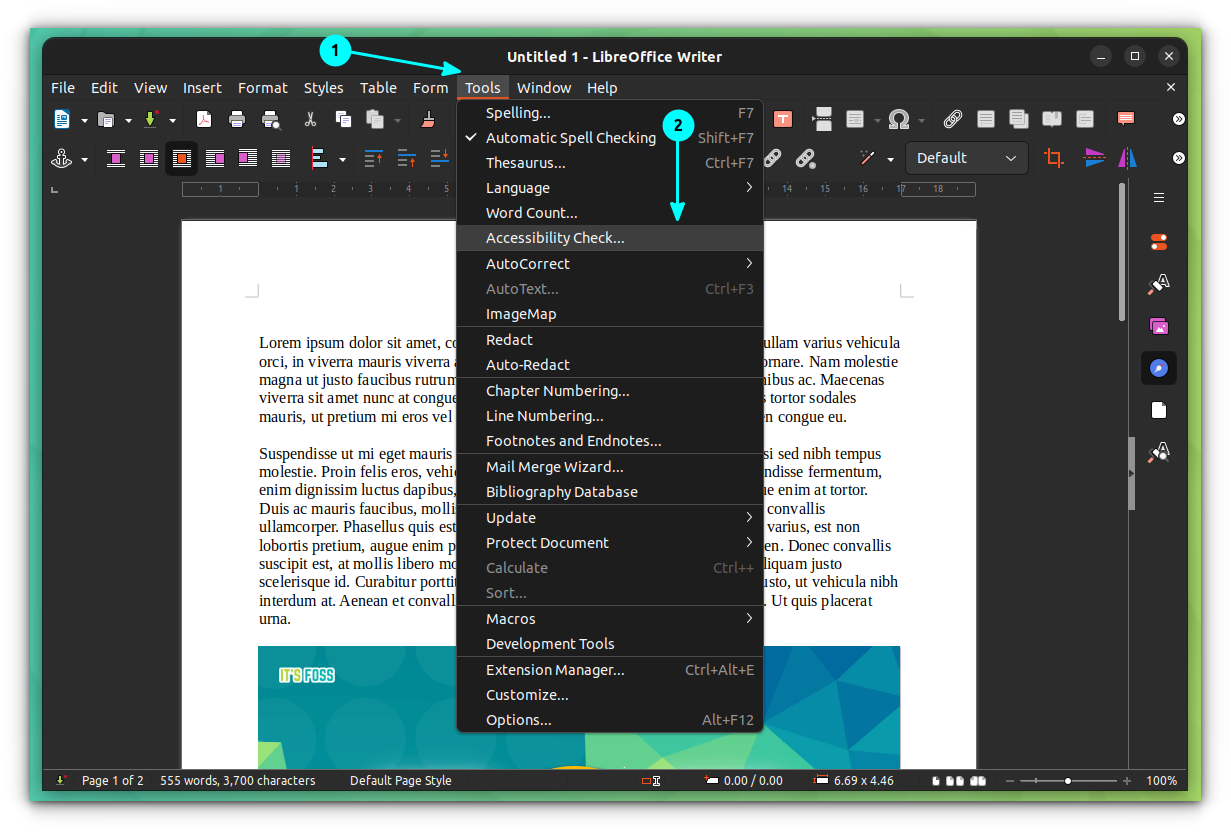
This will open a dialog, with all the accessibility issues on your document and a button to go to that particular issue.
11. Change the icon set
Don't like the default looks of LibreOffice? You can change the various icons you see in the menu and other places in LibreOffice.
First, select Tools ⇾ Options. From the new dialog, go to View tab and then change the icons as needed.
12. Automatic scroll using middle mouse button
If you are working on long documents and want to skim through it, no need to scroll continuously. Use auto scroll instead.
By default, middle click in LibreOffice is paste clipboard. You can change it and use it for continuous auto scrolling.
Go to Tools ⇾ Options ⇾ View. From there, under Mouse section, set Middle Button behavior to Automatic Scrolling.
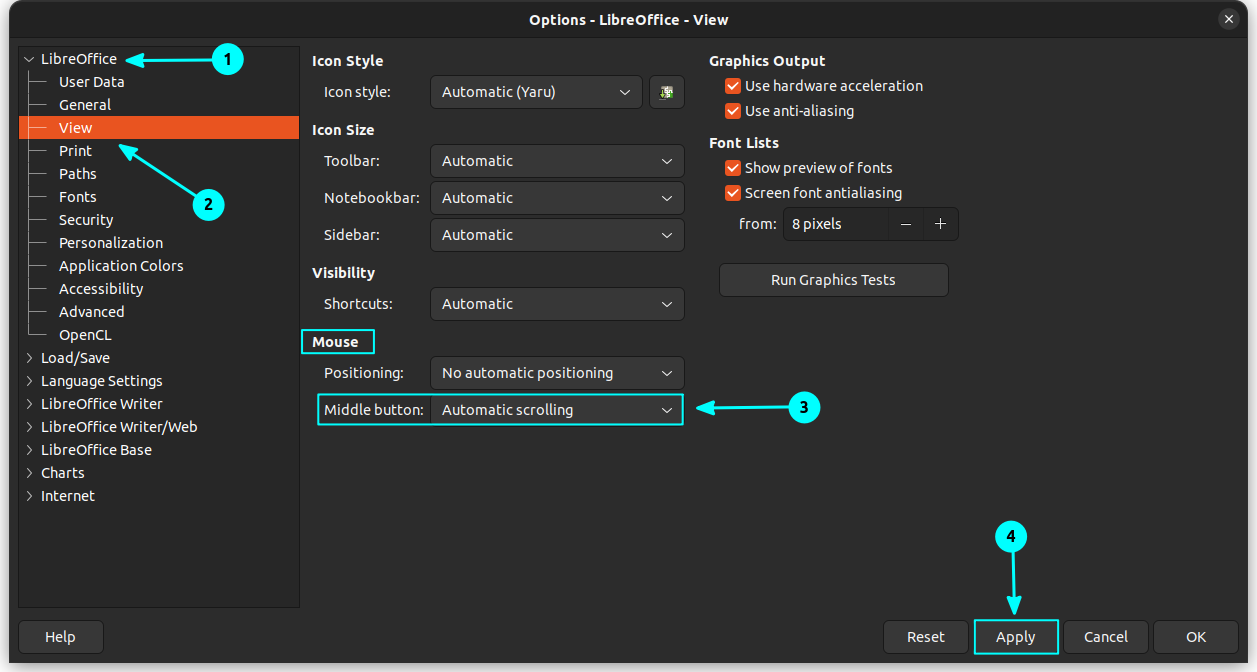
Now, if you middle-click on a document, a two-sided arrow appears and scrolls in the direction of your choice.
13. Customize the context menu, tool bar and appearance
Configure the appearance of the toolbar and other sections for minimal clutter.
Change user interface
Click on View ⇾ User Interface
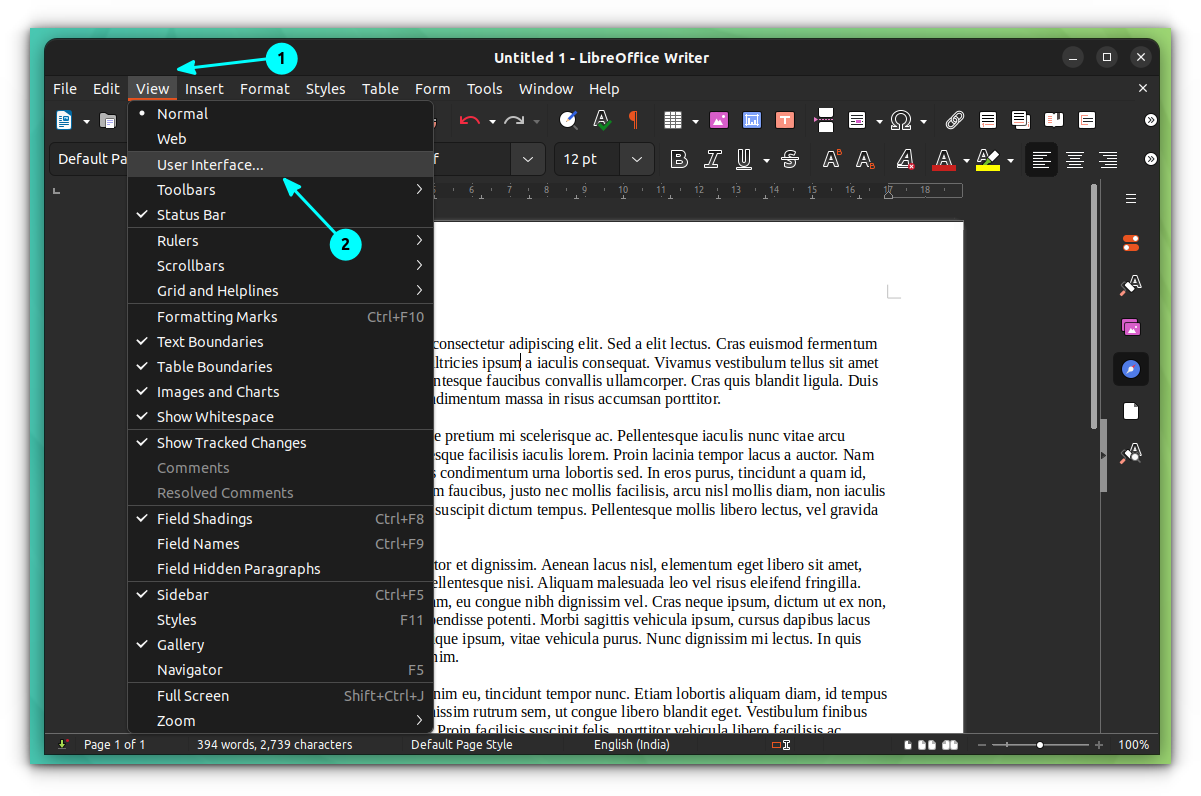
Set the required user interface, like tabbed, sidebar, etc.
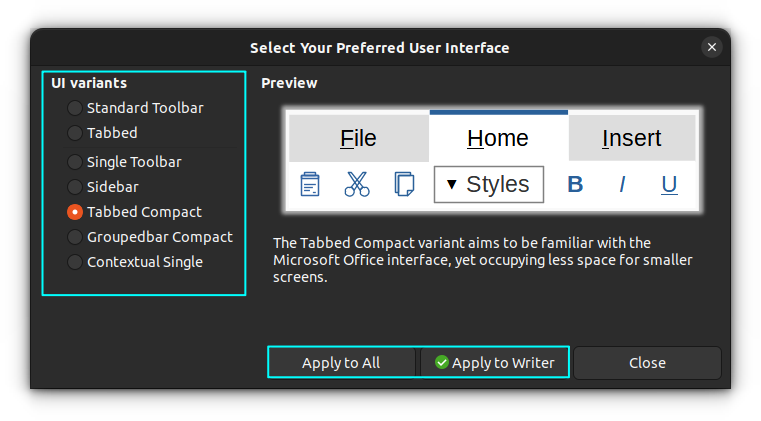
Either apply it to the current LibreOffice application like Write, or apply to all apps at once.
Change items in context menu
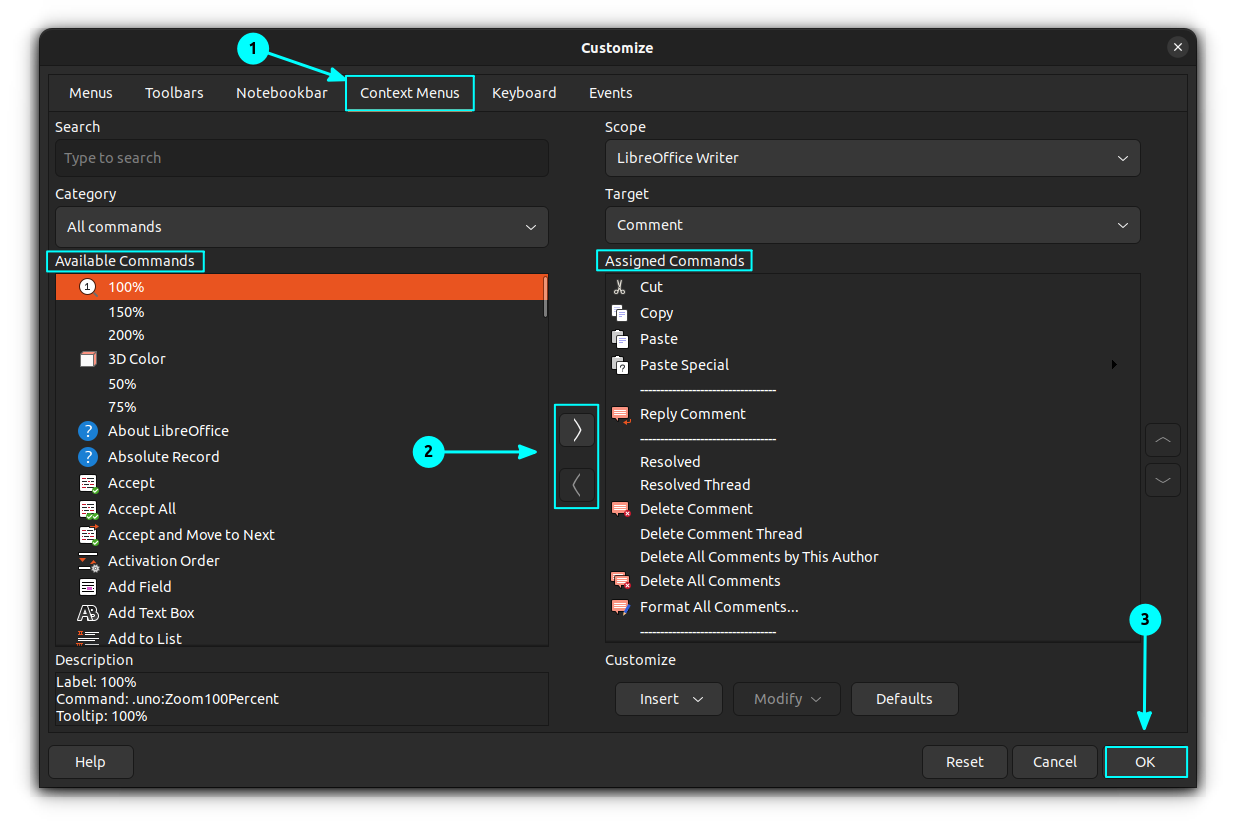
Select Tools ⇾ Customize.
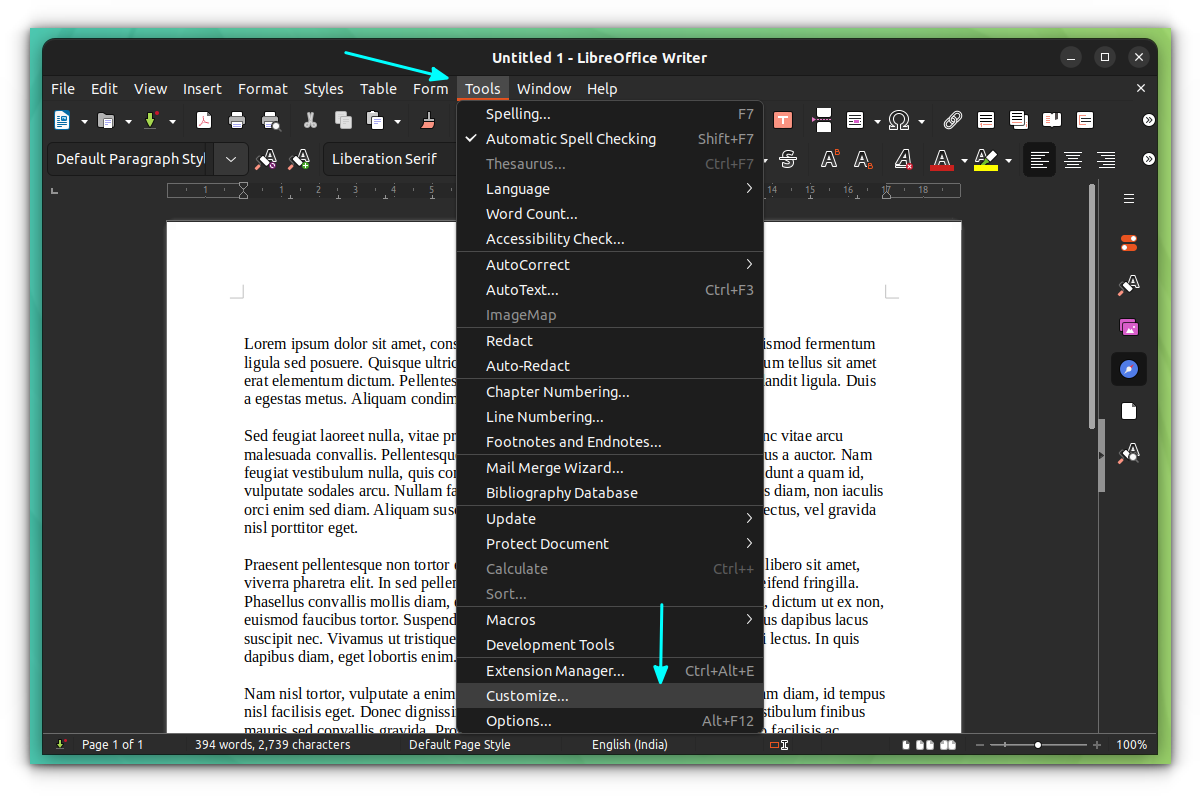
On the new dialog, go to “Context Menu”. Here, use the two arrow button to move items between Available commands and Assigned commands.
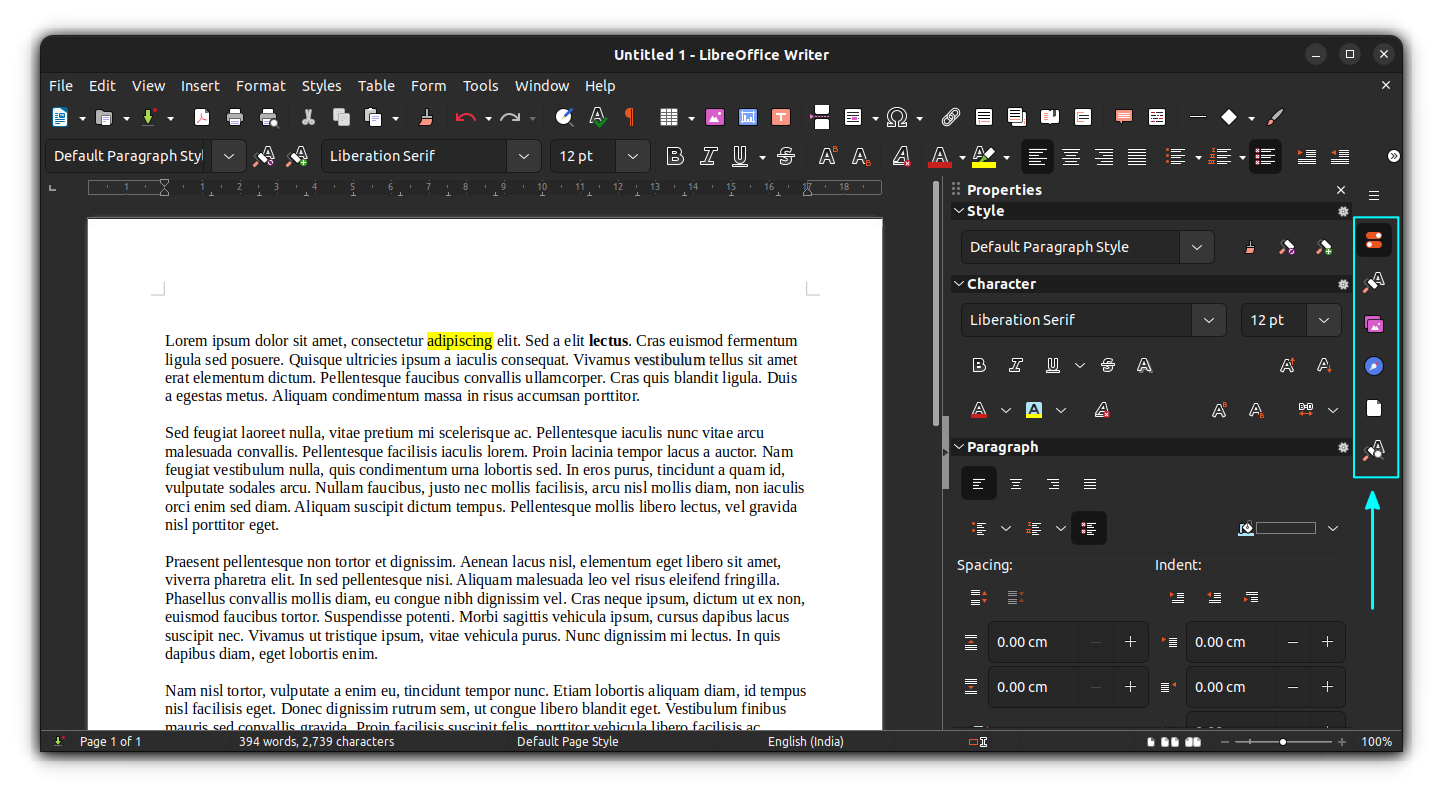
14. Learn to use the right side bar
The right sidebar in LibreOffice has several tools minimized, like the page settings, styles, format etc. You can access these tools by clicking on it. After using, hide it by clicking on it again.
15. Add code blocks with syntax highlight
If you are working on technical documents that has code snippets, this trick will be good for you.
Though, this is not an inbuilt feature. You need to install Code Highlighter 2 extension to make this work.
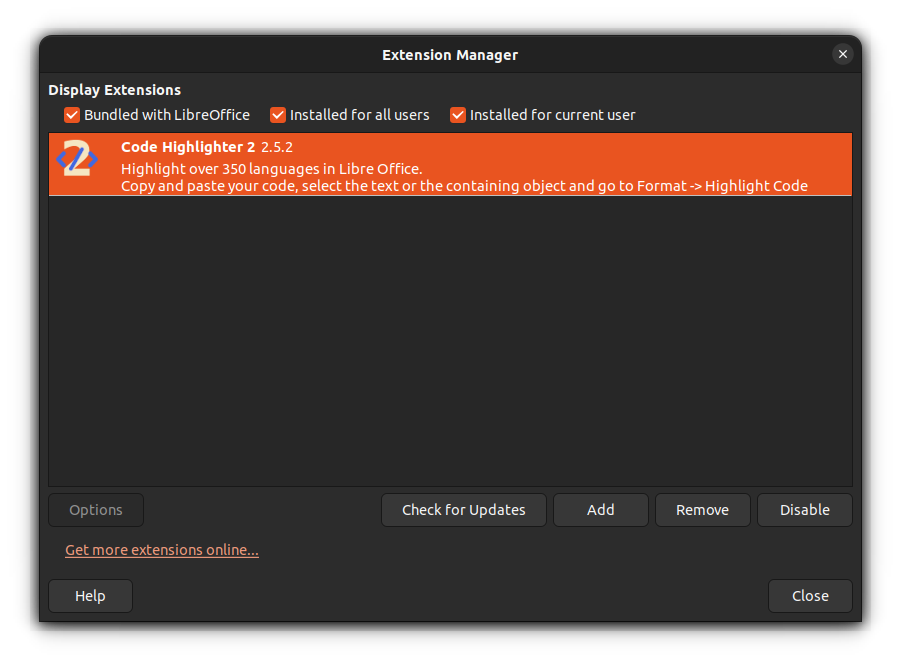
Install and enable the extension. Restart LibreOffice.
Now, right some code and select it. Click on Format ⇾ Code Highlighter 2 ⇾ Highlight Code.
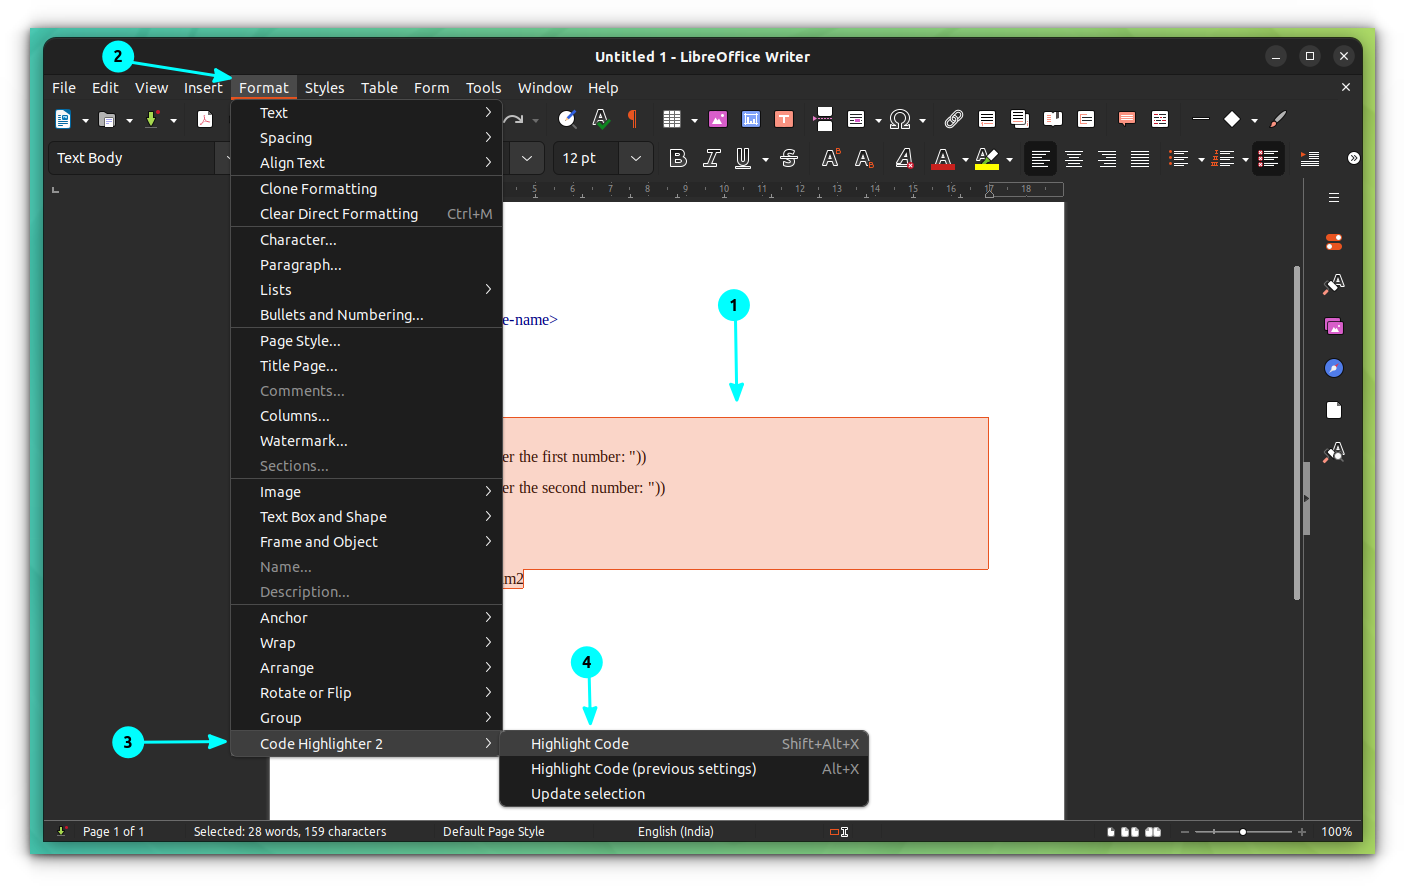
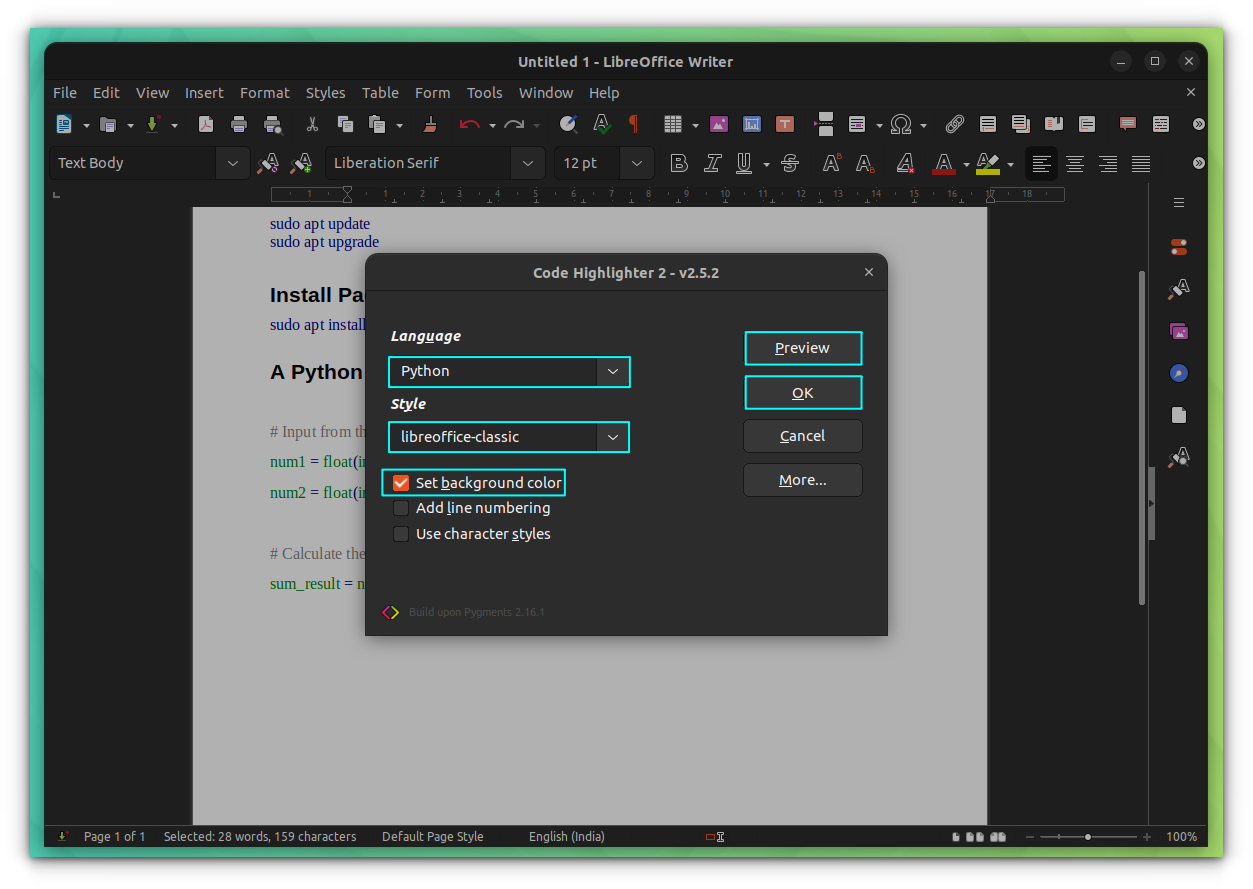
On the next dialog box, select the language, then also select the style. Use the Preview button to get the look. Once selected, click OK to apply.
Bonus Tip: Download the free LibreOffice guide
Alright! It’s not a trick, but it will help you nevertheless. If you are new to LibreOffice, you can learn how to use its features from the official guide.
LibreOffice Getting Started Guide is available to download for free. You can get it from the link below.
They have pretty good guides in various languages on different tools. Feel free to explore them.

Your favorite LibreOffice trick?
One of It’s FOSS readers, Daniel Baran, shared a little spreadsheet he developed for tracking time. It works with LibreOffice Calc and aims for tracking time spend on projects and clients, specially focused on freelancers. You can find more details on using this spreadsheet here.
If you are missing Times New Roman and other such fonts, you may read about installing these Microsoft fonts on Ubuntu based Linux distributions.
I know this is just the tip of the iceberg when it comes to LibreOffice tips. So why don’t you share a quick tip that you frequently use in LibreOffice and help me expand this list? The comment section is all yours.
