

If you ever used Windows, you may have used the cool yellow colored sticky note apps which allows you to create small notes, that “sticks” on the desktop and helps you remember stuffs just like a real sticky note.
Linux has plenty of note-taking applications, but sometimes, all you need is a sticky note for your temporary to-do list.

If you are looking for Sticky notes for Ubuntu and other Linux distributions, here are various solutions that allow you to use quick sticky notes on your Linux desktop. Check them out and see which one fits your requirements.
1. Indicator Stickynotes
Indicator Stickynotes is a simple lightweight indicator applet for Ubuntu (and other distributions) that can be used for scribbling some small tasks, and can be “pasted” on the desktop to be reminded about it.
Some of the main features of Indicator Stickynotes are:
- Create quick sticky notes, as many as you like
- Group sticky notes into categories
- Color code the categories
- Lock sticky notes for accidental editing
- Resize the notes as per your preference
- Hide or show all sticky notes at once from global settings
- Import and export your notes
- Supports keyboard shortcut
- Free and open-source software licensed under GPL v3
Installing Indicator Sticky Notes
Indicator Stickynotes can be installed by using its official PPA. Use the following commands in the terminal (Ctrl+Alt+T):
sudo add-apt-repository ppa:umang/indicator-stickynotes
sudo apt update
sudo apt install indicator-stickynotes
Once installed, you can start using it straight away. No need for a restart or anything like that. Simply search for in the application menu and start it.
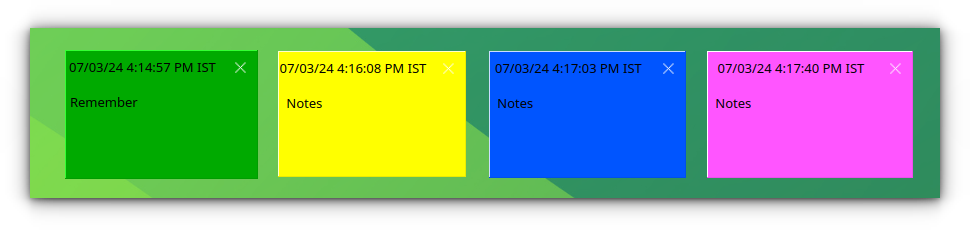
Using Indicator Stickynotes is very simple and self-explanatory. This picture will help you use most of its features at one glance:
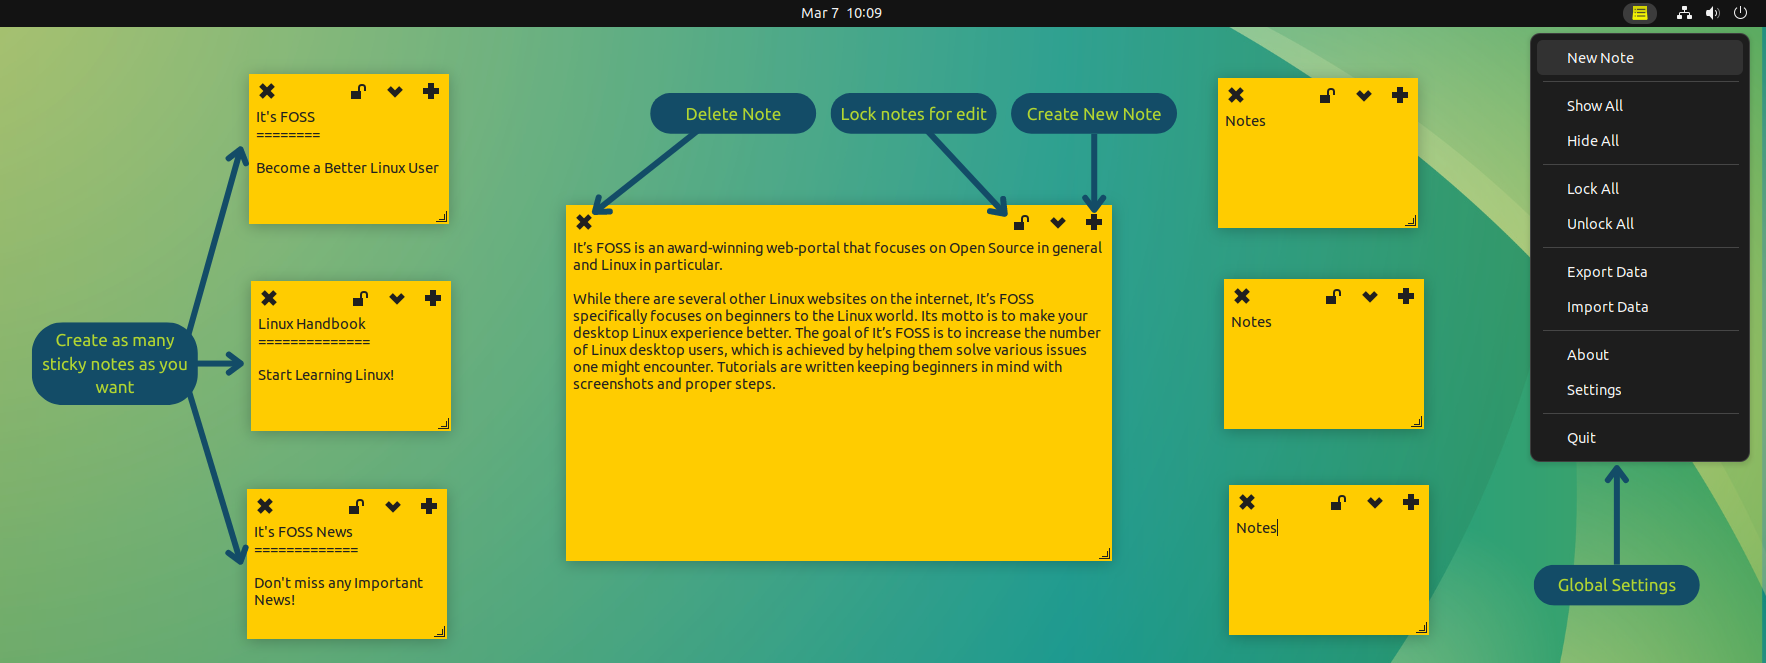
You can pin these sticky notes to the desktop or hide all of them using the option from the top panel.
If you are a keyboard shortcut fan, you can also use the following keyboard shortcuts for handling sticky notes:
- Ctrl + W : Delete note
- Ctrl + L : Lock note
- Ctrl + N : New note
2. Xpad
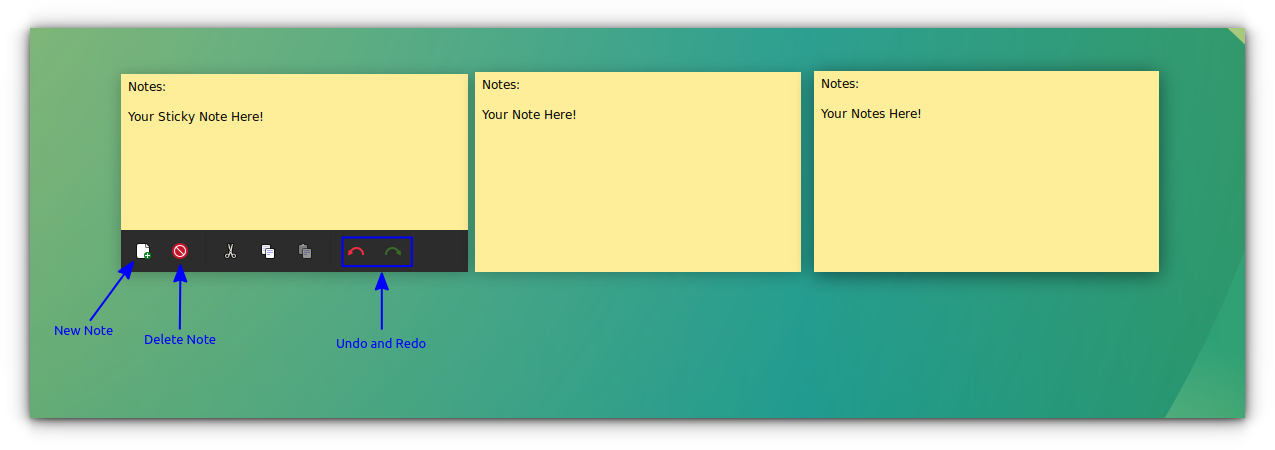
Xpad is a simple sticky note app for desktop, that comes with tray icon support. A usual Xpad session contains notes, that are automatically saved.
Apart from simple jotting of notes, Xpad also supports basic note formatting, such as bold, italics, and underline.
When you first open the app, it will display a neat help page, that describes everything Xpad can do. Here, you should take care that, to move the notes around the desktop, use CTRL+Left click and then drag. Normal click and drag won't work here.
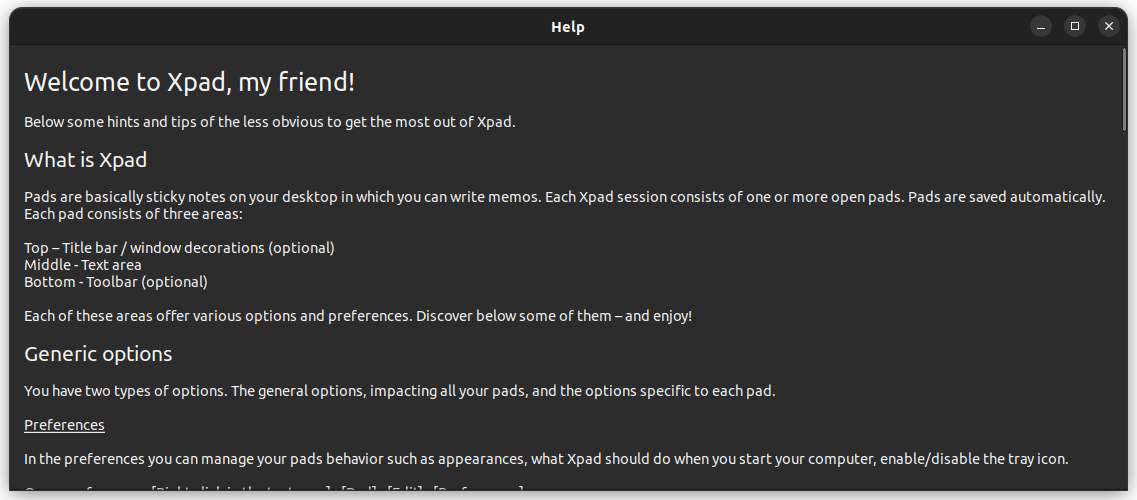
There is one more reason you should read the help page thoroughly if you are using it. Because there are many features available in this nice software, that are otherwise hidden for you.
Some of the features Xpad provides are:
- Colored Notes, with customizable foreground and background.
- Text Formatting with bold, italics, underline, and strike though text.
- Use custom fonts inside notes.
- Show notes on all workspaces.
Install Xpad in Ubuntu
Xpad is available in the official repositories of Ubuntu and many other distributions. If you are in Ubuntu or other Debian-based distributions, open a terminal and run:
sudo apt install xpad
Once installed, open Xpad by searching on the GNOME dash.
3. Sticky Notes (for GNOME)
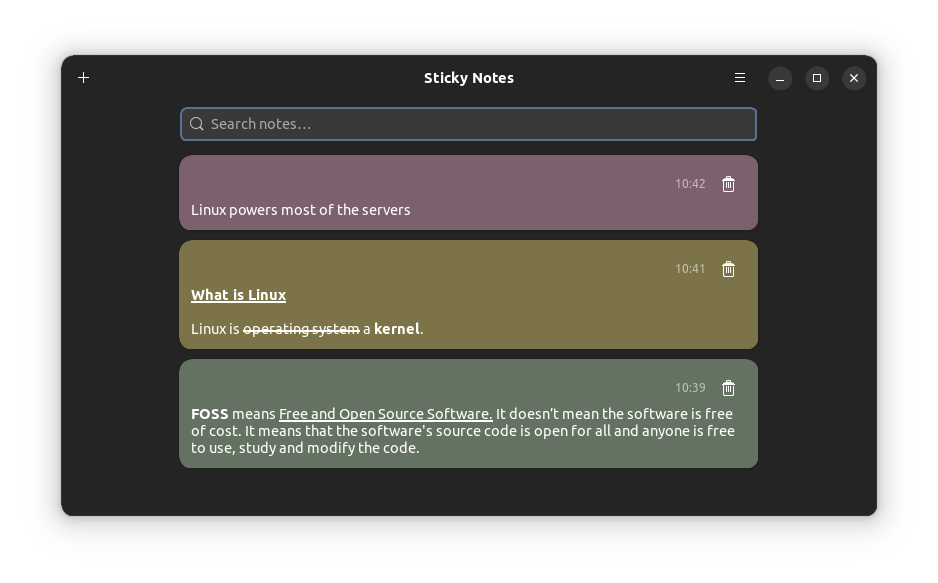
Not using Ubuntu? Or in any other distribution? Don't worry, GNOME Sticky Notes is a cool app, that is available as a Flatpak package so that you can use in any Linux distribution, that has Flatpak support enabled.
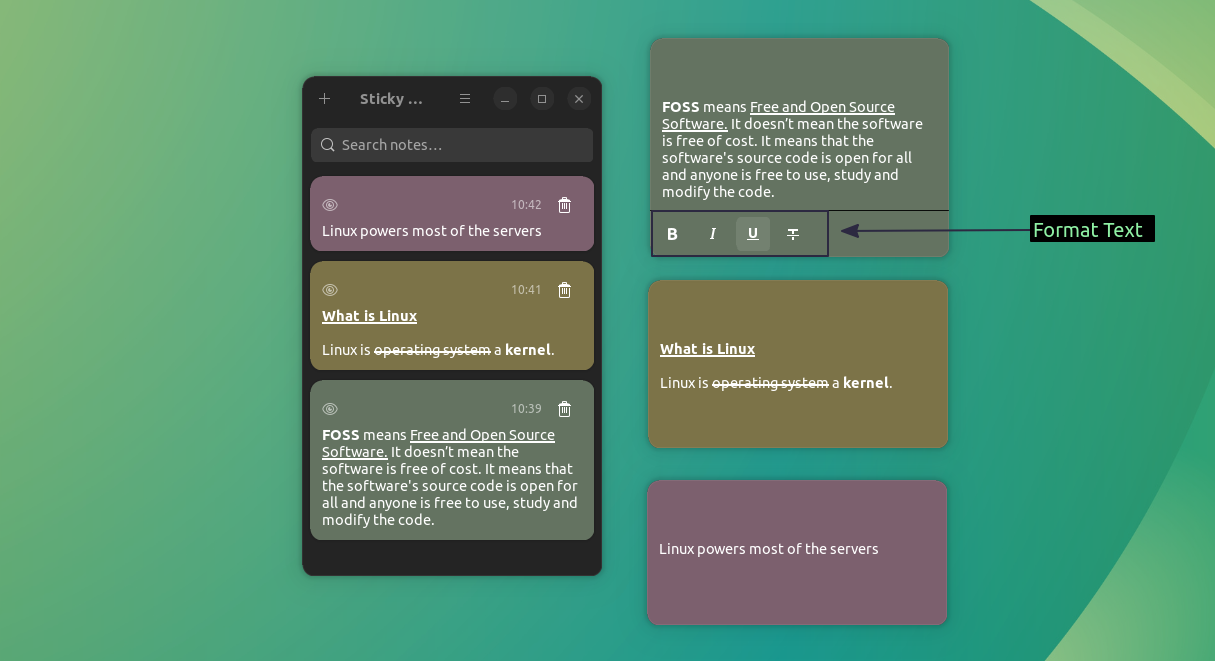
Sticky Notes is an App, focussed on GNOME desktop. Interestingly, it allows basic note formatting like bold/italics text, underline, and strikeout text.
Some other features include:
- Notes are restored if they were open when the application was closed
- Changing color of notes
- Dark theme support
Installing Sticky Notes
To install Sticky Notes, first make sure your system has Flatpak support enabled. Now, install it using your Software Store or run the command:
flatpak install flathub com.vixalien.sticky
That's it. You can now create an unlimited number of formatted sticky notes!
Almost like the Google Keep, the notes will be available on the main Sticky Notes apps, so that when you need them, you can open it as a sticky note on your desktop. It also allows you to search among your notes.
4. Sticky Notes for Kubuntu and other KDE Plasma Desktops
The above sticky notes, except the Xpad, are GNOME focussed. So, if you are a Kubuntu user or any KDE Plasma-based system user, there are some neat sticky notes options for you.
Panel Sticky Notes
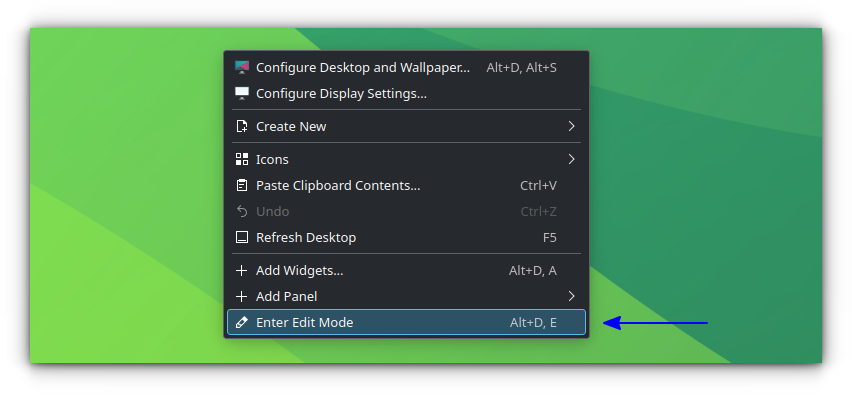
There is a sticky note widget for KDE Plasma desktop and panel. First, right-click on the desktop and select enter edit mode.
A side panel will be opened. On it, search for “Sticky Note”.
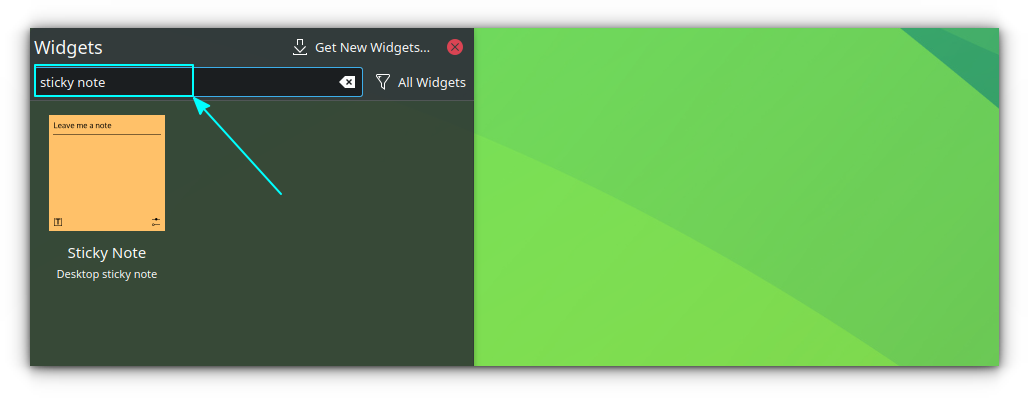
Now, just drag and drop the “Sticky Note” widget to anywhere on your Plasma panel.
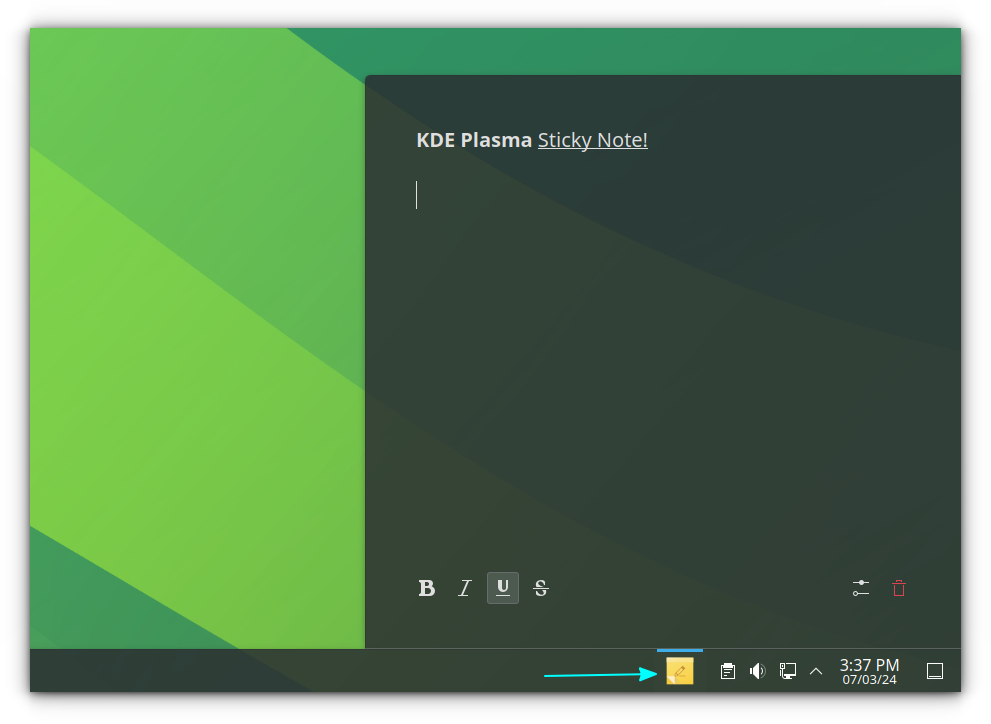
You can configure it for a different font size or different color. Just right-click on the panel sticky note button and choose the according to requirement.
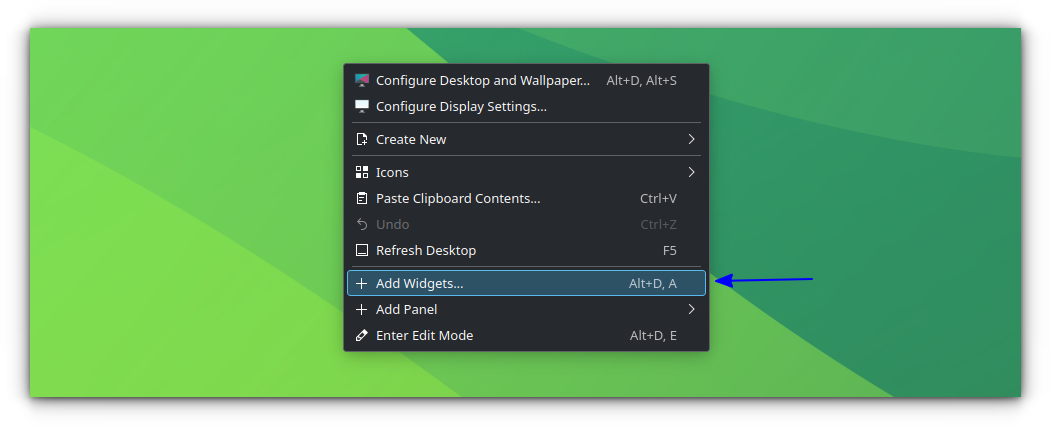
Or, you can just enter the edit mode, by right-clicking on the desktop and selecting “Enter the Edit Mode”.
And now, click on “Add Widgets”.

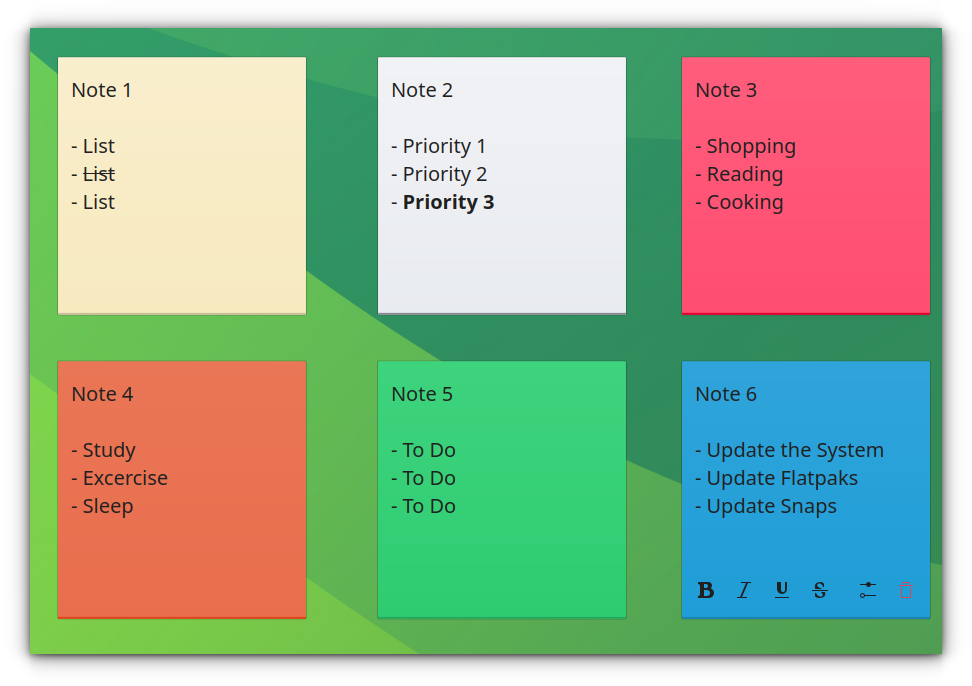
Drag and drop some sticky notes to the screen. Keep the numbers low so that it won't affect the system performance.
KNotes
KNotes is ideal, if you would rather not use widgets on screen, yet use Sticky Notes in KDE Plasma.
In KNotes, the notes are saved automatically when you exit the program. When you open the program, they are displayed again.
KNotes offers many other features like:
- Selection of font and background color
- Use drag and drop to email your notes
- Can be dragged into Calendar to book a time-slot
- Notes can be printed
Install KNotes
Since KNotes is an official KDE Plasma project, it is available on the repos of distro, that support KDE Plasma. In Ubuntu and other Debian-based systems, install KNotes using the command:
sudo apt install knotes
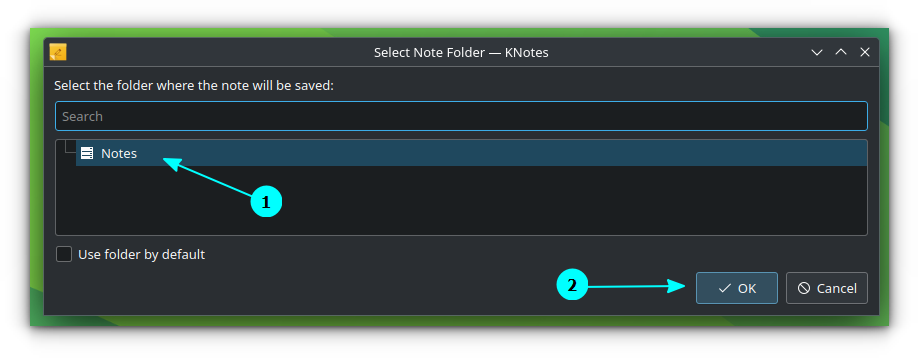
Once installed, open it. It will prompt you to select a location. Go with the default locations, by clicking on it and clicking on OK.
On the next page, click on “Show Collections”.

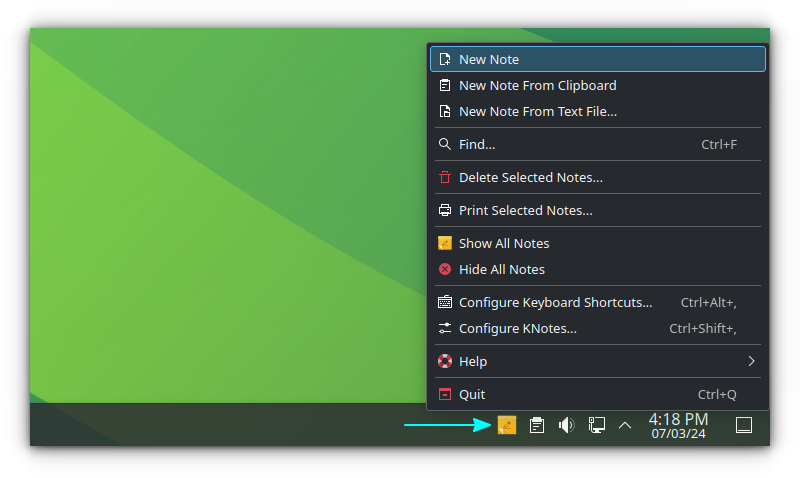
That's it. Note will be opened. You can right-click on the panel KNotes button and select new note to start a new note.
This will ask you to select the location for notes, go with the default as mentioned in the previous step.
Wrapping Up
Hope you enjoyed the various Sticky Notes options available for Ubuntu and other Linux distributions. Did you use Sticky Notes often? Which one was your favorite? Comment your opinions.
If you are interested in knowing what Note-taking applications are available for Linux, here is a list.
 Ankush Das
Knowledge management apps are gaining traction among developers and many Linux users. Here are some open-source knowledge management apps, that can act as your second brain!
Ankush Das
💬 I hope you find your favorite tool for sticky note on Linux. If you have questions or suggestions, do let me know.
