

Brief: This is a detailed guide showing you how to install GNOME Shell Extensions manually or easily via a browser.
While discussing how to install themes in Ubuntu, I briefly mentioned GNOME Shell Extension. It was used to enable user themes. Today, we’ll have a detailed look at GNOME Shell Extensions in Ubuntu and other Linux distributions.
I may use the term GNOME Extensions instead of GNOME Shell Extensions but both have the same meaning here.
In this tutorial, I’ll explain the following:
- What are GNOME Shell Extensions?
- How to install GNOME Shell Extensions?
- How to manage and remove GNOME Shell Extensions?
What is a GNOME Shell Extension?
A GNOME Shell Extension is basically a tiny piece of code that enhances the capability of the GNOME desktop. Think of it as an add-on in your browser. Just as a browser add-on adds additional features to the browser, the GNOME extension adds additional features to the GNOME desktop environment.
For example, you can install an add-on in your browser to disable ads. This add-on is developed by a third-party developer. Though your web browser doesn’t provide it by default, installing this add-on enhances the capability of your web browser.
Similarly, GNOME Shell Extensions are like those third-party add-ons and plugins that you can install on top of GNOME. These extensions are created to perform specific tasks such as displaying weather conditions, internet speed, etc. Mostly, you can access them in the top panel.
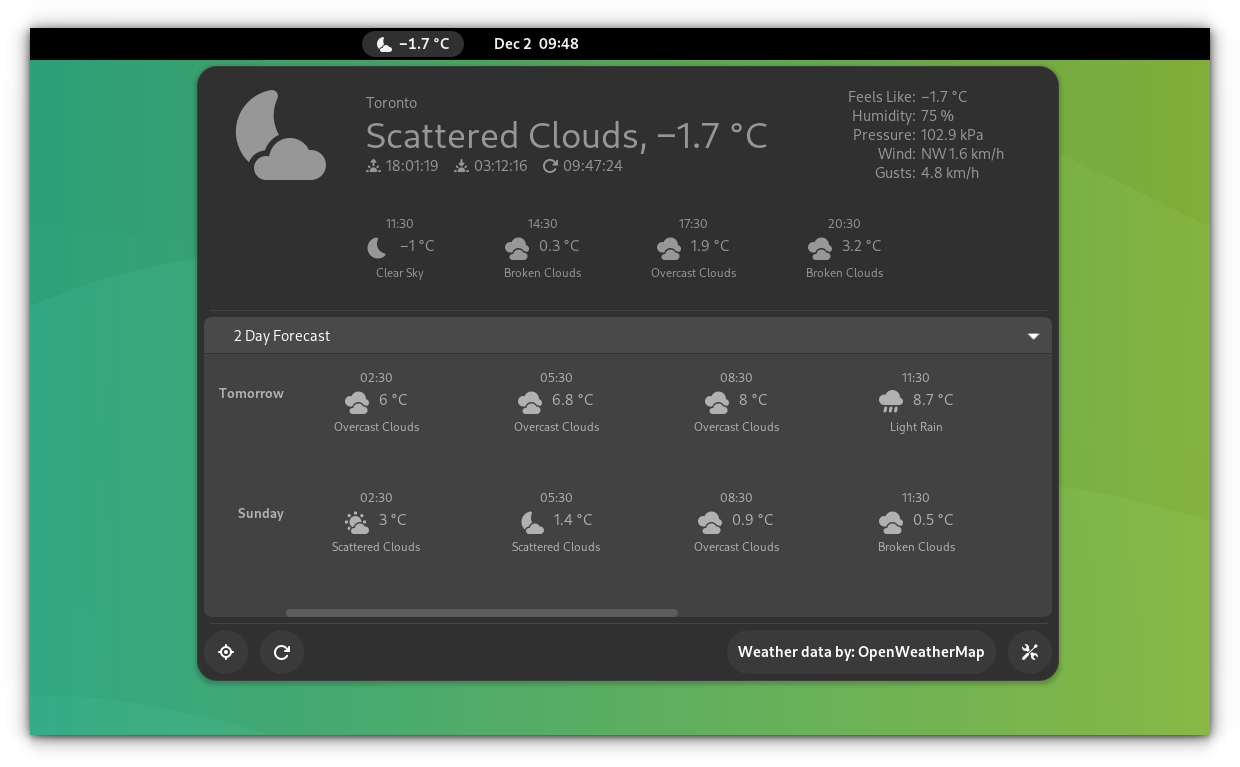
There are also GNOME Extensions that are not visible in the top panel. But they still tweak GNOME’s behavior. For example, the middle mouse button can be used to close an application with one such extension.
Installing GNOME Shell Extensions
Now that you know what GNOME Shell Extensions are, let’s see how to install them.
There are three ways you can use GNOME Extensions:
- Use a minimal set of extensions from Ubuntu (or your Linux distribution)
- Find and install extensions in your web browser
- Install extensions using Extension Manager App
- Download and manually install extensions
Although GNOME Tweaks is not required for extensions to work, installing GNOME Tweak Tool in Ubuntu or whichever distribution you are using is better.
sudo apt install gnome-tweaksAt times, you would also need to know the version of GNOME Shell you are using. This helps determine whether an extension is compatible with your system. You can use the command below to find it:
gnome-shell --versionMethod 1: Use the gnome-shell-extensions package
Ubuntu (and several other Linux distributions such as Fedora) provide a package with a minimal set of GNOME extensions. You don’t have to worry about compatibility here as it is tested by your Linux distribution.
If you want a no-brainer, just get this package and you’ll have 8-10 GNOME extensions installed.
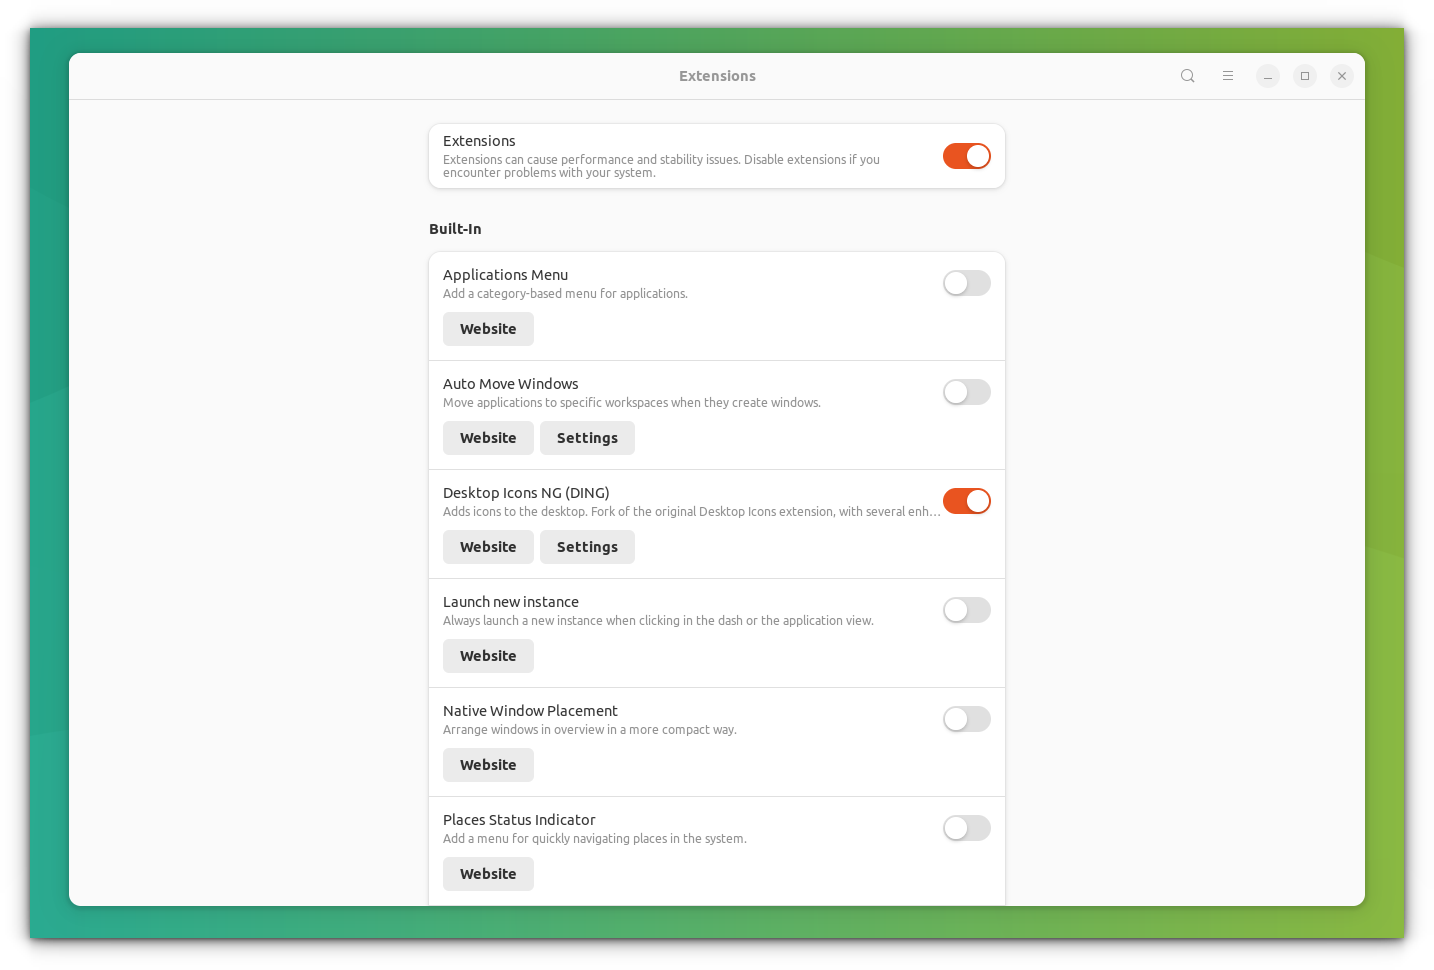
sudo apt install gnome-shell-extensionsOnce installed, log out and re-login to your system. After that, start GNOME Extensions App from Overview. This extensions app will be installed as part of gnome-shell-extensions package.
You’ll find a few extensions installed. You can just toggle the button to start using an installed extension.
Method 2: Install GNOME Shell extensions from a web browser
The GNOME project has an entire website dedicated to extensions. That’s not it. You can find, install, and manage your extensions on this website itself. No need even for the GNOME Extensions app.
But to install extensions through a web browser, you need a browser add-on and a native host connector in your system.
Step 1: Install a browser add-on
When you visit the GNOME Shell Extensions website, you’ll see a message like this:
“To control GNOME Shell extensions using this site you must install GNOME Shell integration that consists of two parts: browser extension and native host messaging application.”
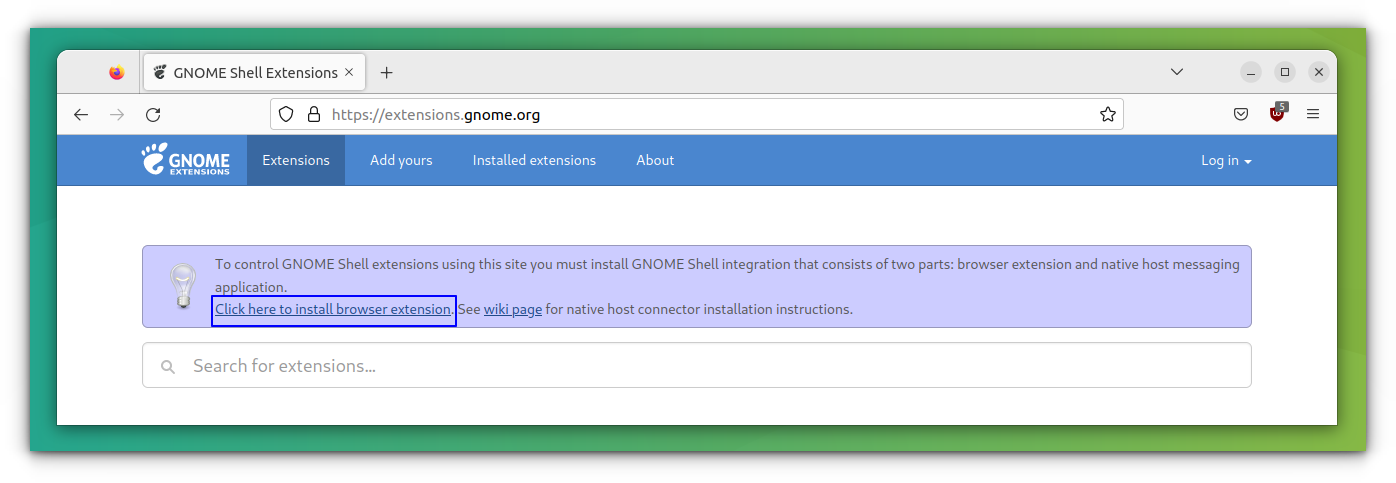
You can simply click on the suggested add-on link in your web browser.
Step 2: Install a native connector
Just installing a browser add-on won’t help you. You’ll still see an error like this:
“No such native application org.gnome.chrome_gnome_shell”
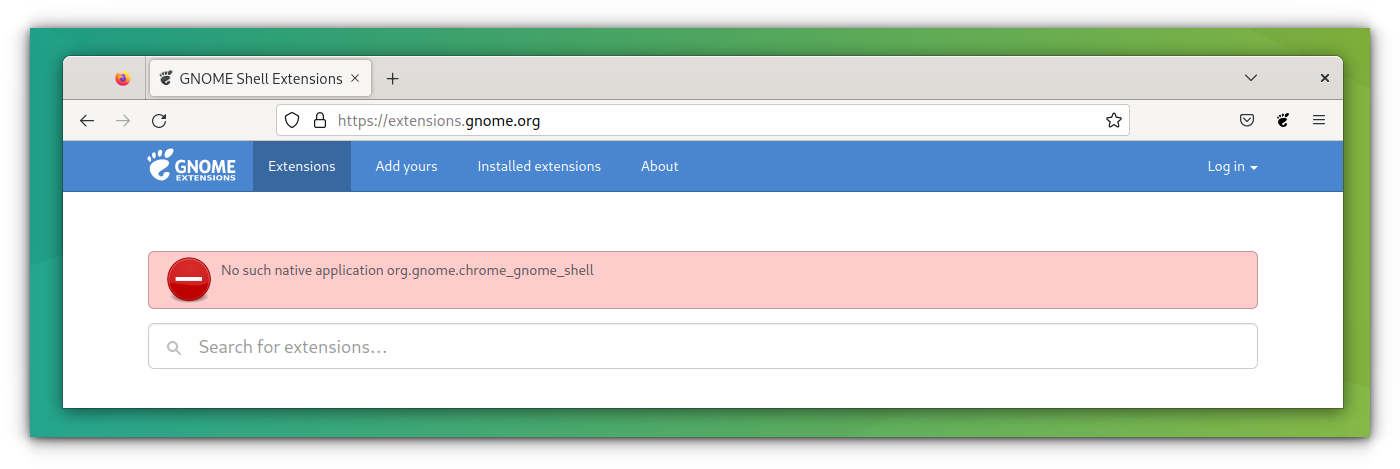
This is because you haven’t installed the host connector yet. There is chrome-gnome-shell to help you. To install it, use this command:
sudo apt install chrome-gnome-shellDon’t worry about the ‘chrome’ prefix in the package name. It has nothing to do with Chrome. You don’t have to install a separate package for Firefox or Opera here.
Also, for Arch Linux users, the package in AUR has been changed to gnome-browser-connector. So, you can install it with your favorite AUR helper.
yay -S gnome-browser-connectorStep 3: Installing GNOME Shell Extensions in the web browser
Once you have completed these two requirements, you are all set to roll. Now when you go to the GNOME Extension website, you won’t see any error message.
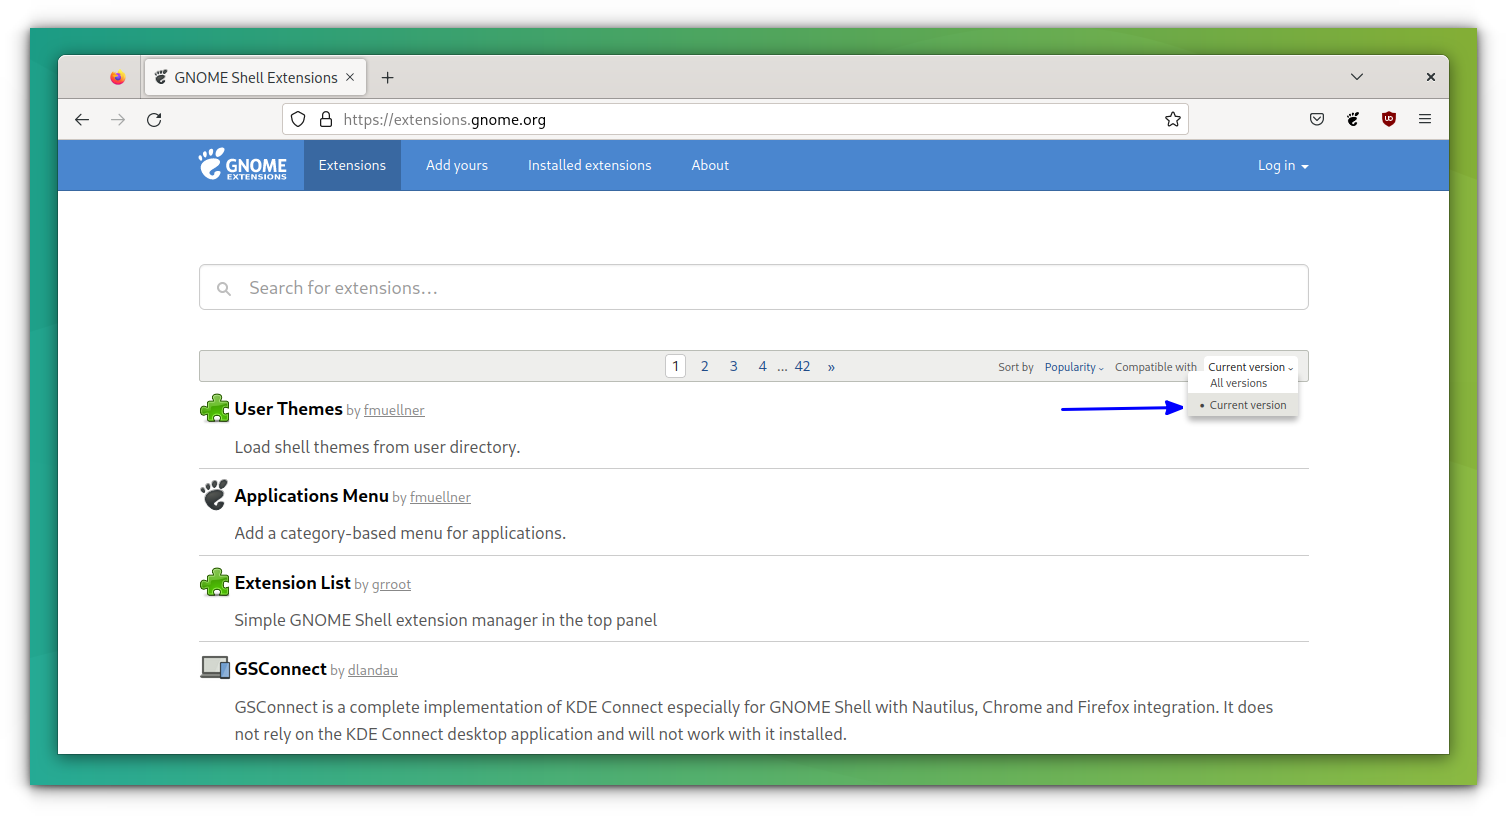
A good thing to do would be to sort the extensions by your GNOME Shell version. It is not mandatory though. What happens here is that a developer creates an extension for the present GNOME version. In one year, there will be two more GNOME releases. But the developer didn’t have time to test or update his/her extension.
As a result, you wouldn’t know if that extension is compatible with your system or not. The extension may work fine even in the newer GNOME Shell version despite that the extension is years old. It is also possible that the extension doesn’t work in the newer GNOME Shell.
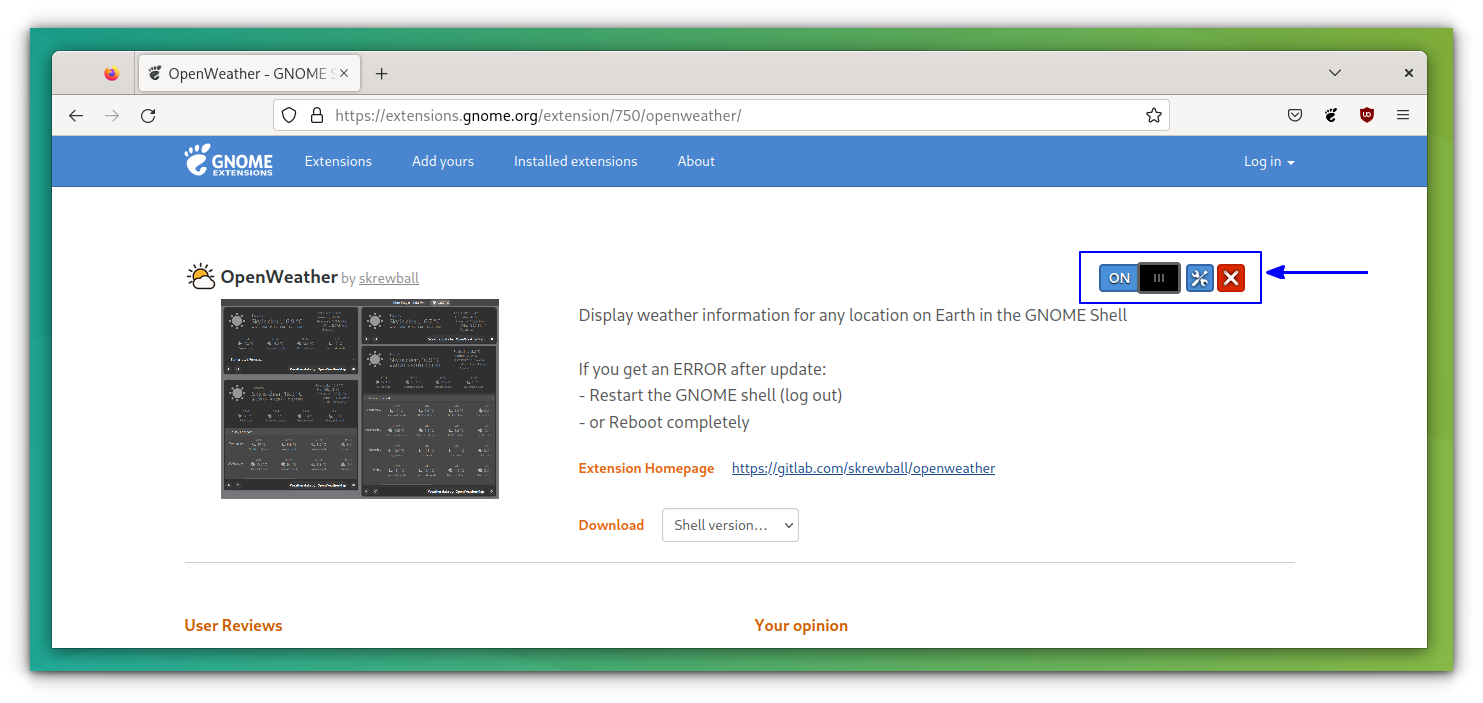
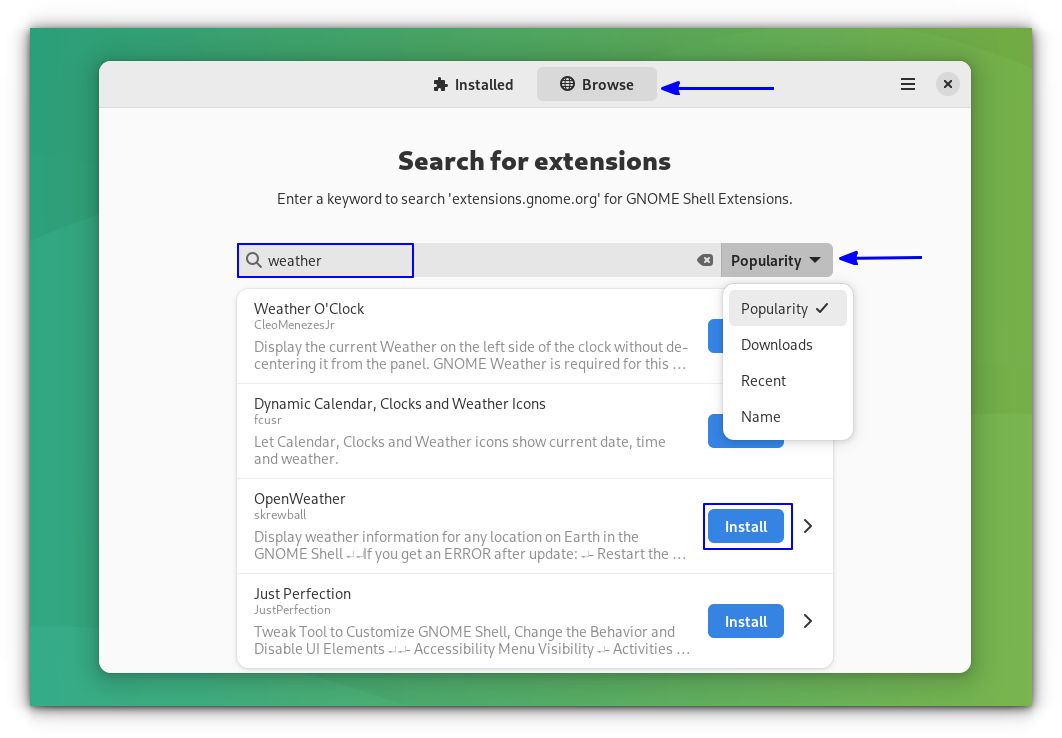
You can search for an extension as well. Let’s say you want to install a weather extension. Just search for it and go for one of the search results.
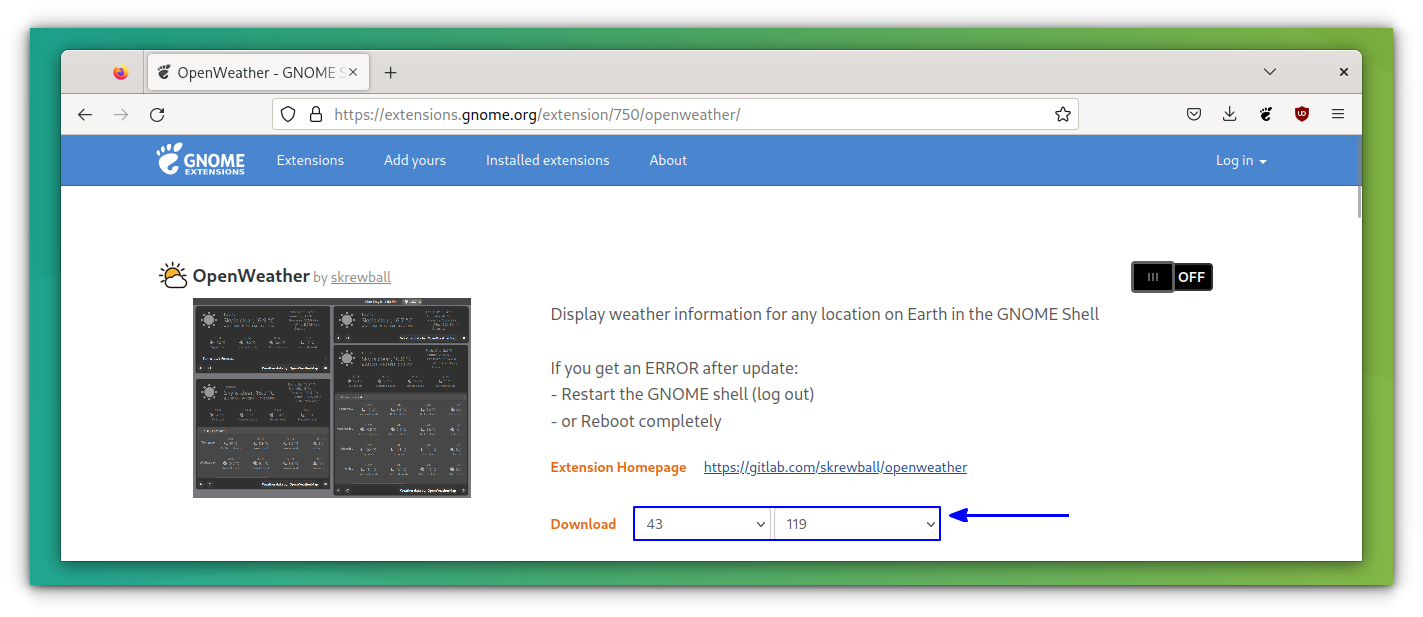
When you visit the extension page, you’ll see a toggle button.
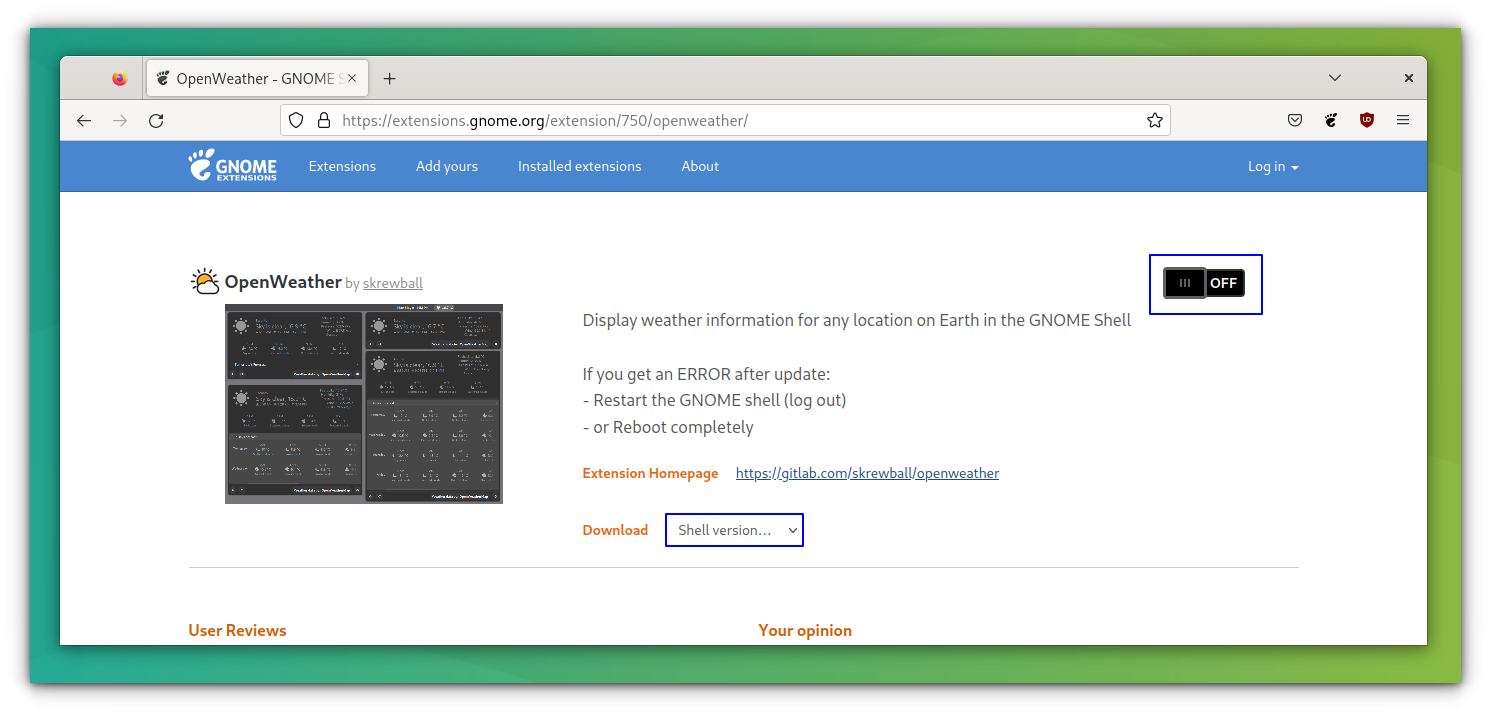
Toggle the button to enable or disable GNOME Shell Extensions
Click on it and you’ll be prompted if you want to install this extension:
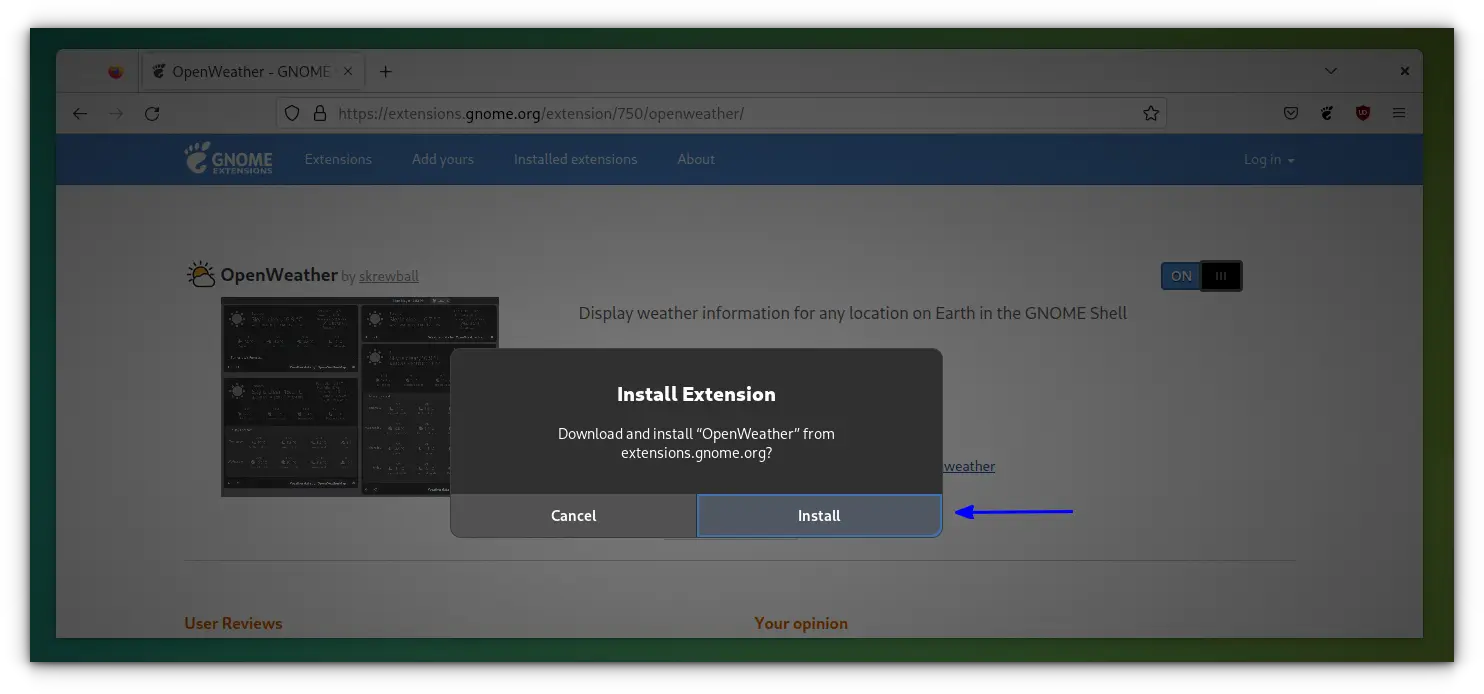
Obviously, go for Install here. Once installed, you’ll see that the toggle button is now on and a setting option is available next to it. You can configure the extension using the setting option. You can also disable the extension from here.
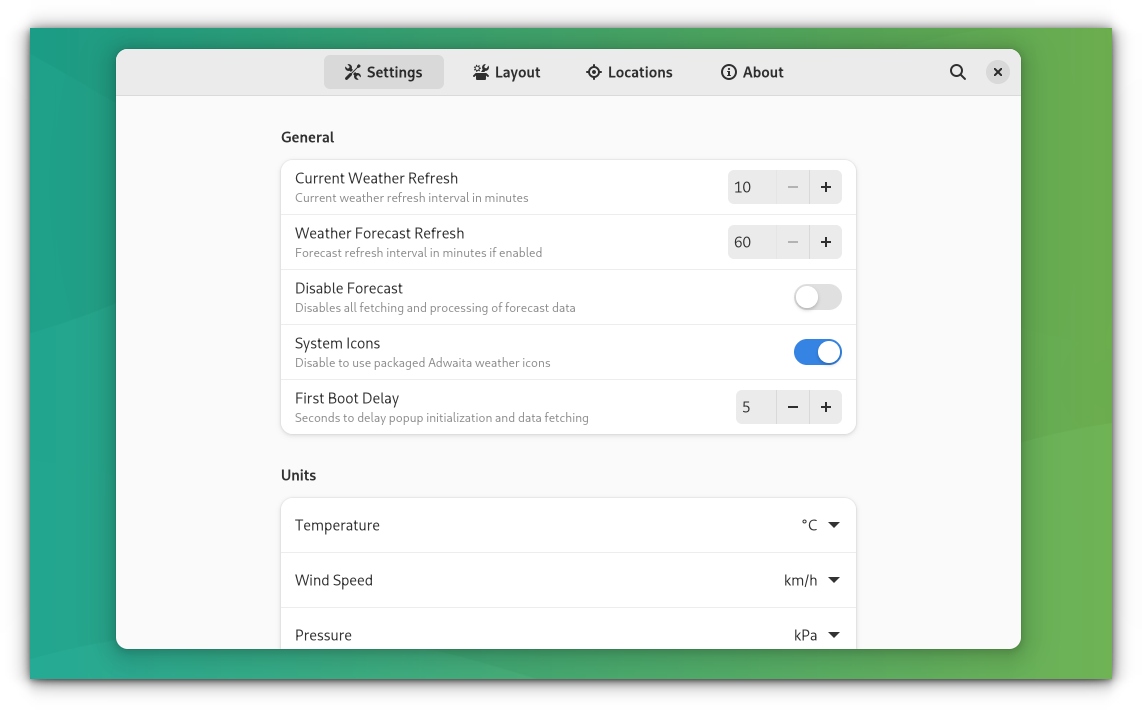
You can also configure the settings of an extension that you installed via the web browser in the GNOME Extensions App:
You can see all your installed extensions on the website under the installed extensions section. You can also delete the extensions that you installed via the web browser here.
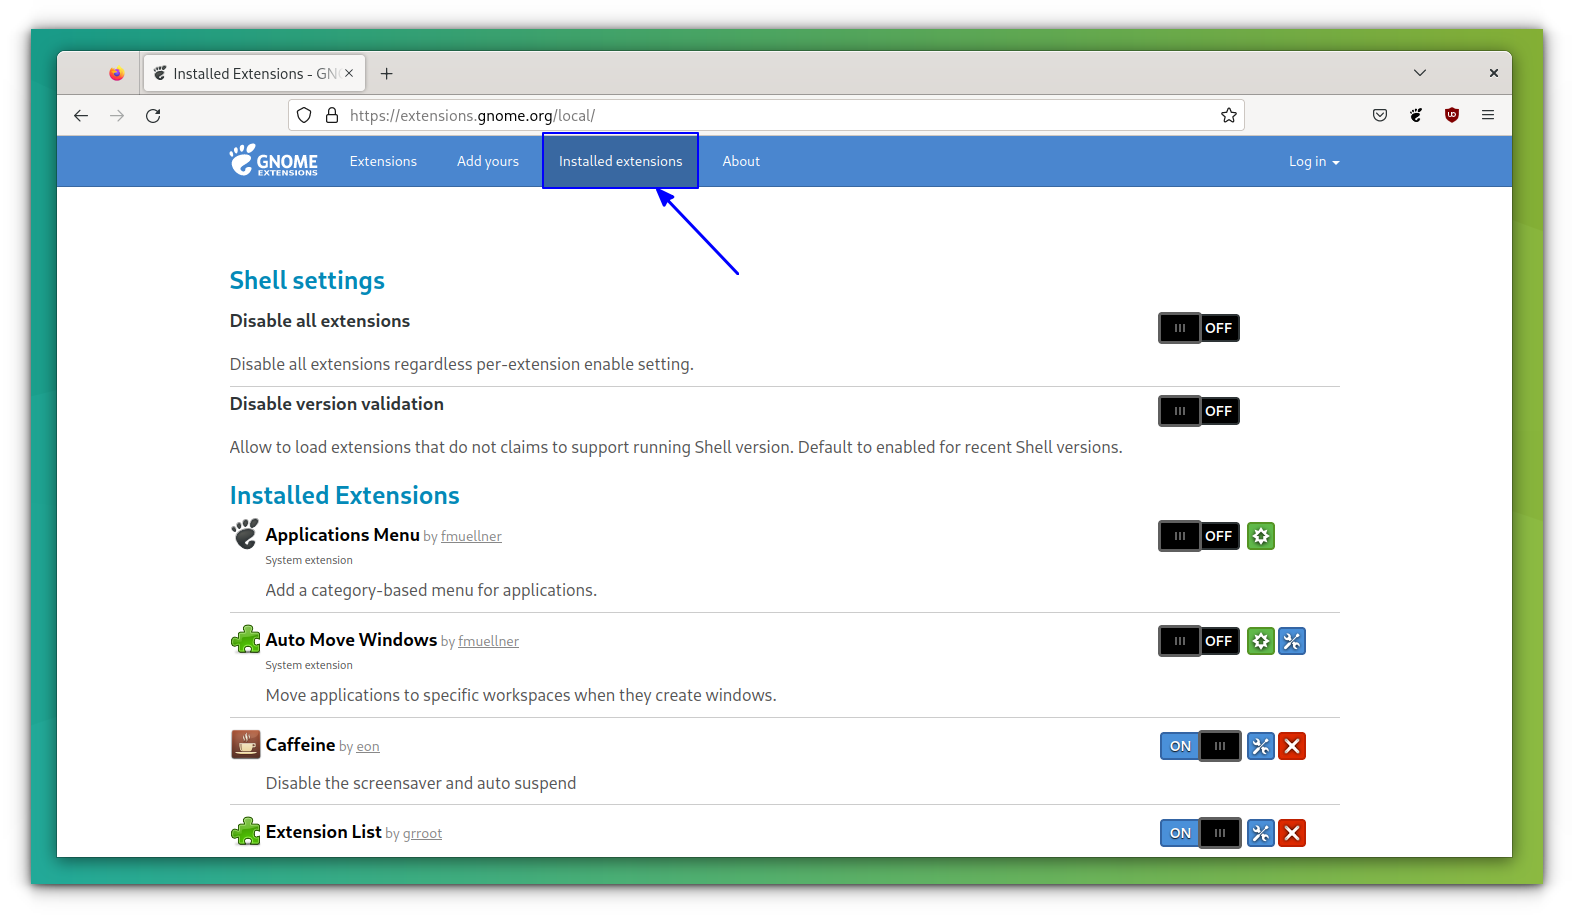
One significant advantage of using the GNOME Extensions website is that you can see if there is an update available for an extension.
Method 3: Install GNOME Shell Extensions using the Extension Manager application
There is a dedicated application called GNOME Shell Extension Manager to browse, install and manage your extensions. This application avoids the need for a web browser.
By default, it will not be installed on your system. So you can install this application through the command:
sudo apt install gnome-shell-extension-managerIf you are using Arch Linux, it is available in AUR.
There is a known issue with this application as of now. Updates do not work out of the box on GNOME 40 and certain older versions of GNOME 41 and 42 unless the official GNOME Extensions app is also installed. There is a workaround for this issue, and you can refer to their Wiki for the same.
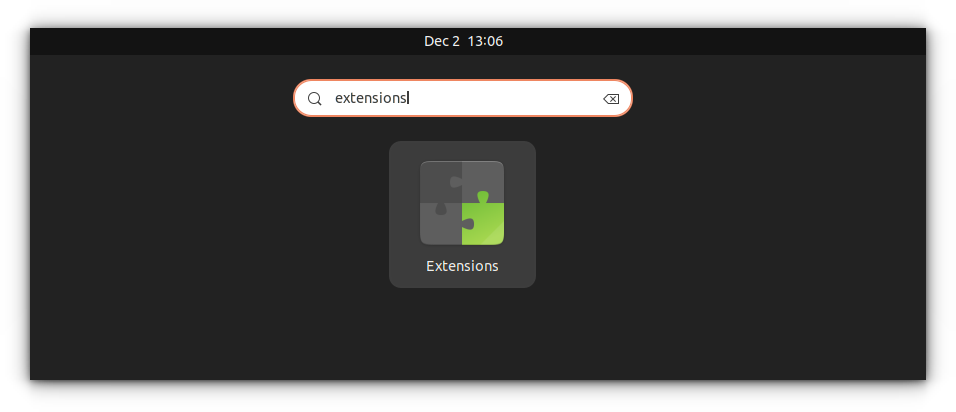
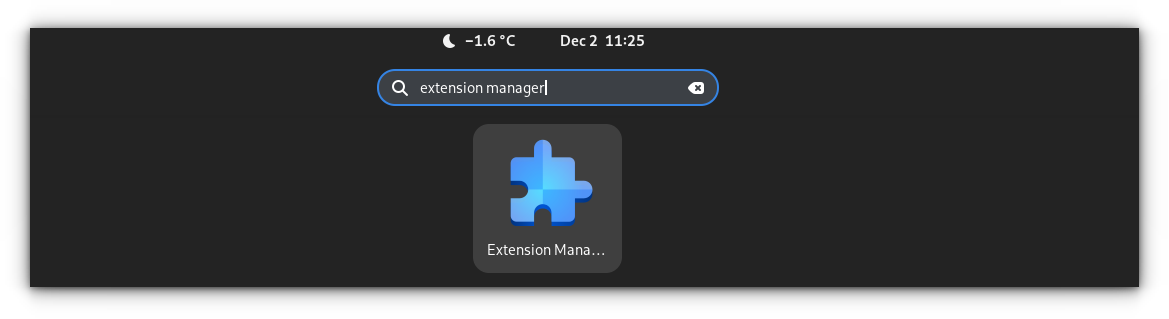
Now, search for the extension manager in Activities Overview and open the Extension-Manager app.
Inside the application, you can see the recommended extensions on the browse page. Search for extensions inside this browse page, and install those you want.
Method 4: Install GNOME Shell Extensions manually (for intermediate to advanced users)
It’s not that you have to be always online to install GNOME Shell extensions. You can download and install the files later, without needing the internet.
Go to GNOME Extensions website and download the extension with the latest version. The download will automatically start once you select the required shell and the extension version.
Extract the downloaded file. Copy the folder to ~/.local/share/gnome-shell/extensions directory. Go to your Home directory and press Crl+H to show hidden folders. Locate the .local folder, and you can find your path to the extensions directory.
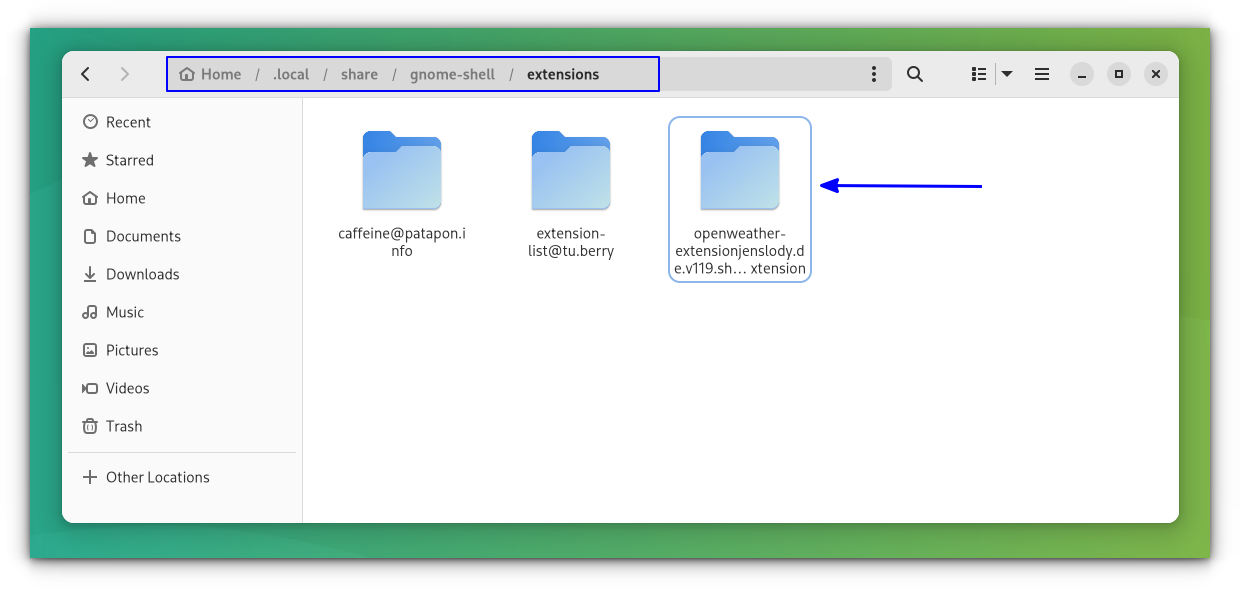
Once you have the files copied into the correct directory, go inside it and open the metadata.json file. Look for the value of uuid.
Make sure that the name of the extension’s folder is the same as the value of uuid in the metadata.json file. If not, rename the directory to the value of this uuid.
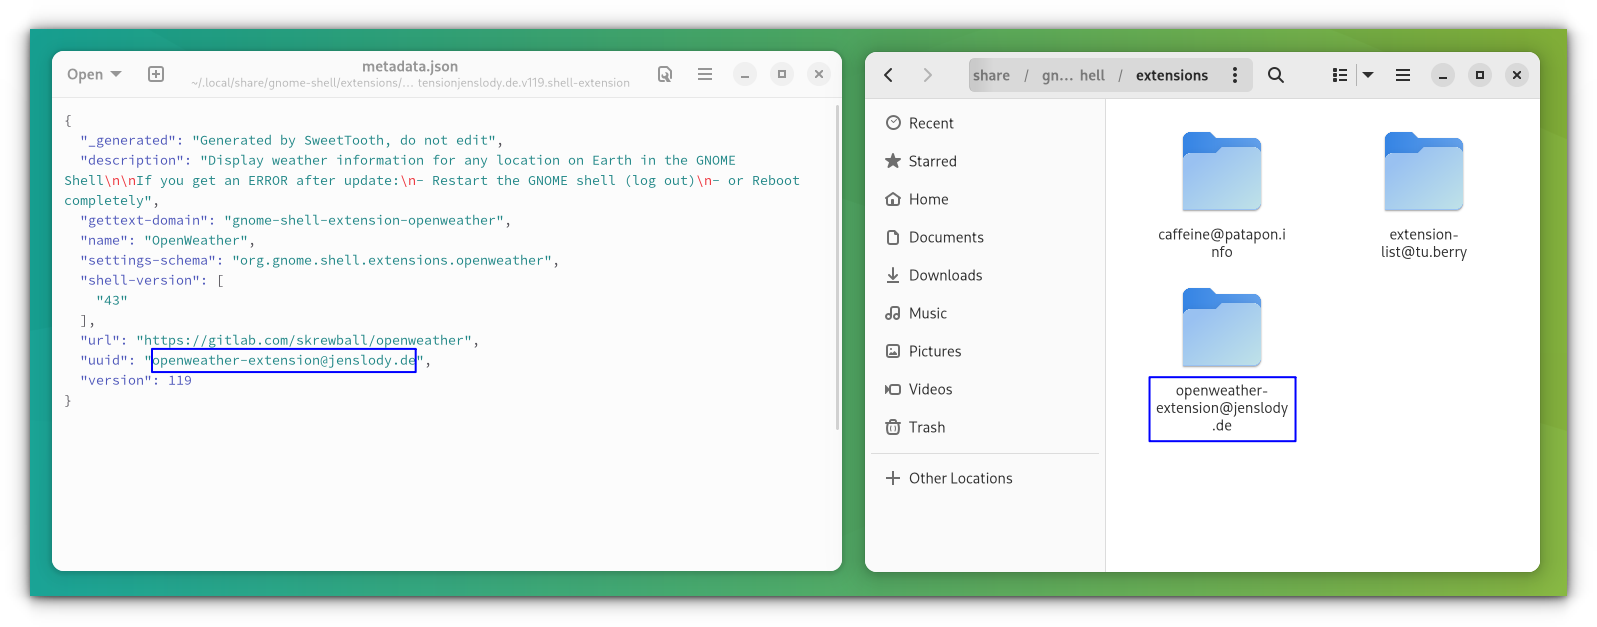
The name of the extension folder should be the same as uuid.
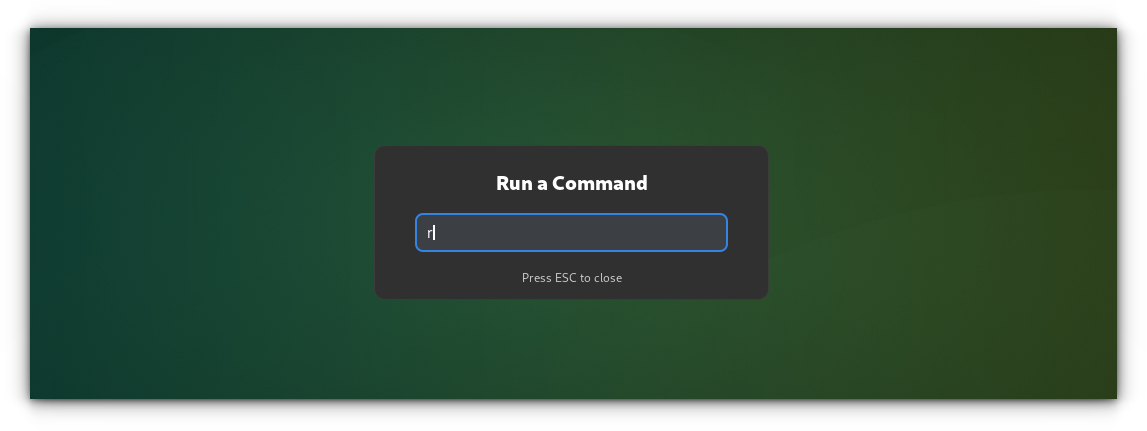
Almost there! Now restart GNOME Shell. Press Alt+F2 and enter r to restart GNOME Shell.
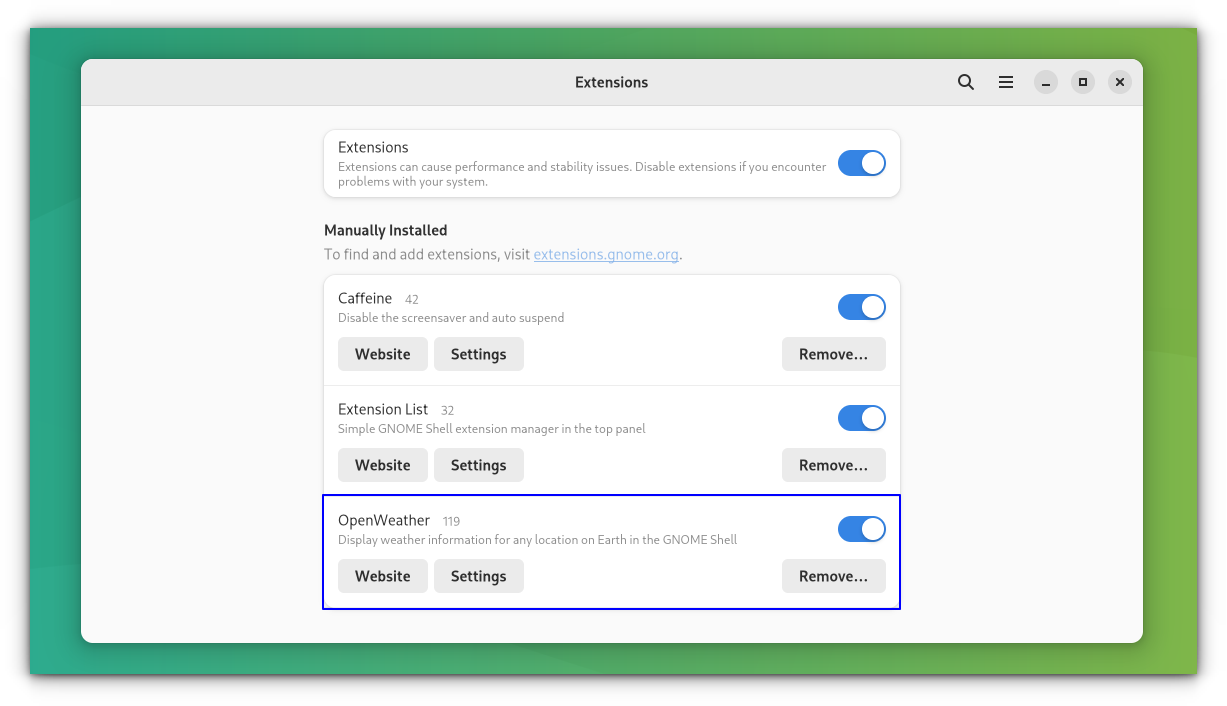
Restart the extensions app and you should see the manually installed GNOME extension there now. You can configure or enable the newly installed extension here.
And that’s all you need to know about installing GNOME Shell Extensions.
Remove GNOME Shell Extensions
Understandably, you might want to remove an installed GNOME Shell Extension.
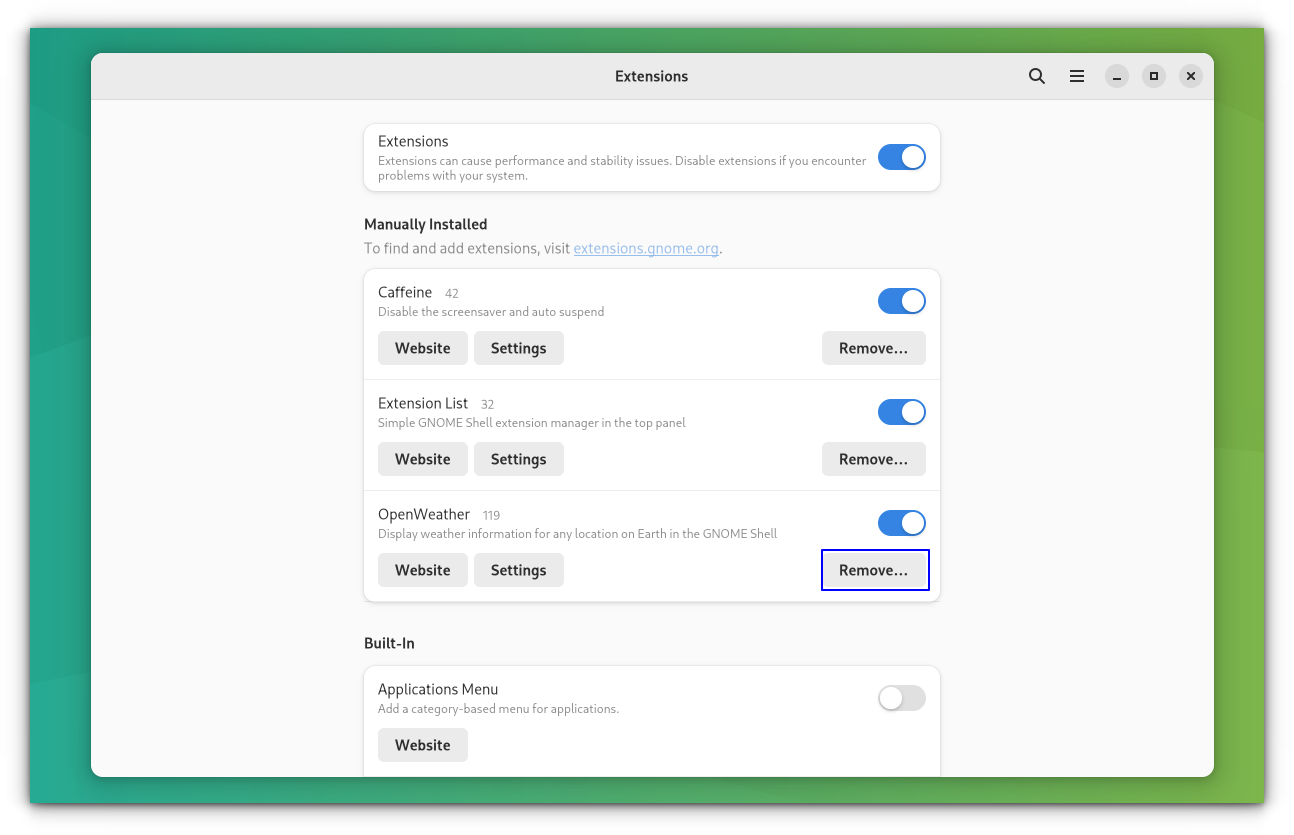
If you installed it via a web browser, you can go to the installed extensions section on the GNOME website and remove it from there (as shown in an earlier picture). Or you can remove it from the Extension App or Extension-Manager app.
Note that, only extensions installed either using the extensions app or through the browser can be removed using the browser or app. Any extension installed through package managers should be removed by uninstalling it using the respective package managers.
Or if you installed it manually, you can remove it by deleting the extension files from the ~/.local/share/gnome-shell/extensions directory.
Bonus Tip: Get notified of GNOME Shell Extensions updates
GNOME Shell extensions that are installed on your system will get updates via the GNOME Shell Extension Manager app. Upon login to your system, the extensions that have updates to install will prompt notification for updates.
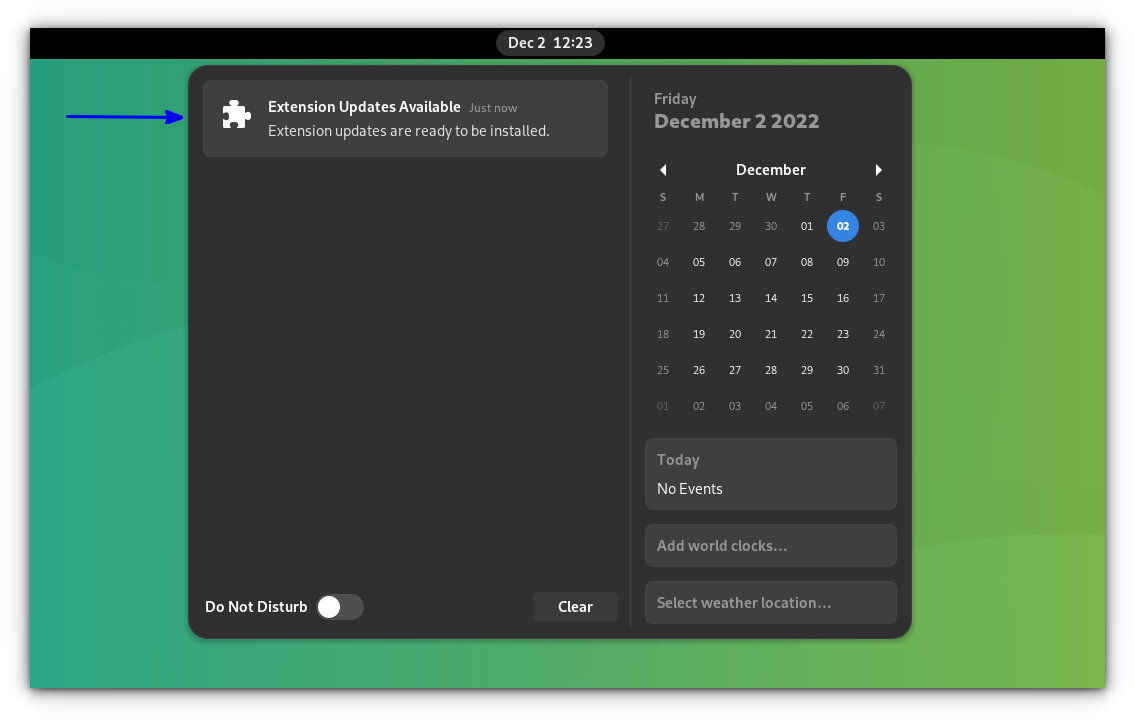
Opening the notification will bring you to the extension app. It will make the update ready and you need to log out and re-login to apply the updates.
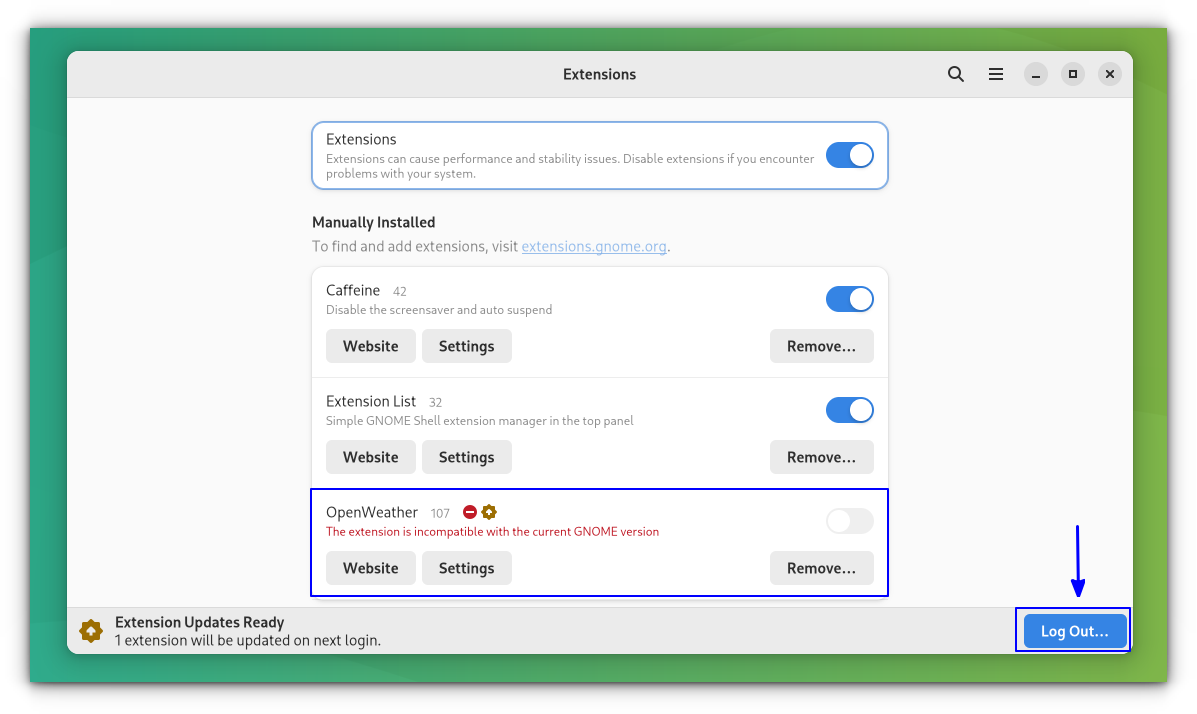
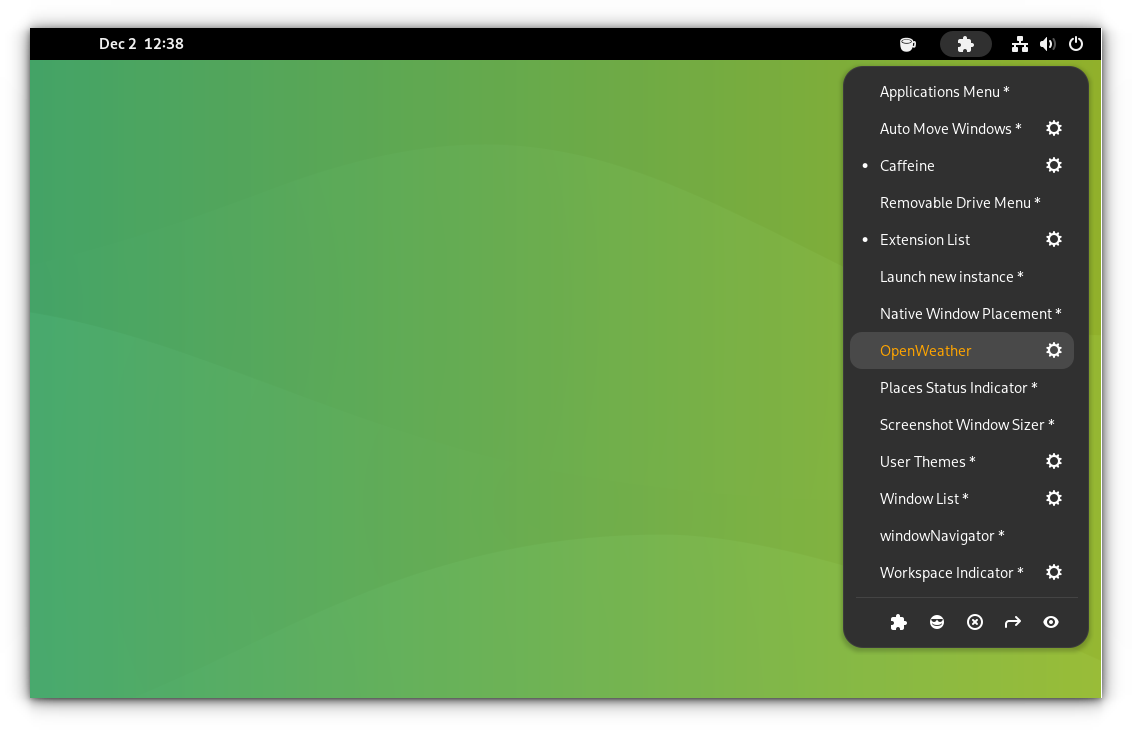
Also, there is a GNOME Shell Extension called Extension List that helps you manage your installed extensions and is accessible from the top panel.
You can get it from the link below:
How do you manage GNOME Shell Extensions?
I find it rather weird that you cannot update the extensions via the system updates. It’s as if GNOME Shell extensions are not even part of the system.
If you are looking for some recommendations, read this article about the best GNOME extensions.
 Phillip Prado
At the same time, share your experience with GNOME Shell extensions. Do you often use them? If yes, which ones are your favorite?
