

GNOME is one of the most popular desktop environments and for good reasons. It has a modern UI and it comes with a number of GNOME-specific applications that blend well with the overall desktop appearance.
One such application is GNOME's built-in screen recorder!
It is a simple screen recorder with limited features. It works on Wayland and Xorg both. Mind you, there are not many screen recorders on Linux that support Wayland.
But you won't get fancy features like delaying the recording or saving the output to a different path and format. Heck! You cannot even pause the recording.
However, GNOME's recorder is simple, easy, and efficient to capture the screen for a certain amount of time.
Let's see how to use it.
Using the GNOME Screen recorder
The screen recorder is actually combined with GNOME's screenshot tool.
To start the screen recorder, you can use the Print Screen button to open the screenshot tool. You'll find a switch to toggle between screenshot (camera icon) and screencast (video camera icon). Toggle it to select the screen recording.
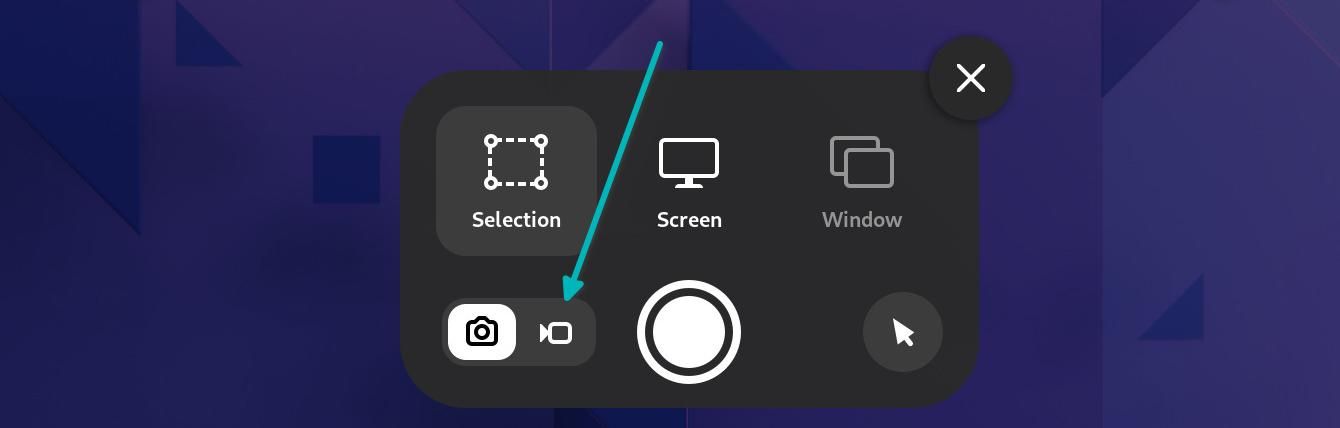
Alternatively, execute the key combination of Alt + Ctrl + Shift + R and it will get you the controls for recording immediately:
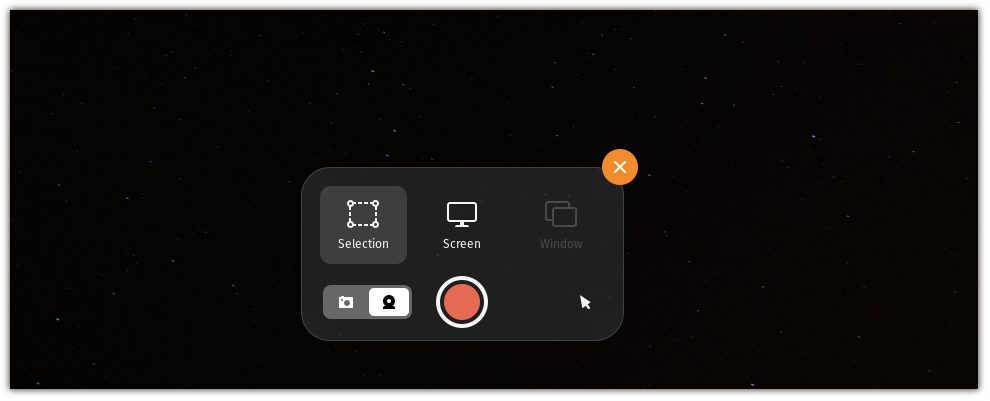
And as you can see, here, you have two options to choose from:
- Select a portion of the screen to record
- Use the entire screen to record
The option to record a specific application window is not available while writing.
Start the recording
Now, let's look at how you can record a specific portion of the screen using a GNOME screen recorder.
First, select the Selection option and set the size of the desired portion you want to record and start recording by pressing the 🔴 button:
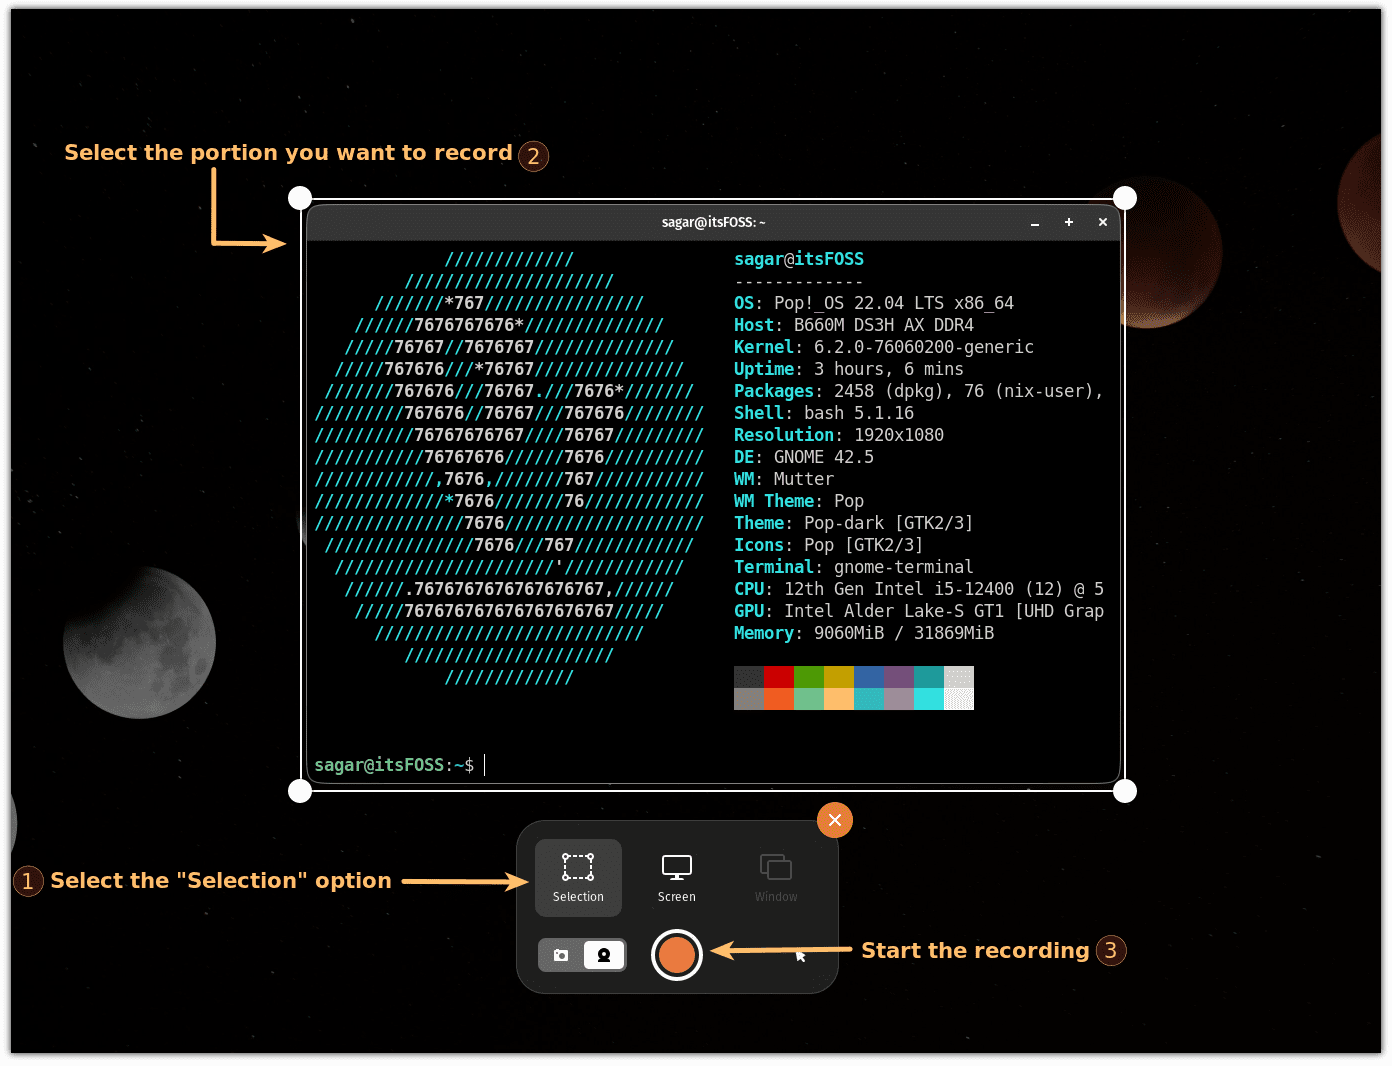
Yes, that's all it takes to record the desired portion of the screen.
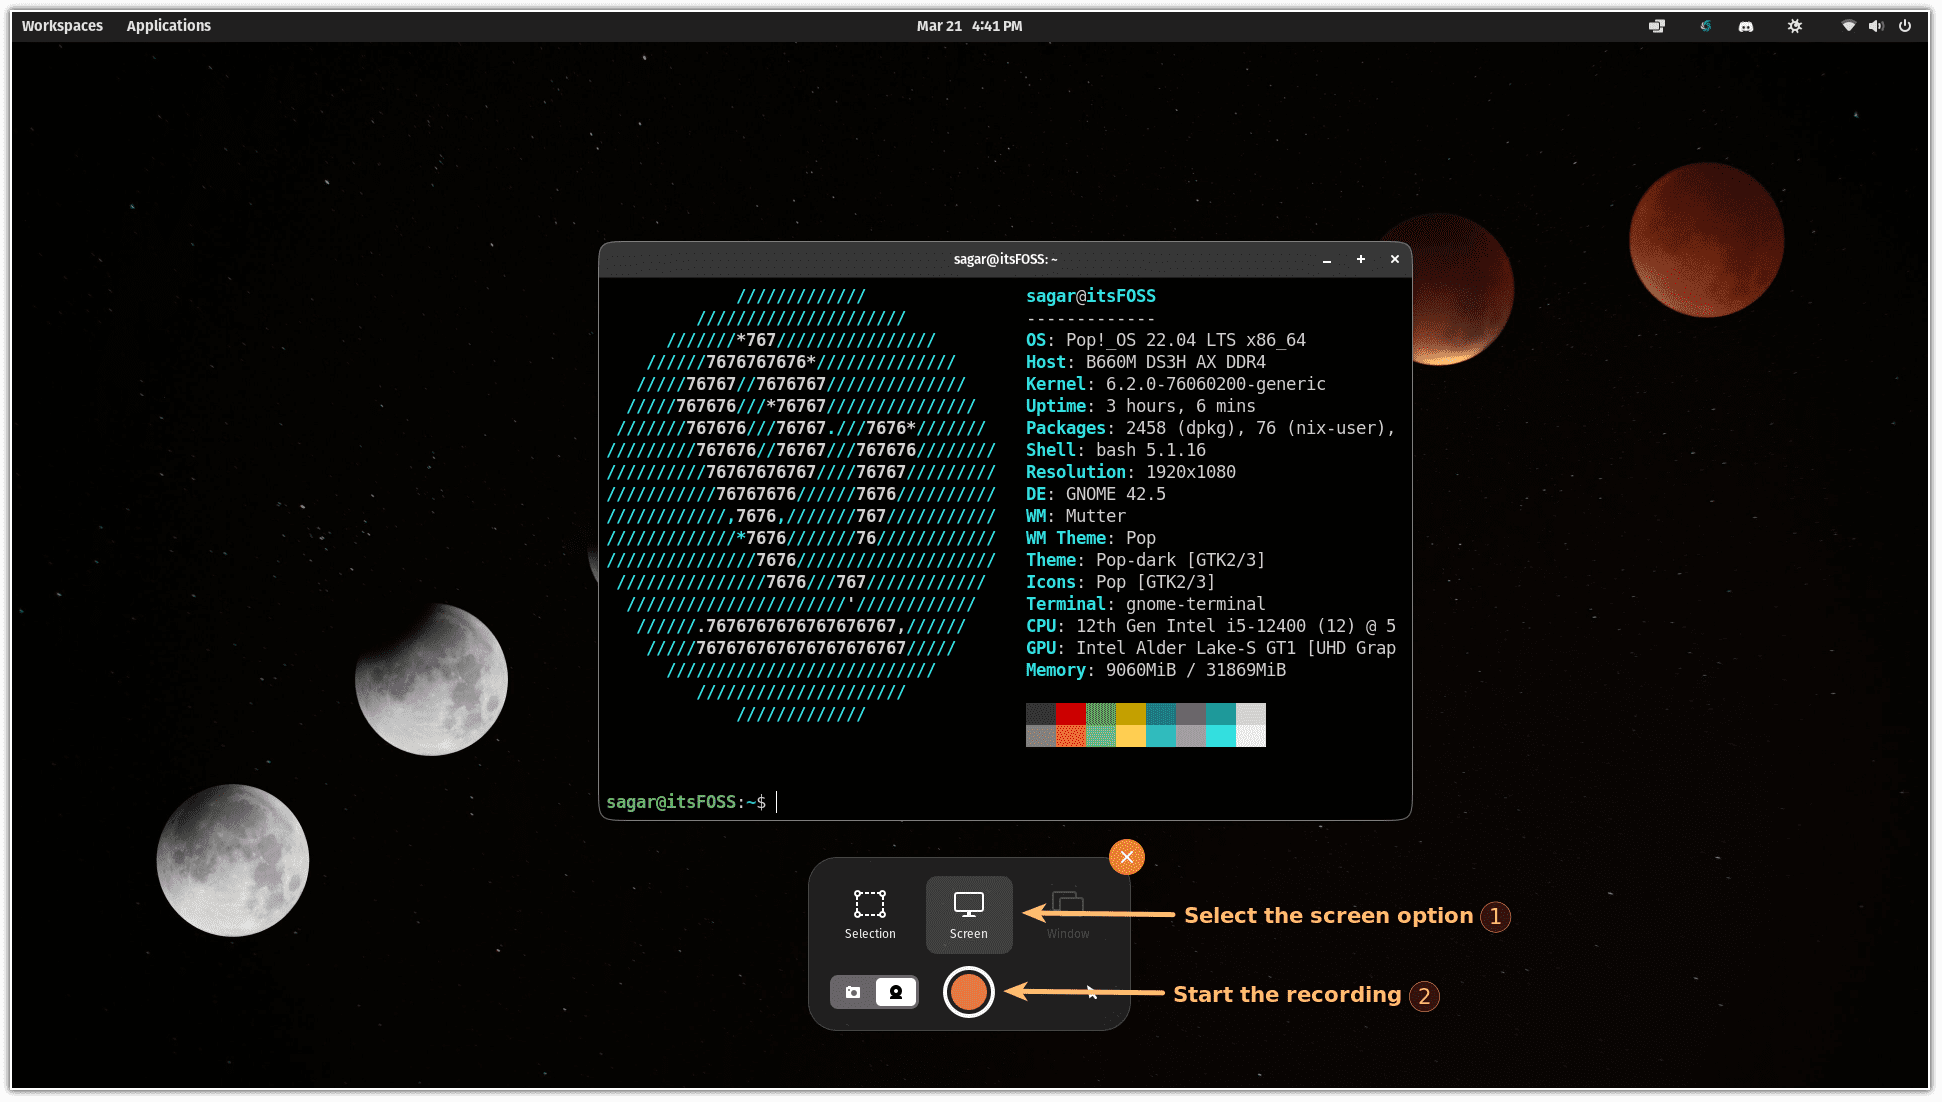
The process remains similar when you want to record the entire screen.
To record the entire screen, select the Screen option and start recording by pressing the red button:
But how are you supposed to stop the recording?
Stop the recording
Once you start recording, you will see a timer on your top bar suggesting the length of the video.
Which also acts as a stop button!
So all you have to do is press that button to stop the video:
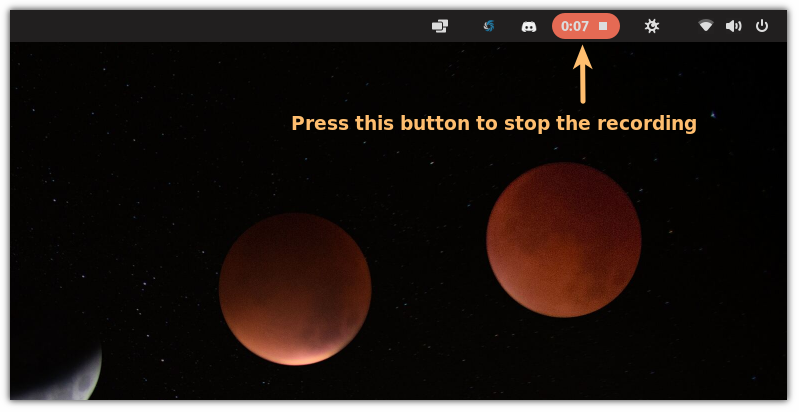
And your video will be saved under /home/user/Videos/Screencasts.
/home/user/Videos/Screencasts with .webm extension.As I mentioned earlier, the GNOME Screen Recorder offers few features. You cannot pause the recording, select output file formats, show mouse clicks etc. If you want such fancy features, you can try the powerful OBS. It offers a lot of features but comes with a complex interface.
 Abhishek Prakash
Want to convert the screen-recorded videos?
The files will be saved with the .webm extension, which may not be the preferred video file for everyone.
But worry not! You can use FFmpeg CLI utility that allows users to modify video file properties, including the media format:
Sergiu
Sure, FFmpeg is great utility but new users won't be able to make the most out of it as it bombards you with tonnes of options at once.
And for that purpose, you can use the Handbrake utility, which not just allows you to convert video files to different formats but has other useful features for you:
Ankush Das
Happy recording!
And if you have some queries, feel free to ask me in the comments.
