

Over time, any operating system can become cluttered as programs are added and removed. If you have like a TB of storage capacity, you might not bother to clean up Ubuntu to make some disk space. But if your hard disk has limited space, like I have a 128 GB SSD laptop, freeing up disk space becomes a necessity.
In this article, I’ll show you some of the easiest tricks to clean up your Ubuntu system and get more space. I’ll also share some advanced tricks so that you’ll have choices.
But before that, let’s see how to find the free space remaining on Ubuntu.
Check free space on Ubuntu
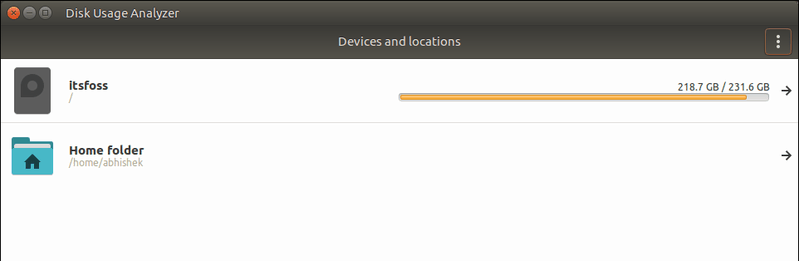
It’s always a good idea to check the free disk space in Linux first. This is rather easy on Ubuntu. Just use the Disk Usage Analyzer tool. Search it in the menu and run the tool. You should see the disk space used and the free space remaining here:
Once you know the state of free space on your disk, it’s time to clean up your system and make some more free space here.
 Abhishek Prakash
How to free up disk space in Ubuntu and Linux Mint
There are several ways you clean up disk space in Ubuntu and other Ubuntu-based system. I have discussed several command-line tricks here followed by some GUI options.
While I have mentioned several ways here, if you are a beginner, avoid the ones marked as ‘expert’. Not that you cannot use them, but it’s better to avoid them if you don’t know what you are doing.
I am using Ubuntu while writing this tutorial but you can use the same steps for Ubuntu versions, Linux Mint, elementary OS, and other Ubuntu-based Linux distributions.
If you prefer videos, I have made a video to show you how to clean Ubuntu.
1. Get rid of packages that are no longer required [Recommended]
If you read the apt-get commands guide, you might have come across the apt-get command option ‘autoremove’.
This option removes libs and packages that were installed automatically to satisfy the dependencies of an installed package. If that package is removed, these automatically installed packages are useless in the system.
It also removes old Linux kernels that were installed automatically in the system upgrade.
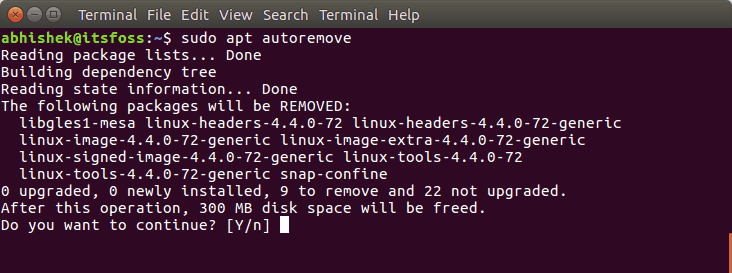
It’s a no-brainer command that you can run from time to time to make some free space on your Ubuntu system:
sudo apt-get autoremoveAs you can see, this command is going to free up 300 Mb of free space in my system.
2. Uninstall unnecessary applications [Recommended]
We all have a few games and/or applications that we hardly use. Don’t trust me? Go and find all the installed software on your Ubuntu system.
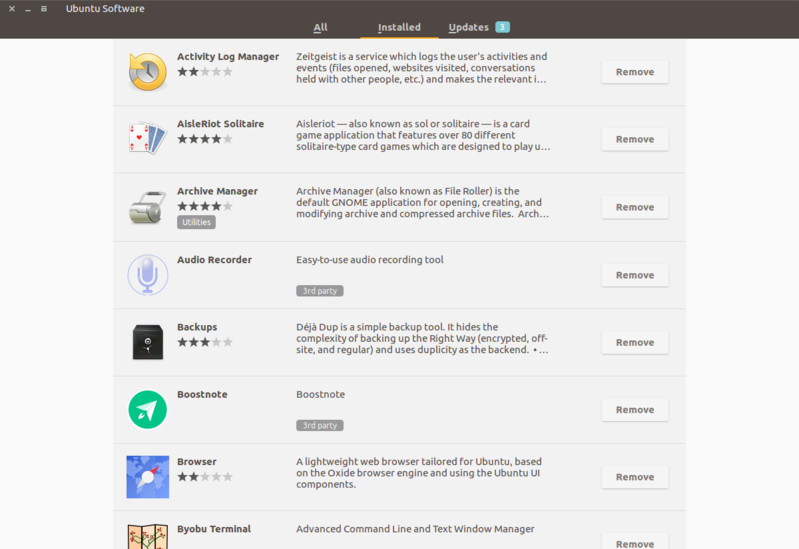
Chances are that you have a number of apps installed that you seldom use. Maybe you installed them on the back of an awesome review, out of nosiness, or to handle a particular task.
If you need space more getting rid of the unused or lesser used applications is always a good idea.
You can remove a program in Ubuntu from the software centre or use the command below with the particular app names:
sudo apt-get remove package-name1 package-name23. Clean up APT cache in Ubuntu
Ubuntu uses APT (Advanced Package Tool) for installing, removing and managing software on the system, and in doing so it keeps a cache of previously downloaded and installed packages even after they’ve been uninstalled.
The APT package management system keeps a cache of DEB packages in /var/cache/apt/archives. Over time, this cache can grow quite large and hold a lot of packages you don’t need.
You can see the size of this cache with the du command below:
sudo du -sh /var/cache/apt As you can see, I have over 500 Mb of cache storage. When you are almost out of space, this 500 Mb can make a lot of difference.

Now, you have two ways to clean the APT cache.
Either remove only the outdated packages, like those superseded by a recent update, making them completely unnecessary.
sudo apt-get autocleanOr delete apt cache in its entirety (frees more disk space):
sudo apt-get clean4. Clear systemd journal logs [Intermediate knowledge]
Every Linux distribution has a logging mechanism that helps you investigate what’s going on in your system. You’ll have kernel logging data, system log messages, standard output and errors for various services in Ubuntu.
The problem is that over time, these logs take a considerable amount of disk space. You can check the log size with this command:
journalctl --disk-usageNow, there are ways to clean systemd journal logs. The easiest for you is to clear the logs that are older than certain days.
sudo journalctl --vacuum-time=3dHere’s an example:
abhishek@itsfoss:~$ journalctl --disk-usage
Archived and active journals take up 1.8G in the file system.

abhishek@itsfoss:~$ sudo journalctl --vacuum-time=3d
Vacuuming done, freed 1.7G of archived journals from /var/log/journal/1b9ab93094fa2984beba73fd3c48a39c
5. Remove older versions of Snap applications [Intermediate knowledge]
You probably already know that Snap packages are bigger in size. On top of that, Snap stores at least two older versions of the application (in case, you want to go back to the older version). This eats up a huge chunk of space. In my case, it was over 5 GB.
du -h /var/lib/snapd/snaps
4.0K    /var/lib/snapd/snaps/partial
5.6G    /var/lib/snapd/snaps
Alan Pope, part of Snapcraft team at Canonical, has created a small script that you can use and run to clean all the older versions of your snap apps.
What you have to do here is to create a new shell script and use the following lines in your script:
#!/bin/bash
# Removes old revisions of snaps
# CLOSE ALL SNAPS BEFORE RUNNING THIS
set -eu
snap list --all | awk '/disabled/{print $1, $3}' |
    while read snapname revision; do
        snap remove "$snapname" --revision="$revision"
    done
Give it execute permission, run the shell script with sudo and see the magic. The script removed the older Snap packages and freed over half of the 5 GB space used by Snap.
du -h /var/lib/snapd/snaps
4.0K    /var/lib/snapd/snaps/partial
2.5G    /var/lib/snapd/snaps
6. Clean the thumbnail cache [Intermediate knowledge]
Ubuntu automatically creates a thumbnail, for viewing in the file manager. It stores those thumbnails in a hidden directory in your user account at the location ~/.cache/thumbnails.
Over time, the number of thumbnails would increase dramatically. Moreover, the thumbnail cache will eventually contain many superfluous thumbnails of pictures that don’t exist anymore.
You can check the size of the thumbnail cache with the command below:
du -sh ~/.cache/thumbnailsFor my system, the thumbnail cache is over 300 Mb in size.

So it’s a good practice to clear the thumbnail cache every few months or so. The quickest way is to use the terminal (please copy-paste the commands to avoid mistakes):
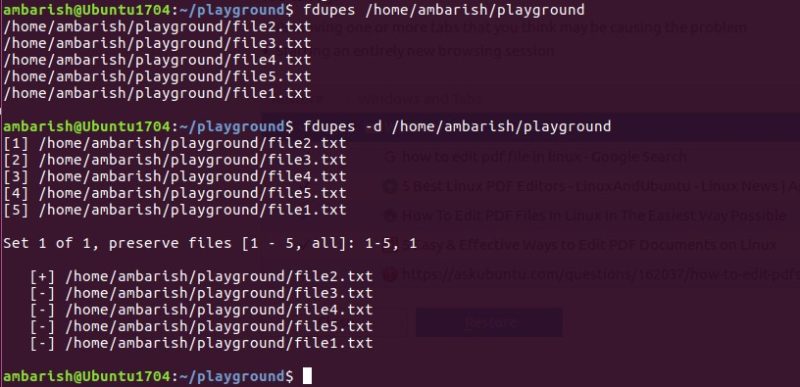
rm -rf ~/.cache/thumbnails/*7. Find and remove duplicate files
Sometimes you may have duplicate files in different places in your system. Getting rid of the duplicates will certainly free up some space and clean your Ubuntu system.
You can use a GUI tool like FSlint or a command line tool like FDUPES for this task. I recommend reading this article to see how to use these tools to remove duplicate files.
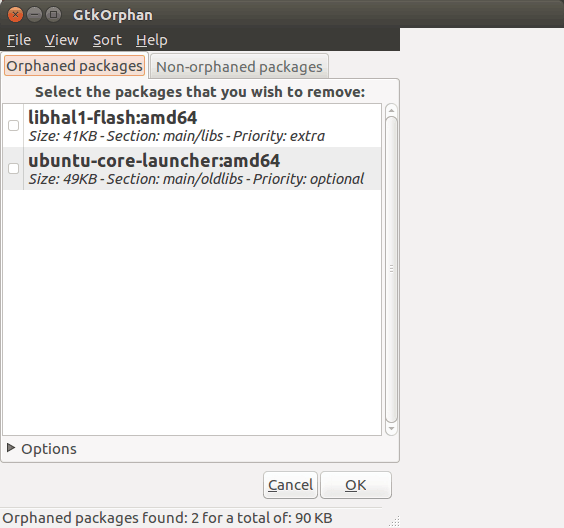
Bonus Tip: Using GUI tools to free space in Ubuntu
We saw a number of command-line options to make space in the Linux system but I understand if you don’t want to use the commands.
Remembering all the commands or using them all one by one may not be convenient for you. And this is why we have a number of GUI tools that will help you do that in a few clicks with an easy-to-use interface.
Stacer is one such tool that you could use. You can read this article to know how to use Stacer in Ubuntu.
You can check out more tools to clean up Ubuntu and make some free space easily.
Wrapping up
So, you saw a number of ways to clean up the Ubuntu system. Personally, I use apt-get autoremove more often than any other commands here. Regularly using this command keeps the system free from unnecessary files.

I hope this article helped you to make free space in Ubuntu, Linux Mint, and other such distributions. Do let me know if this worked for you or if you have some other tips to share.
