

Fastfetch is a command-line tool to display detailed information about your system in an easy-to-comprehend format. Remember Neofetch, which used to do this? Unfortunately, Neofetch is no longer being updated.
In any case, you'll find Fastfetch to be a great alternative.
It offers similar features, including a cool ASCII logo of your operating system. Fastfetch provides a lot of information about your system, like CPU, GPU, memory, Local IP, and more. Plus, it's highly customizable, so you can tweak the output to show exactly what you want.
Whether you're a casual user or a tech enthusiast, Fastfetch is a handy tool. Let's see what it can achieve.
Install Fastfetch on your Linux system
Fastfetch is available in the official repositories of several popular Linux distributions.
If you are an Arch Linux user, install Fastfetch using the pacman command:
sudo pacman -Syu fastfetchFedora users can install Fastfetch by running the command:
sudo dnf install fastfetchopenSUSE users can use the Zypper command:
sudo zypper install fastfetchFor Ubuntu, you can install Fastfetch from PPA. First, add the PPA to your system:
sudo add-apt-repository ppa:zhangsongcui3371/fastfetchNow, update the package cache and install Fastfetch.
sudo apt update
sudo apt install fastfetch
Using Fastfetch
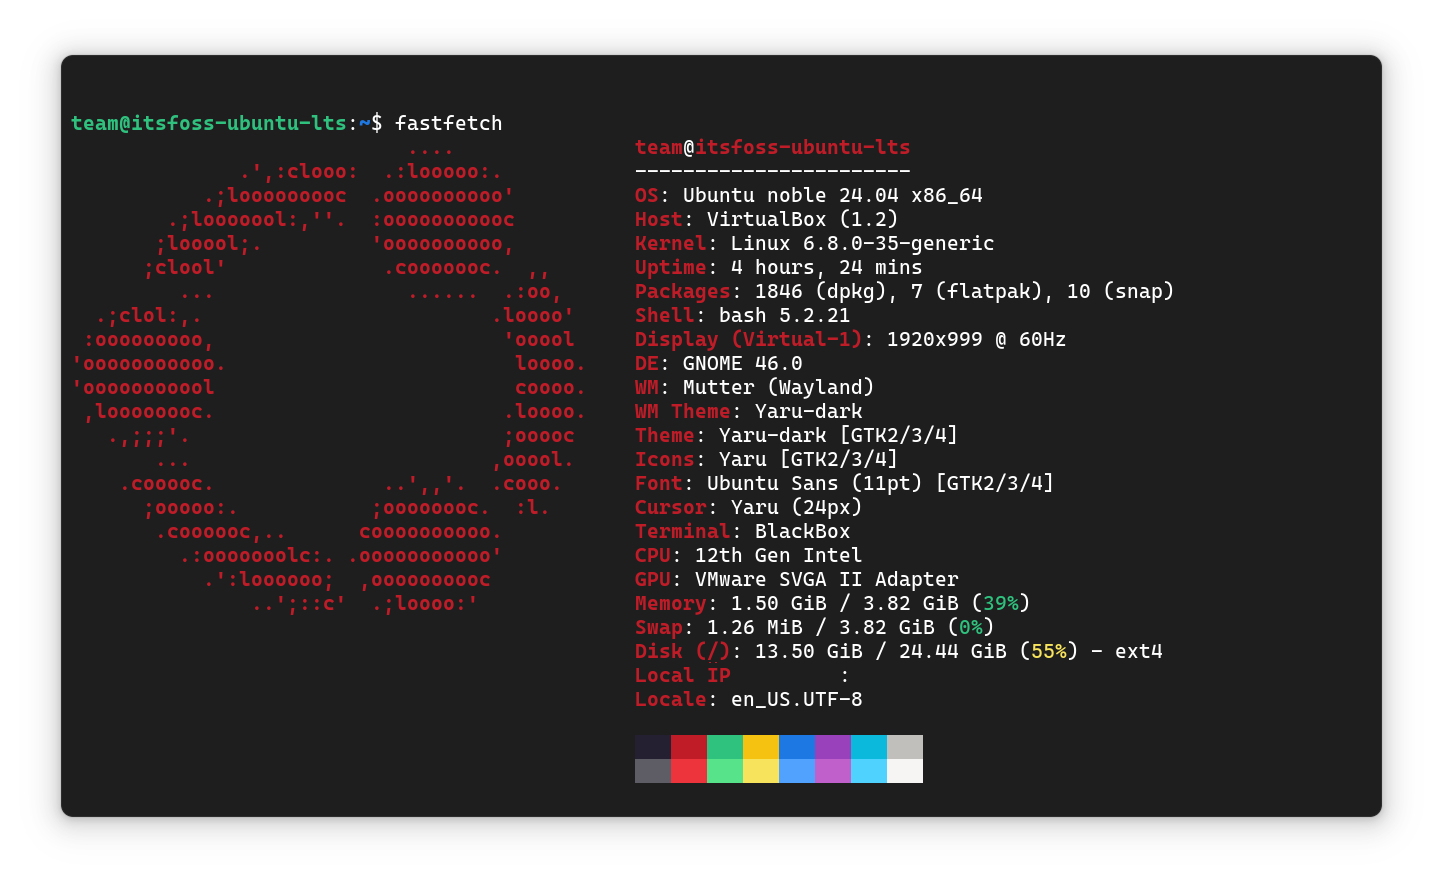
Once you have installed Fastfetch, you can use the fastfetch command to run Fastfetch with the default configuration.
fastfetchThis will output a big ASCII logo along with a comprehensive list of system information.
Let's see how you can configure Fastfetch to your personal needs.
1. Generate a configuration file
The configuration file for Fastfetch is generally located at ~/.config/fastfetch/config.jsonc. From the file, it is clear that, the Fastfetch configuration is JSON with comments.
When you install Fastfetch for the first time, you won't get a configuration file. So the first step is to generate a simple config file. For this, run the command:
fastfetch --gen-config
You are good to go now.
2. Using different logos
The ASCII Logo of the distribution makes these fetch tools more cool to watch. Like Neofetch, Fastfetch can also generate system info with different logos.
First, list all the available logos using the command:
fastfetch --list-logosThis will list the proper names of all the available logos.

This is a huge list with 400+ entries! Let's say I want to use the Fedora logo in Ubuntu. Here, I will use the -l option to specify the name of the logo.
--print-logos option to print the built-in logo. But, most of the time, you won't see all the results because of the terminal scroll-back buffer limit.3. Change the color of the logo
To make the logo appear in a different color, you can use the command:
fastfetch --logo-color-[1-9] color
Now, the [1-9] is the placeholder. If you have a logo that has multiple colors in it, you can decide which color appear where.
4. Set a custom logo (workaround)
Fastfetch can show a custom image in place of the logo displayed.
First, make sure you have jp2a installed. If not, install using:
sudo apt install jp2a
Now, convert the image you want to show as an ASCII logo and save it to a text file.
jp2a imput-image.png > out.txt
Now, use this logo for Fastfetch.
fastfetch --logo <path/to/out.txt>
That’s it. Your image will be placed as the logo. If you want to change the color, use:
fastfetch --logo-color-1 cyan --logo <path/to/out.txt>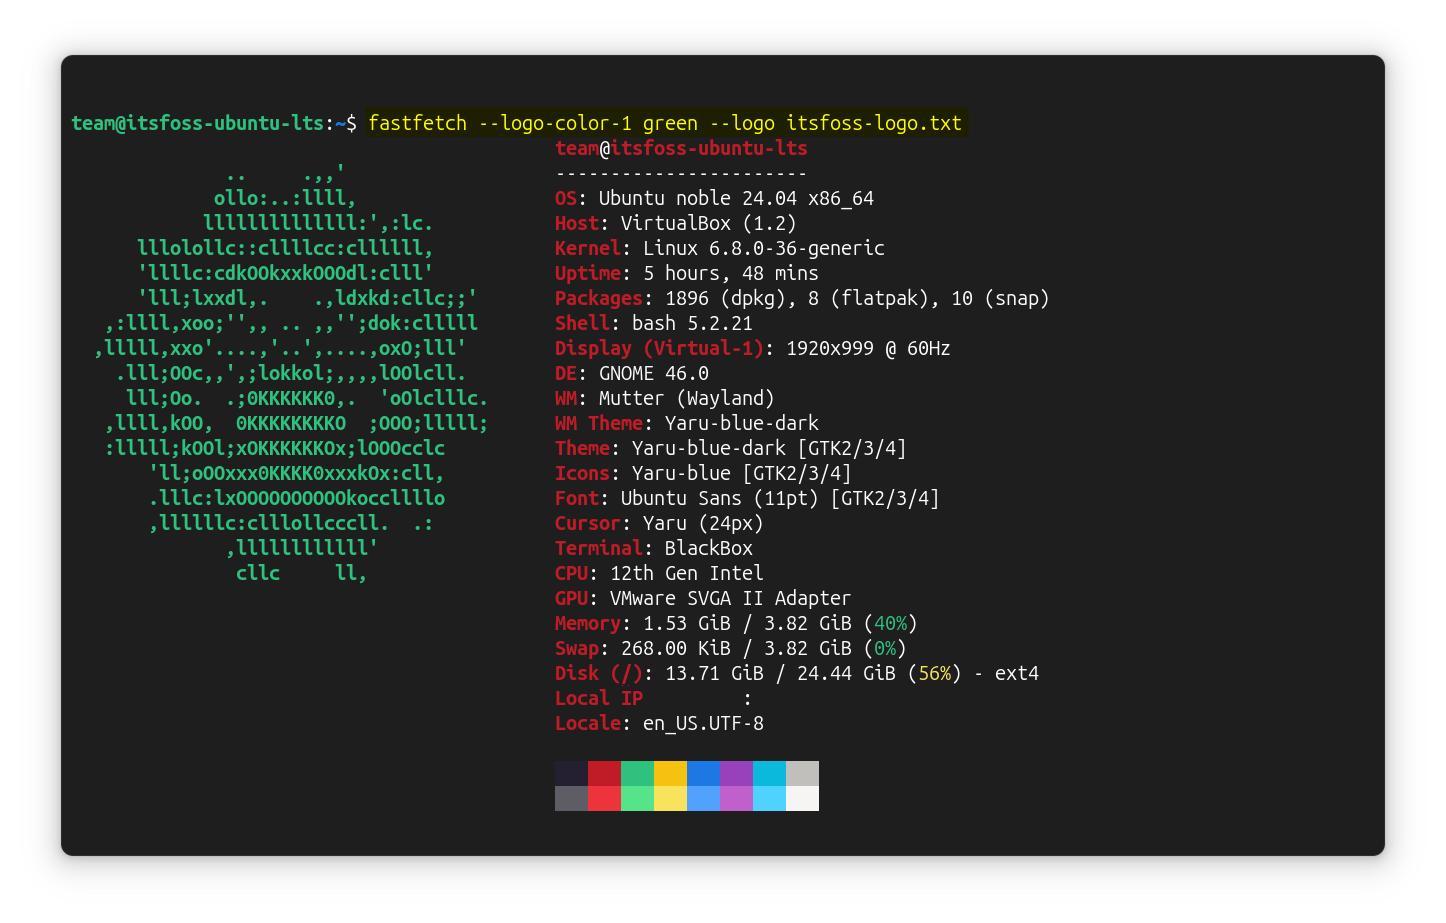
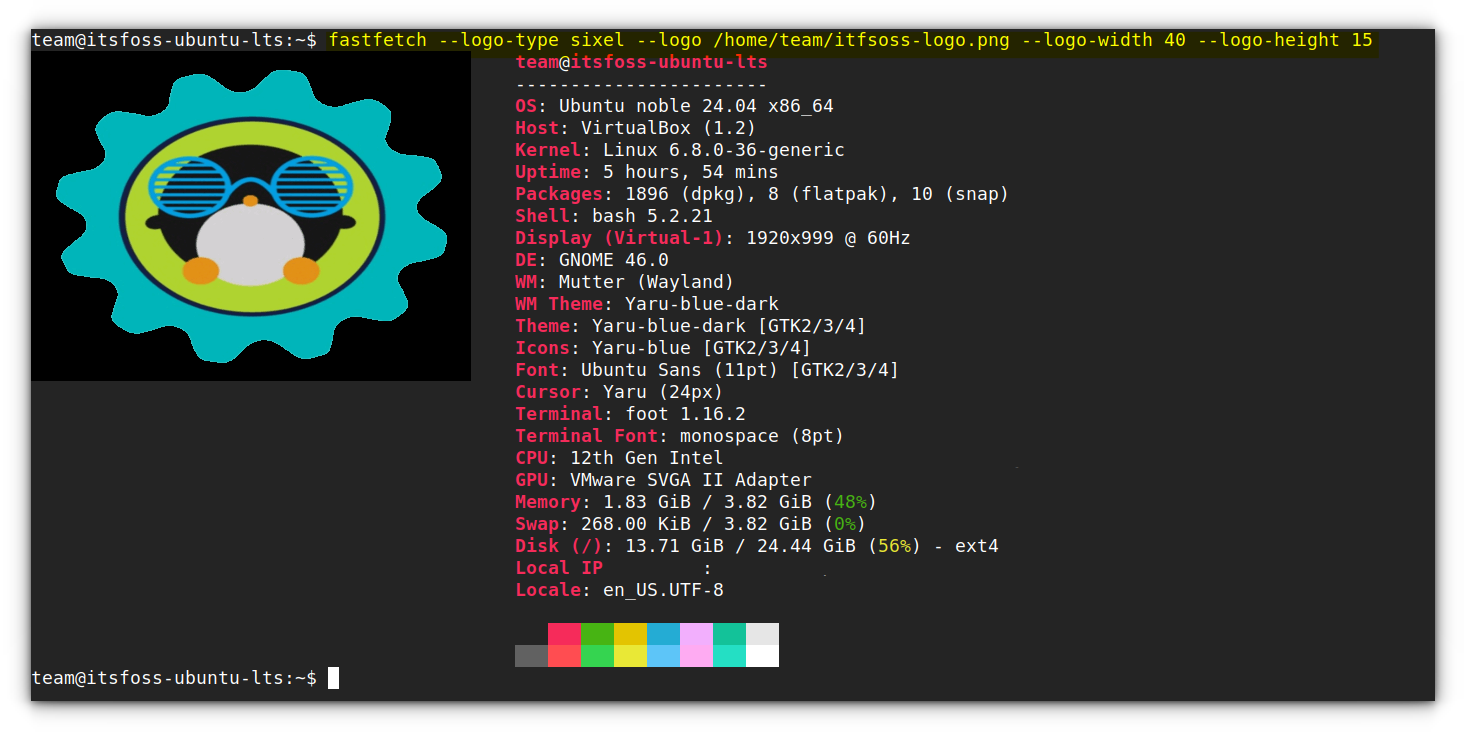
If you have a terminal like Foot, you can display and image using the sixel. Run:
fastfetch --logo-type sixel --logo <path/to/file.png> --logo-width 40 --logo-height 15
This will display the PNG image in the terminal.
5. Dynamically set the structure of Fastfetch
In Fastfetch, you can specify what modules are to be displayed. First, list all the available modules in Fastfetch using the command:
fastfetch --list-modules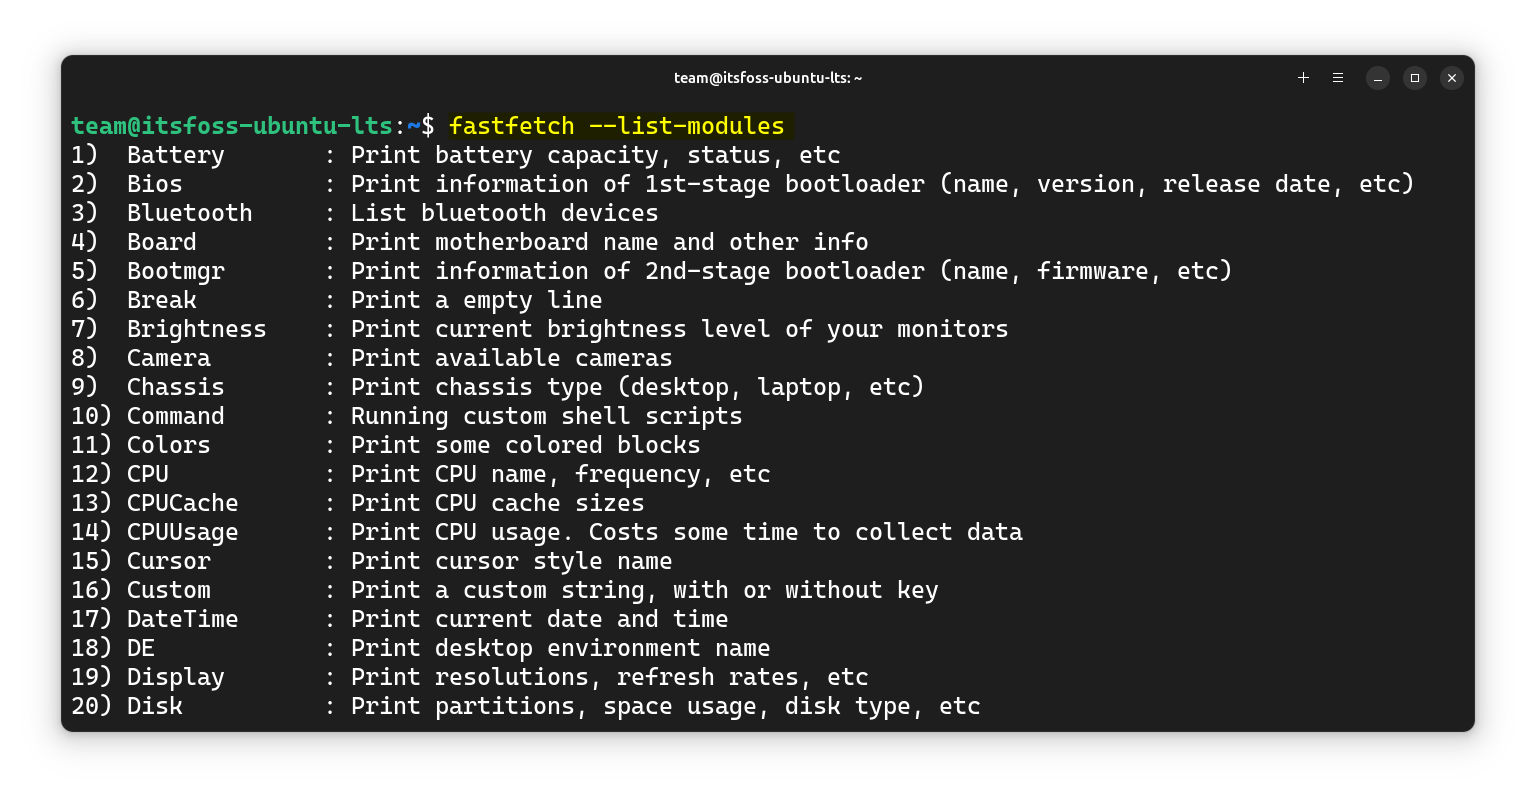
Now, for example, if you want to launch Fastfetch and display only the OS, Kernel, Packages, Terminal, Memory, and Locale. Specify these options in a ":" separated form to -s option. Like:
fastfetch -s OS:Kernel:Packages:Terminal:Memory:Locale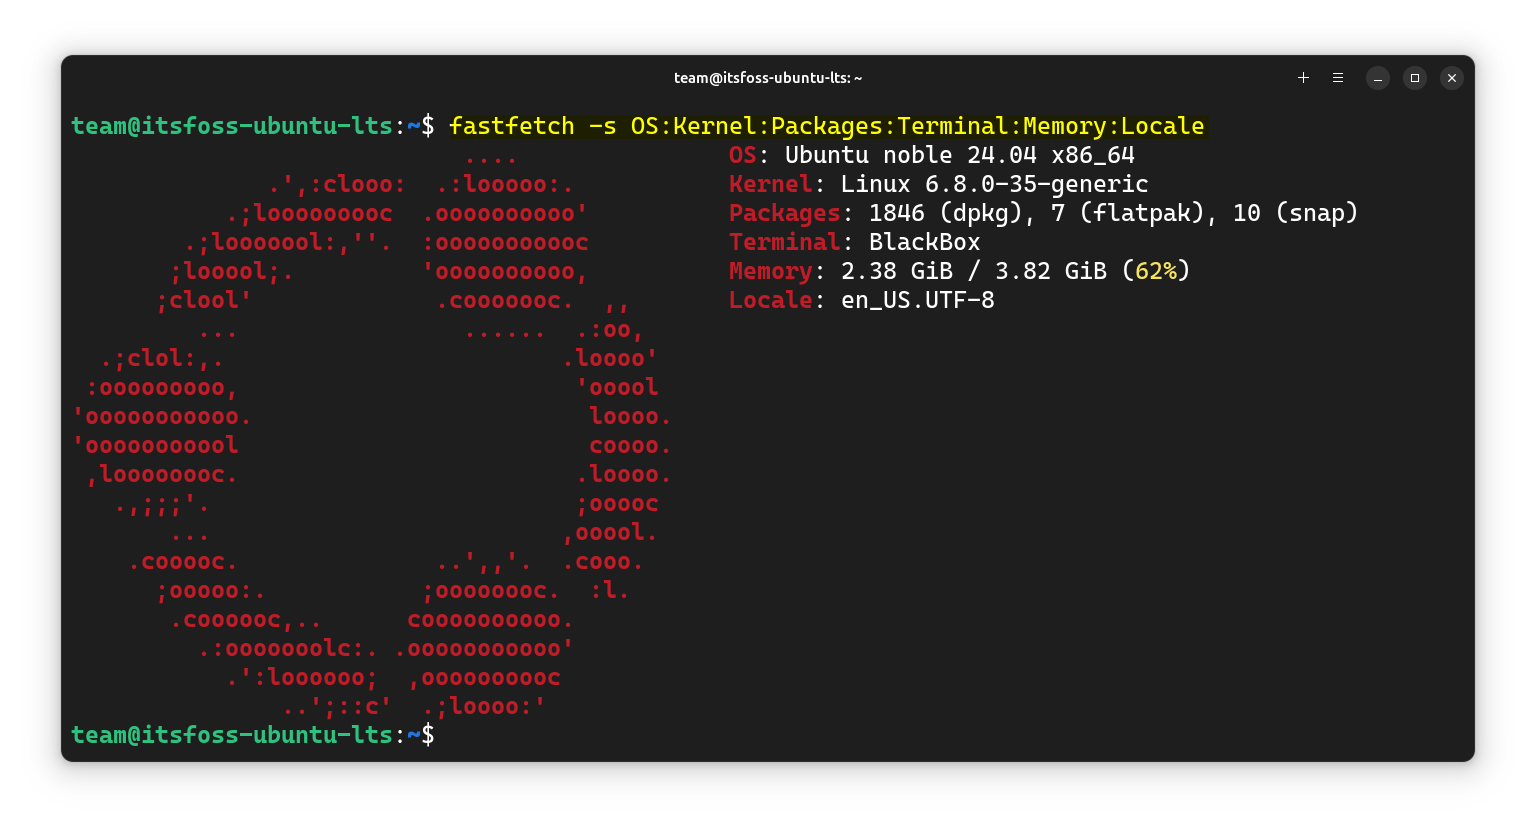
In the above screenshot, you can see that there is no gap between the command input and the fastfetch output. This is because we didn't ask to print the Separator module.
6. Use a preset configuration
Not ready to edit the configuration files? Don’t worry! There are some cool presets available out of the box.
First, list all the available presets using:
fastfetch --list-presets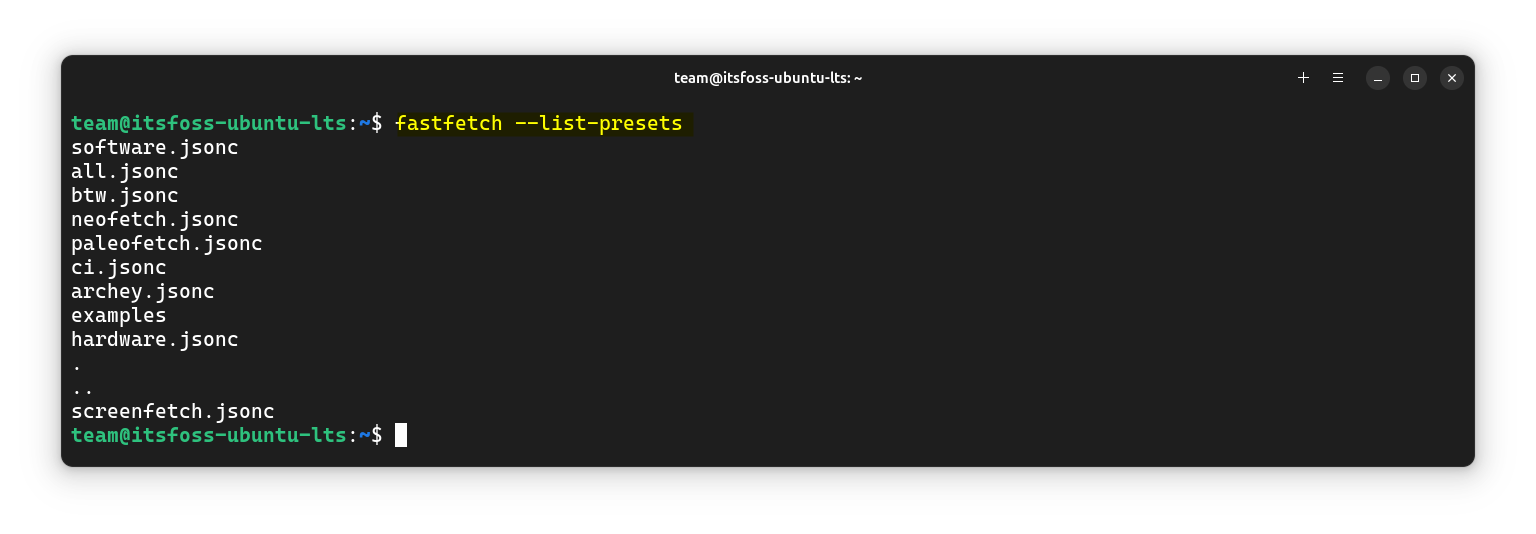
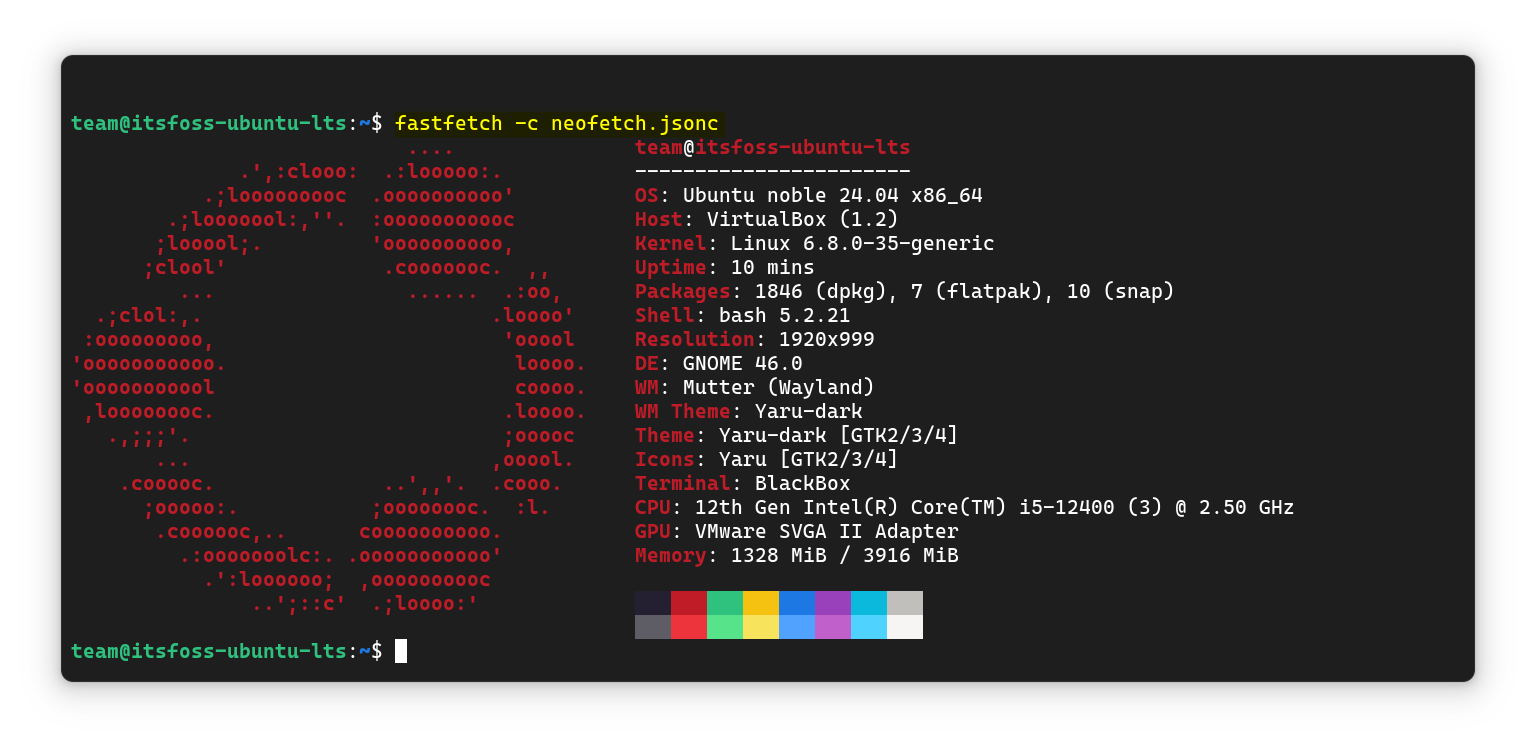
Now, you can load a particular preset configuration using the -c option.
fastfetch -c neofetch.jsonc
The above command will load Fastfetch looking exactly like Neofetch.
There are several presets like paleofetch.jsonc, hardware.jsonc, etc. Of which, another cool one is, btw.jsonc.
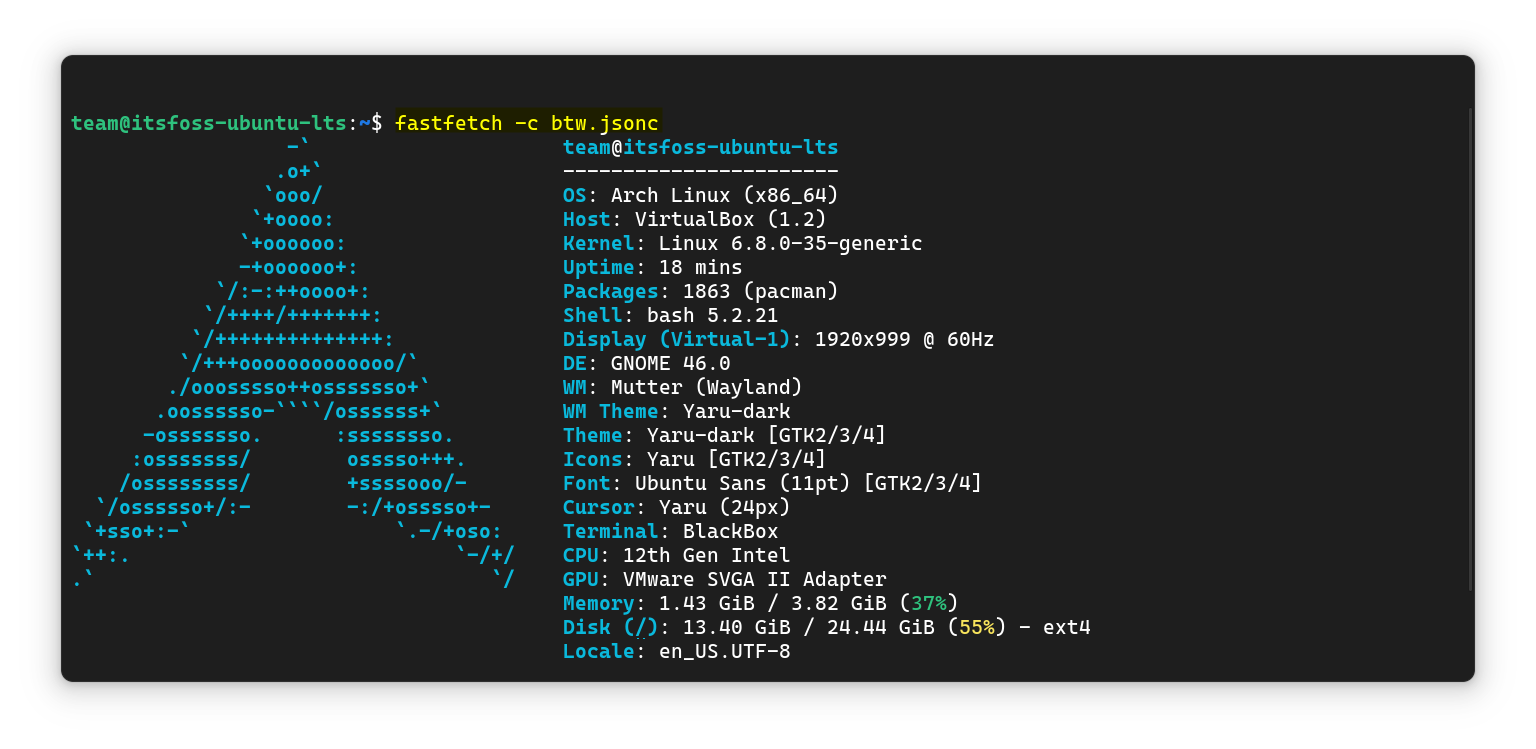
That is funny. It shows distro name as Arch Linux, pacman as packages, on an Ubuntu system 😉
7. Configure using file
As I mentioned earlier, you can fine control Fastfetch using the configuration file. Open Fastfetch config file in a JSON supported IDE. Here, I am using VS Code.
Add a default module
As you can see, when you hover over a module name, it reports that a “default configuration” is used.
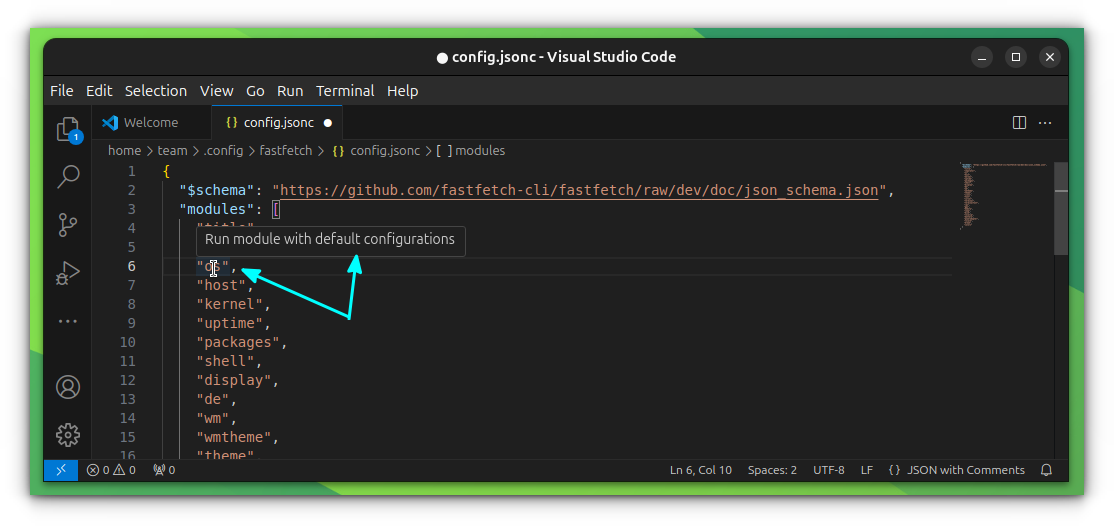
The modules can be used in Fastfetch config by following the format:
"modules": [
	"modname1",
	"modname2",
	"modname3"
]
In this format, the specified modules will be run in the default values.
Modify a module
Now you can run a module with some custom values. The general syntax is:
"modules": [
	{
	"type": "modename1",
	"format": "value",
	"Other": "value"
	}
	{
	"type": "modname2",
	"option": "value",
	"option": "value"
	}
]
As shown above, we use the module name inside the “type” field. Here comes the use of an IDE like VS Code. Here, as you continue typing, it will suggest the possible values.
Editing the Fastfetch modules in VS Code
In the above video, you can see the suggestions in action.
It is possible to use some modules to run with default configuration and some others with custom configuration.
"module": [
	"modone",
	"modetwo",
	{
	"type": "modethree",
	"option": "value"
	}
	"modfour",
	{
	"type": "modfive",
	"option": "value"
	}
	"modesix"
]
If you are struggling with the options, you can take a look at the preset configurations for an understanding.
8. Get detailed help
The man page of fastfetch only provides a limited help regrading the tool. So for a quick reference, you can read the manual page of Fastfetch.
man fastfetch
Apart from the man page, Fastfetch offers a comprehensive help mechanism by using the --help option.
fastfetch --help | less

With the less command, you can scroll the output to view things easily.
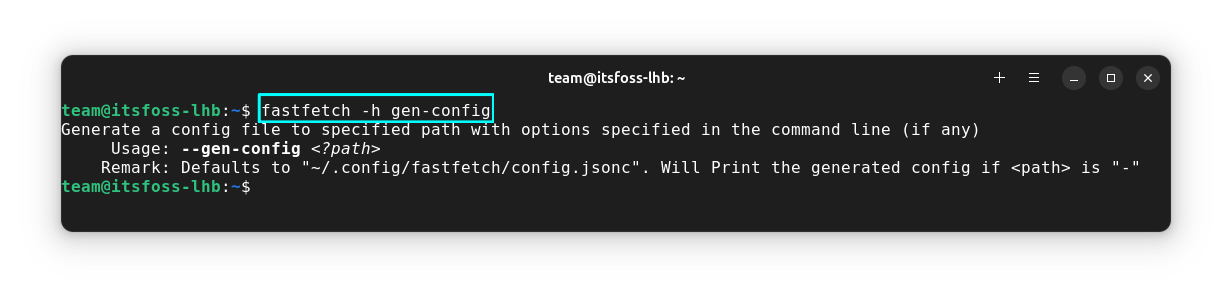
To get help for a particular option, you can use:
fastfetch -h <option-name>
Here, the option-name should not contain the -- prefix.
For example,
fastfetch -h gen-config
will show the details of that option.
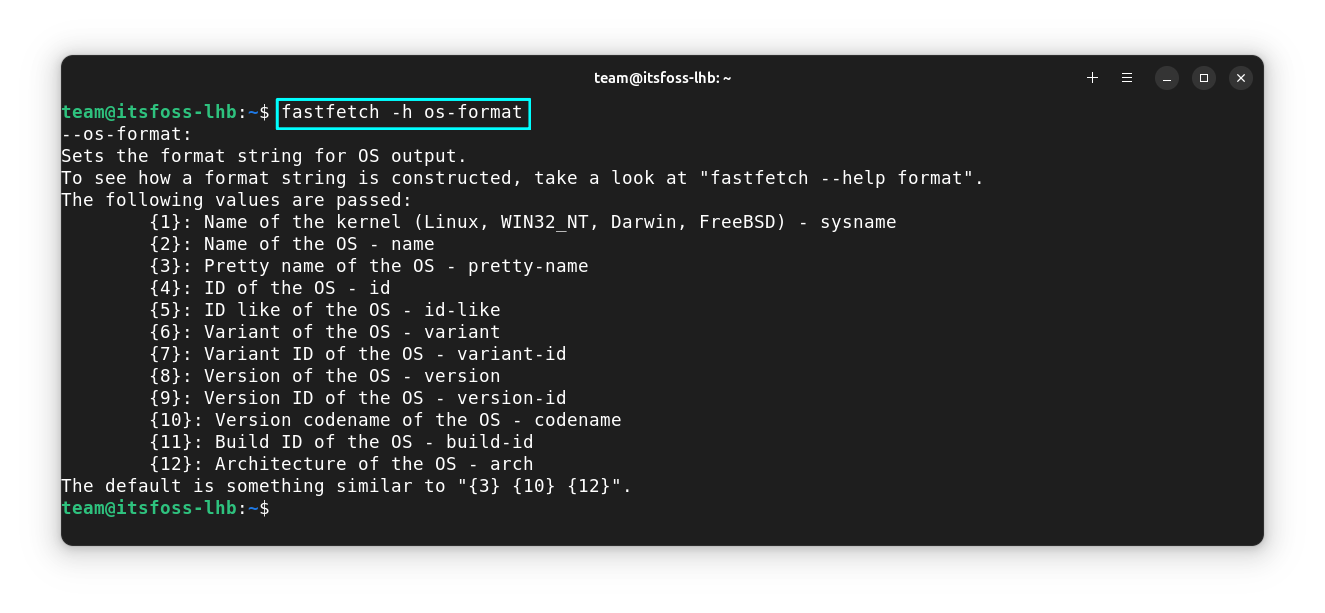
Other than that, to output the format of a module, use the command:
fastfetch -h <module>-format
For example:
fastfetch -h os-format
Conclusion
I understand that most Linux users will probably install Fastfetch to display the distro logo in ASCII format.
But there is a minority that wants to do more than the default offering. This tutorial caters to that small group of people who like to go the extra mile.
I hope it helps you utilize the full potential of Fastfetch.

