
Despite all the concern, facial recognition is getting popular among consumers. Most recent Android and iOS devices have the feature to unlock the device with facial authentication.
Once you get used to the face unlock or fingerprint unlock, typing the password feels like a tedious, boring task.
On the Windows operating system, Microsoft provides Windows Hello which allows instant authentication based on your face.
On Linux, face unlock is not a built-in feature. No Linux distribution, as far as I know, provides the face unlock feature out of the box.
But as the saying goes, there is a shell; there is a way.
In Linux, you’ll often find alternative things and tools that you can configure for a certain task. Remember the tutorial I wrote for sharing mouse and keyboard between Linux and Raspberry Pi devices?
In this tutorial, I’ll show you how to set up face unlock in Ubuntu. You can use the tutorial for other Linux distributions as well.
You need to be comfortable with the terminal and Linux commands because you’ll be using a Linux command line tool.
Howdy: A Windows Hello Styled Facial Recognition Authentication System for Linux
Howdy is an open source software that gives you the ability to login to your Linux system with face recognition. Consider it an open source Windows Hello alternative for Linux. Here, your data is stored locally on your computer.
Howdy uses the built-in IR emitters and webcam combination to recognize your face. It is built using OpenCV and Python.
Howdy uses the PAM authentication system, which means not only you can log in to your system with your face, but you can also use it for sudo, su and in most other situations where you need to use your account password. However, in my testing, it could not unlock the keyring in Ubuntu.
In this tutorial, I’ll show you how to install Howdy and how to set it up for facial recognition. The process is not too complicated but you should not be too uncomfortable using the terminal here.
Installing Howdy on Ubuntu and other Linux distributions
The developer of Howdy provides a handy PPA that makes installing Howdy easier to install on Ubuntu-based distributions.
Open a terminal and use the following commands on Ubuntu:
sudo add-apt-repository ppa:boltgolt/howdy
sudo apt update
sudo apt install howdy
Howdy is a big software and it installs a huge number of software libraries. For me, it showed around 140 MB of download size and 600 MB of disk size requirement after installation.
During the installation, it asks you to choose from Fast, Balanced and Secure authentication type. I chose Balanced at this step because I don’t want to wait too long but don’t want it to be less secure as well.
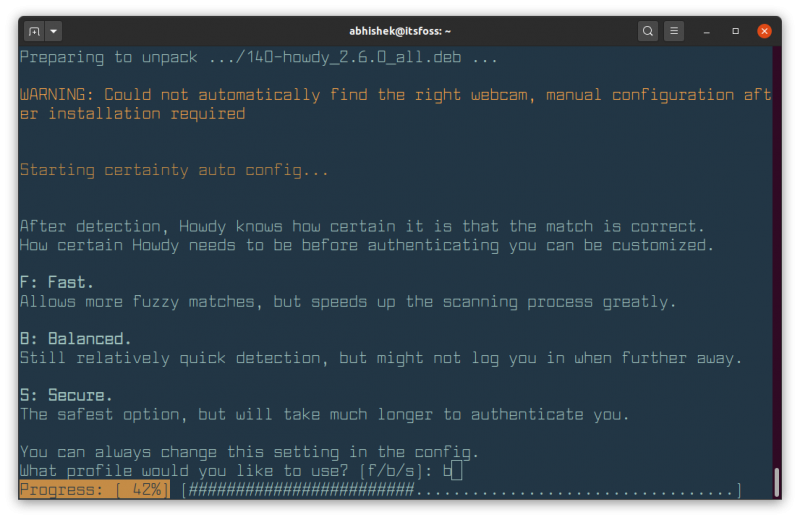
During the installation, it complains about adding /usr/local/bin in the PATH but for me it was already there. You may verify it for your system.
Installing Howdy on other Linux distributions
For Debian, you can download the DEB file. Arch/Manjaro users can install it from AUR.
Fedora users have the option to use COPR repository:
sudo dnf copr enable luya/howdy
sudo dnf install howdy
openSUSE users can find the installation instructions here.
As a last resort, you can get the source code on its GitHub repository.
Since I am using Ubuntu 20.04 in this tutorial, some steps may use apt command but I believe you can use your distribution’s package manager in those steps.
Setting up face unlock on Ubuntu and other Linux with Howdy
Let’s see how to set it up for facial recognition.
Change config file
Before you use Howdy, you should change the configuration file to specify your webcam device.
On most Linux systems, /dev/video0 should be the device for the webcam but you should make sure of it using v4l2-ctl command.
Install v4l-utils first:
sudo apt install v4l-utilsNow use the v4l2-ctl command to list your devices
abhishek@itsfoss:~$ v4l2-ctl --list-devices
Integrated_Webcam_HD: Integrate (usb-0000:00:14.0-5):
	/dev/video0
	/dev/video1
Why two (or more) video devices? You’ll have to check the capabilities of the device. The device should have Video Capture capability, not just Metadata Capture.
You can check it with a command like v4l2-ctl --device=/dev/video0 --all and then look under the capability section. Most of the time, it should be the first device i.e., /dev/video0.
Now, you need to set the device path in the Howdy config. You can do that by manually opening the /lib/security/howdy/config.ini file for editing or use the command below to open the config file for edit in your default terminal-based text editor:
sudo howdy configLook for the line starting with device_path. Change its value to /dev/video0 or whatever is the path for your webcam device.
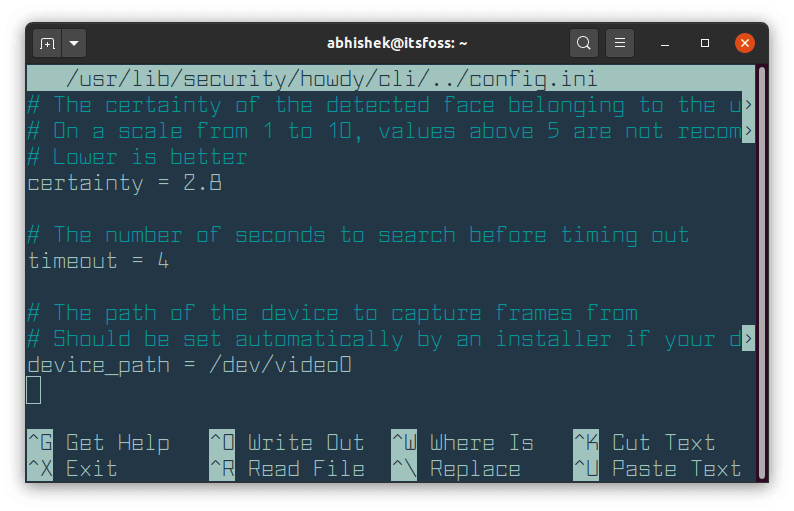
Save and exit the file. You are ready to go now.
Add your face for facial recognition
Howdy is a command line tool. You have to do everything in the terminal.
Now that you have the correct device path set, it is time to add some faces to its database for recognition.
Use the following command to associate a face to the currently logged-in user i.e., you.
sudo howdy addIt doesn’t show how your face looks like by opening a camera, so you should look into the webcam to get your face appropriately captured.
It will ask you to add an identifier to the face. You can name it anything you want. I used terms like glasses, with-headphones, etc.

I suggest adding a few more variants of your face especially if you wear glasses. Just run the sudo howdy add command each time you want to add a face.
Howdy is ready to use as soon as you add a face. To test it, open a new terminal and run a command with sudo. You’ll notice that your webcam blinks and tries detecting a face. If the face is not recognized, it will show an error message and ask you to use your password.

To add a face for some other user, you should provide the username as well:
sudo howdy -U username add You don’t need to worry about starting Howdy after reboot. Howdy starts automatically at each boot.
List all the known face models for a user
You can see what face models are associated with a user with the list option. If you don’t specify the username, it shows the output for the current user.
sudo howdy list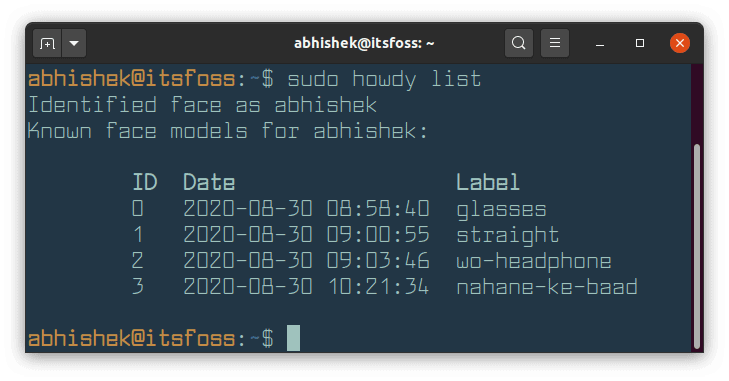
Clear some or all face models
When you list all the face models for a user, you can use the remove option to delete a certain face model. You’ll have to provide the ID of the face model, not the label.
sudo howdy remove face_ID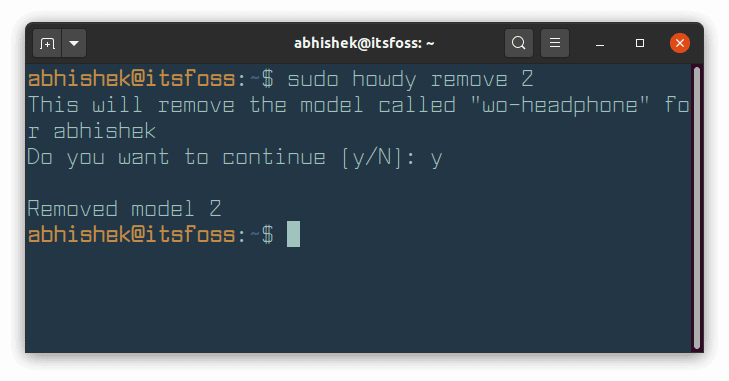
You can remove all the face models with the following command:
sudo howdy clearDisable and re-enable Howdy
You can temporarily disable Howdy using this command:
sudo howdy disable 1You can re-enable it using the same disable option but with 0 as an argument:
sudo howdy disable 0Removing Howdy from your system
You can use your distribution's package manager to remove Howdy.
On Ubuntu, use the following command:
sudo apt remove howdyYou should also delete the PPA:
sudo add-apt-repository -r ppa:boltgolt/howdyFor other distributions, use the uninstallation method that corresponds to the installation method you used.
Conclusion
It’s fun to set up face unlock on Linux. I think this could provide a base for some good Raspberry Pi projects. It’s a fun weekend exercise to do a thing like this.
However, I won’t recommend setting it up on critical infrastructure or servers. Facial recognition is not very secure.
Using face unlock on your personal Linux system is one thing, but please don’t use it on servers or work machines.
I hope you liked this DIY (if I may call it) tutorial. Let me know if you would like to see more such tutorials on It’s FOSS in the future.

