

I landed in a situation where I had two monitors connected to my laptop and I wanted to use a Raspberry Pi in the mix.
Since I only needed to use the Pi occasionally, it made no sense to get a dedicated keyboard for it. And thus I decided to share my keyboard and mouse between the two devices.
Actually, there are two ways to handle this issue:
- Hardware: Get a keyboard mouse pair that can switch between devices. Some keyboards allow you to switch between 3 devices using RF and Bluetooth combination. You may always use KVM switch to change the output device.
- Software: You use a tool like Barrier or its fork Input Leap (both explained in detail in this article).
If you cannot go for the hardware solution, try the software based approach to share the keyboard and mouse between computers.
The set-up
Barrier used to be the go-to software for this kind of approach but it has not seen new development in years. An earlier version of this tutorial used Barrier, and the instructions can still be followed in the PDF here.
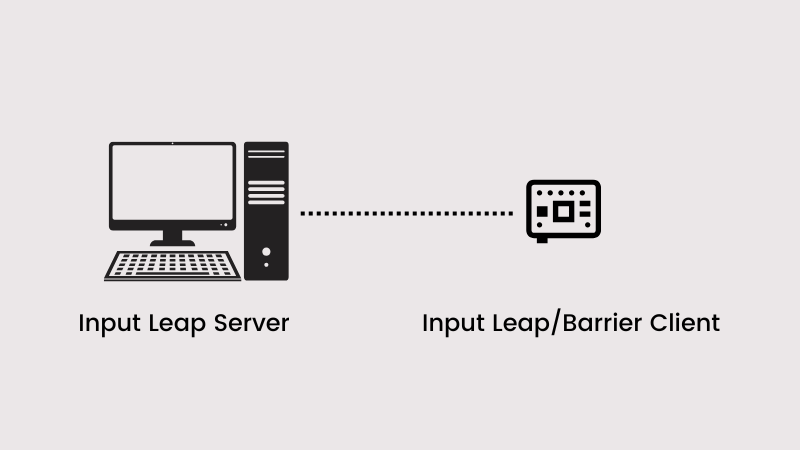
I used Input Leap, a fork of another open-source project called Barrier. The architecture of this setup is simple. You setup Input Leap in server mode on the system where keyboard-mouse is attached. And then you setup Input Leap or Barrier in client mode. Why Barrier? I'll discuss it later in the tutorial.
The process involves this:
- Installing the Input Leap software on all the devices you want in this sharing setup
- Setting up the software on the system with keyboard-mouse in server mode
- Setting up the software on the system(s) without keyboard-mouse in client mode
- Using the software to switch between the devices
Let’s see how to share the mouse and keyboard with multiple computers using this method.
Installing Input-leap on Debian (using pre-built releases)
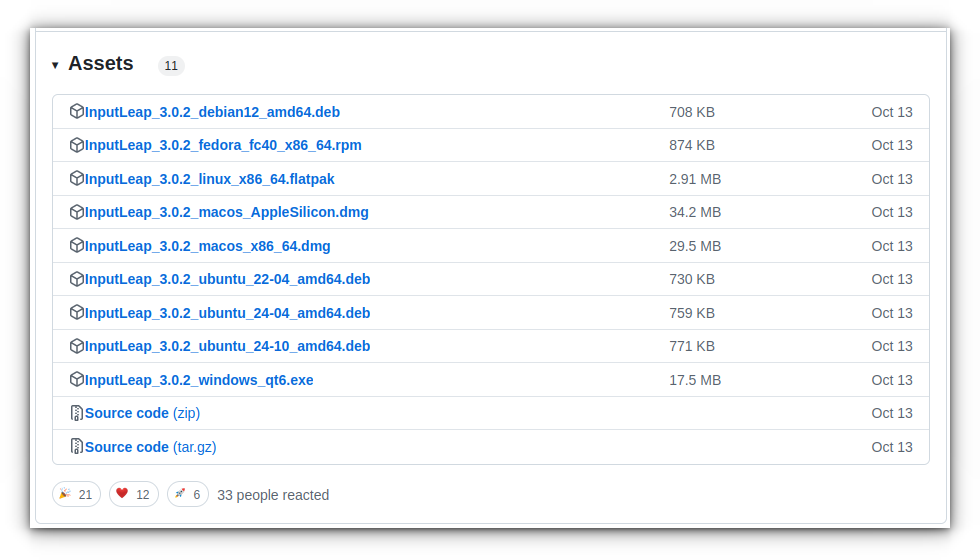
The developers of Input Leap have kindly provided pre-built releases on their GitHub page. This is the easiest way to get started.
Download the Pre-Built Package
Visit the GitHub releases page and download the .deb file that matches your system’s architecture (e.g., amd64).
Install the Package
sudo dpkg -i input-leap-*.deb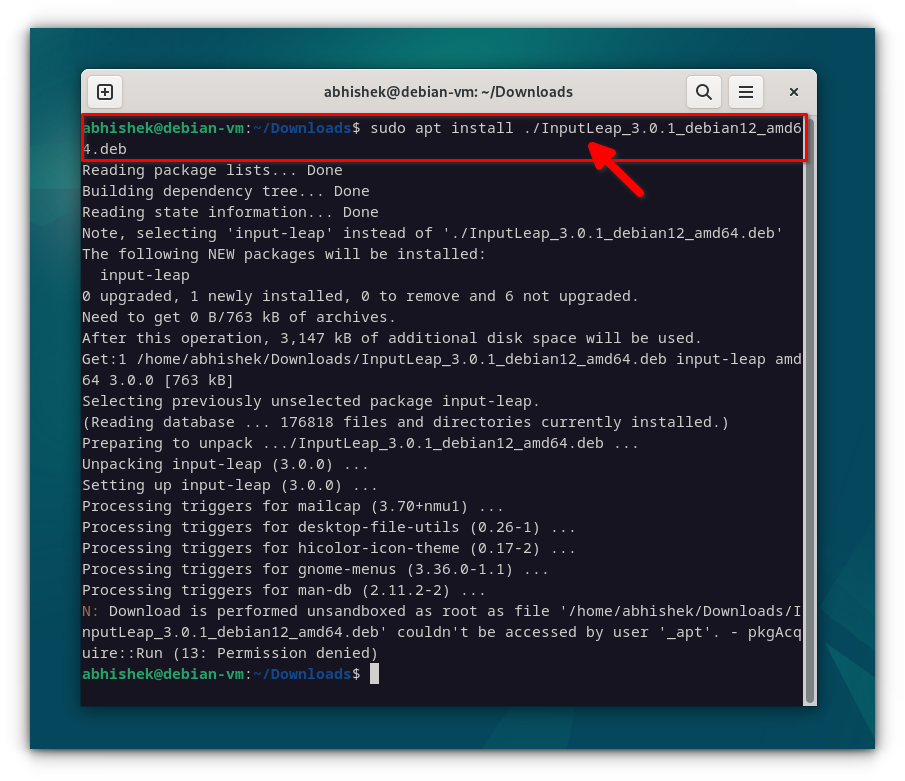
Start Input Leap
Run the Input Leap server on your device:
Now you are ready to start input-leap:
That’s it! Your Debian system is ready to share its keyboard and mouse.
Configure the client on your secondary device(s).
Building input-leap from source (for Raspberry Pi)
If you can’t find a suitable pre-built release, or you’re using a platform like Raspberry Pi, you’ll need to build Input Leap manually from source.
If you still decided to go for source code installation, here are the steps.
Install build dependencies
Ensure your system has all the necessary tools and libraries installed:
sudo apt-get install -y \
                  cmake \
                  g++ \
                  git \
                  libavahi-compat-libdnssd-dev \
                  libcurl4-openssl-dev \
                  libice-dev \
                  libsm-dev \
                  libssl-dev \
                  libxinerama-dev \
                  libxrandr-dev \
                  libxtst-dev \
                  libxkbcommon-dev \
                  libglib2.0-dev \
                  ninja-build \
                  qtdeclarative5-dev \
                  qttools5-dev \
                  meson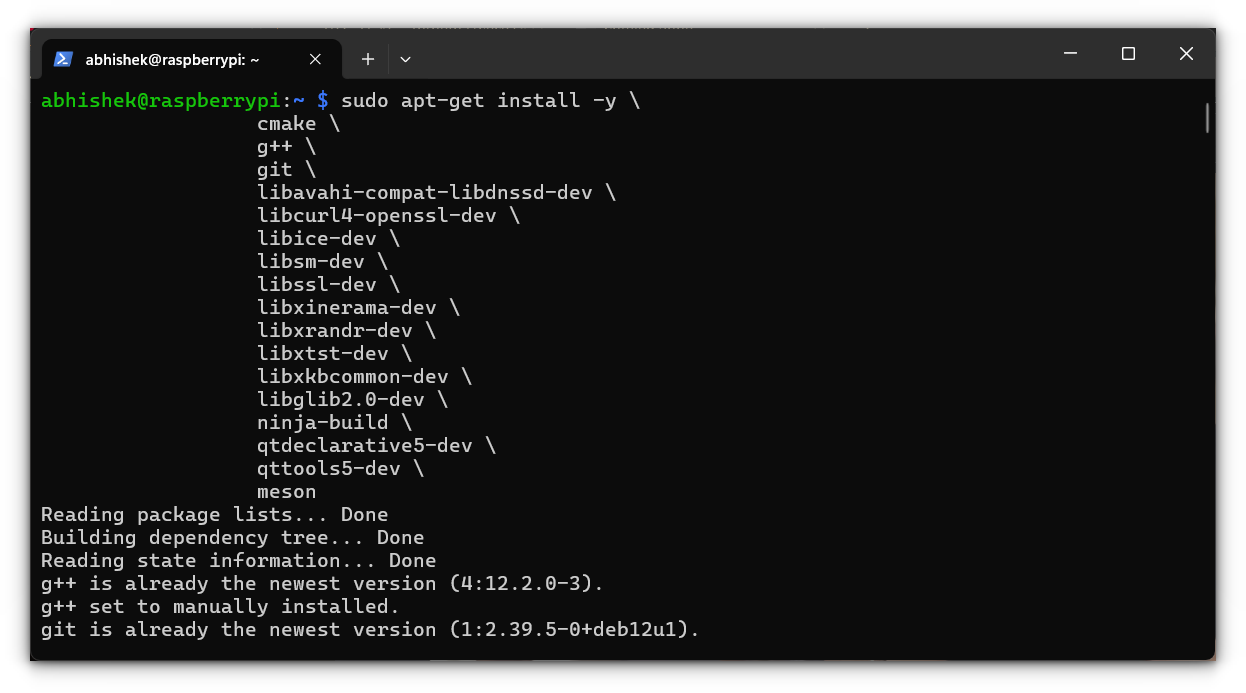
Clone the repository
Fetch the source code:
git clone --recursive https://github.com/input-leap/input-leap.git
cd input-leap/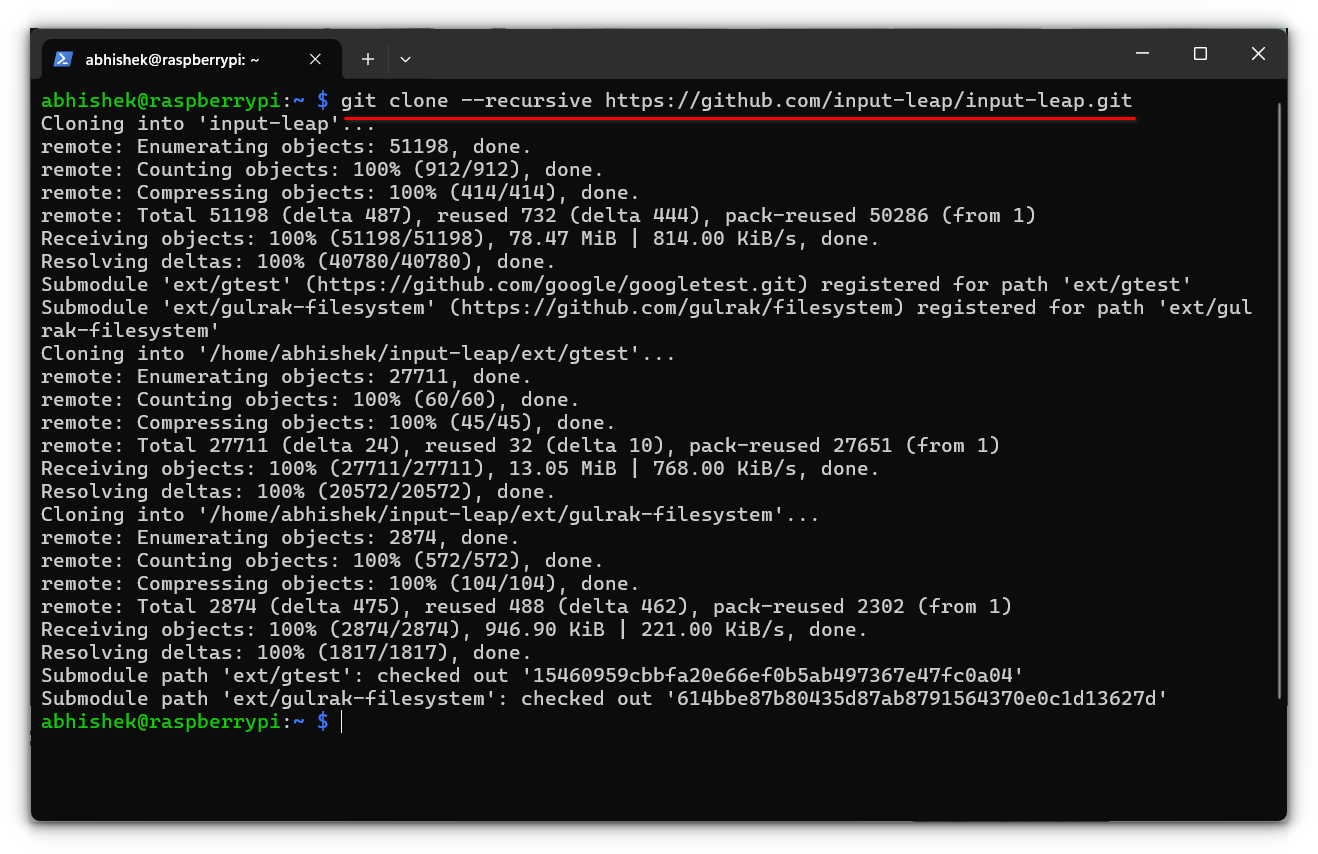
Build the project
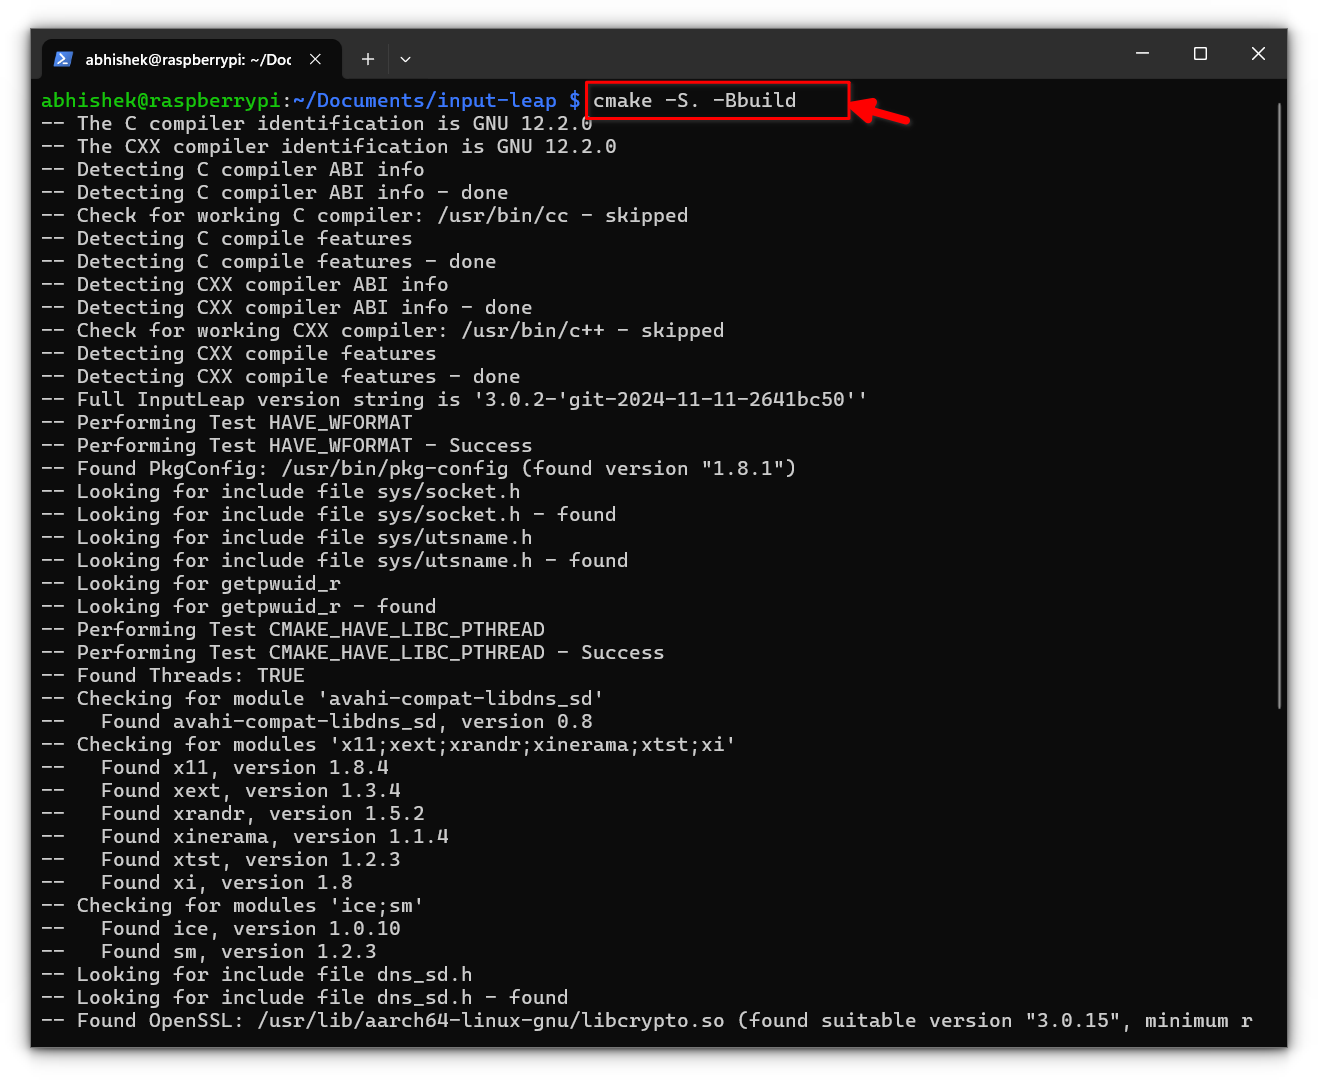
First, create a build directory and configure the build system:
cmake -S. -B build
Then, compile the project:
cmake --build build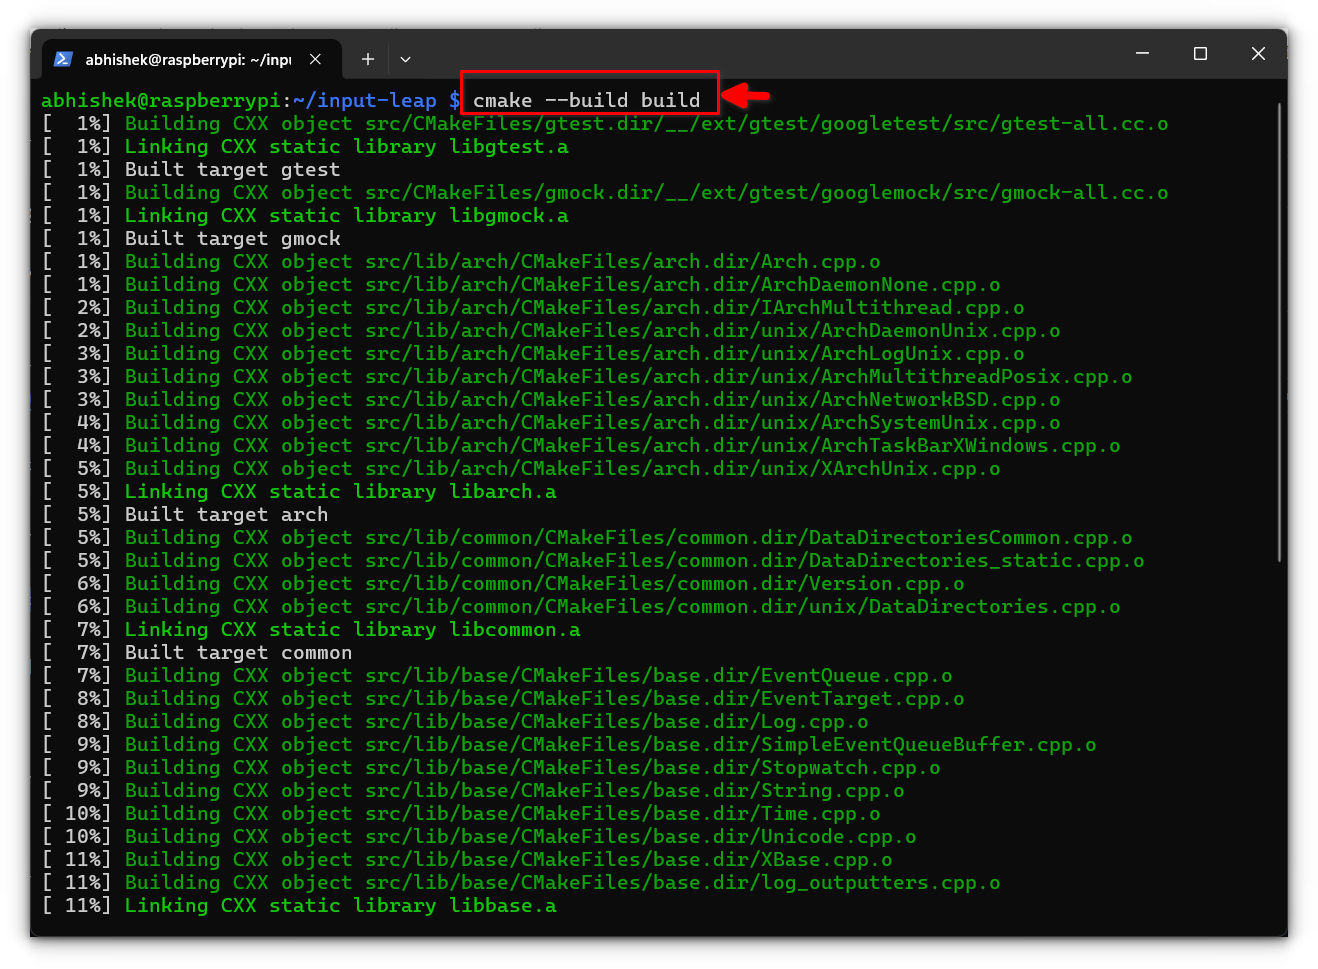
Install Input Leap
Finally, install the compiled binaries:
sudo make install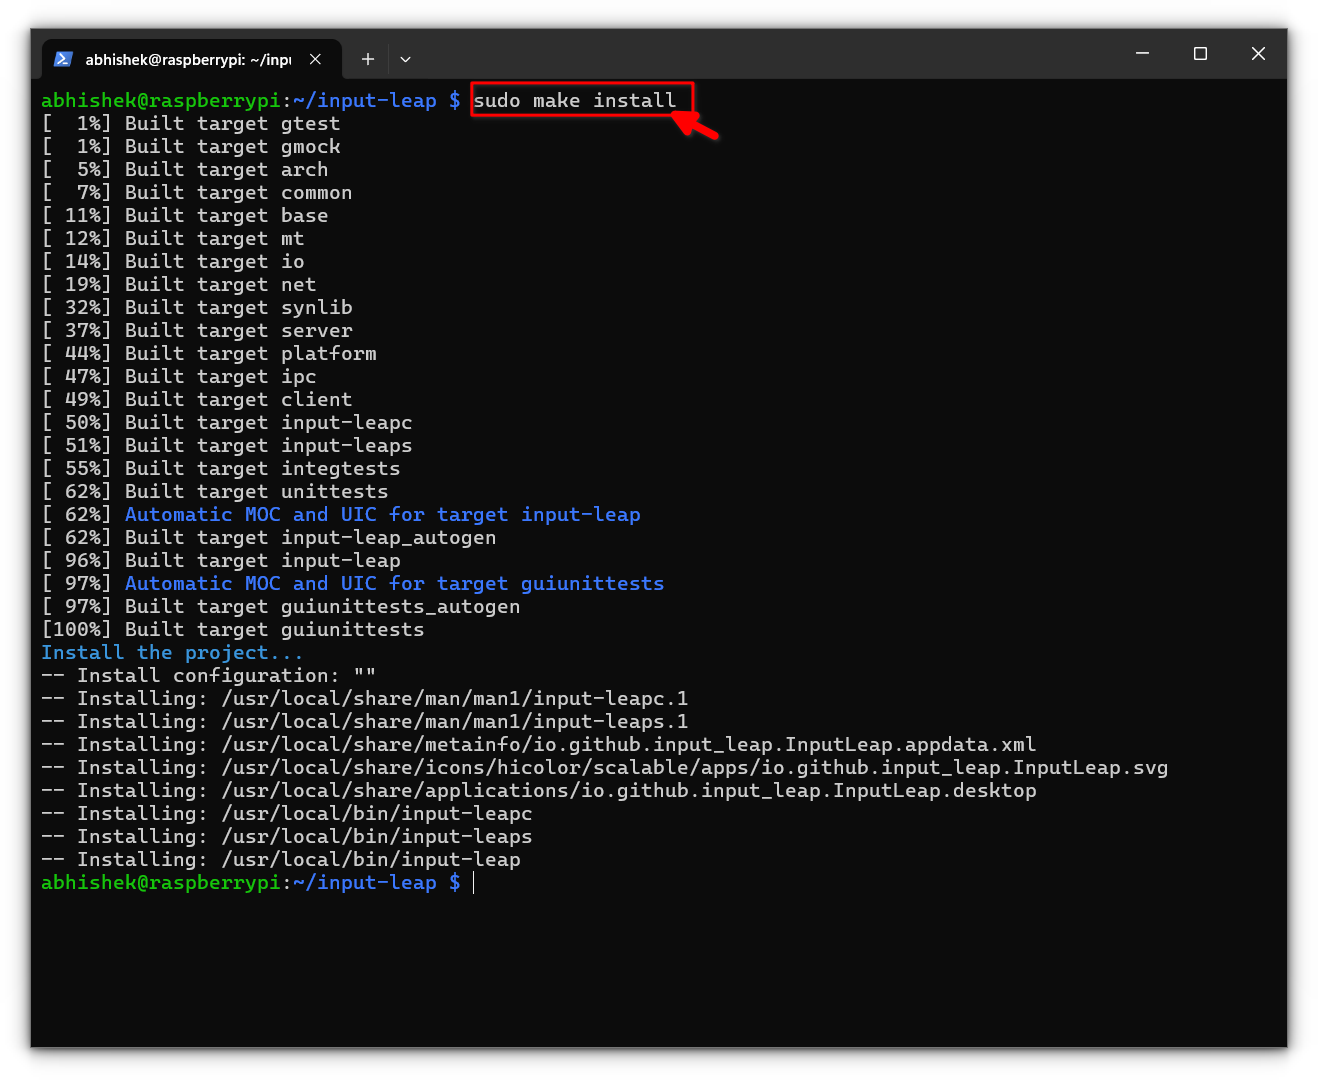
Set up Input Leap as the server
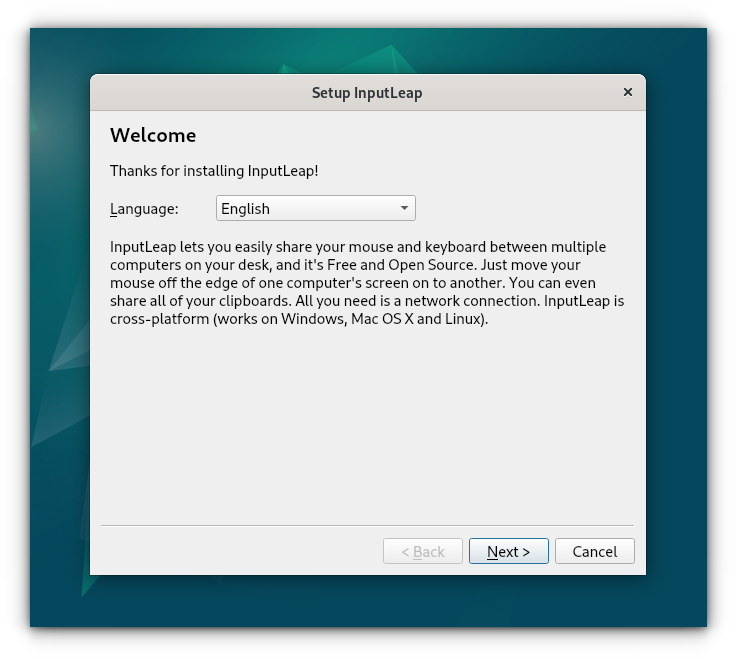
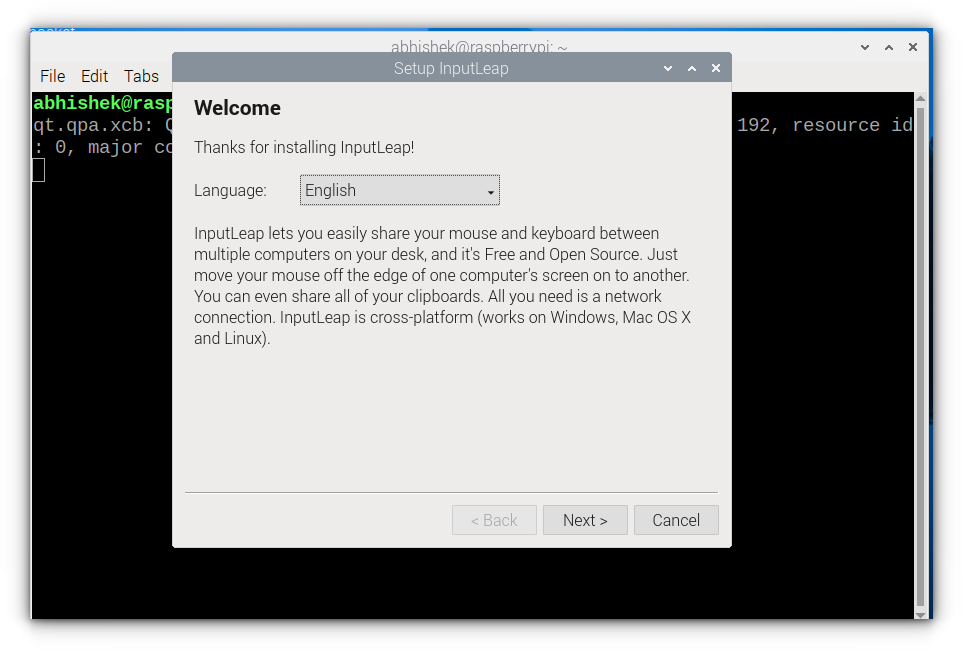
Once you build and install Input Leap, you won’t find its icon in the main menu bar. To access it, simply type:
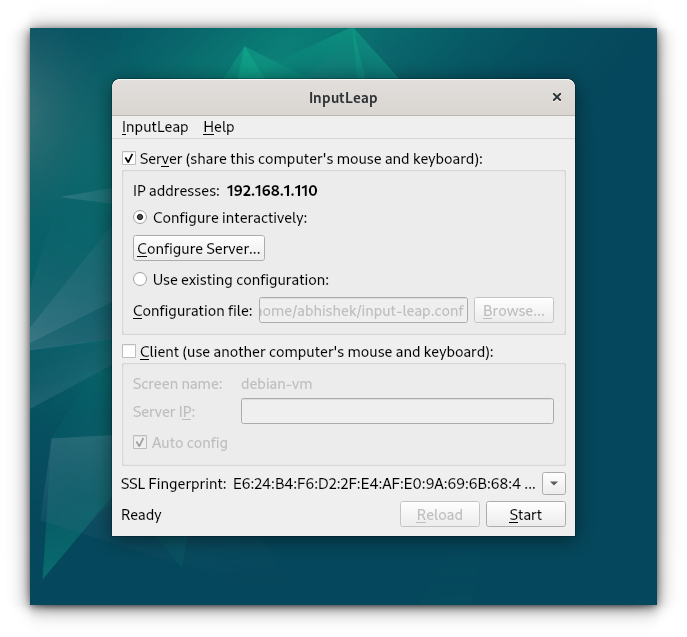
input-leapThis will launch Input Leap in GUI mode, and a welcome window will pop up, guiding you through the initial setup.
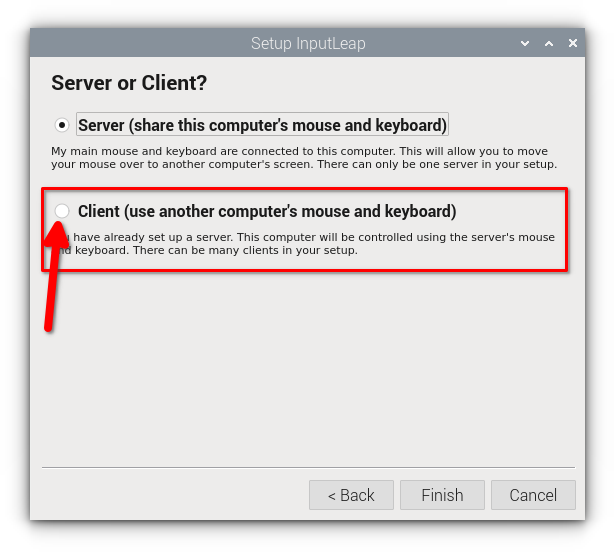
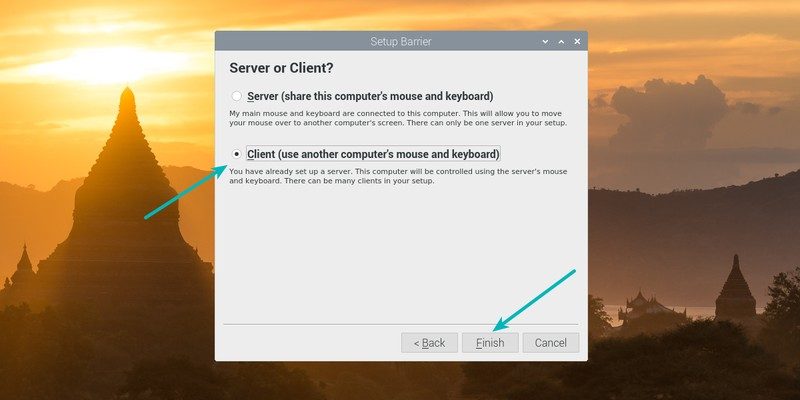
Next, it will prompt you to select a role as either a server or client. Choosing a server means your device will share its keyboard and mouse with other systems, while selecting client allows the device to receive inputs from the server.

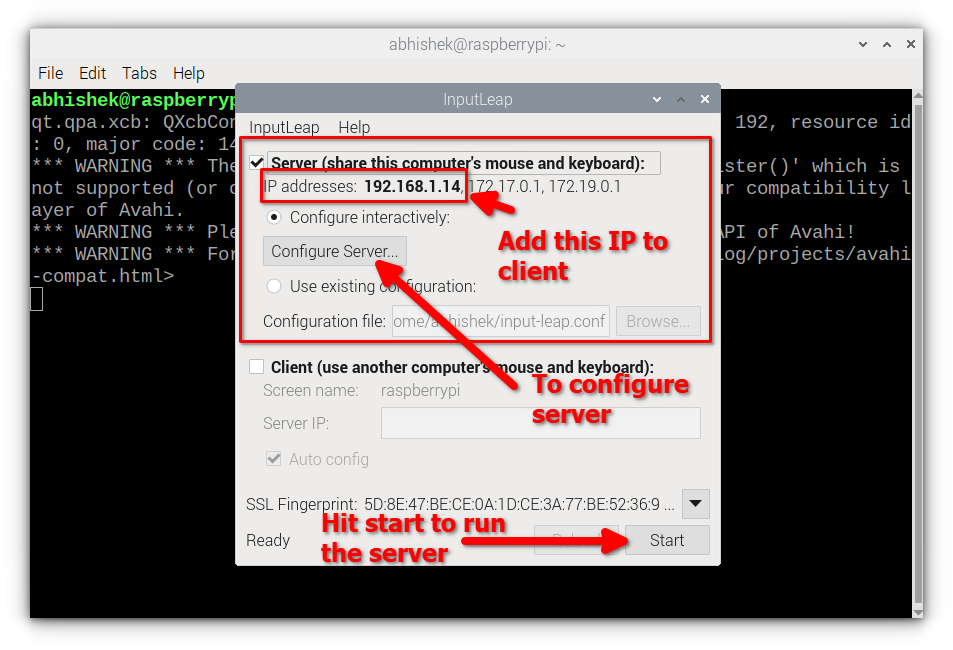
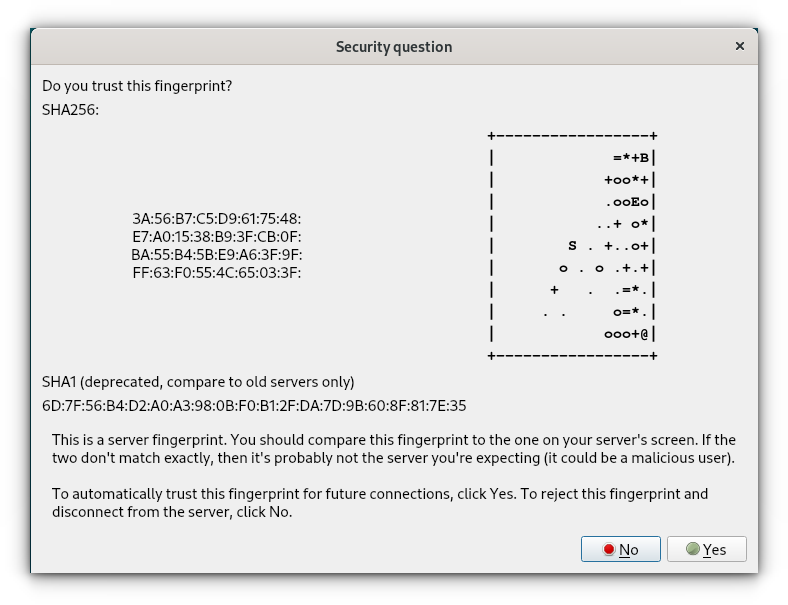
And voila! You should see an IP address and an SSL fingerprint. It’s not entirely done because you have to configure the server a little. Click on Configure Server option.
In here, you should see your own system in the center. Now you have to drag and drop the computer icon from the top right to a suitable position. The position is important because that’s how your mouse pointer will move between screens.
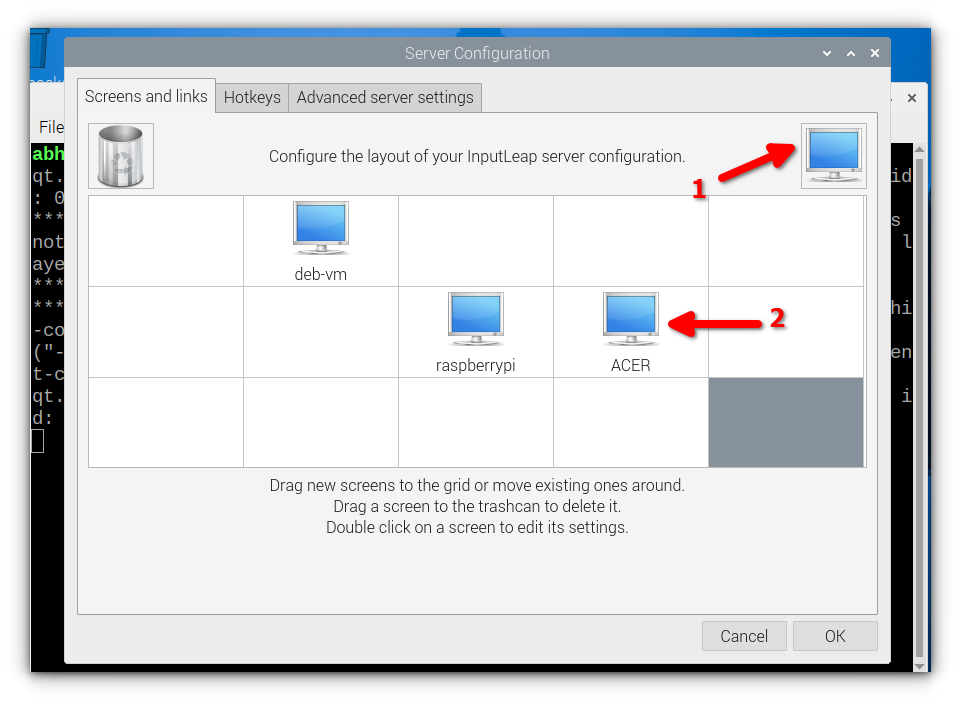
I have my Acer laptop connected and a Debian virtual machine as a client.
Do note that you should provide the hostname of the client computer. In my case, it was ACER and deb-vm. It won’t work if the hostname is not correct.
Don’t know the client’s hostname? Don’t worry, you can get it from the client system.
Set up the client
On the second computer, start input-leap and choose to use it as client.
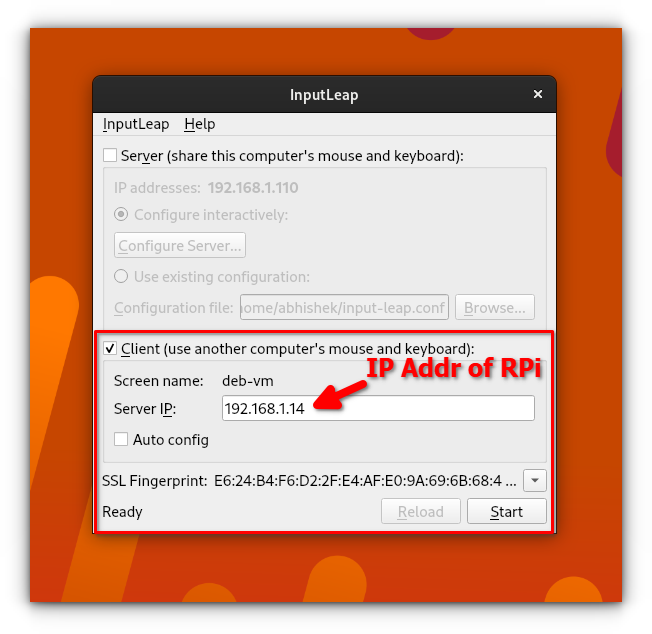
You need to provide the IP address of input-leap server. You can find this IP address on the input-leap application running on the main system, in my case on my Raspberry Pi (see the screenshots in previous section).
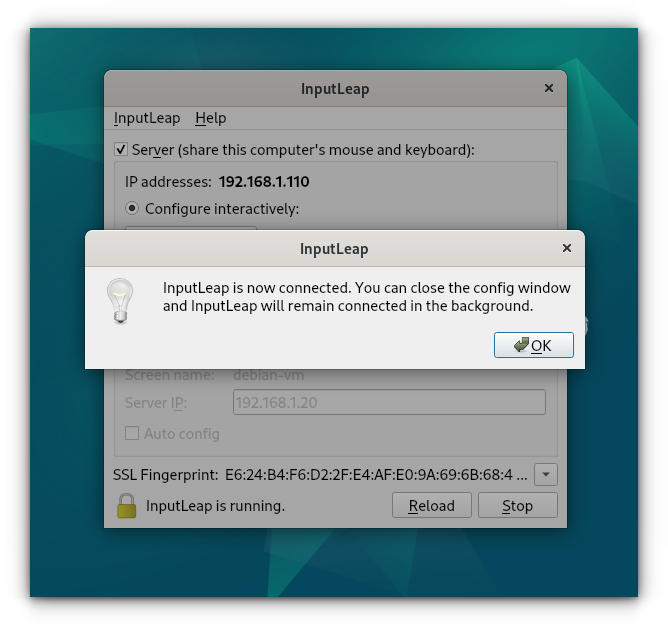
If you see an option to accept secure connection from another computer, accept it.
You should be now able to move your mouse pointer between the screens connected to two different computers running two different operating systems. How cool is that!
Mix-and-match: Using input leap and barrier together?
During my initial attempts, I couldn’t get input-leap to build successfully on my Raspberry Pi. As a workaround, I used Barrier on the Pi and Input Leap on my Windows PC.
Surprisingly, this setup worked flawlessly! Both tools use the same protocol, making them interchangeable in many scenarios.
Conclusion
An earlier version of this tutorial used Barrier in the complete setup. If you want to do that, the older tutorial instructions are available in this PDF.
Input Leap is a powerful tool for managing multiple devices with ease, but it comes with some caveats, particularly for Wayland users.
If you’re comfortable building software from source, Input Leap offers a seamless experience.
For those encountering challenges, Barrier provides a reliable fallback. With this guide, you can simplify your workflow across Linux, Raspberry Pi, and Windows systems. Happy tinkering!
If this helped you, consider supporting It's FOSS
It's FOSS has been helping people use Linux for the past 14 years. Help us stay independent from big tech. Become a Plus member, enjoy ad-free reading and get 5 eBooks.
