elementary OS is a beginner-friendly Linux distribution based on Ubuntu. People often feel that its look and feel is similar to macOS.
I don’t know about that but if you want to try it, the first step would be creating a live USB.
In this tutorial, I’ll show how to create a live USB of elementary OS in both Linux and Windows.
Before you follow anything, please download the ISO file of the latest elementary OS. This is the file that we’ll be using to install the elementary OS.
Download elementary OS
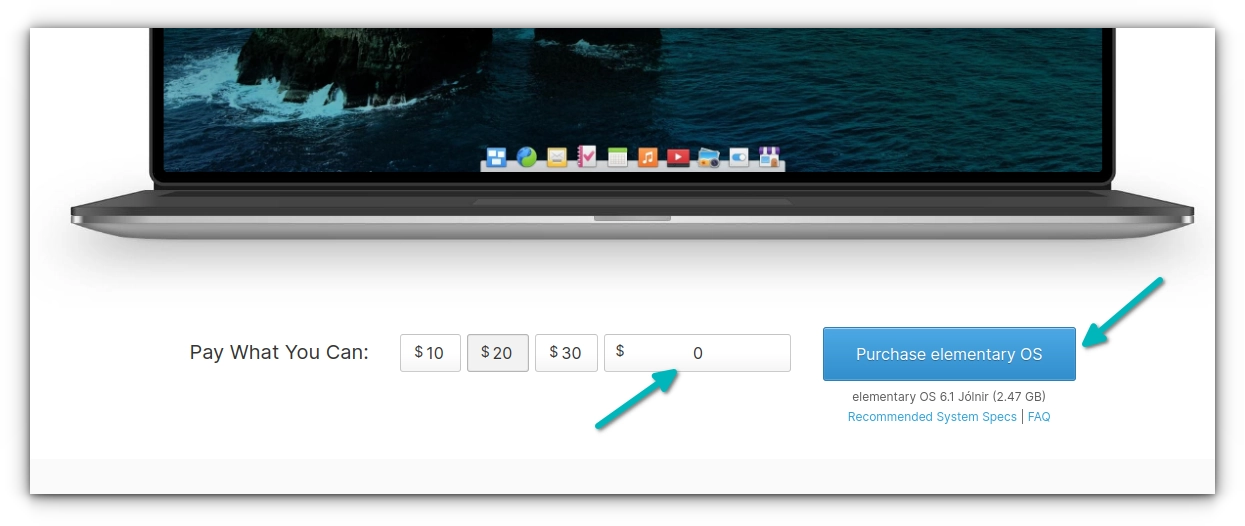
Head over to the homepage of the elementary OS website. You’ll see a ‘pay what you can’ payment option. You can choose any amount to support the project. If you are just trying and you cannot or do not want to spend money, you can even enter 0 and download it for free.
Creating live USB of elementary OS in Windows
If you are using Windows, here are the steps you can follow to create the live USB of elementary OS.
Step 1
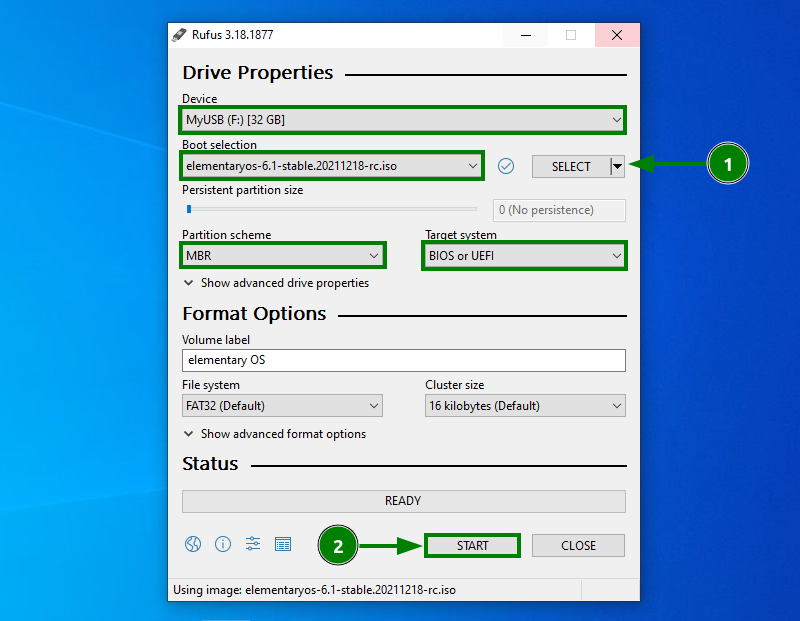
Plug in your USB. Download Rufus and Run it. Your USB device will be automatically detected.
Step 2
Select the downloaded Elementary OS image file and press the Start button.
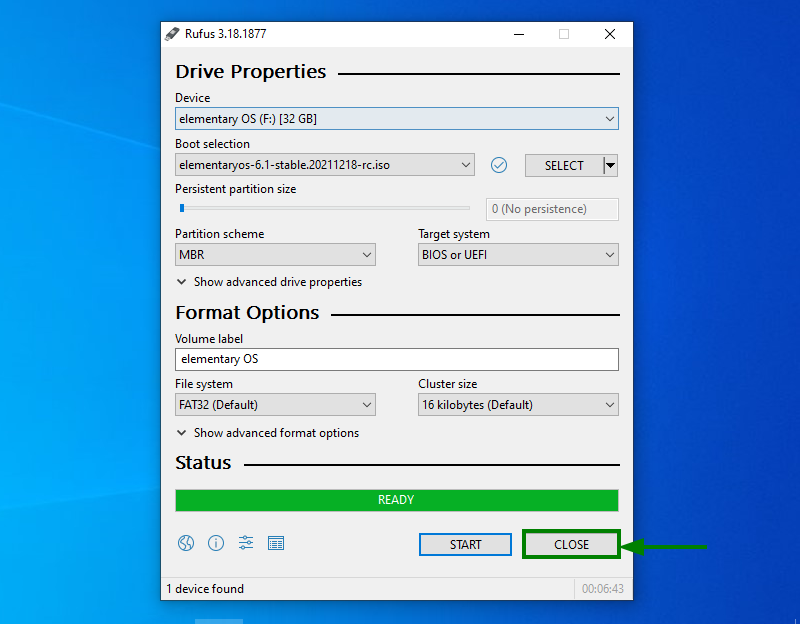
It will start the writing process and be completed in a few minutes. Press the close button once finished.
The Elementary OS Live USB is now ready to be used.
Creating Live USB of the elementary OS with Etcher [Windows, macOS and Linux]
There is no Rufus for Linux. However, there are other tools available for making live USB in Linux.
Etcher is one such tool and it’s quite easy to use. The best thing is that it is available for Windows, macOS and Linux.
Step 1
Download Etcher from its website. You’ll find the installer for all platforms there.
Step 2
Insert the USB and run Etcher.
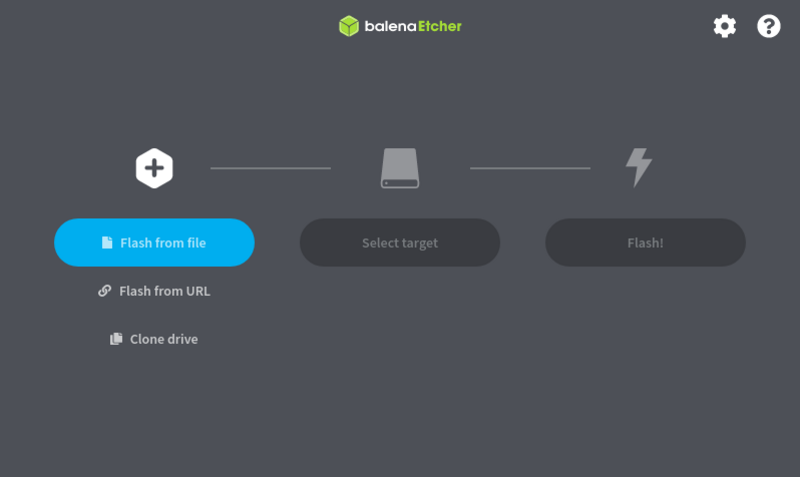
You should see the application window like the one in the screenshot below. Select “Flash from file” button and choose the downloaded elementary OS ISO file.
Step 3
Select the disk where Live USB is to be created from Select Target button and Press Flash button to start flashing. You need to enter your password at this point.
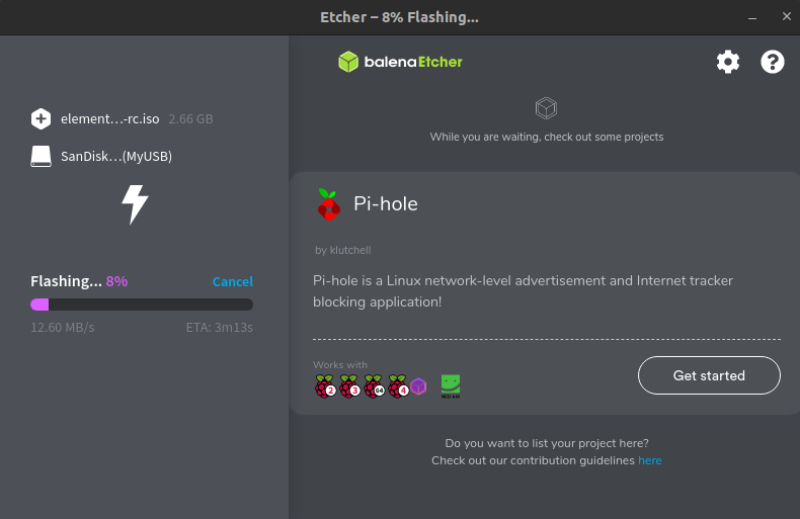
After flashing and verification, your Live USB of Elementary OS Jolnir will be ready for using.

By the way, you may have to fix the USB after using Etcher if it shows only 4 MB of space left.
Creating live USB of Elementary OS in Ubuntu
If you are using Ubuntu, you don’t need to install any third-party application to create a live USB. Ubuntu comes preinstalled with a tool named Startup Disk Creator.
Step 1
Insert a USB drive or a DVD.
Go to Overview and look for Startup Disk Creator:
Step 2
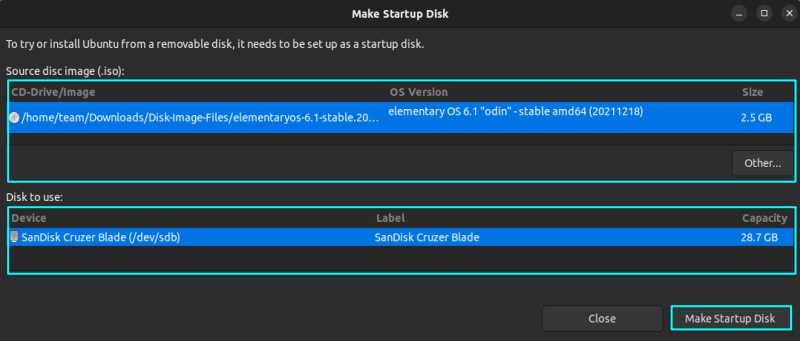
When you start it, it intelligently detects the presence of a “disk image” file on your system. And if there is only one, it will automatically add it to create a live disk from it. It also recognizes the inserted USB or disk.
If not, just browse it to the location of the disk image in the CD/Drive Image section. Once you have done this, just click on Make Startup Disk:
And that would be all. It will take some time (around 3-4 minutes) to create the live USB. You’ll see the following message when the process ends successfully:
Conclusion
Once the elementary OS live USB is ready, reboot the system where you want to test it. From the BIOS boot settings, choose to boot from the USB.
You can now experience this awesome distribution. If you like it enough, you can install elementary OS from the same USB on your system.

