

Dual booting Linux and Windows is one of the popular ways to enjoy the full potential of the two operating systems. You have both Linux and Windows installed on the same system and you can choose which one to use after starting your system.
If you have a system with Windows installed already, you’ll learn how to install Fedora alongside Windows in this tutorial.
Installing Fedora alongside Windows
The tutorial has been performed on a system with Windows already installed, GPT partitioning and UEFI boot. It should be applicable to other systems with MBR partitioning and legacy BIOS system as well, but I cannot confirm that.
Note: If your Windows system uses BitLocker encryption, it will be a good idea to disable it first before you go on installing Fedora.
Requirements
Here’s what you’ll need to follow this tutorial:
- A system preinstalled with Windows
- Good speed internet connection
- A USB key (pen drive) with at least 4 GB in size
- Optional: External USB disk for making back up of your existing data on Windows.
- Optional: Windows recovery or bootable disk (if you encounter any major boot issues, you can fix with it).
Let’s see the steps.
Step 1: Make a backup of data on your Windows system [optional]
Backup is always a good idea. You will be dealing with the disk partitions. In the rare unfortunate case, if you make a mistake and delete the wrong partition, you’ll lose your data.
The simplest way would to be to copy the data in Documents, Videos, Music, Pictures and other folders to an external USB disk. You can use an external HDD (slower but cheaper) or SSD (faster but expensive) and copy the important files and folders on it.
Step 2: Make some free space for Fedora installation
You need to create a partition where you’ll be installing Fedora. If you just have C drive, shrink it. If you have D, E or F drive, see if you can move their data to some other partition and delete or shrink one of them. Anything above 40 GB should be comfortable enough space for Fedora.
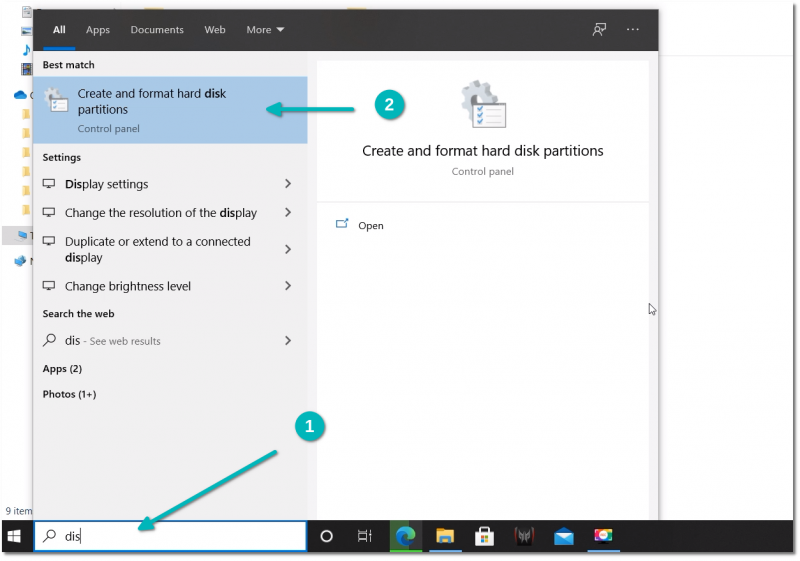
In the Windows menu, search for ‘disk partitions’ and go to ‘Create and format hard disk partitions’.
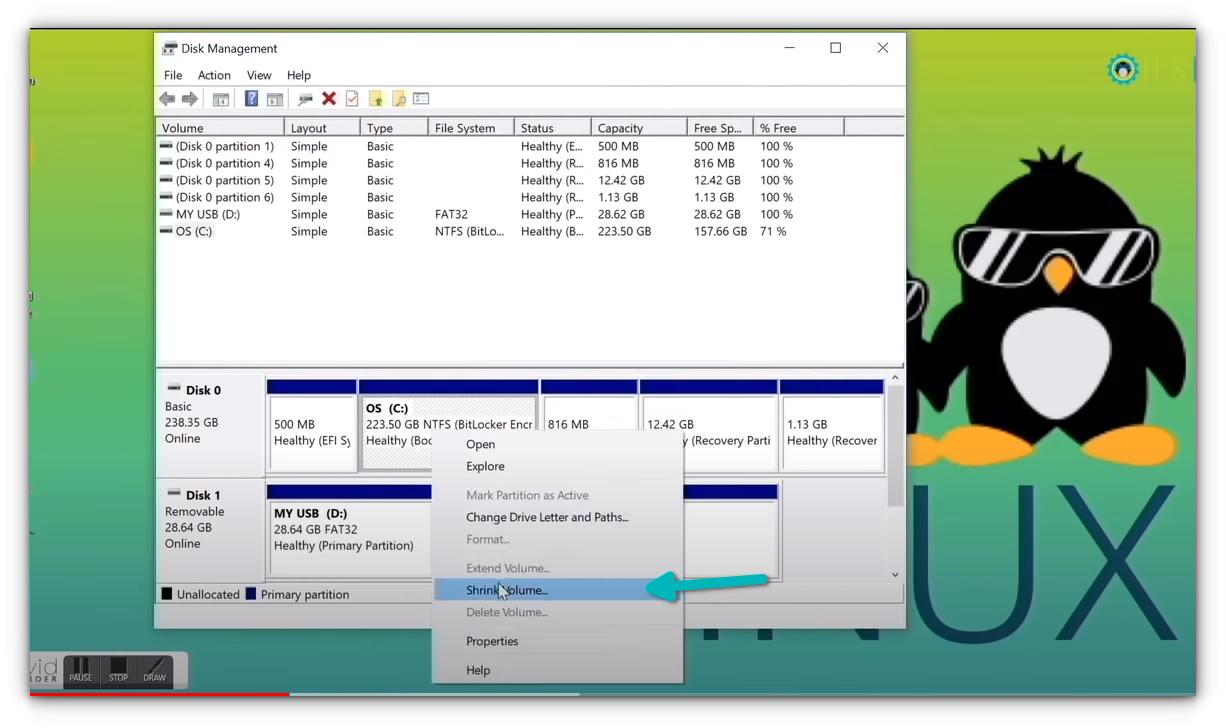
In the Disk Management tool, right-click on the drive which you want to partition and select shrink volume.
If you have just one partition like this, you need to make some free space out of it for Linux. If you have several partitions of considerable size, use any of them except C drive because it may erase the data.
Step 3: Making a live USB of Fedora in Windows
Now, this can be done in different ways. You can download the ISO and use Etcher or Rufus or some other tool to write the ISO image to the USB disk.
However, Fedora provides a dedicated tool for downloading and making live USB. I am going to use that in this tutorial. The Fedora team put some effort in creating this tool, so why not use it.
But first, plug in the USB key. Now, go to the download page of Fedora:
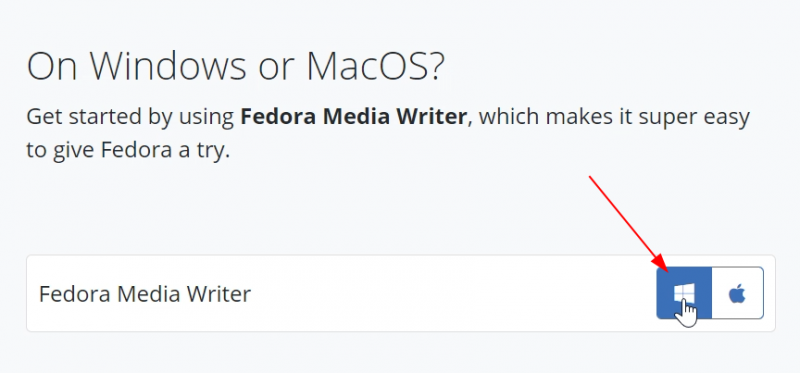
You’ll see the option to download the Fedora Media Writer tool for Windows.
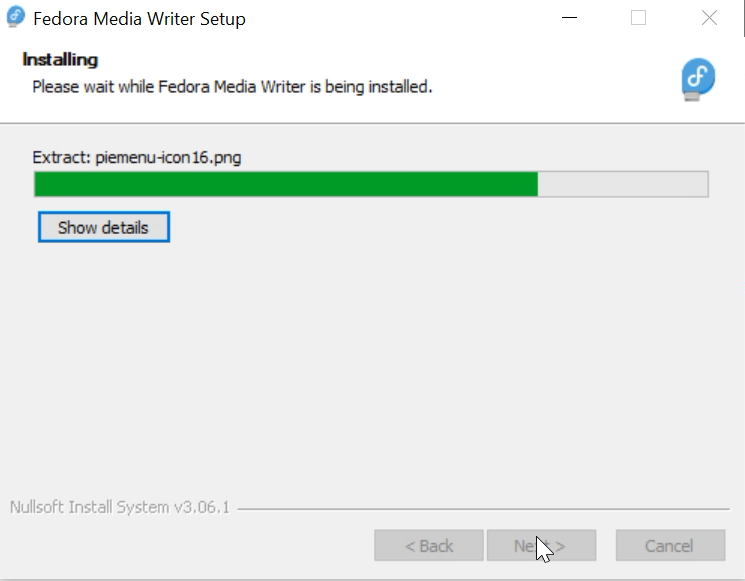
It will download an exe file. Once downloaded, go to your downloads folder and double-click the FedoraMediaWriter exe file to install the Fedora Media Writer tool. Just keep on hitting next.
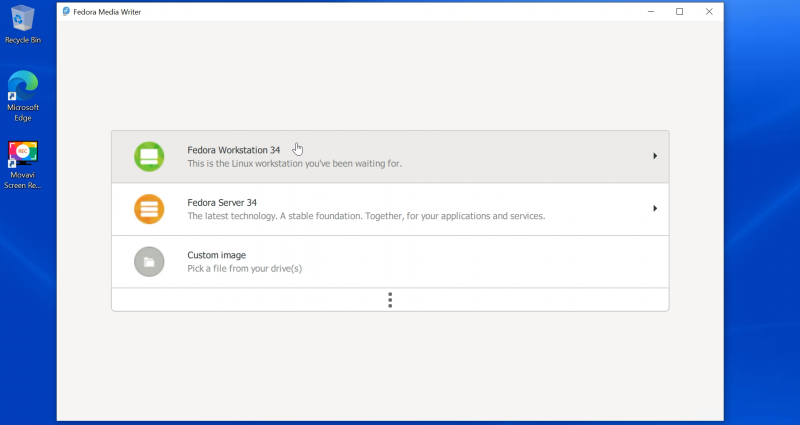
Once installed, run the Fedora Media Writer tool. But before that, make sure that you have plugged in the USB.
It will give you the option to install various editions of Fedora. For desktops, go with Workstation.
On the next screen, you’ll get the option to create live USB. When you hit that button, it starts downloading the ISO. It will also recognize your inserted USB key.
You need to have a good speed internet connection to download the 2 GB of ISO in a comfortable time span.
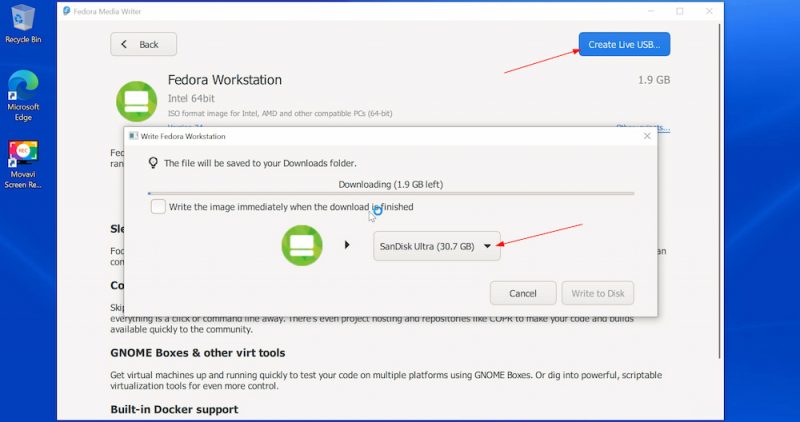
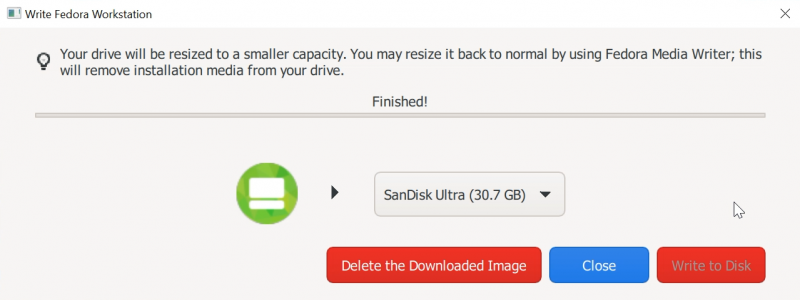
After downloading the ISO, it checks the download automatically and then gives you the option to write the ISO image to the USB disk, i.e. create the live USB. Hit the “Write to Disk” button.
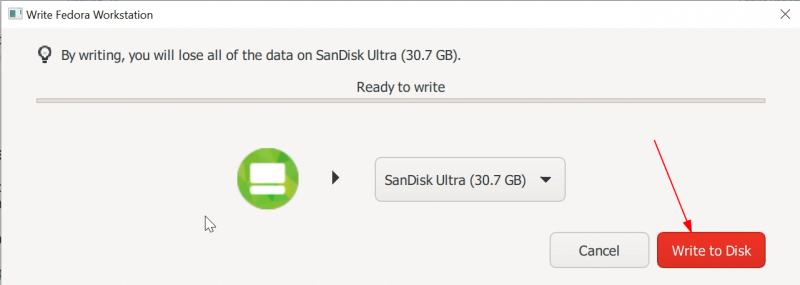
It will take a couple of minutes to complete the process. It displays “Finished” message and you can close the Fedora Media Writer tool now.
Good! So now you have the Fedora live USB ready with you. Time to use it for installing Fedora with Windows.
Step 4: Boot from live USB and install Fedora
Some systems do not allow you to boot from live USB with secure boot. If that’s the case with you, please disable secure boot.
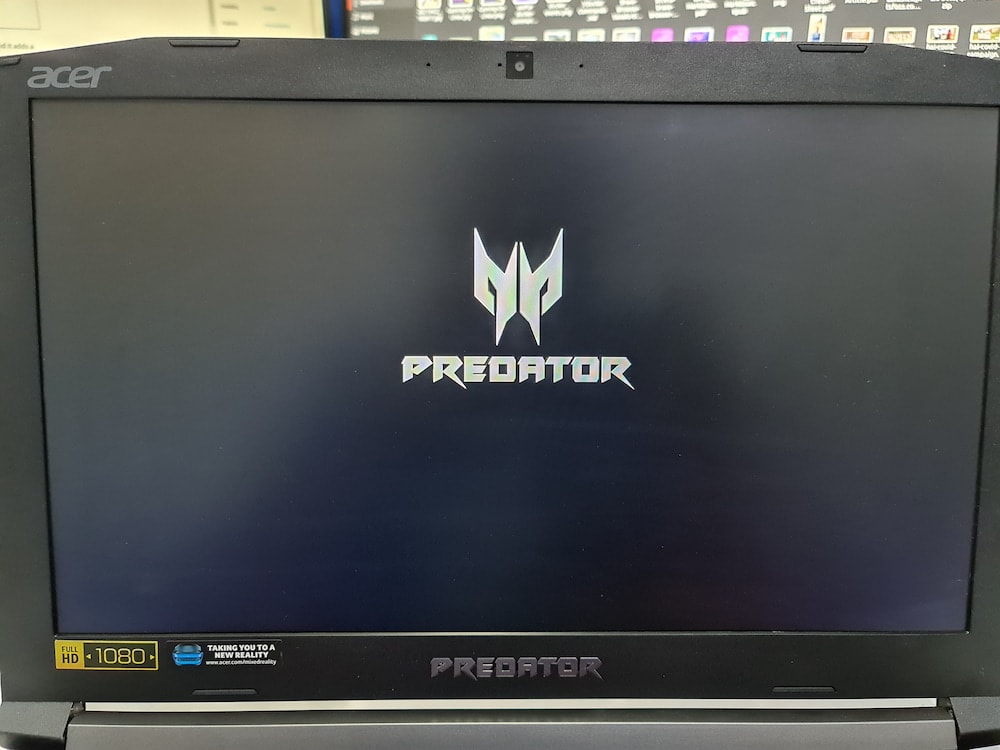
At the screen that shows the logo of your system manufacturer, press the F2 or F10 or F12 key. You may try pressing all of them one by one if you are not sure of the key. But be quick when you do that otherwise it will boot into the operating system.
This key is different for different brand of computers. Some may even use Esc or Del keys for this purpose.
In some rare cases, you may have to access the UEFI boot settings from within Windows.
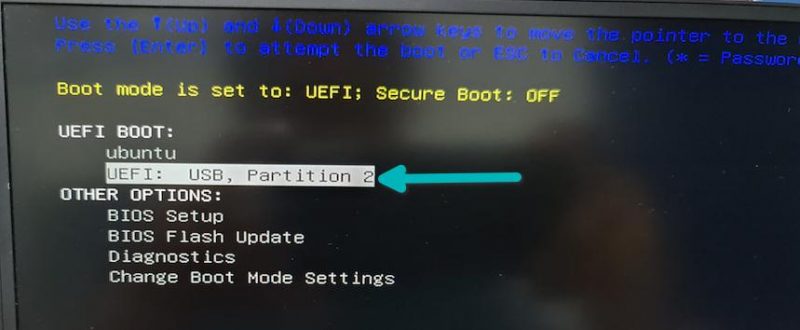
In the BIOS settings, normally, you should see a screen like this. Here, you use the arrow keys to move down to USB option and press enter to boot from the USB. Please note that the screen may look different in different systems.
If things go right, you should see a screen like below. Go with the first option “Start Fedora Workstation”:

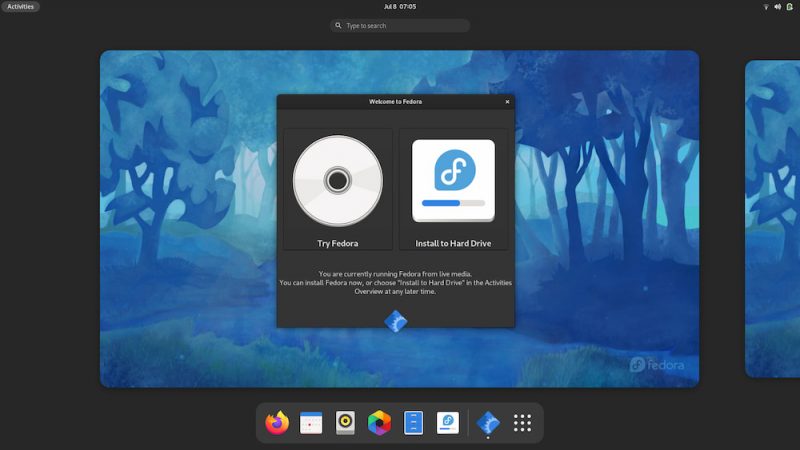
After some seconds, you should boot into the live Fedora session and see the option to try or install it. Go with “Install to Hard Drive”.
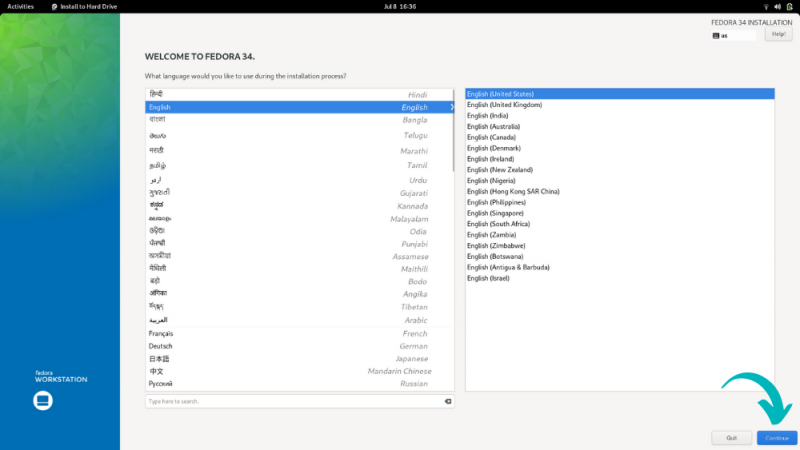
It will ask to choose the language of choice for the installation process.
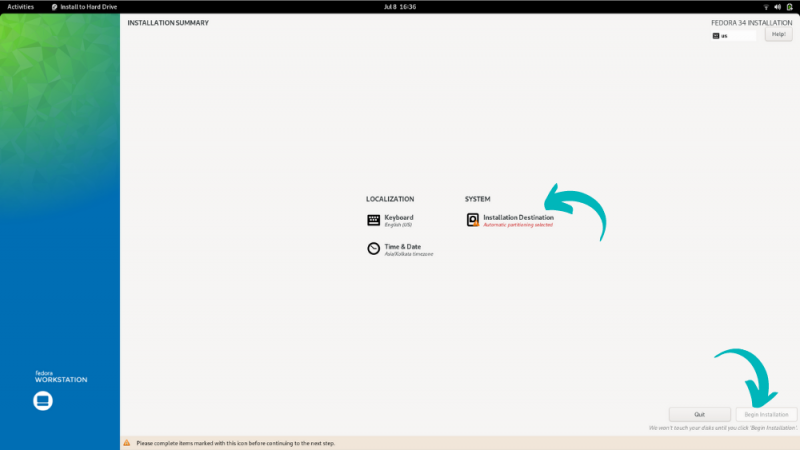
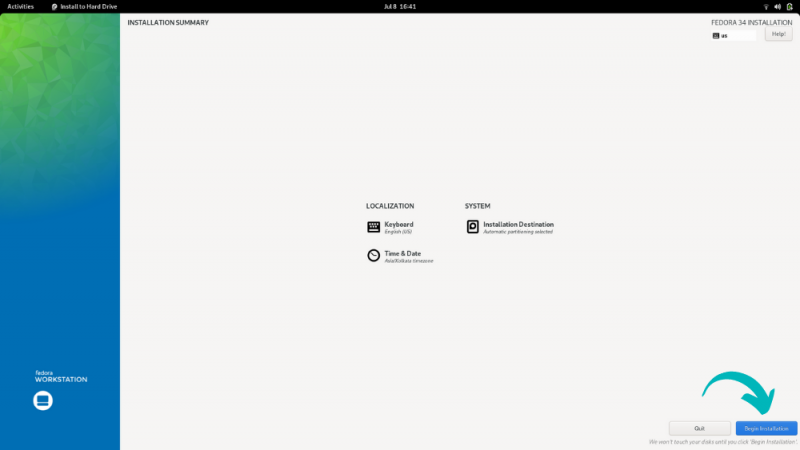
The next screen is important. If you had created the free space in the step 2, you should be able to hit on the “Begin Installation”. If you see an exclamation mark on the disk icon under System, click on it and see what kind of disk configuration you can use here.
If you have more than one disk, you can choose which disk to use for Fedora.
Select the disk and click on Done. You may see a warning message now. In my case, I did not create free space in the step 2 and hence it complained that there is not enough free space to install Fedora.
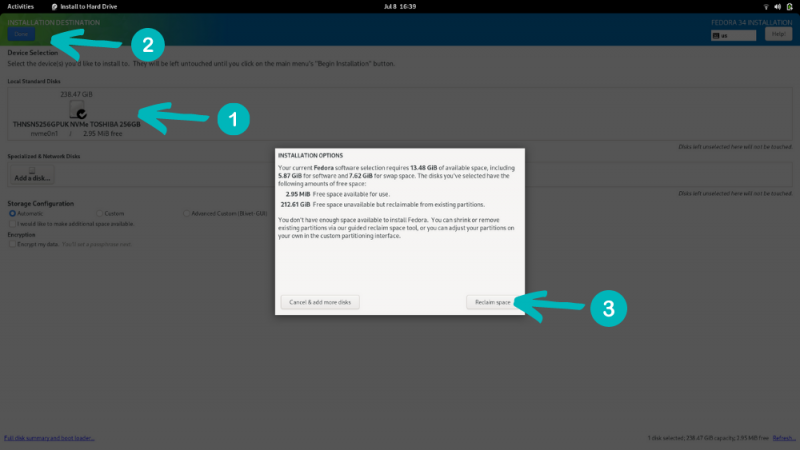
I clicked on reclaim space and shrank the Windows partition here.
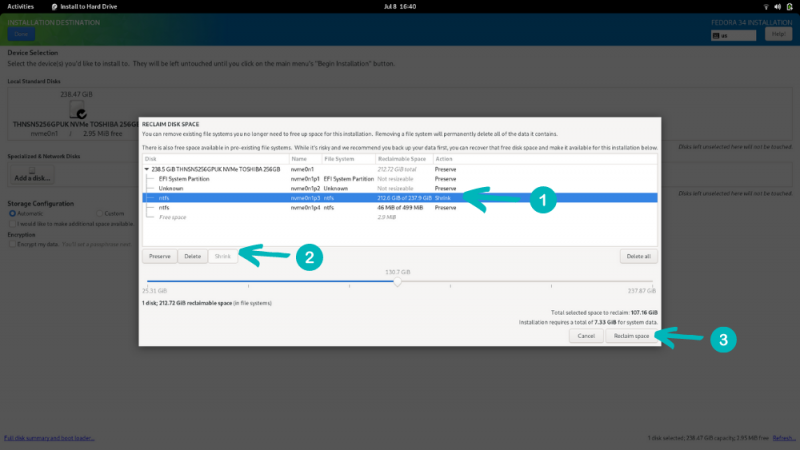
After this, the “Begin Installation” option appeared to start the installation.
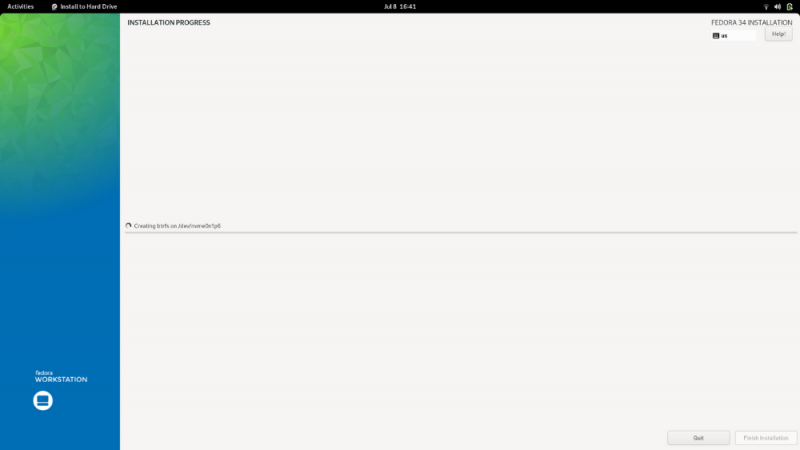
Now it’s just a waiting game. It will take a few minutes to extract files and install them.
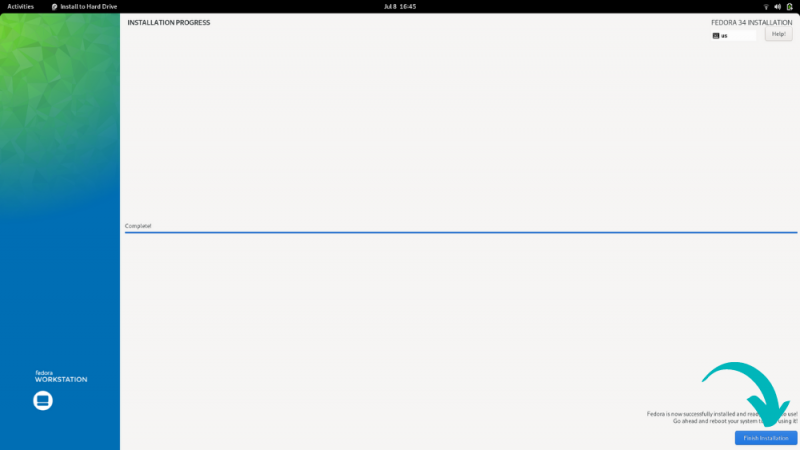
When the process completes, you’ll see the “Finish Installation” button. Hit it.
You’ll be back to Fedora live session. Click the top right corner to bring down the menu and select Restart.

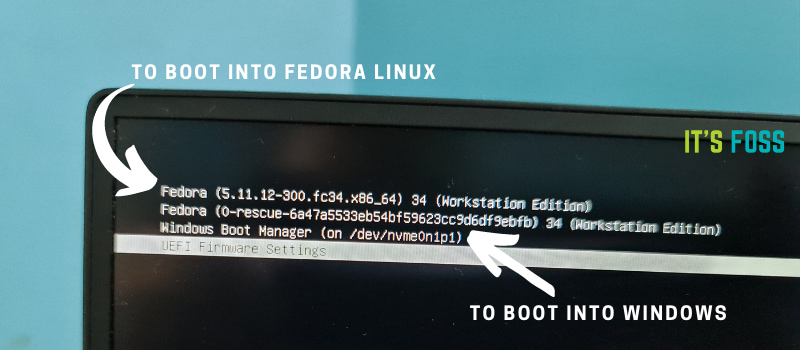
When the system starts now, you should see the Grub bootloader screen with option to boot into Fedora and Windows.
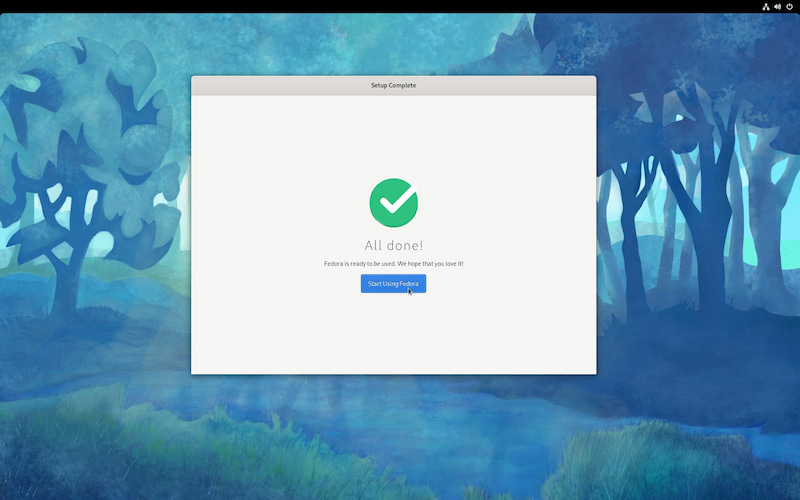
Step 5: Complete Fedora setup
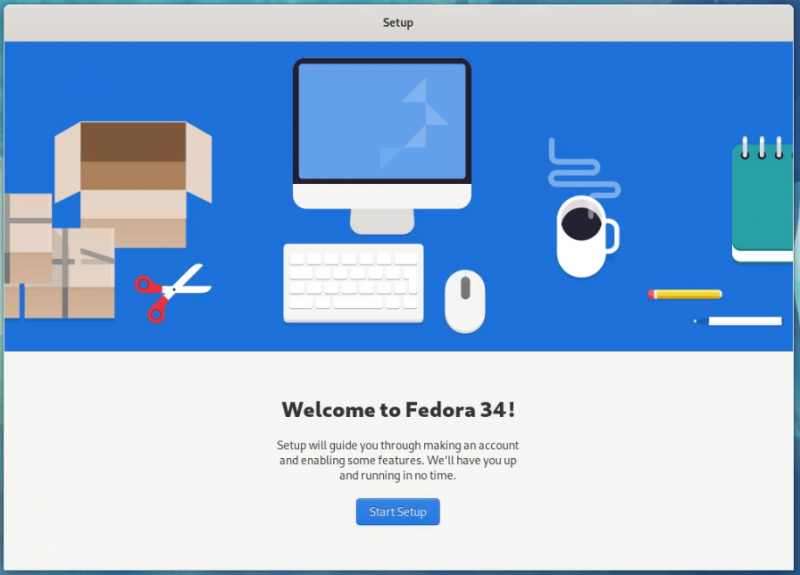
You are almost there. Did you notice that Fedora didn’t ask you to enter username and password? Many distributions like Ubuntu ask you to create an admin user during the installation itself. On the other hand, Fedora gives you this option when you log in to the installed system for the first time.
When you first log in, it runs a setup and creation of user and password is part of this initial setup.
Once you do that, you are ready to enjoy Fedora Linux.
That’s it. You can enjoy Fedora Linux and Windows in dual boot mode on the same system.
If you have any questions or if you are facing any issues while following this tutorial, please let me know in the comment system.
If this helped you, consider supporting It's FOSS
It's FOSS has been helping people use Linux for the past 14 years. Help us stay independent from big tech. Become a Plus member, enjoy ad-free reading and get 5 eBooks.
