
These days, if you buy a computer pre-installed with Windows, it comes with UEFI boot system. UEFI is not something that Microsoft invented, instead it is a protocol existing even before Windows 8. Some Mac devices have been using UEFI for a longer time.
With UEFI comes the feature of “secure boot” which boots only those bootloaders that are signed in to UEFI firmware. This security feature prevents rootkit malware and provides an additional layer of security.
The downside of secure boot is that if you want to boot from a Linux USB or if you want to use a bootable Windows USB, it won’t allow that. Sometimes, it may also create problems in dual booting with Linux.
The good thing is that you can easily disable the secure boot. All you have to do is to access the UEFI firmware settings, go to the Boot option and disbale it.
Don’t worry. I won’t leave you hanging like that. Let me show the steps in detail.
Disabling UEFI secure boot in Windows 10
Some systems don’t let you change the secure boot option without setting an admin password. I’ll discuss the issue in later steps.
Step 1: Access the UEFI settings
You may access the UEFI settings by powering on your system and using the F2/F10 or F12 keys at the boot time. If that doesn’t work, don’t worry. You can go to the firmware settings from within Windows as well. Here’s how.
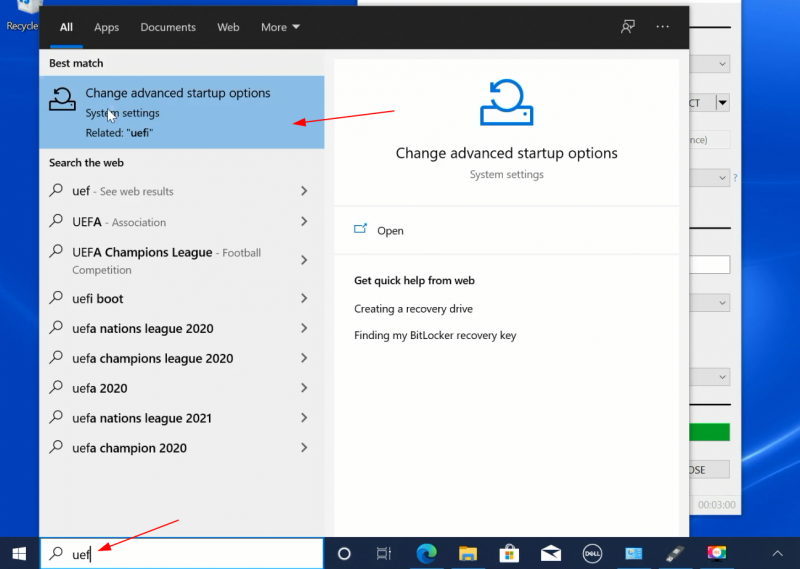
Search for UEFI and go to Change advanced startup options in Windows menu.
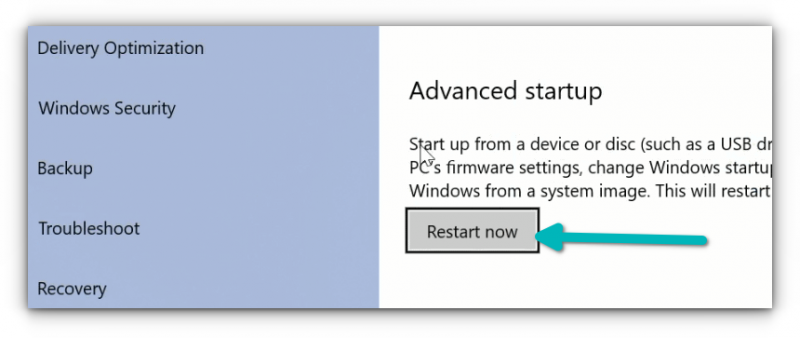
Now, click on the Restart now button under Advanced startup option.
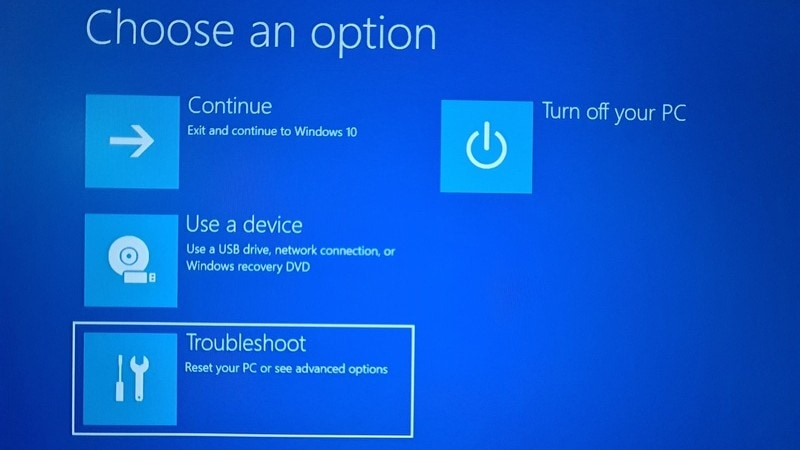
After a few seconds, you should see a blue screen with a few options to choose from. You have to click on Troubleshoot option.
Now, some systems will give you the UEFI Firmware Settings on this screen. Some system may require you to choose an Advanced options.
If you see the UEFI Firmware Settings option, well, click on it. Otherwise, click the Advanced options.
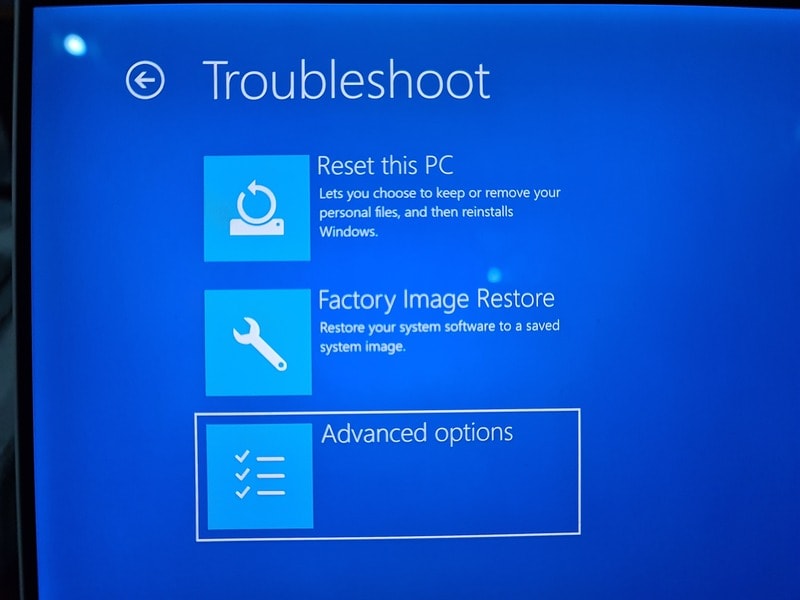
When you see the UEFI Firmware Settings, click on it.
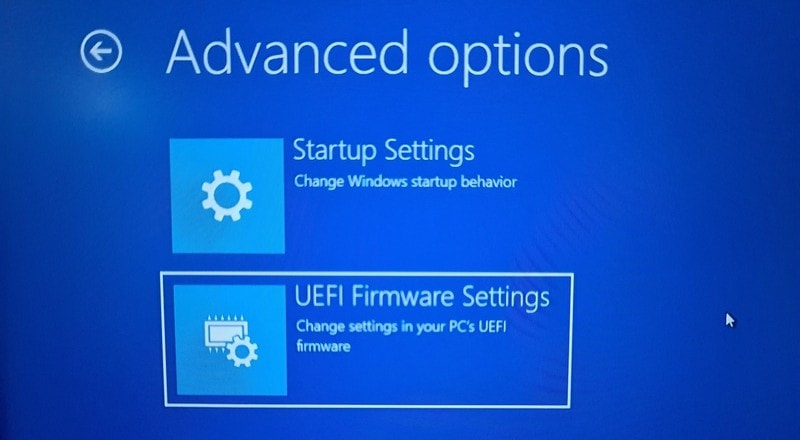
It will notify that you’ll have to restart in order to change any UEFI firmware settings (or UEFI settings in short). Click on the Restart button.

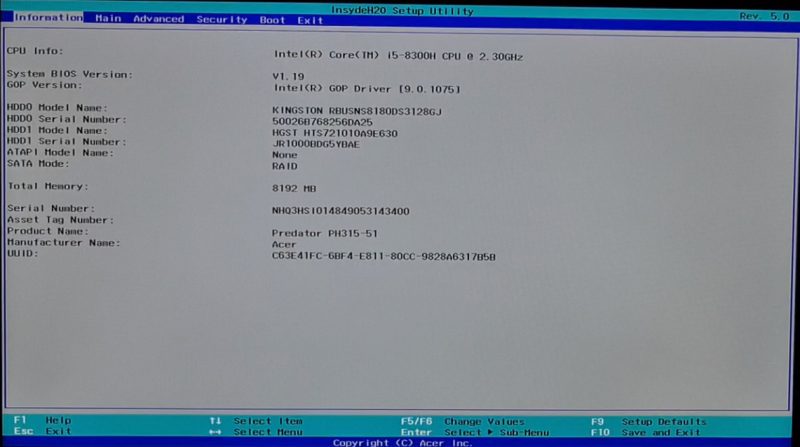
Your system will restart now and when it boots again, you’ll find yourself in the BIOS/UEFI settings interface.
Step 2: Disable secure boot in UEFI
By this time you must have been booted in to UEFI utility. You can change various settings here but all we want to do right now is to disable secure boot option here.
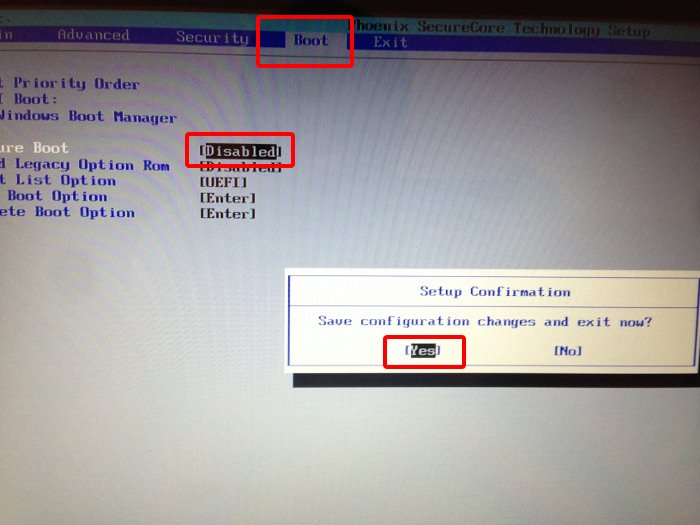
Move to Boot tab. Here, you’ll find Secure Boot option which is set to enabled.
Use the arrow key to go to Secure Boot option and then press enter to select it. Use + or – to change its value. Confirm it when prompted.
Press F10 to save the changes and exit the UEFI settings.
Troubleshooting tip: Disable secure boot option disabled?
As mentioned by some readers in the comments, if you are using an Acer laptop, you might see that option to disable secure boot has been greyed out. If that is the case, no need to panic just yet. There is a way around it.
Using arrow keys, move to Security tab. Look for Set Supervisor Password here.
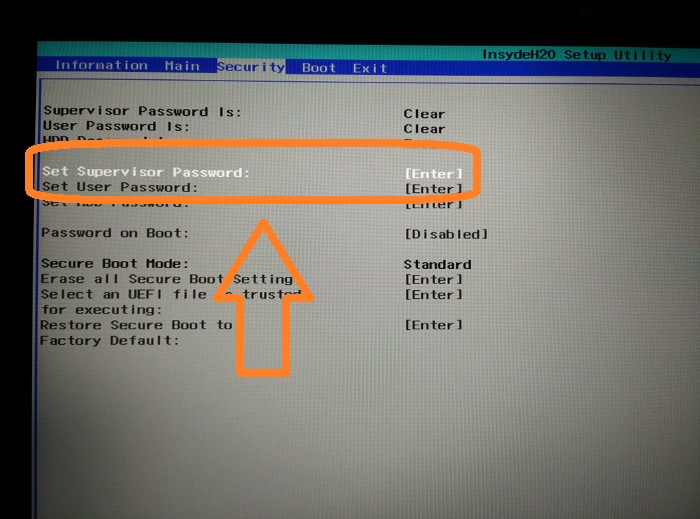
Set a Supervisor password by double-clicking on it.
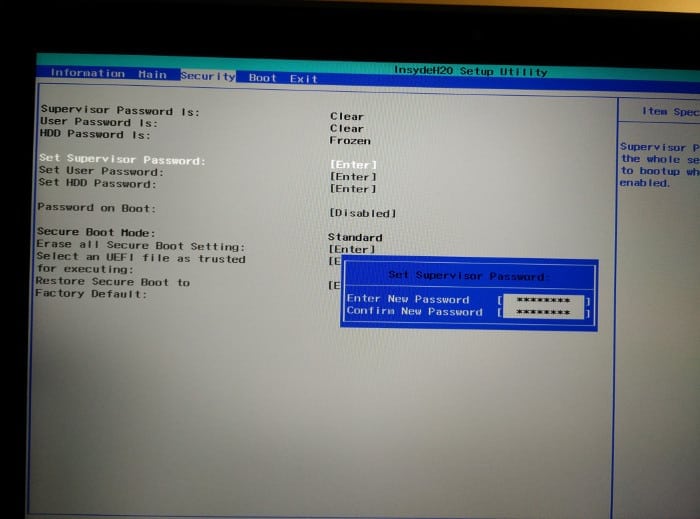
Once you have set the supervisor password, move to Boot tab now. This time you’ll see that you can actually access the Secure Boot option and change its value. Press the Enter key and change its value to Disabled.
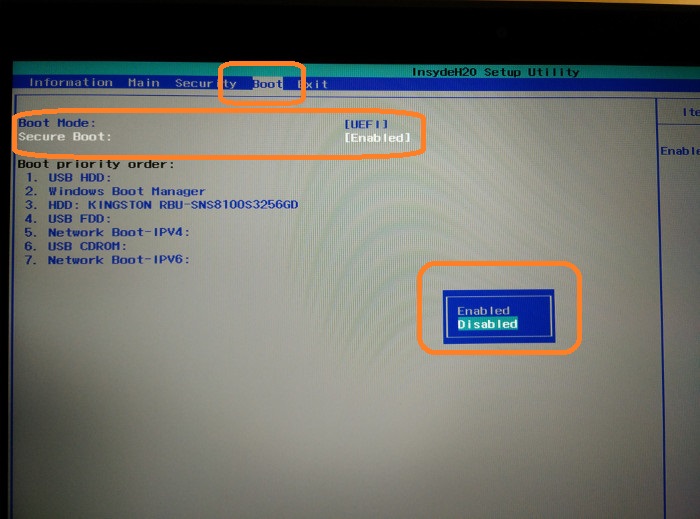
Press F10 to save and exit the UEFI settings.

Next you’ll be booted into Windows normally. That’s it. You can use similar steps to re-enable secure boot later as well.
I hope you find this tutorial helpful. Do let me know if you have confusion and I’ll try to help you out.
It's FOSS turns 13! 13 years of helping people use Linux ❤️
And we need your help to go on for 13 more years. Support us with a Plus membership and enjoy an ad-free reading experience and get a Linux eBook for free.
To celebrate 13 years of It's FOSS, we have a lifetime membership option with reduced pricing of just $76. This is valid until 25th June only.
If you ever wanted to appreciate our work with Plus membership but didn't like the recurring subscription, this is your chance 😃

