This tutorial shows you how to create Solus Linux live USB on Windows and Ubuntu Linux.
Solus OS has gained a good user base and fan following quickly. One of the rare few Linux distributions that are built from scratch, Solus OS has shown some solid promises.
I am not going to review Solus OS here. I am just gearing up to try Solus OS, and the first step is creating a live USB of Solus OS.
In this post, we shall see how to create live USB of Solus OS on Windows. On Linux, you can easily create live USB using dd command line tool.

Follow the steps below:
1. Download Solus OS
One of the first things we need is to download the ISO of Solus OS. Head over to the download page of Solus OS and download the latest ISO image of your favorite Desktop Environment. Currently, Solus offers Budgie, Gnome, Mate, and KDE Plasma DEs.
There are two options. Either download it via torrent or choose a mirror closest to your location. I let you decide how you download it.
2. Verify checksum [Optional but recommended]
Running checksum is a way to identify if your downloaded file is not corrupted. This ensures the integrity of the file. After all, you want to be sure that the file you downloaded is the same as on the server. I did not care much about checksum until the Linux Mint hack.
So, I would recommend that you also run a checksum. If the file is corrupted, it may result in Solus OS not booting at all. Better to be safe than sorry.
On the download page of Solus OS, you can find individual Checksum files under the corresponding Desktop Environment page. Download the sha256 checksum file and open it with a text editor to get the checksum code.
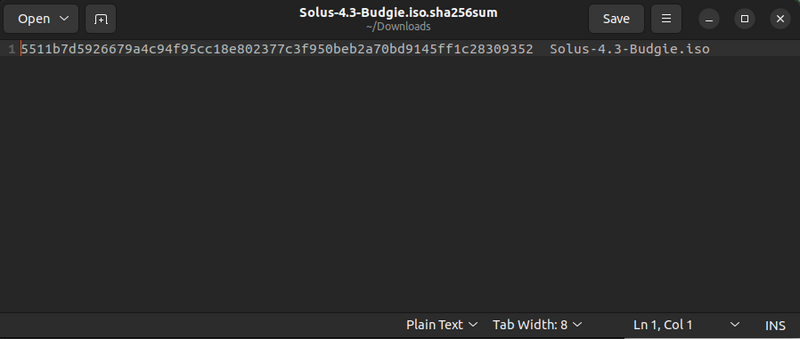
If you are downloading some other version, the checksum will be different. We will be using this number later.
Now, to verify checksum, we’ll use a freeware utility called MD5 & SHA Checksum Utility.
Extract/install it. It requires .Net, so it might have to be installed if your system doesn’t have it already. Windows will prompt the .NET installation window (if not already installed) once the downloaded file is opened. Once everything is ready, run this tool.
Browse to the downloaded ISO and copy and paste the SHA checksum you have downloaded. Run it and see whether it is okay or not.
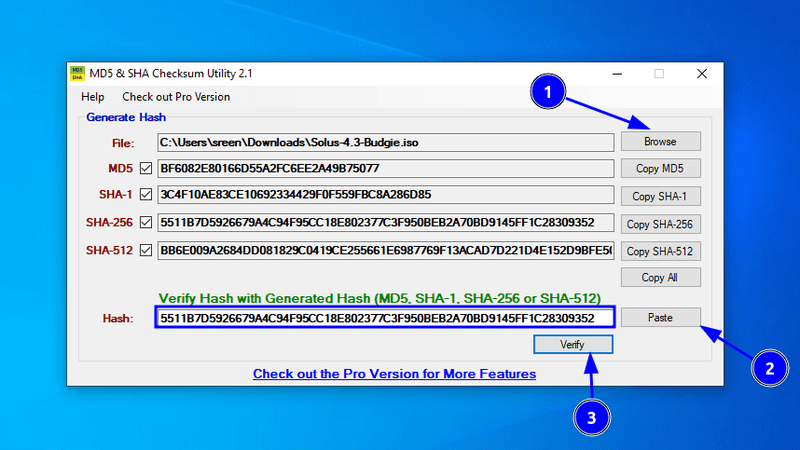
If the checksum run fails, try downloading the ISO again.
3. Use Rufus to create live USB of Solus Linux [For Windows]
Rufus is a popular application for Windows to create bootable USB of various operating system. It’s a free tool and can be downloaded from the button below:
Open the tool and select the Solus ISO. It will automatically detect the USB drive and press write to start writing.
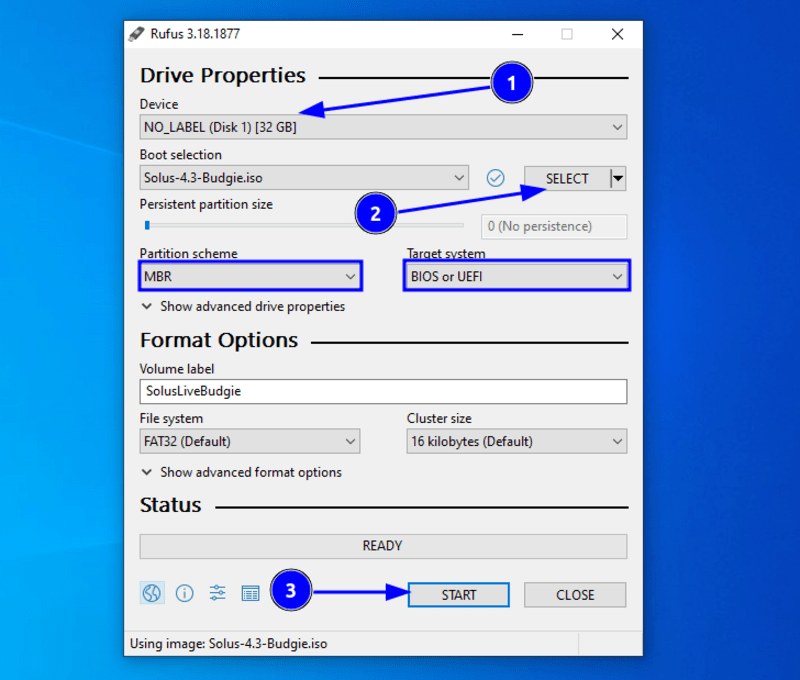
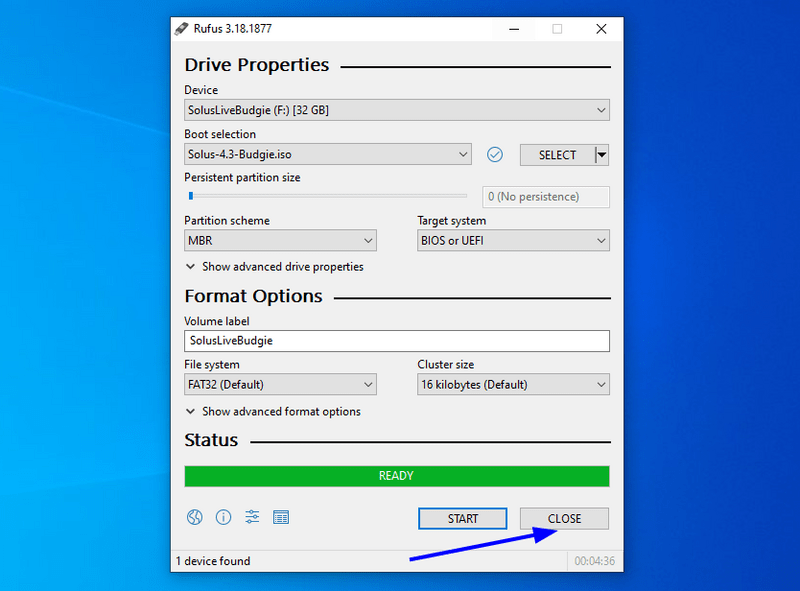
It may prompt ISO Hybrid Image settings. Follow what is recommended and will ask permission to download files from internet. Allow these settings and within some minutes, the ISO will be written. Once completed, press close and the Live ISO is ready to use.
If you are not interested in using Rufus, or want to use Linux instead. You can follow the alternative methods listed below.
Once we have verified that the downloaded ISO image is in good health, it’s time to write the files to a USB. To do that, I recommend USBWriter tool. It’s a free-to-use tool.
- Plug in your USB and format it to FAT 32.
- Run USBWriter and browse it to Solus OS ISO.
- Click on write.

Wait for a few minutes. And you’ll see a success message. Congratulations!! You just made a live USB of Solus OS.
To test your newly created live USB, boot into Windows firmware settings and change boot order to boot from USB first.
Recommended Read: Best Live USB Creating Tools
Use Gnome MultiWriter to create live USB of Solus Linux [For Linux]
I am using Ubuntu for this part, but the tool I use is also available for other Linux distributions. So, I can comfortably say that you can create a live USB of Solus OS in any distro with this trick.
Get started by installing GNOME MultiWriter. In Ubuntu-based Linux distributions, you can use the command below to install GNOME MultiWriter:
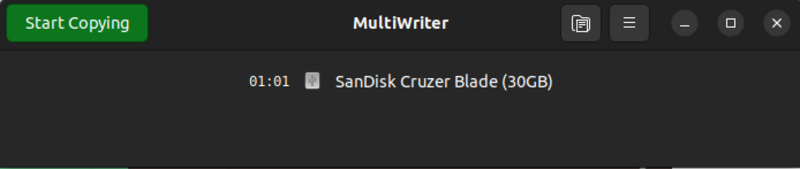
sudo apt install gnome-multi-writerPlug in the USB and Start MultiWriter. It will automatically detect the USB device.
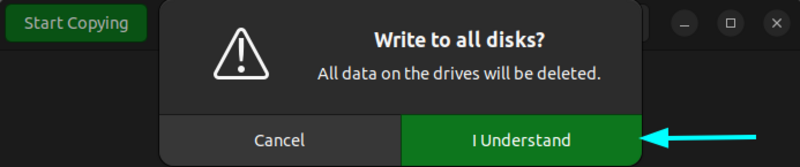
It will warn you about data loss on the USB disk:
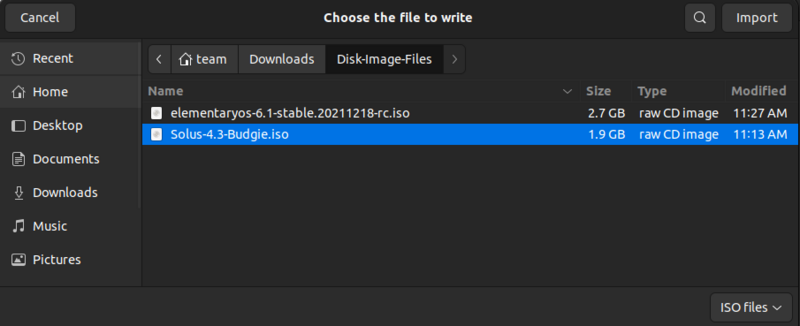
Next, you’ll have to enter your password and then select the ISO of Solus:
And then click on the Start Copying button, and it will start the process:
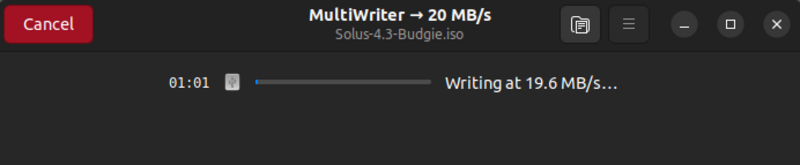
It takes some time before the process is complete. That’s it. Reboot your computer and go into your boot settings to boot from USB.
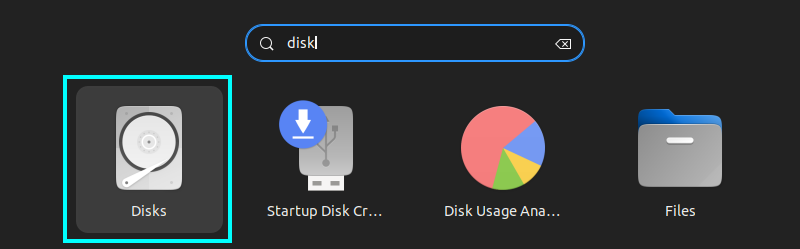
Use Gnome Disks to create live USB of Solus Linux [For Linux]
Gnome Disk Utility is preinstalled on Ubuntu. Open it from the overview.
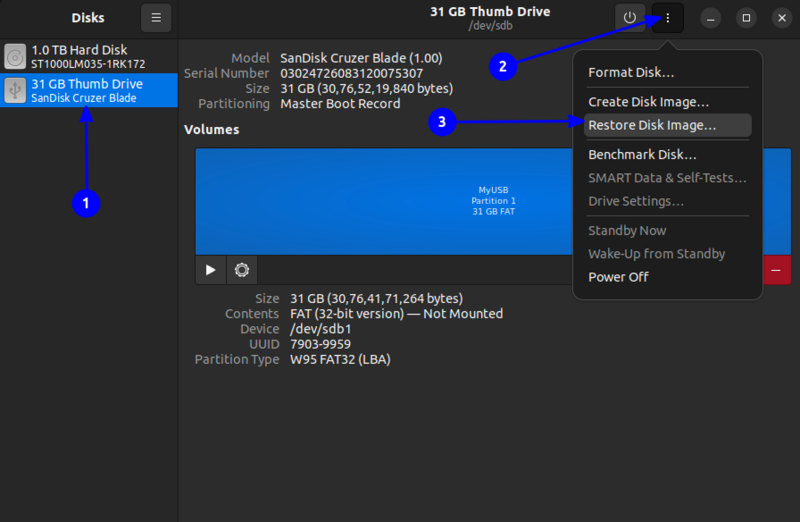
Select the USB Device and from the menu (three dots) select Restore Disk Image:
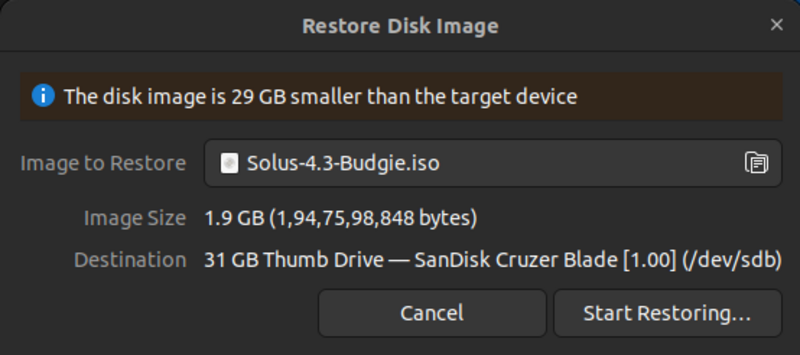
Choose the downloaded ISO and press Start Restoring:
Now, you should enter the password, and it will start writing the image to USB.
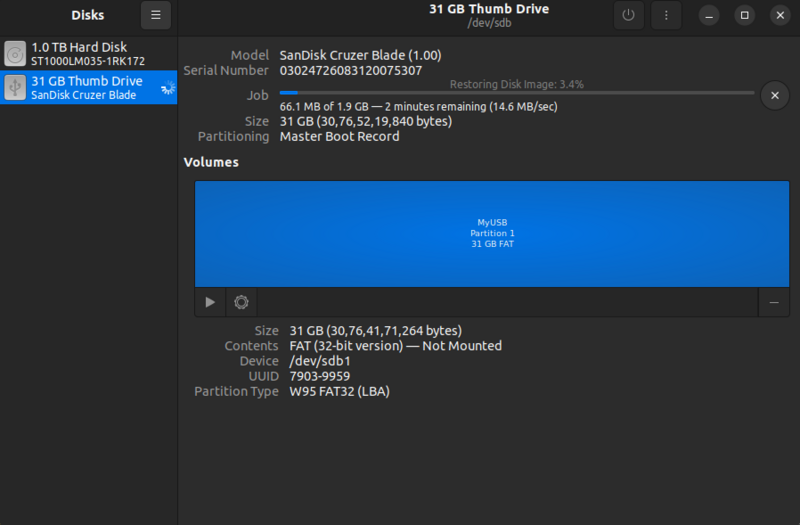
It will be completed in several minutes, and you can use it as Live Solus USB.
I presume that you can handle the things hereafter. If you face any issues or if you need any clarification, don’t hesitate to ask in the comments.