Ready to dive in the world of Bash shell scripting? It would be a lot better if you followed everything on your Linux system. Trust me, learning is better if you are doing it.
Your first shell script: Hello World!
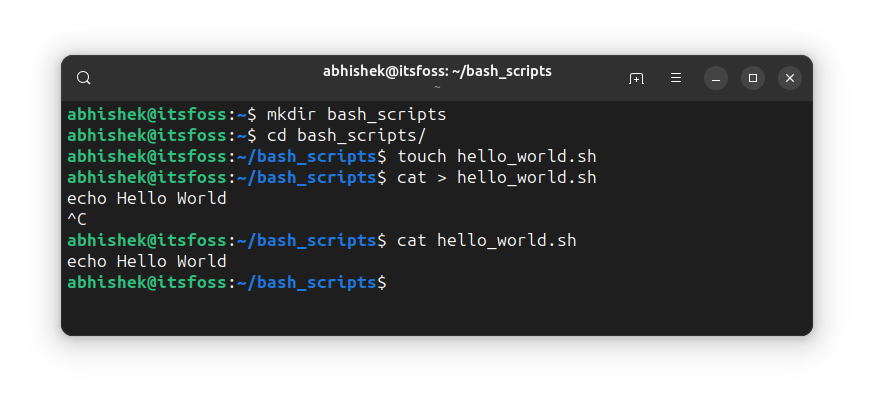
Open a terminal. Now create a new directory to save all the scripts you'll be creating in this series:
mkdir bash_scriptsNow switch to this newly created directory:
cd bash_scriptsLet's create a new file here:
touch hello_world.shNow, edit the file and add echo Hello World line to it. You can do this with the append mode of the cat command (using >):
abhishek@itsfoss:~/bash_scripts$ cat > hello_world.sh
echo Hello World
^C
I prefer adding new lines while using the cat command for adding text.
Press Ctrl+C or Ctrl+D keys to come out of the append mode of the cat command. Now if you check the contents of the script hellow_world.sh, you should see just a single line.

The moment of truth has arrived. You have created your first shell script. It's time to run the shell script.
Do like this:
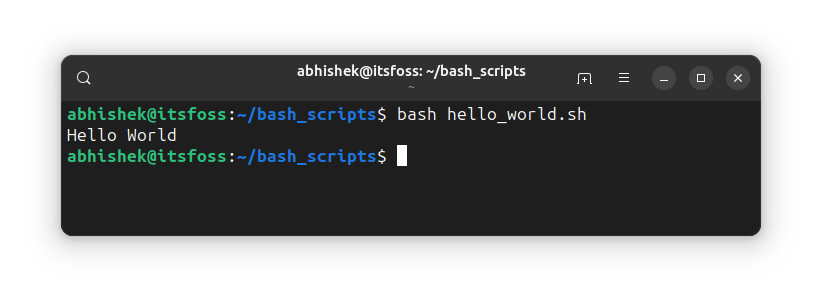
bash hello_world.shThe echo command simply displays whatever was provided to it. In this case, the shell script should output Hello World on the screen.

Congratulations! You just successfully ran your first shell script. How cool is that!
Here's a replay of all the above commands for your reference.

Another way to run your shell scripts
Most of the time, you'll be running the shell scripts in this manner:
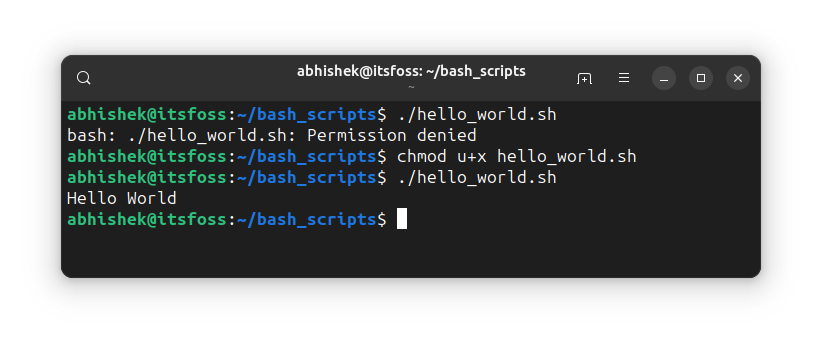
./hello_world.shWhich will result in an error because the file for you as the script doesn't have execute permission yet.
bash: ./hello_world.sh: Permission deniedAdd execute permission for yourself to the script:
chmod u+x hello_world.shAnd now, you can run it like this:
./hello_world.sh
So, you learned two ways to run a shell script. It's time to focus on bash.
Turn your shell script into a bash script
Confused? Actually, there are several shells available in Linux. Bash, ksh, csh, zsh and many more. Out of all these, bash is the most popular one and almost all distributions have it installed by default.
The shell is an interpreter. It accepts and runs Linux commands. While the syntax for most shell remains the same, their behavior may differ at certain points. For example, the handling of brackets in conditional logic.
This is why it is important to tell the system which shell to use to interpret the script.
When you used bash hello_world.sh, you explicitly used the bash interpreter.
But when you run the shell scripts in this manner:
./hello_world.shThe system will use whichever shell you are currently using to run the script.
To avoid unwanted surprises due to different syntax handling, you should explicitly tell the system which shell script it is.
How to do that? Use the shebang (#!). Normally, # is used for comments in shell scripts. However, if #! is used as the first line of the program, it has the special purpose of telling the system which shell to use.
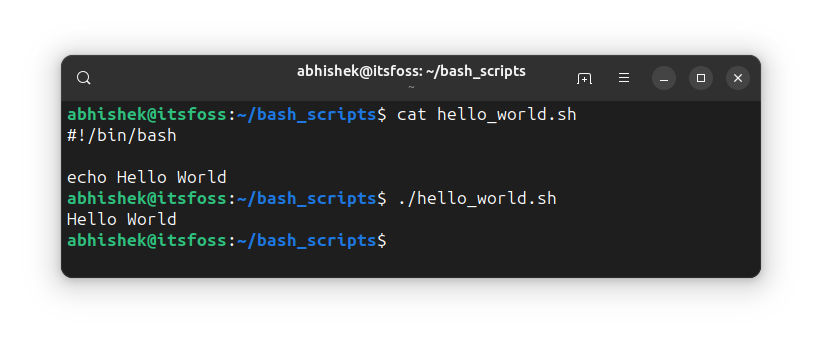
So, change the content of the hello_world.sh so that it looks like this:
#!/bin/bash

echo Hello World
And now, you can run the shell script as usual knowing that the system will use bash shell to run the script.

🏋️ Exercise time
It is time to practice what you learned. Here are some basic practice exercises for this level:
- Write a bash script that prints "Hello Everyone"
- Write a bash script that displays your current working directory (hint: use pwd command)
- Write a shell script that prints your user name in the following manner: My name is XYZ (hint: use $USER)
The answers can be discussed in this dedicated thread in the Community forum.

Next chapter: Variables in bash
The last practice exercise uses $USER. That's a special variable that prints the user name.
And that brings me to the topic of the next chapter in the Bash Basics Series: Variables.

Keep on learning bash.


