

If you’re looking for a free and open source solution to work together on documents, you might want to take a look at that has announced a new release and now brings a series of new features for a more efficient document co-authoring.
ONLYOFFICE is an open source feature-rich office suite integrated with a set of productivity tools for managing documents, emails, projects, events and client relations. You can always select the tools you need for your work and disable the ones you don’t need.
Some features are:
- two ways to collaborate on documents: Fast (like in Google Docs) and Strict (when the changes appear after saving only);
- commenting,
- integrated chat,
- version history,
- reviewing and tracking changes.
- review access rights to documents,
- mail and calendar integration,
- personal address book,
- mail auto-reply.
Install ONLYOFFICE in Ubuntu and derivatives using Docker
Since the latest released version you can use the official Docker script to install the whole system: Document Server and Community Server. This allows you to simplify the installation process and reduce the number of dependencies to be installed to one single dependency – Docker 1.10. or later.
To check the installed Docker version, use the following command:
docker versionTo install ONLYOFFICE, download the installation script:
wget http://download.onlyoffice.com/install/opensource-install.shThen start the installation process:
sudo bash opensource-install.sh -ims falseThis command will download the official Docker image with all the dependencies needed for its correct work.
Run ONLYOFFICE
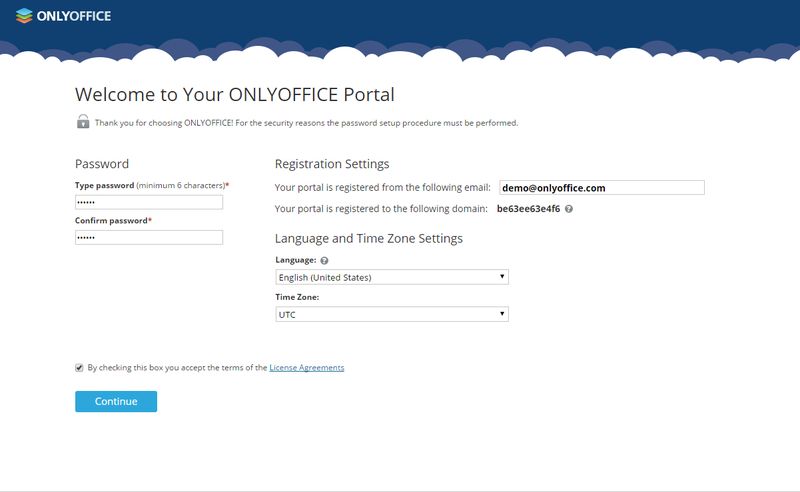
To run your web office, open a web browser on the machine that your Docker image is running on, and enter your IP address. Once the initialization process is complete, on the Welcome page enter a password, its confirmation and specify the email address you will use to access your web office the next time.
Start co-authoring your document
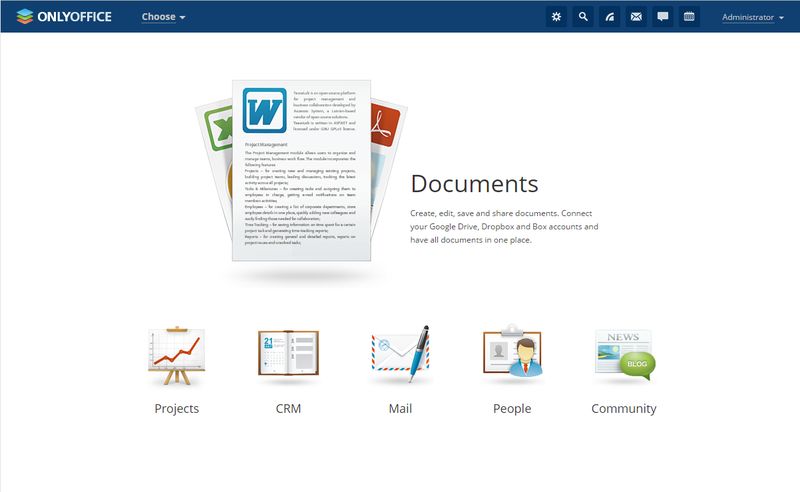
Step 1. Open the My Documents folder by clicking the Documents link in the middle of the screen.
Step 2. Select a document to co-author. You can create a new document/spreadsheet/presentation, upload an existing one from your PC or connect any popular storage services, like Dropbox, Google Drive, ownCloud, etc., and select a file stored there.

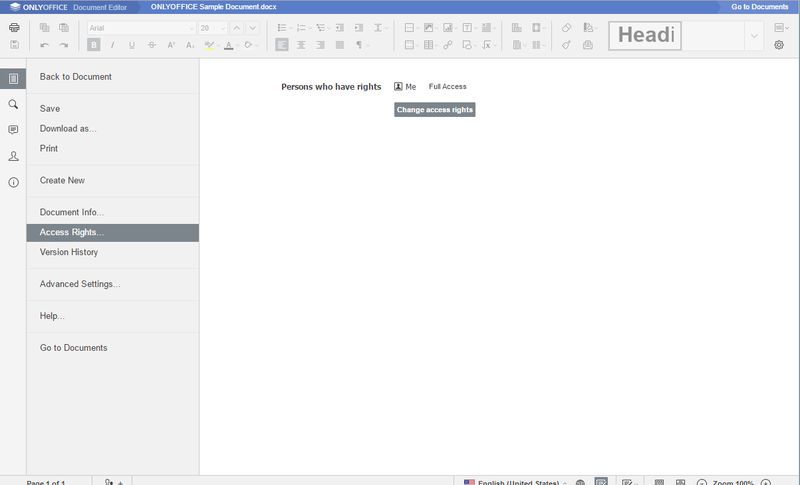
Step 3. Grant access to your document to others. Use the Share button to the right if you are in the My Documents folder, or follow File >> Access Rights… if you are inside your document.
Click the People outside portal link on the left, open the access to the document, and give full access to it by enabling the Full Access radio button. If you don’t wish your document to be actually edited, enable the Review radio button.
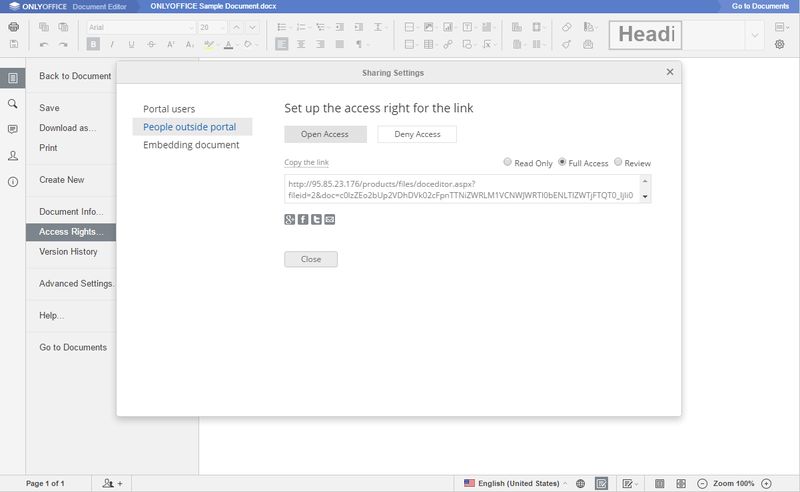
Finally, share the link to your document in any available way.
Step 4. Once the invited person follows the provided link and starts editing your document, you will see his/her edits in real time.
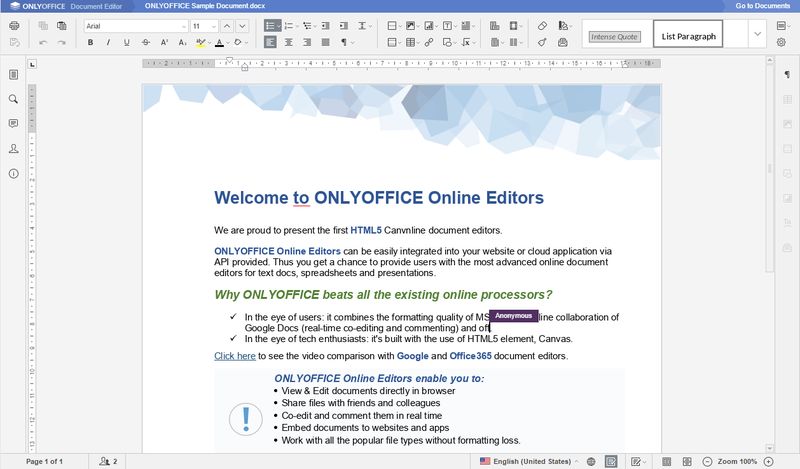
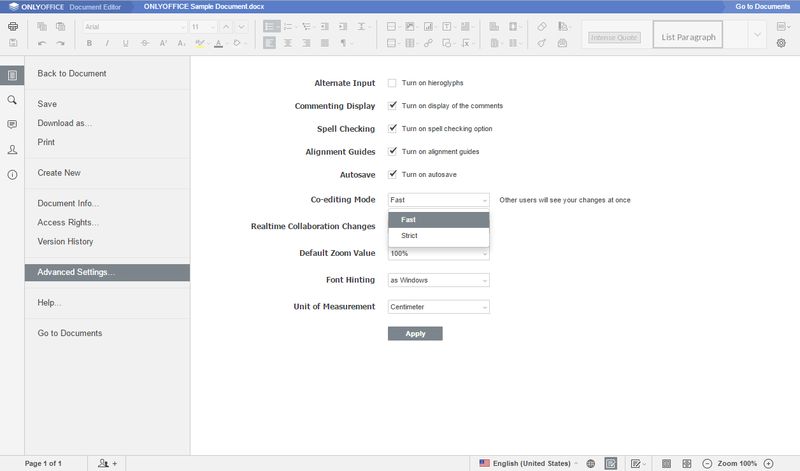
If you wish to hide the other’s changes or just don’t want your changes to be shown to others, switch to the Strict co-editing mode. Just follow File >> Advanced Settings … >> Co-editing modes >> Strict. In this case, you will need to accept the changes before you can see it clicking the Save button.
Step 5. To interact with co-authors in real time, use the built-in chat at the left-side bar. All the users who currently edit the document will be listed on the Chat panel.
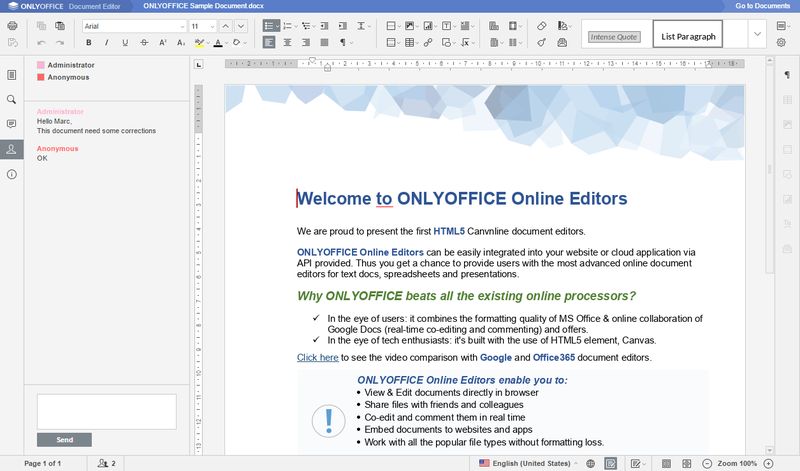
To comment a text passage, use the Add comment option from the context menu.

Step 6. To track changes made by others, follow File >> Version History. If you need to recover one of the previous version, go back to the My Documents, select the document you need, open the version history using the corresponding option from the context menu. Then click the Restore link on the right of the version to be recovered.
This is all you need to co-author a document in ONLYOFFICE.
Author bio: For the past 10 years, Tatiana Kochedykova has been working as a technical writer and translator specializing in productivity software. She also writes for Opensource.com and Xmodulo. Otherwise, she likes to spend her time with her husband and small son. She says she’s optimistic by nature: “I know for sure that all will be well.”
If this helped you, consider supporting It's FOSS
It's FOSS has been helping people use Linux for the past 14 years. Help us stay independent from big tech. Become a Plus member, enjoy ad-free reading and get 5 eBooks.

