
Eclipse is the preferred IDE for C++, Java, Android, Perl and what not. In my universities, the start up where I interned, the big IT company where I currently work at, Eclipse has always been the main tool for development. If you ever used Eclipse, you would know why so.
One of the most loved feature about Eclipse is customization. I am not going to dig deep in to what kind of customization you can do with Eclipse. I am just going to show you how to change the default light colored theme in Eclipse and give it a new, fresh and different look. If you prefer dark, you can give Eclipse a dark look easily.
I am using Ubuntu Linux to demonstrate changing themes in Eclipse, but this should be the same procedure for Windows and Mac OS X version.
Just make sure that you have installed the latest version of Eclipse in Ubuntu or whichever operating system you are using.
Change Eclipse color theme
You’ll be using The Eclipse Color Theme for this purpose. Just follow the steps below to change the theme of Eclipse.
Step 1
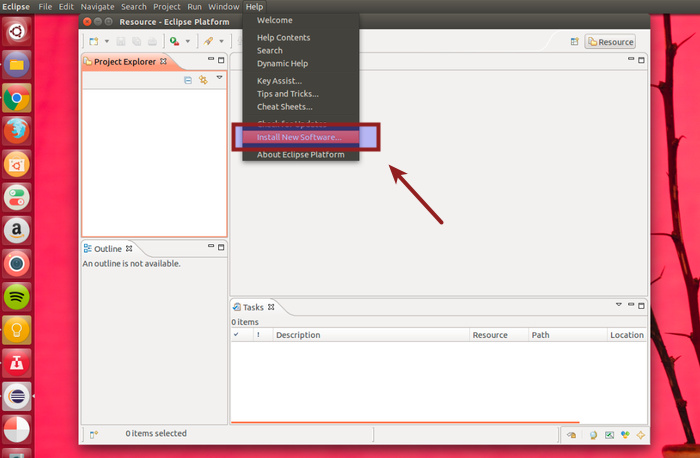
Open Eclipse and in the top menu go to Help->Install New Software.
Step 2
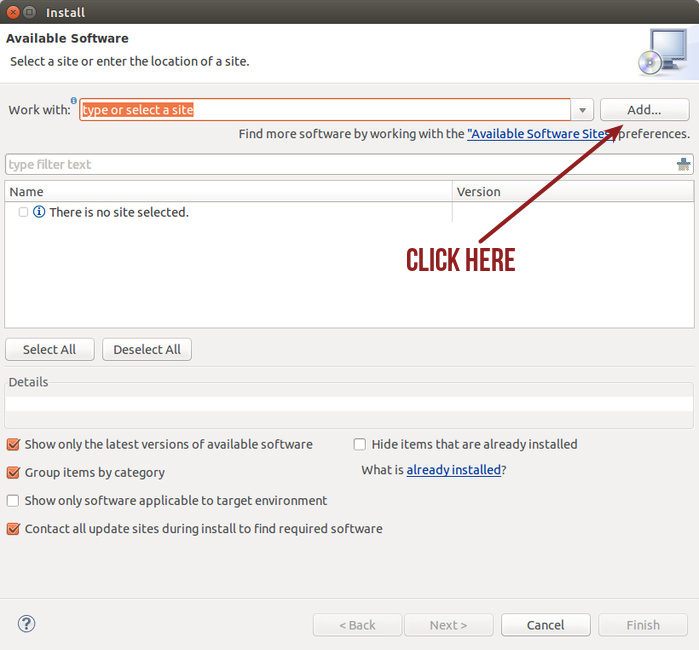
You’ll see a screen like the one below. Click on Add.
Step 3: Online installation
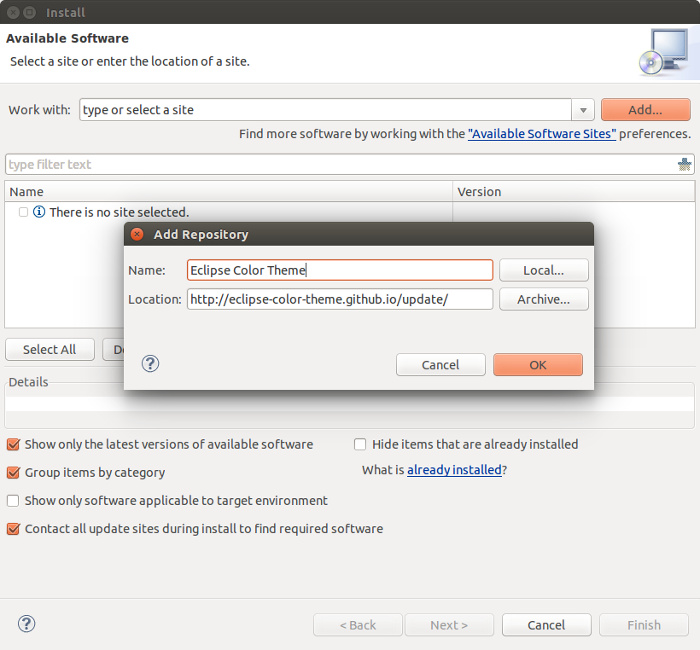
If you are connected to the internet, just add the following URL in location: http://eclipse-color-theme.github.io/update/. You can copy the URL here. Give it any name you like. I named it Eclipse Color Theme for obvious reasons to easily recognize it (if you have several plugin installed already). Once done press OK.
Step 3: Offline installation
If your computer cannot be connected to internet, don’t despair. You can install any Eclipse theme offline. You just need the zipped file of the plugin and you are good to go. Download the Eclipse Color Theme from the link below (on the system where you have internet access).
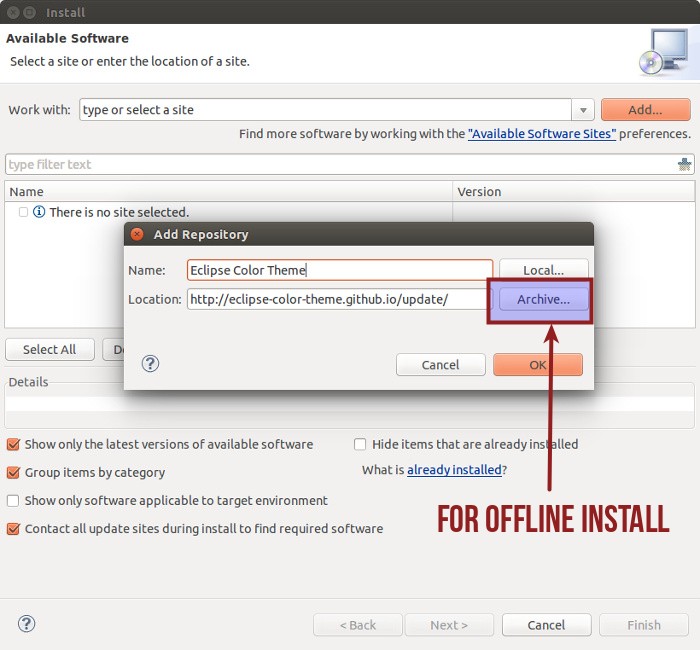
In the previous step, while adding the source, click on Archive for offline installation. Browse to the downloaded zipped file and click OK.
Step 4: Install color theme
Once added, you’ll see that Eclipse Color Theme (or whatever name you chose) has appeared. Select it and press Next.
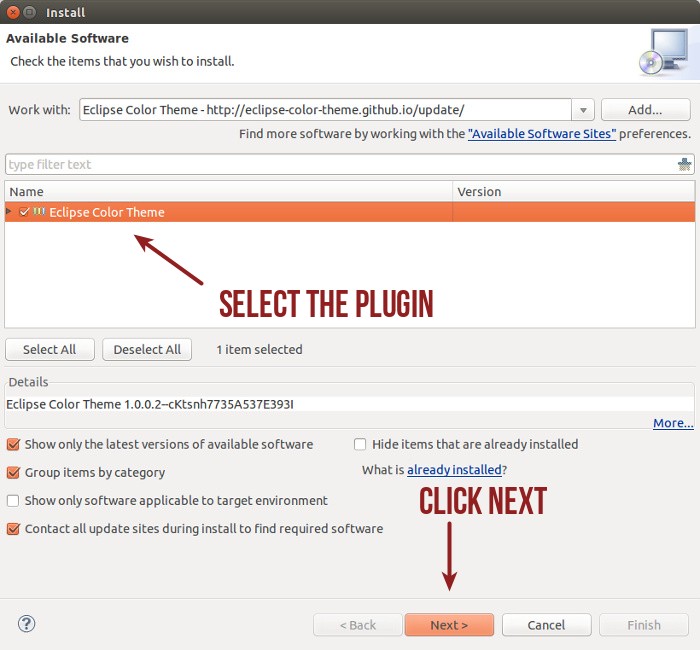
Keep on pressing Next or Okay. Accept the license, when prompted.
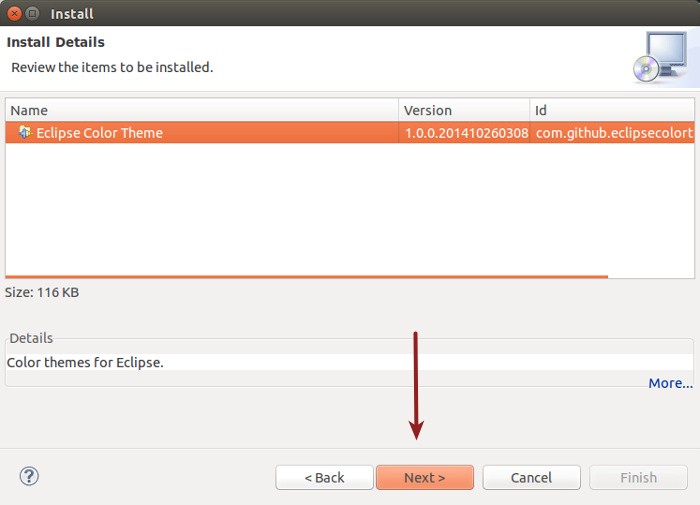
You’ll also see a security warning during the installation. Just press OK.

Once the installation is finished, you’ll need to restart Eclipse before you could use the newly installed plugin.
Step 5: Change color theme
Now that we have installed the color theme plugin, it is time to use this plugin and change the skin of Eclipse. Go to Menu->Windows->Preference:
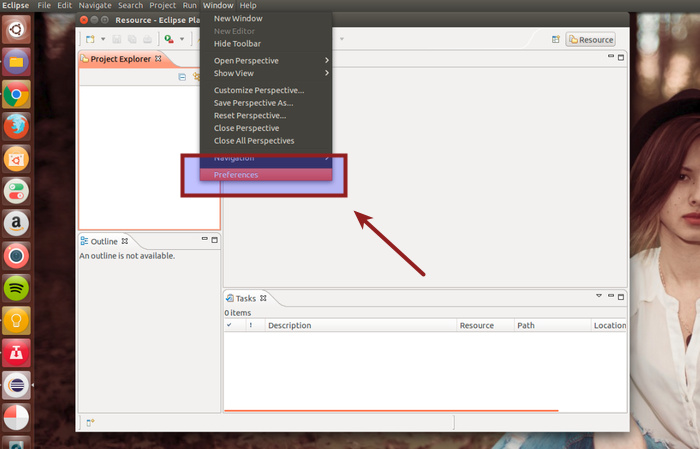
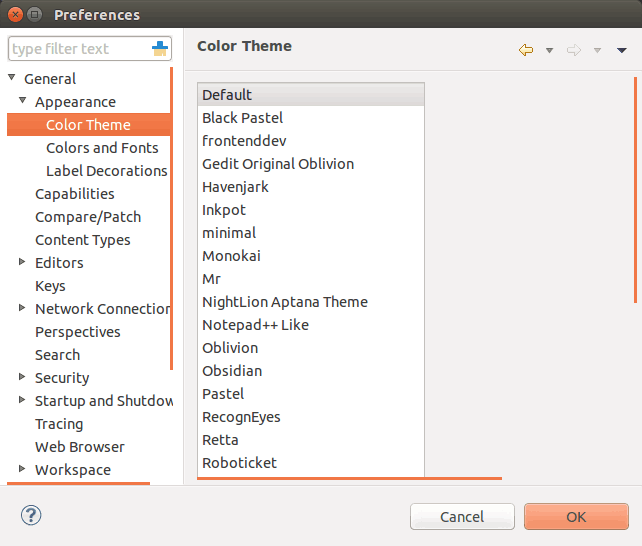
In the left sidebar, go to General->Appearance->Color Theme. When you select that, it will show you different available themes in the right pane. You can choose the one you like and press OK.
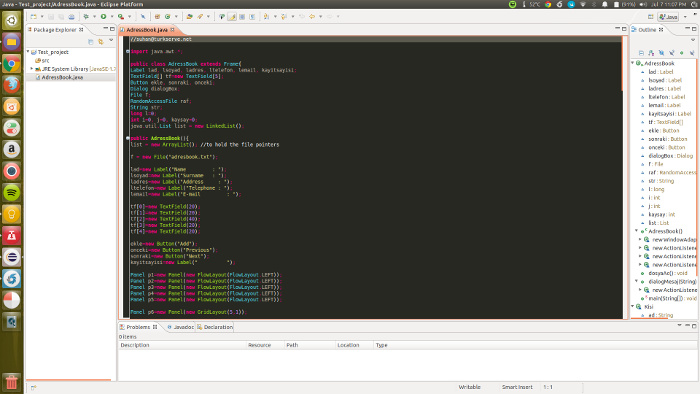
Here is what my Eclipse looks like with Sublime Text 2 theme. If you do not know already, Sublime Text is one of the best text editors for Linux and Windows.
Step 6: Getting more color themes
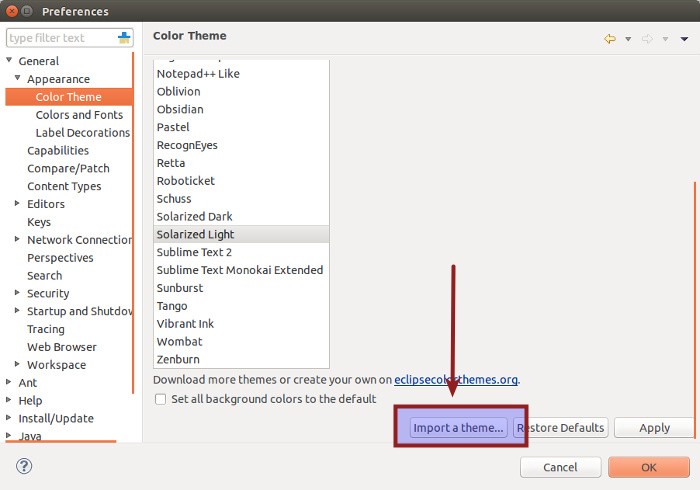
There are around 20 color themes in this plugin. You can get more at Eclipse Color Themes website. All you need to do is to download the XML file and import it under Eclipse Color Theme like this:
That’s it. This is all you need to do to install Eclipse color theme. I hope you find this tutorial helpful. Any questions, suggestions or a word of thanks is appreciated.

