

WSL feature allows running an actual Linux distribution inside Windows. Ubuntu was the first distro that could be installed this way. Soon, SUSE, Kali Linux and some other Linux distributions joined the WSL bandwagon.
Recently, after much waiting, Arch Linux also became a part of the WSL distributions.
In this article, I show you the steps for using Arch Linux WSL system under WSL 2.
There are some prerequisites.
- WSL should be installed and setup.
- Check your WSL version. You need WSL 2, version 1 is not supported.
If your system meets the prerequisites, follow the steps for installing Arch Linux in WSL and setting it up.
Step 1: Installing Arch Linux in WSL
You can install Arch Linux in two different ways in WSL, both producing the same result, a working Arch Linux WSL installation.
- Install from WSL online repository: Easy and recommend.
- Install manually using Arch Linux WSL file: For the sake of Arch Linux complexity.
I will discuss the first method in this section. The manual method is discussed later to avoid any confusion.
Since Arch Linux now officially supported in WSL, there is an image available on the WSL online repositories.
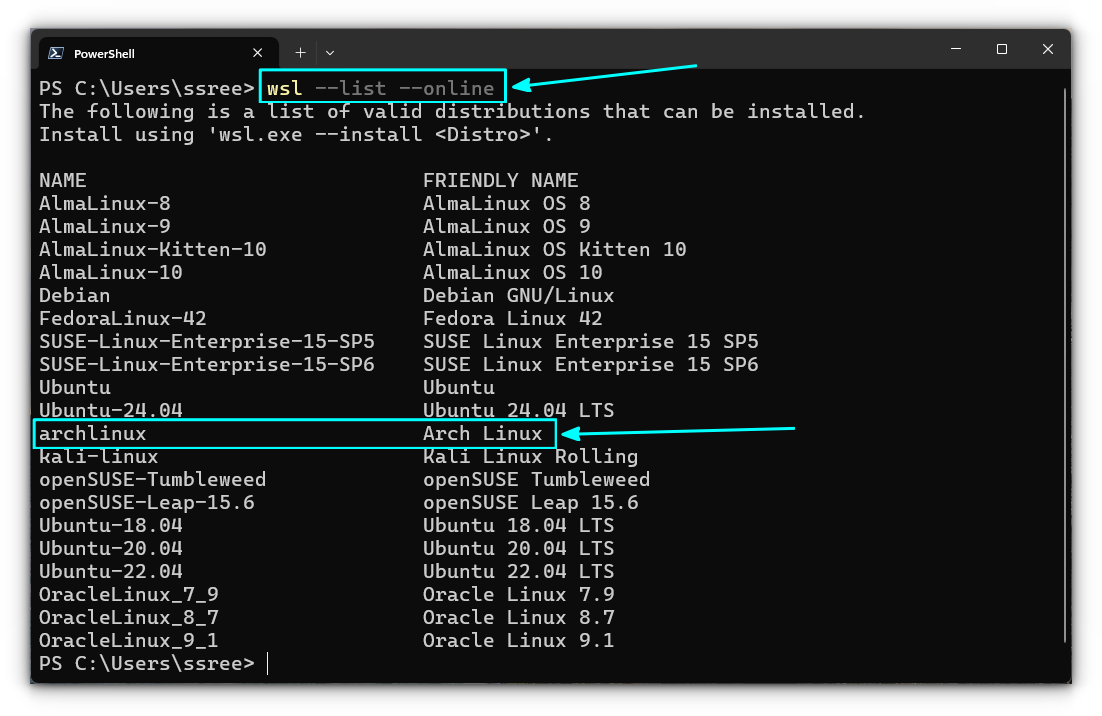
List the available WSL distributions using the command:
wsl --list --online
Now, to install Arch Linux, use the WSL command below:
wsl --install archlinux
This will download the Arch Linux image and install the distribution.
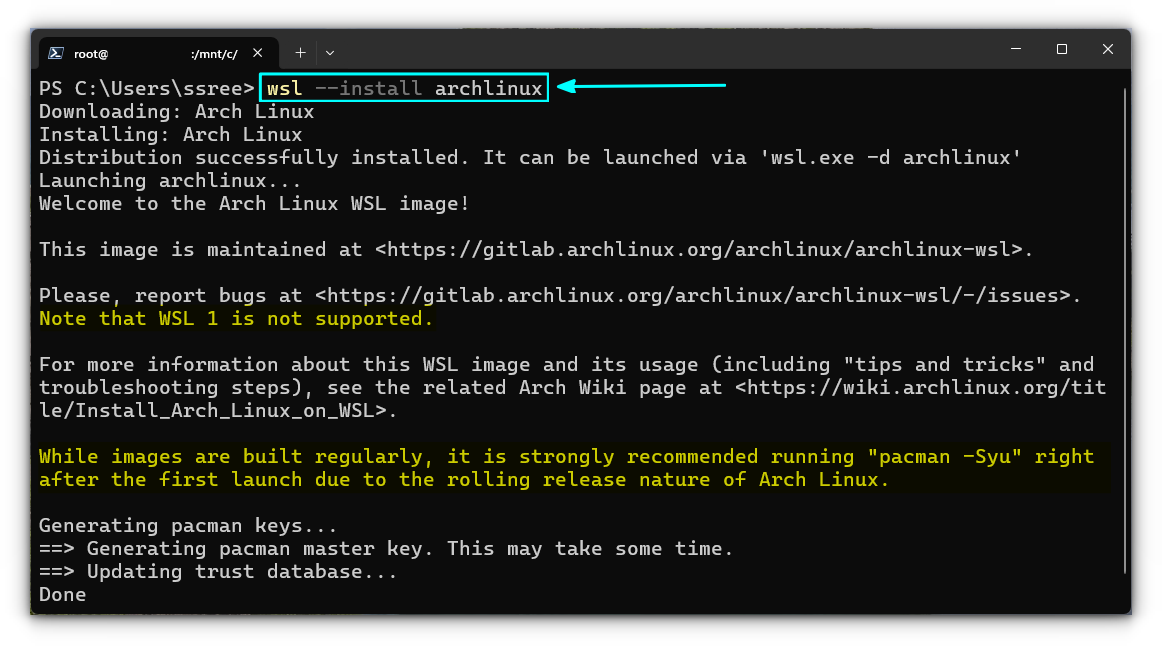
Once the installation is finished, you will be logged in as the root.
Step 2: Setting up Arch Linux
The default Arch Linux installation (both official repo and manual) logs you in as a root user. There is no regular admin user created for your day-to-day usages at this stage. But we will create it ourselves.
If you have already installed Ubuntu in WSL, it prompts you to create a user soon after the installation is finished. Since Arch Linux is a DIY Linux distribution, such convenience should not be expected.
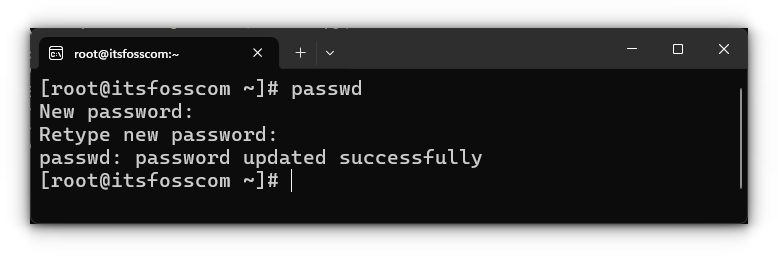
Set a root password
Since you currently haven't a root password set up, do that by using the passwd command:
passwd
Type and retype the password to make the change effect. Please note that nothing is displayed on the screen when you type the password. That's normal behavior.
Update the system
Once you have opened the newly installed Arch Linux WSL, use the command below to update the system.
pacman -Syu
Stop Arch Linux and reopen it.
wsl.exe --terminate archlinux
Install sudo
Chances are there that sudo is not installed. If that's the case, you may not be able to access visudo in a later stage to set admin privileges.
To check if sudo is installed, use the command:
pacman -Qs sudo
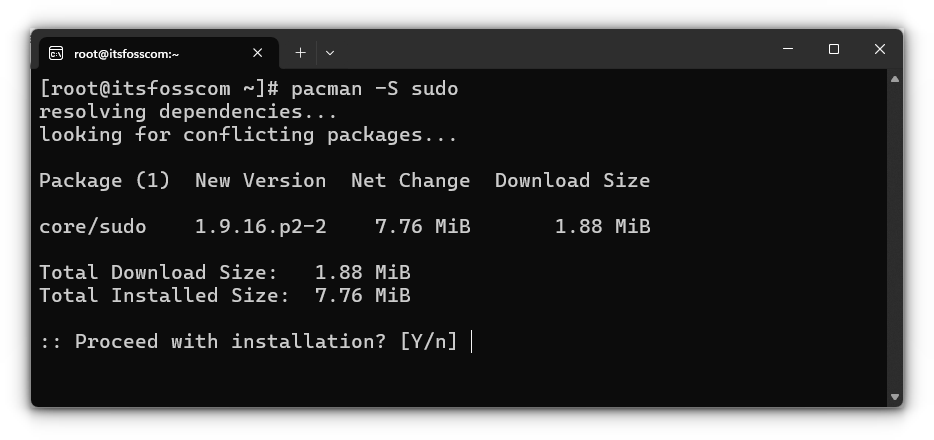
If sudo is not listed, install sudo using:
pacman -S sudo
Create a new user
It is not recommended to log in as the root all the time. You need a regular user who can run administrative commands when needed.
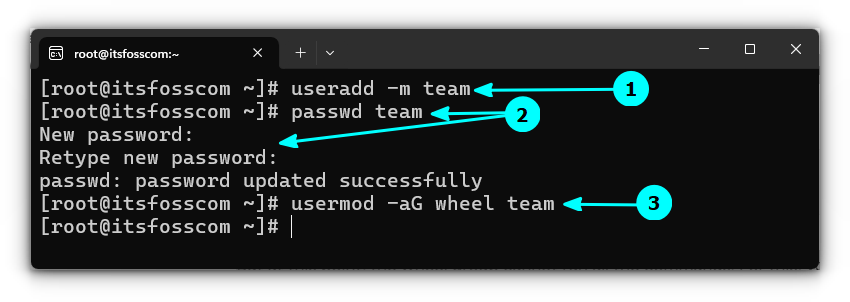
In Arch Linux, you can use the useradd command, to create a new user. Let's create a new user called “team”.
useradd -m team
Here, the -m option will automatically create a home directory for the user at /home/.
Set a password for the user “team”, using:
passwd team
Type and retype password to confirm the change.
Once the user is created, add that user to the wheel group so that it can run the sudo command to access some administrative privileges.
usermod -aG wheel team
But at this point, the wheel group cannot run all the commands. For this, you need to allow the members of the wheel group to run any commands.
Edit the sudoers file with Nano editor.
EDITOR=nano visudo
Locate the line %wheel ALL=(ALL) ALL and uncomment it.
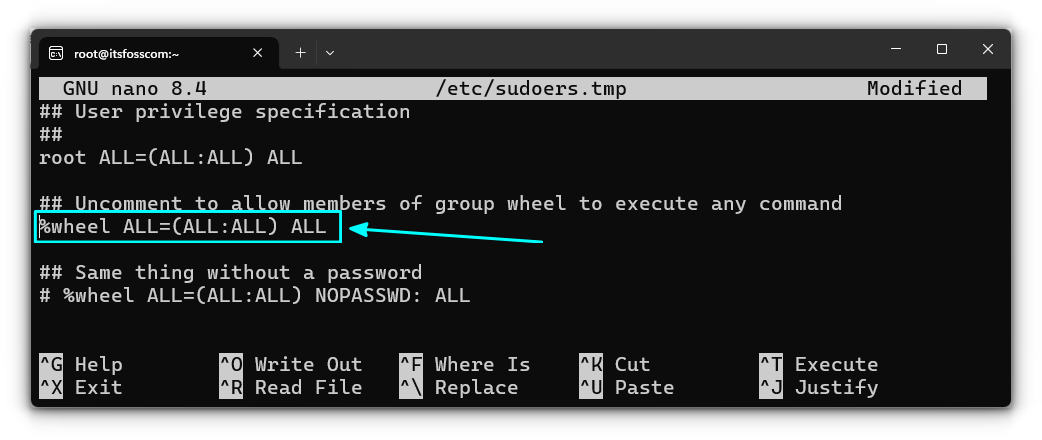
Save the document using CTRL + O and exit using CTRL + X.
At this point, you can just terminate the system using the command:
wsl.exe --terminate archlinux
And then reopen it from the Windows terminal.
wsl ~ -d archlinux -u team
Here, you are directly logging in as the normal user (team), that was created in the previous step. The ~ option will land you straight in the home directory of the user.
Or, you can create a file inside the Arch Linux system by running the following command:
sudo nano /etc/wsl.conf
team.Inside this file, add the line:
[user]
default = team
This will set the user “team” as the default one. You will no longer be logging in as the root.
Now, save the file and exit. Terminate the system using the command:
wsl.exe --terminate ArchLinux
Now, you can restart the system to see that you are logged in with the default regular user instead of root:
wsl ~ -d ArchLinux
Change hostname
To change the hostname of the WSL, you can add the following line to your /etc/wsl.conf file:
[network]
hostname=new_host_name
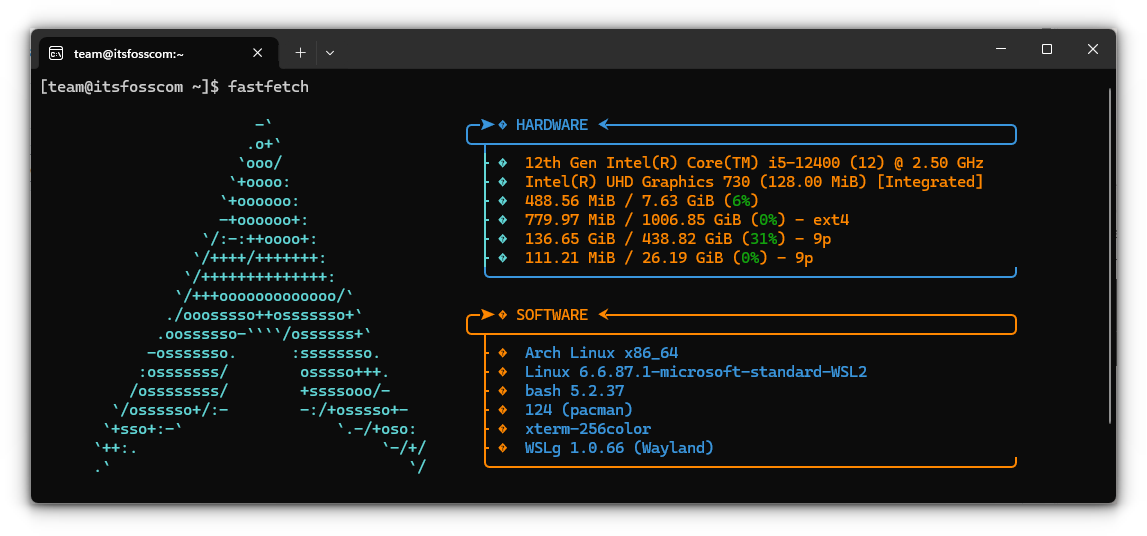
That's it. You can enjoy the Arch Linux experience on Windows now.
In case you want to know the manual installation steps
Along with the WSL repo image, Arch Linux also provides a WSL image as part of archlinux-wsl project.
First, download the latest archlinux-xxxx.wsl image from the official downloads page.
Once downloaded the file to a local folder, go to that folder in File Explorer.
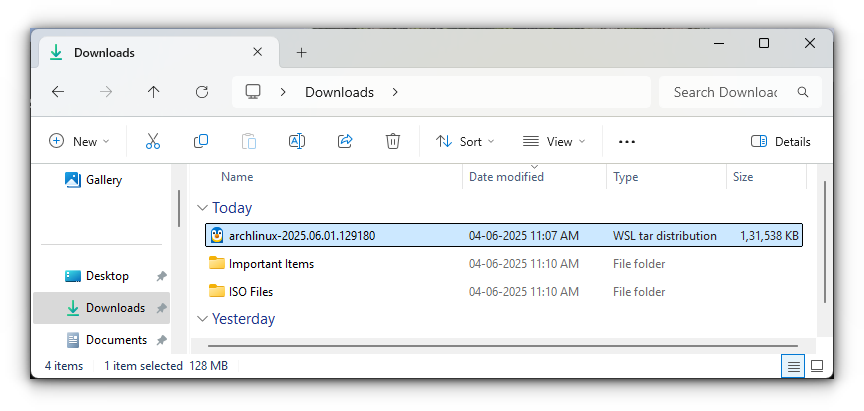
Select the file and press CTRL+SHIFT+C to copy the path to the file. You can also right-click on the file and select the Copy as Path option.
Now, open a Windows terminal and use the command below to install it.
wsl --install --from-file <PATH-TO-WSL-IMAGE>
In place of PATH-TO-WSL-IMAGE, paste the copied location.
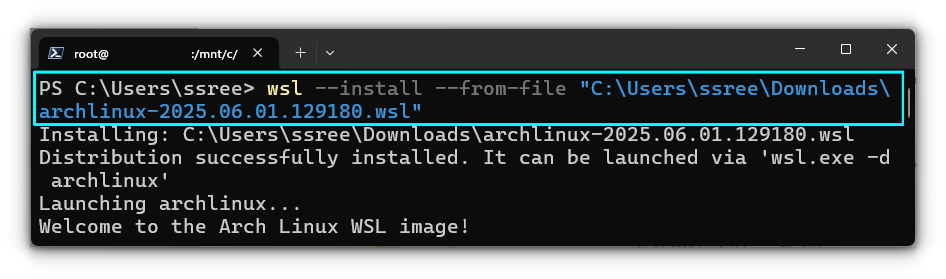
It will be followed by the same post-install steps that you saw earlier.
For advanced setup documentation, you can always refer to the official Arch Wiki page.
If this helped you, consider supporting It's FOSS
It's FOSS has been helping people use Linux for the past 14 years. Help us stay independent from big tech. Become a Plus member, enjoy ad-free reading and get 5 eBooks.
