A search application is one of the most important tools you can have on your computer. Most are slow to index your system and find results. However, here we will be looking at an application that can display results as you type.
Meet ANGRYsearch, a file search utility that provides you with instant search results.
What is ANGRYsearch?
ANGRYsearch is a Python-based application that delivers file results as you type your search query. The overall idea and design of the application are both inspired by Everything a search tool for Windows.
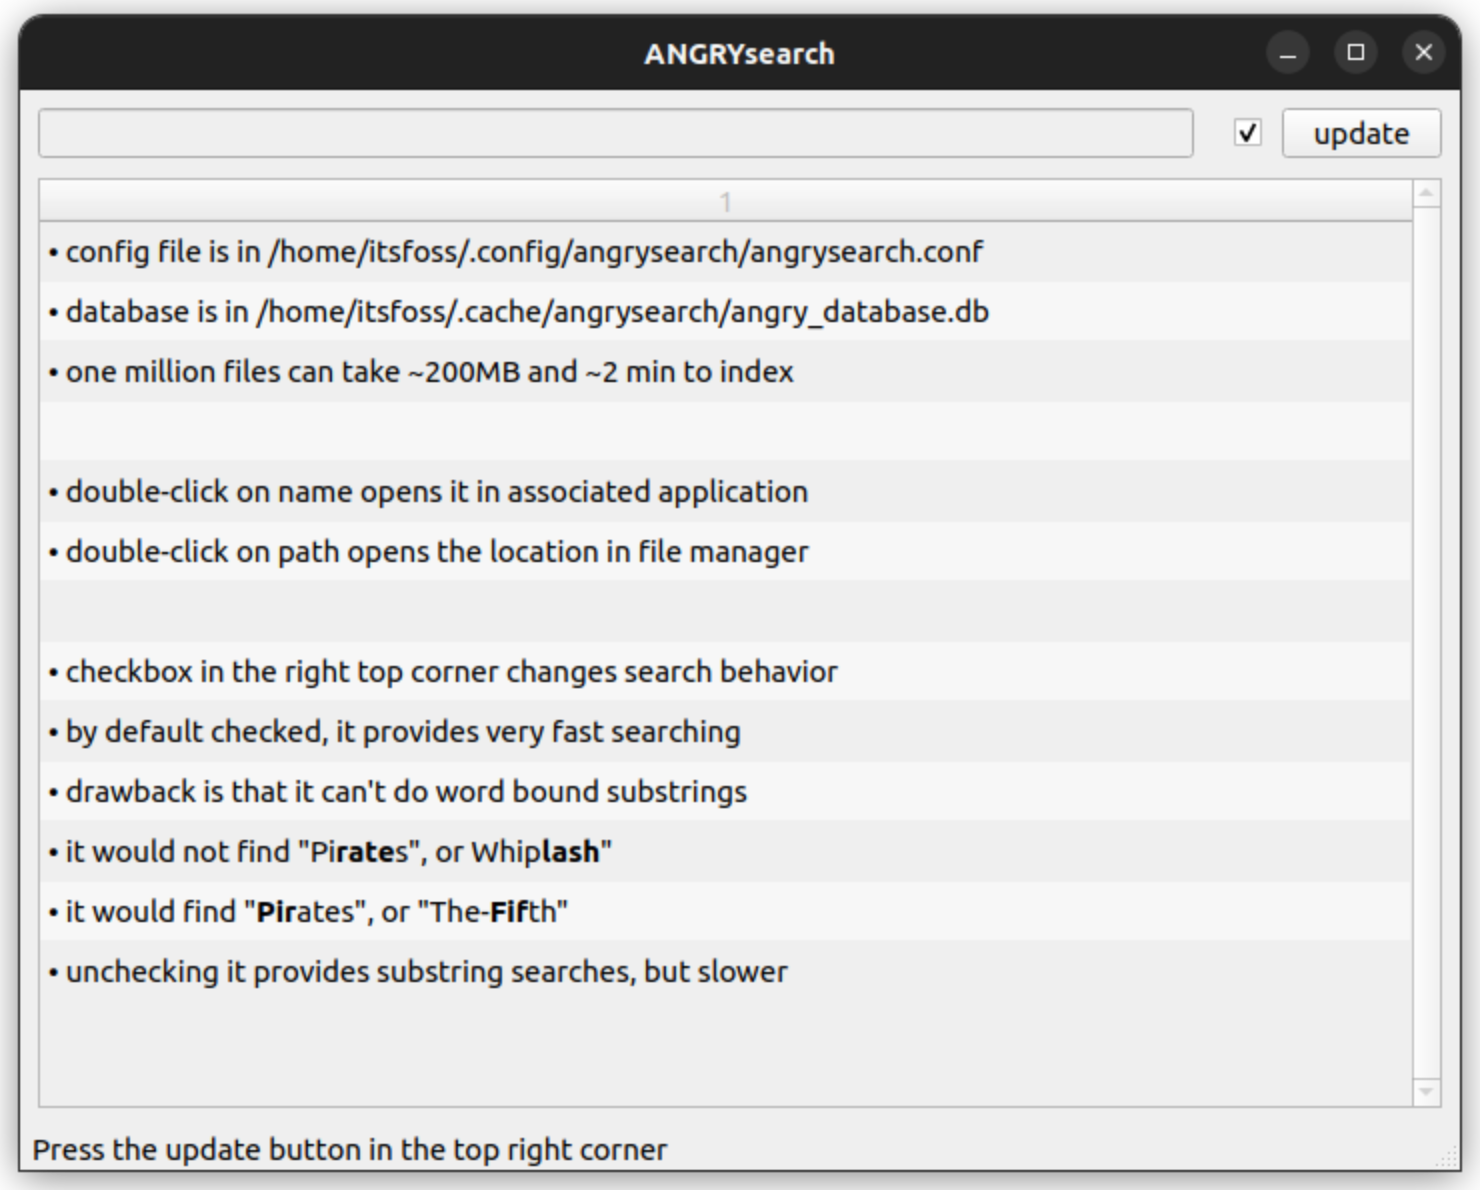
ANGRYsearch can display the search results quickly because it only indexes filenames, and in advance.
After you install ANGRYsearch, you are prompted to create a database of filenames by scanning your system. Once everything has been scanned, which takes a couple of minutes, you can start searching for a particular file without any wait time.
Once you find the file of your choice, simply click on it to open it using the file manager.
Even though ANGRYsearch is a focused tool, there are several things you can do to customize the experience.
First, ANGRYsearch has two different display modes: lite and full. Lite mode only shows the filename and path. Full mode displays filename, path, size, and date of the last modification. Full mode, obviously, takes longer to display. The default is lite mode.
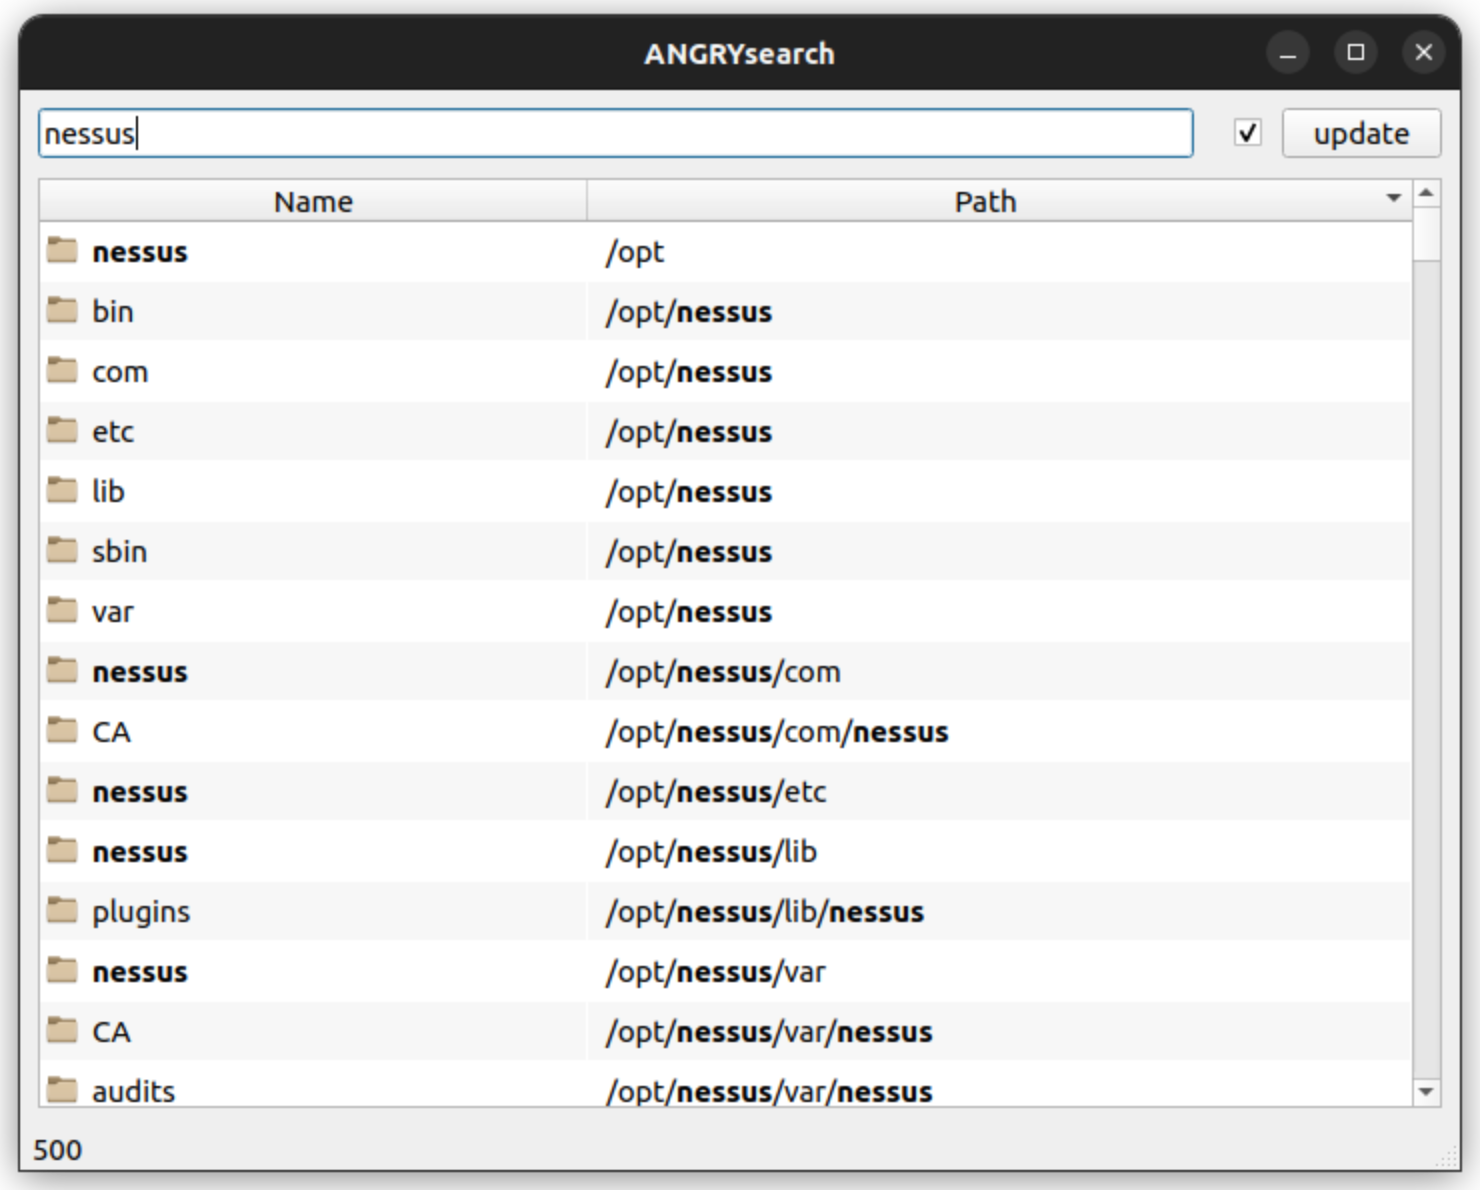
For example, you have installed a tool and want to search for the folders containing the same. Just type in the tool name or first initial characters and ANGRYsearch would display only the files with the initial characters and the application.
To switch to full mode, you need to edit the config file at ~/.config/angrysearch/angrysearch.conf. All it takes is to modify the angrysearch_lite value to false.
Suggested Read 📖

ANGRYsearch also has three different search modes: fast, slow, and regex. Fast mode displays filenames that start with your search term. Fast mode is enabled by default and can be turned off by unchecking the checkbox next to the “update” button.
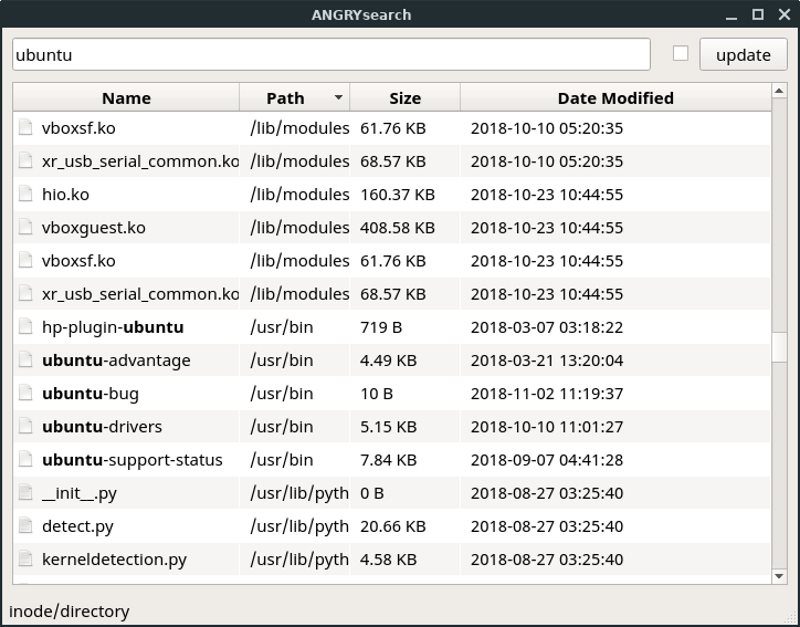
Suppose you search for "Ubuntu" in a computer full of Linux distros, you will only get results for distros like Ubuntu Unity, Ubuntu MATE, etc. It will not display distro files like Xubuntu and Lubuntu.
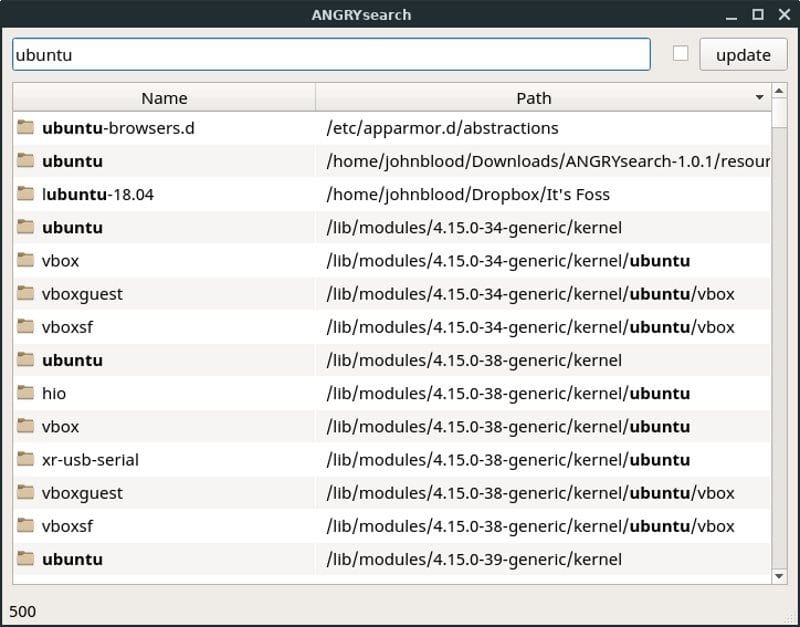
Slow mode is slightly slower (obviously), but it will display files that have your search term anywhere in their name. If you consider the previous example, ANGRYsearch would show all Ubuntu distros including Xubuntu with this mode as shown in the image below.
Lastly, Regex mode is the slowest and most precise. It uses regular expressions and is case insensitive. Regex mode is activated by pressing F8.
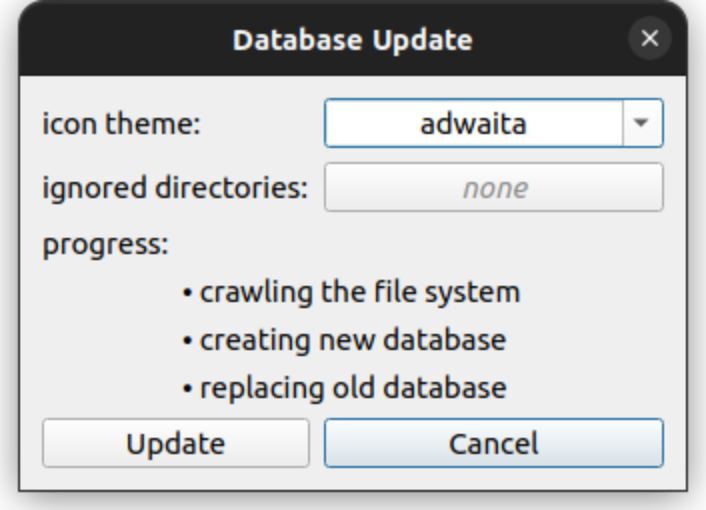
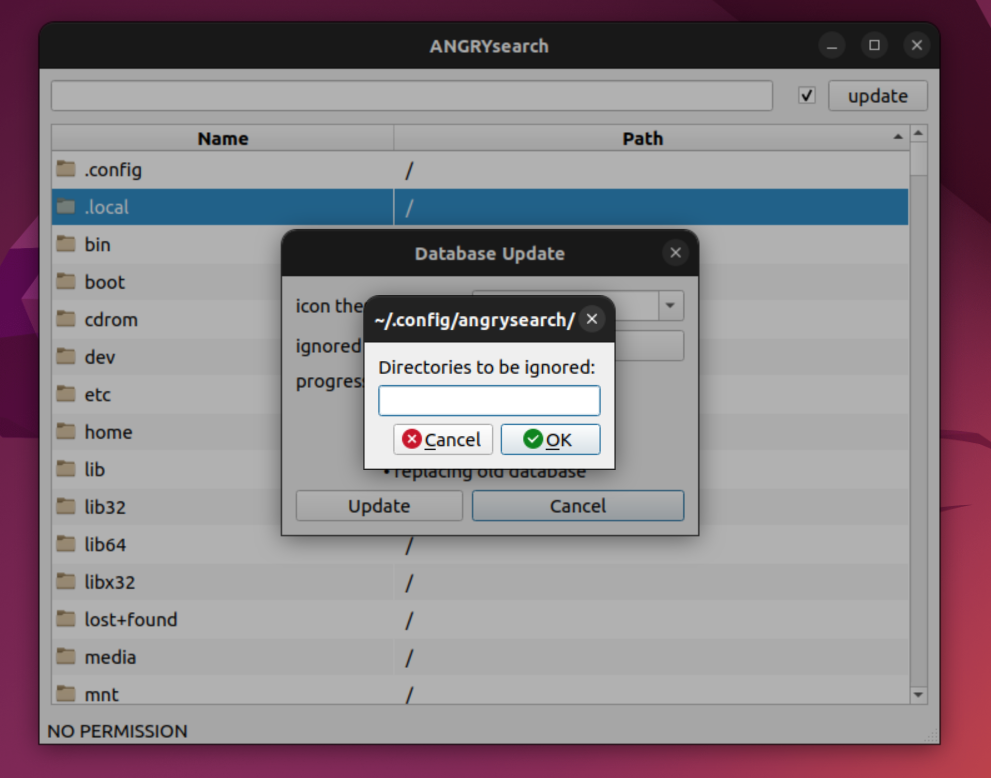
You can also tell ANGRYsearch to ignore certain folders when it indexes your system. Just click the “update” button and enter the names of the folders you want to be ignored in the space provided. You can also choose from several icon themes, though it doesn’t make that much difference.
Installing ANGRYsearch on Linux
ANGRYsearch is available in the Arch User Repository. It has also been packaged for Fedora and openSUSE.
To install on other distros, follow these instructions. I have tested it on Ubuntu 22.04 LTS/
ANGRYsearch depends on python3-pyqt5 andxdg-utils so you will need to install them first. Most distros have xdg-utilsalready installed. So, all you need to install is this::
sudo apt install python3-pyqt5Next, download the archived package (tar.gz) from GitHub releases. Once done, extract it, and open the folder in the terminal or navigate to the folder from within the terminal.
Next, we will navigate to the new folder (ANGRYsearch-1.0.4 at the time of updating the article) and run the installer.
cd Downloads/ANGRYsearch-1.0.4
chmod +x install.sh
sudo ./install.sh
The installation process is very quick, so don’t be surprised when a new command line is displayed as soon as you hit Enter.
The first time that you start ANGRYsearch, you will need to index your system. ANGRYsearch does not automatically keep its database updated. You can use crontab to schedule a system scan or just update it manually whenever you install or add something new to your system.
To open a text editor to create a new cronjob, use crontab -e. To make sure that the ANGRYsearch database is updated every 6 hours, use this command.:
0 */6 * * * /usr/share/angrysearch/angrysearch_update_database.pycrontab does not run the job if it is powered off when the timer does off. In some case, you may need to manually update the database, but it should not take long.
User Experience
In the past, I was always frustrated by how painfully slow it was to search my computer. I knew that Windows had the Everything app, but I thought I was out of luck on Linux. It didn’t even occur to me to look for something similar on Linux. I’m glad I accidentally stumbled upon ANGRYsearch.
I know there will be quite a few people complaining that ANGRYsearch only searches filenames, but most of the time that is all I need. Thankfully, most of the time I only need to remember part of the name to find what I am looking for.
The only thing that annoys me about ANGRYsearch is the fact that it does not automatically update its database. You’d think there would be a way for the installer to create a cron job when you install it.
Final Thoughts
Since ANGRYsearch is basically a Linux port of one of my favorite Windows apps, I’m pretty happy with it. I plan to install it on all my systems going forward.
I know that I have ragged on other Linux apps for not being packaged for easy install, but I can’t do the same for ANGRYsearch. The installation process is pretty easy. I would definitely recommend it for Linux newbies. There is also SearchMonkey application for searching your desktop. You may try that as well.
Have you ever used ANGRYsearch? If not, what is your favorite Linux search application? Let us know in the comments below.
Suggested Read 📖