

Tiling windows is a method of arranging open windows on a computer screen so that they do not overlap, but instead fit neatly alongside one another.
It's been popular among people customizing their desktops. Probably why Ubuntu has also started providing support for some basic tiling with the 24.04 LTS release.
In this article:
- I'll show how the default tiling works in Ubuntu
- I'll discuss the keyboard shortcuts and some enhancing you can do with the tiling feature
- I'll also share another extension that takes the tiling feature to the next level
There are many tiling window managers available, that performs the action in their own specific method.
Ubuntu uses GNOME and GDM, and these are not dedicated tiling window managers. For a long time, Ubuntu has supported basic tiling features like snapping the window to left or right.
From Ubuntu 23.10 Mantic Minotaur onwards, we saw the inclusion of a built-in extension called Ubuntu Tiling Assistant. With this extension, you will be assisted in placing windows during tiling operation, according to the available screen space.
But there is more it can do, other than placing the windows on a grid like pattern. Let’s take a look at some rather unknown use cases of Ubuntu tiling assistant.
Experiencing the window tiling in Ubuntu
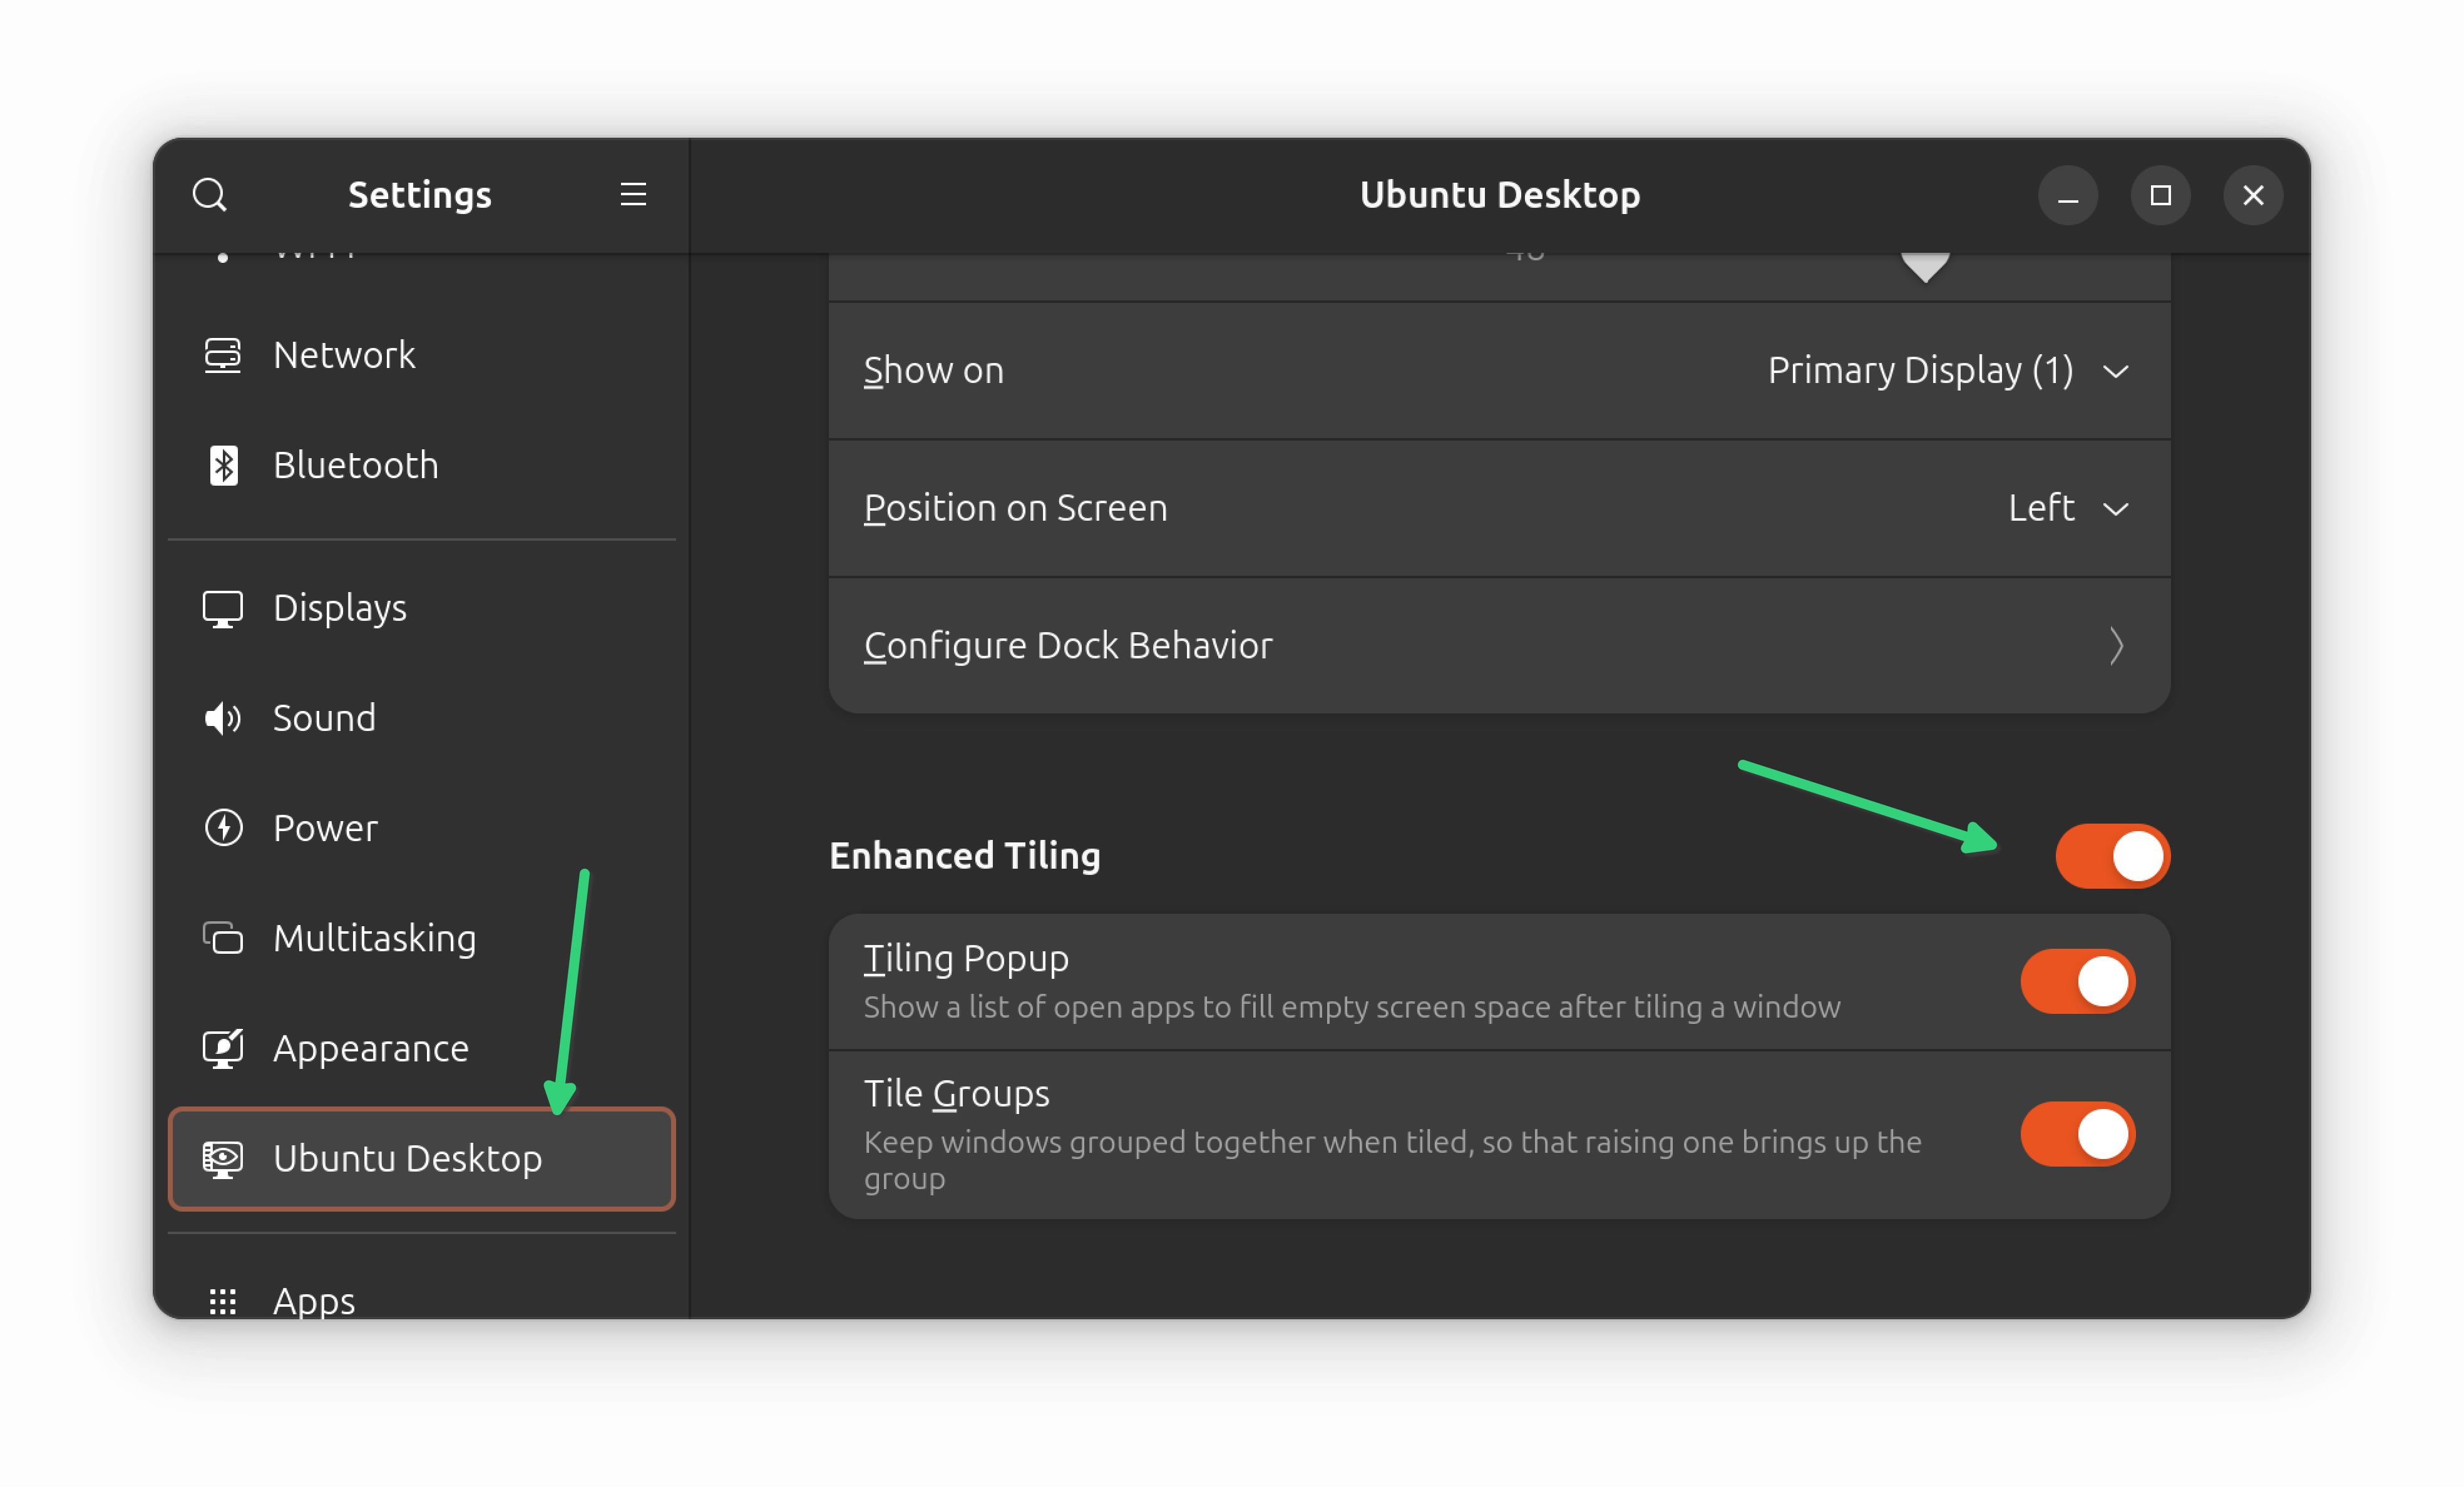
Ubuntu has long supported basic tiling features like snapping the window to the left or right, but it has 'enhanced' them in recent versions by including the built-in extension called Ubuntu Tiling Assistant.
The 'enahnced tiling' setting can be found under the Ubuntu Desktop section.
Using mouse drag to tile
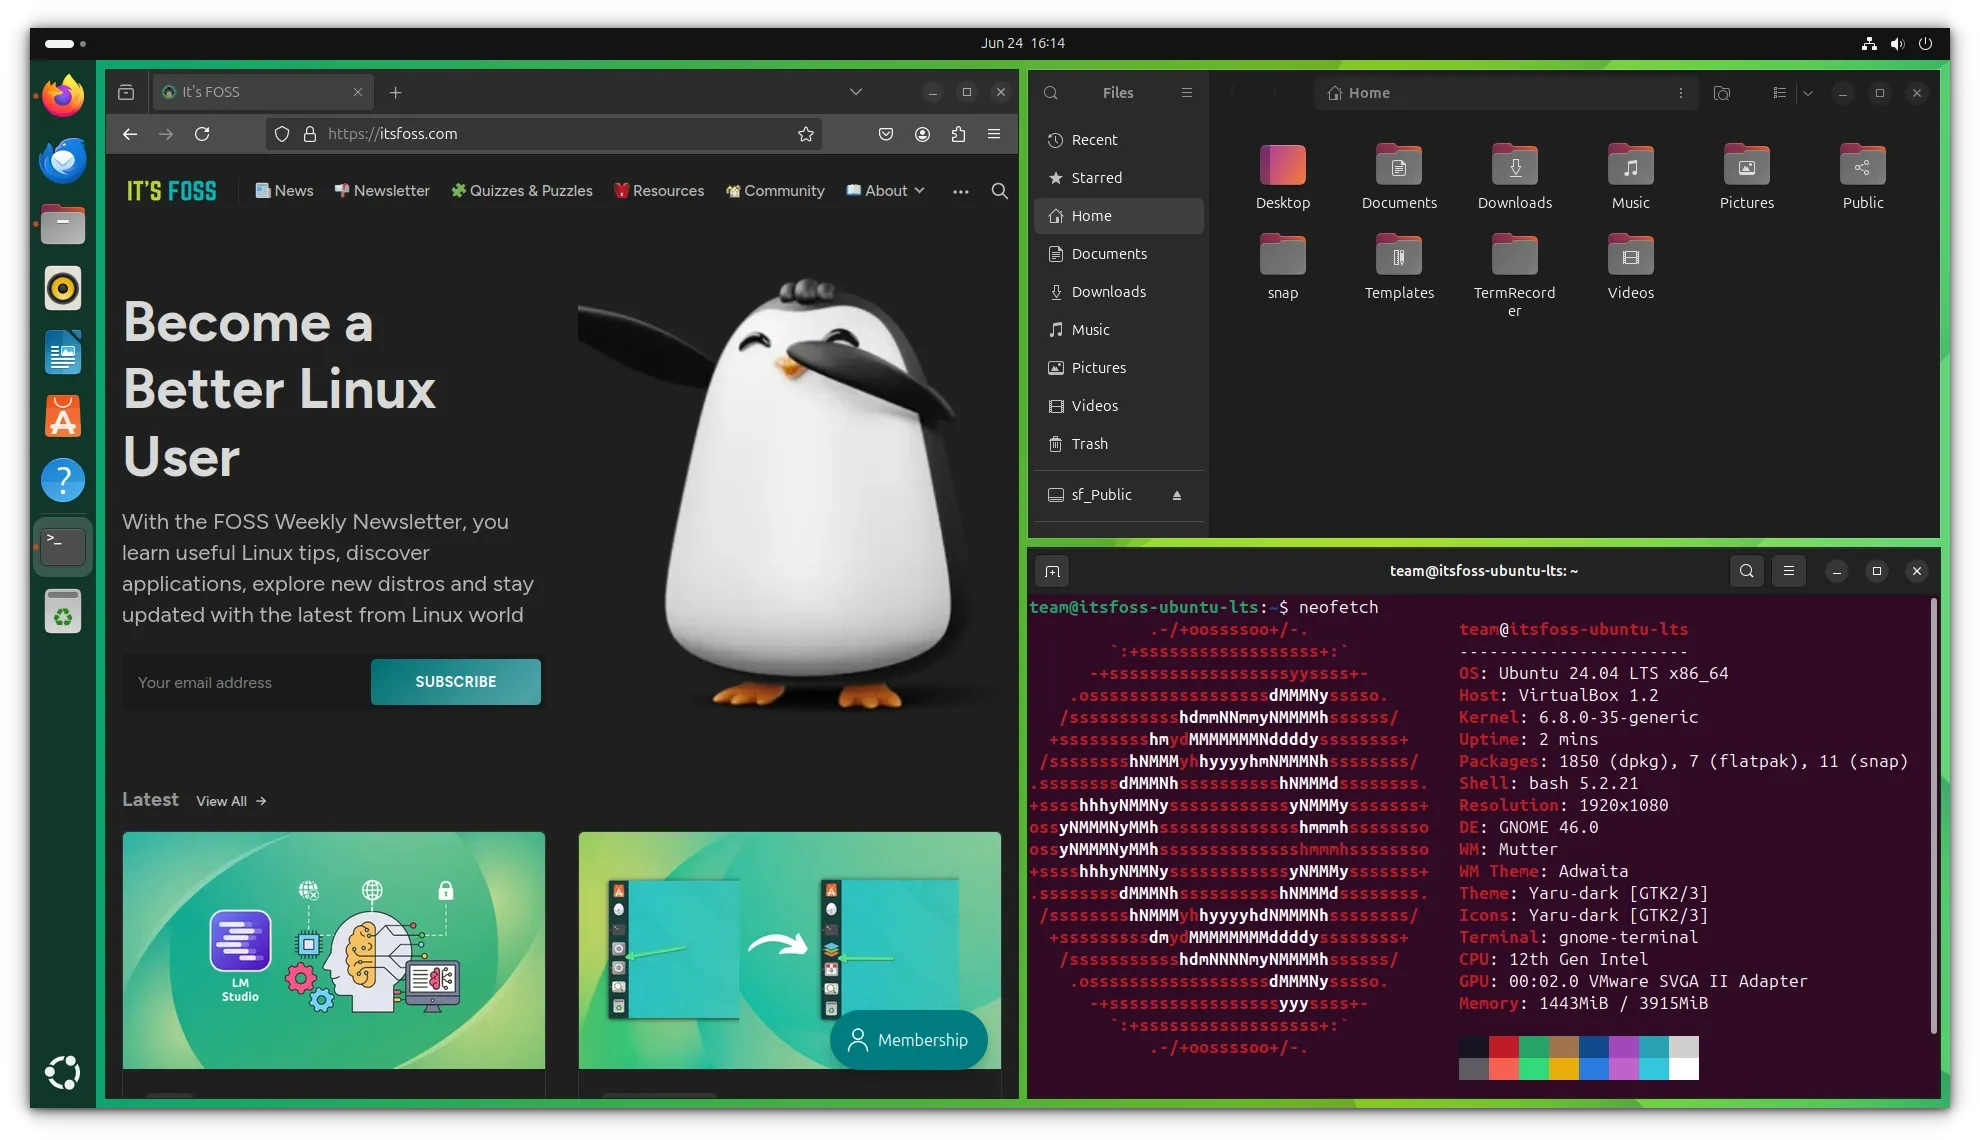
Let’s say you have four windows opened, and you want to tile them.
First, drag a window by clicking on its title bar and then move to any edge. It will be tiled to that edge.
Tile Windows using Mouse
Once a window is tiled to a position, the tiling assistant will suggest other apps, that can be placed to fill the remaining space. This is shown in the video above.
You can drag a window from an existing tiling layout to another layout position at any time.
Use keyboard shortcuts to tile windows
Ubuntu Tiling Assistant has some preconfigured keyboard shortcuts to tile windows to a particular layout position. Let’s see it with the help of a small video.
Small animated video for Ubuntu Tiling Assistant Shortcuts.
Take a look at these table for various default tiling shortcuts:
| Purpose | Shortcuts |
|---|---|
| To the right | Super + Numpad 6 or Super + Right Arrow |
| To the left | Super + Numpad 4 or Super + Left Arrow |
| To the top | Super + Numpad 8 |
| To the bottom | Super + Numpad 2 |
| Top right corner | Super + Numpad 9 |
| Top left corner | Super + Numpad 7 |
| Bottom right corner | Super + Numpad 3 |
| Bottom left corner | Super + Numpad 1 |
| Restore the window | Super + Numpad 5 or Super + Down arrow |
| Maximize the window | Super + Up arrow |
Fine control Ubuntu tiling
But it can do more than place the windows in a grid-like pattern. Let’s take a look at some rather unknown use cases of the Ubuntu tiling assistant.
In order to control the Tiling Assistant, install the GNOME Extension Manager App. Open a terminal and run:
sudo apt install gnome-shell-extension-manager
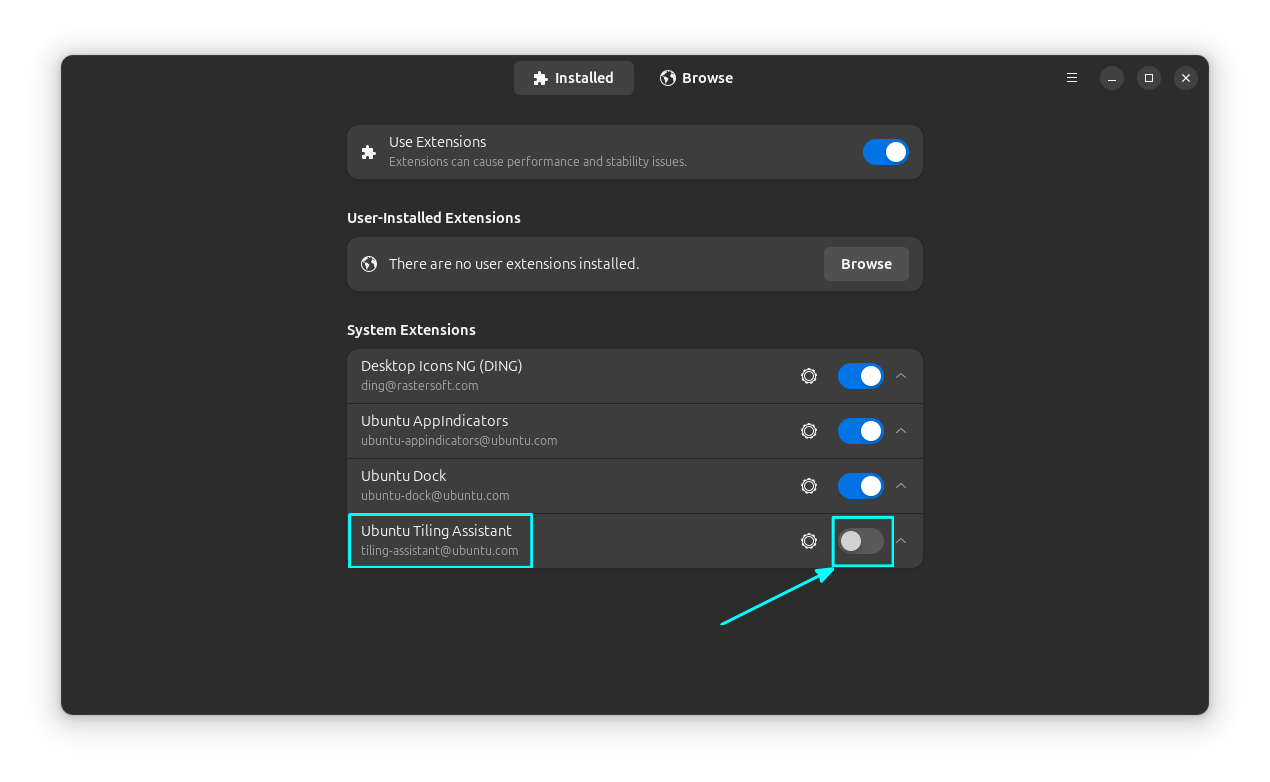
Once installed, open it. The default tab will be the installed extensions. You can find the Ubuntu Tiling Assistant extension at the bottom of System Extensions section. Click on the settings gear icon adjacent to the extension as show below.
This will open the extension settings in a new window. Here, there are options to tweak it in different ways. Let’s see some of the cool items.
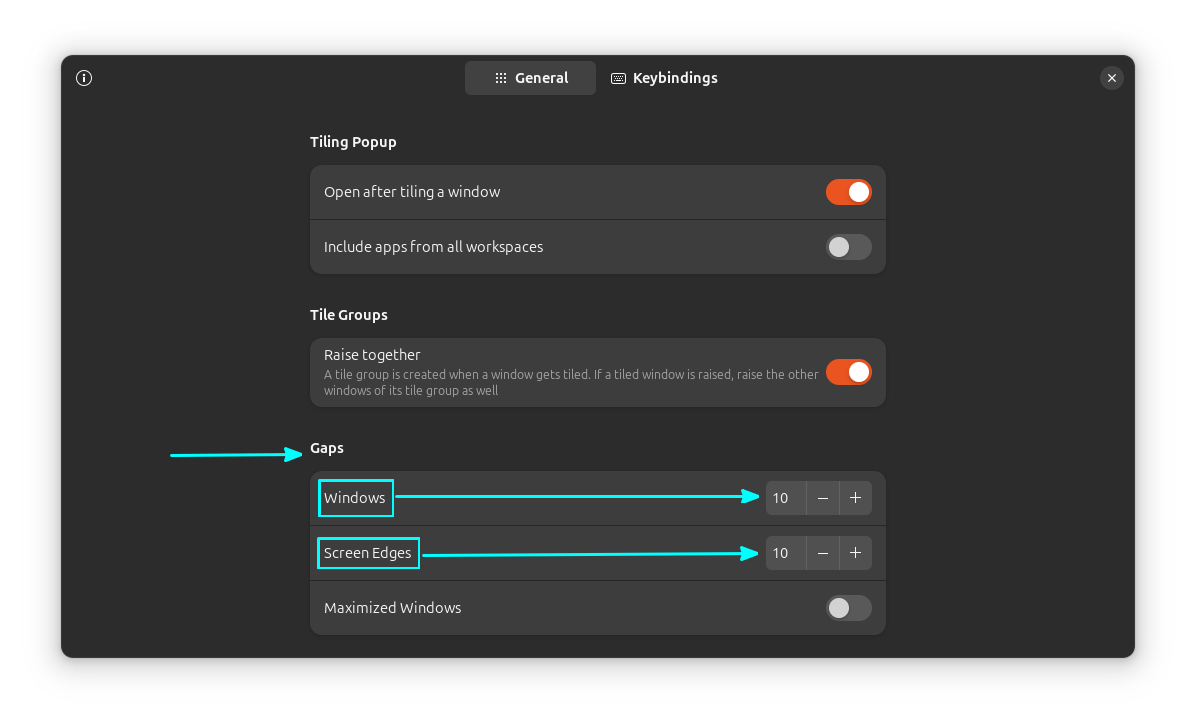
Set the window gaps
By default, there is no gap between the tiled windows, which means the borders are touched. It would be nice if there was a small gap between the windows.
For this, go to the gaps section and set the Windows and Screen Edge gap to a number that is convenient for you.
Show active window hint
In a tiling set up, it is always good to know which window is currently active. In Ubuntu tiling assistant, you can get a small border along the active window.
On the extension settings, scroll down to find “Active Window Hint” section. Here, select Always option.
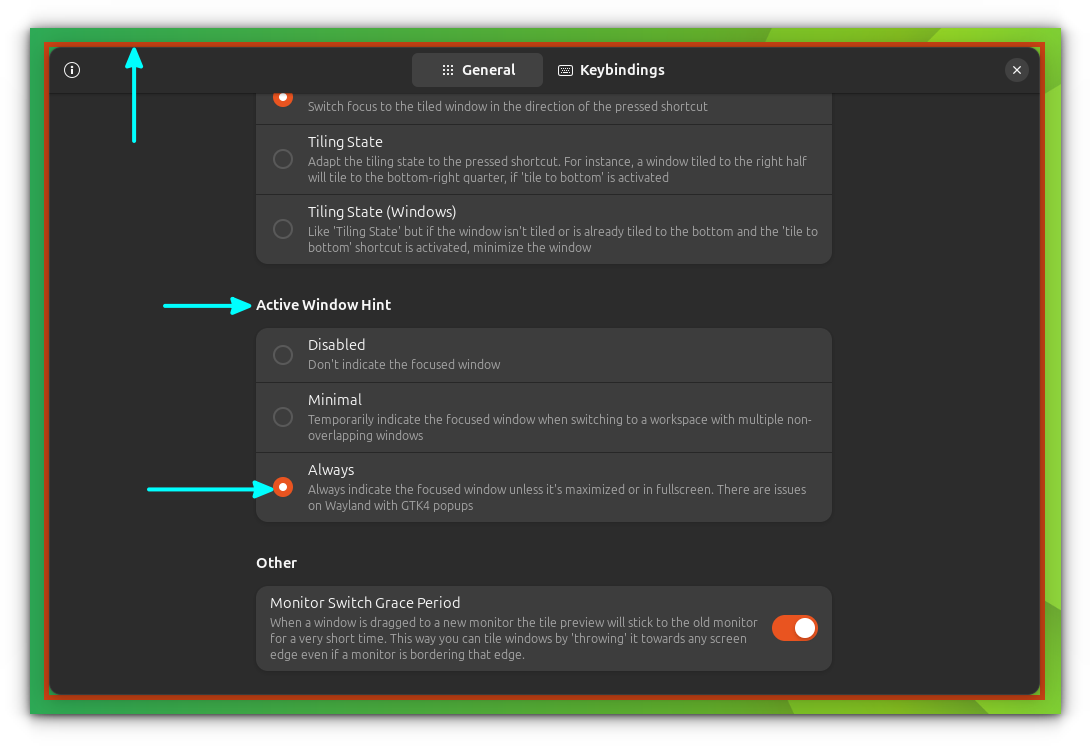
As soon as you enable it, you can see a rectangular border appearing for the active window.
Want more tiling? Use Tiling Shell extension
Ubuntu’s default tiling manager has its limitations. If you are coming from any other tiling window manager, you may not find it lacking.
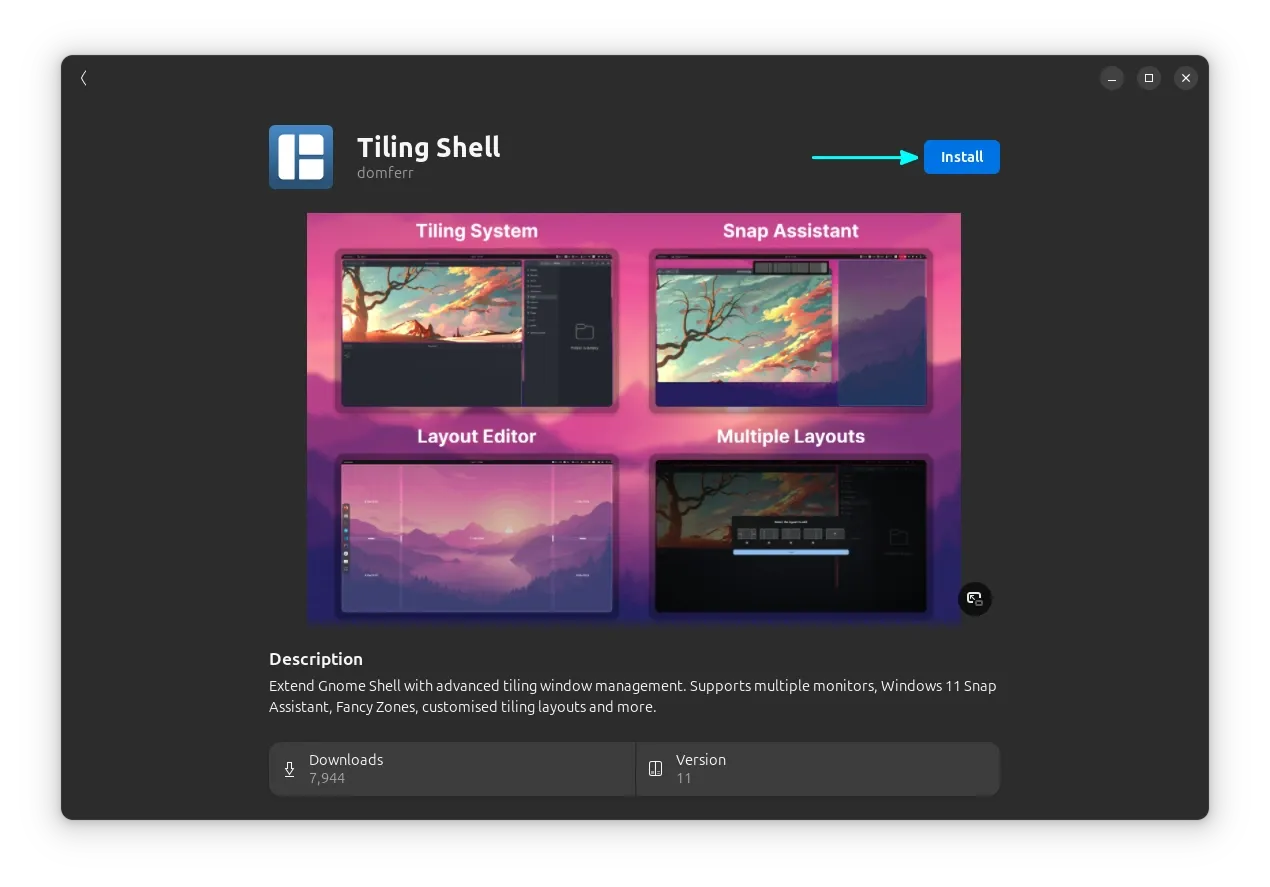
For such people, there is the Tiling Shell extension.
Now, you can install it either through the Extension Manager app, or through a browser.
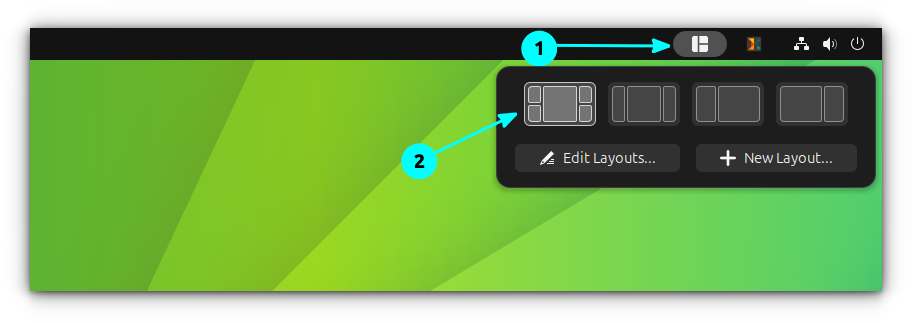
Once installed and enabled, you can see an icon on the system tray, that lists some preset layout configurations. You can also create new layouts.
It's time to know it better.
Default tiling
When you enable the extension for the first time, you can drag a window by catching on the title bar. This will show you a small dropdown bar on the top. Drag to it to reveal the tiling layout. Place the window on top of any layout position to tile it there.
Drag and move to the top so that the tiling layouts are revealed.
The same can be done by pressing the CTRL key and dragging the windows. For this to work properly, first select the Tiling Shell tray icon and set the required layout.
Now, CTRL and drag windows to place them in the layout position selected in the previous step.
Edit or create new layouts
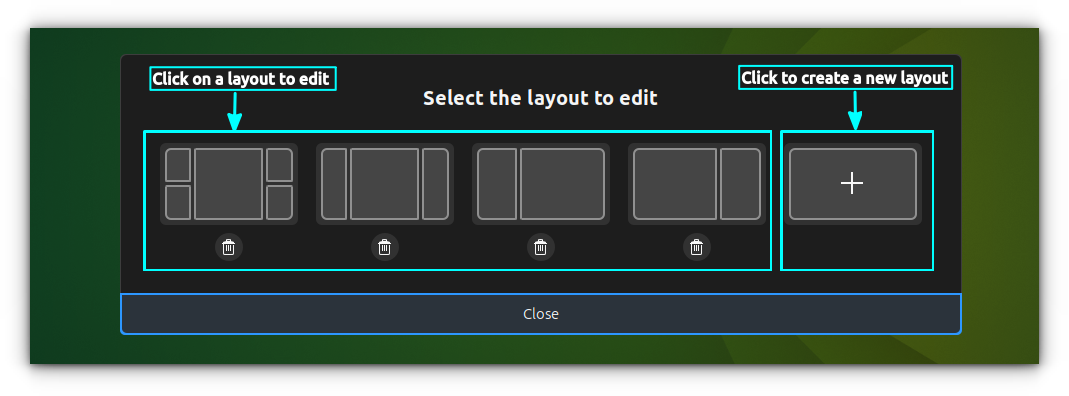
To edit an existing layout, click on the “Edit Layout” button in tiling shell tray icon.

This will give you a list of current layouts. Click on any existing layout to edit it. Or click on the “+” icon to create a new one.
This will allow you to edit the layout. There are certain commands you need to remember. They are listed when you first enter editing.
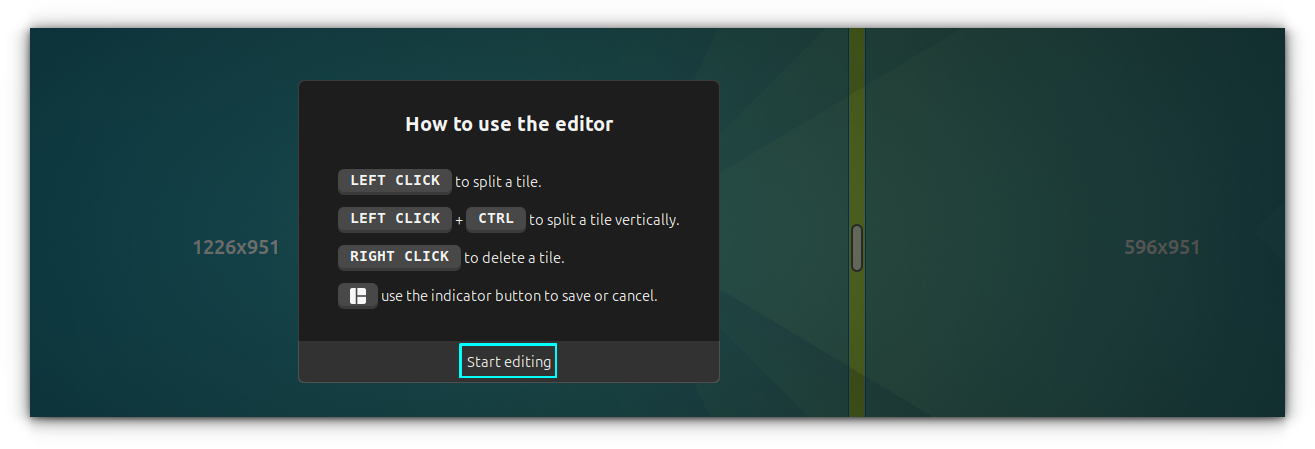
In case you missed the commands, here are those commands, refer to them when needed.
| Command | Function |
|---|---|
| Left-click | Split a tile |
| Left-click + CTRL | Split vertically |
| Right-click | Delete a tile |
| Click the Tiling Shell Tray Icon | Save / Cancel changes |
Once you have created a layout, or edited one, click on the Tiling shell tray icon and select the Save button to save the changes.
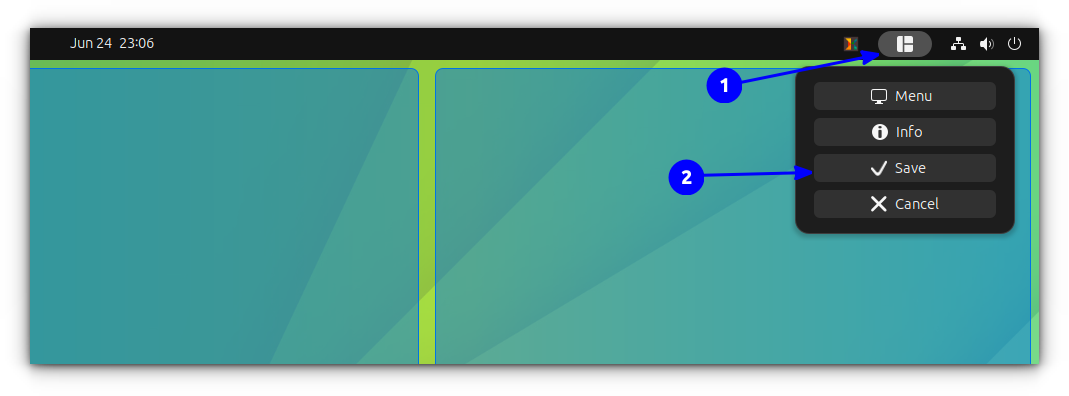
This extension will now be available to access for you.
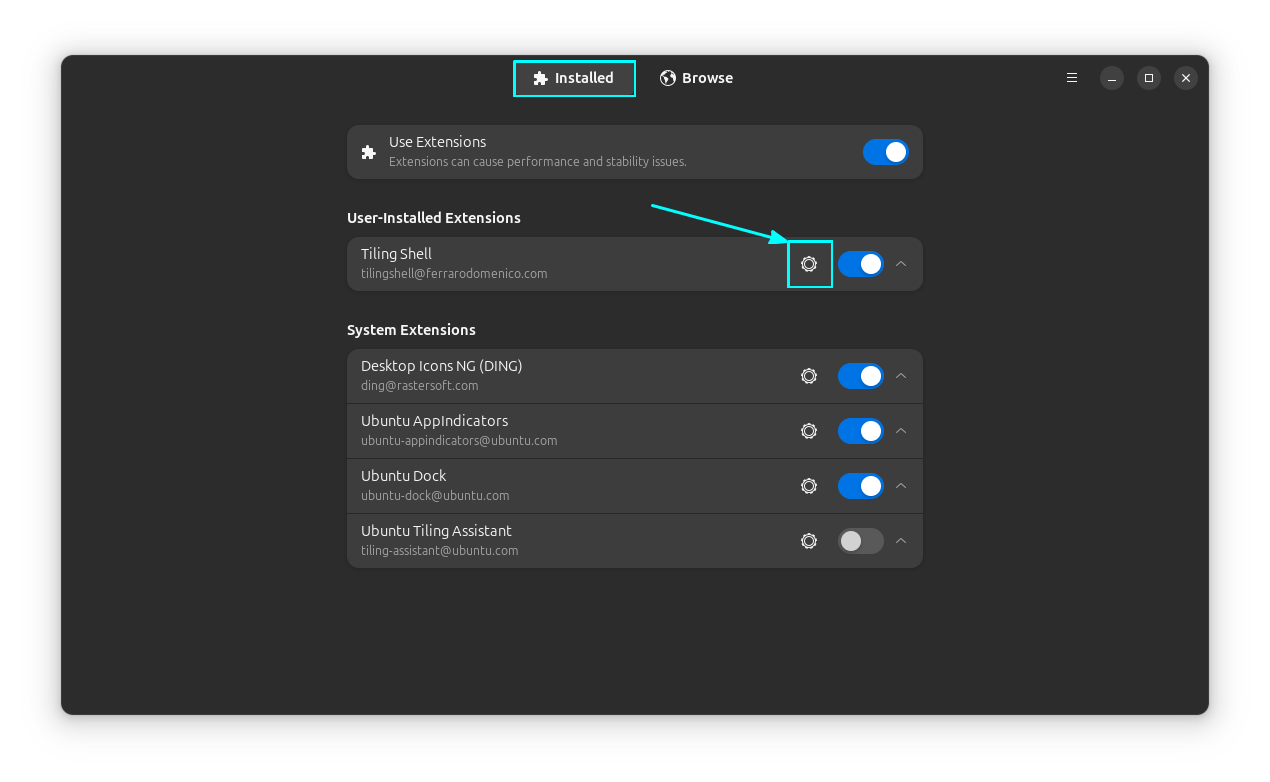
You can access the Tiling Shell settings from the extension manager, just like the Tiling Assistant. Click on the gear icon adjacent to the extension.
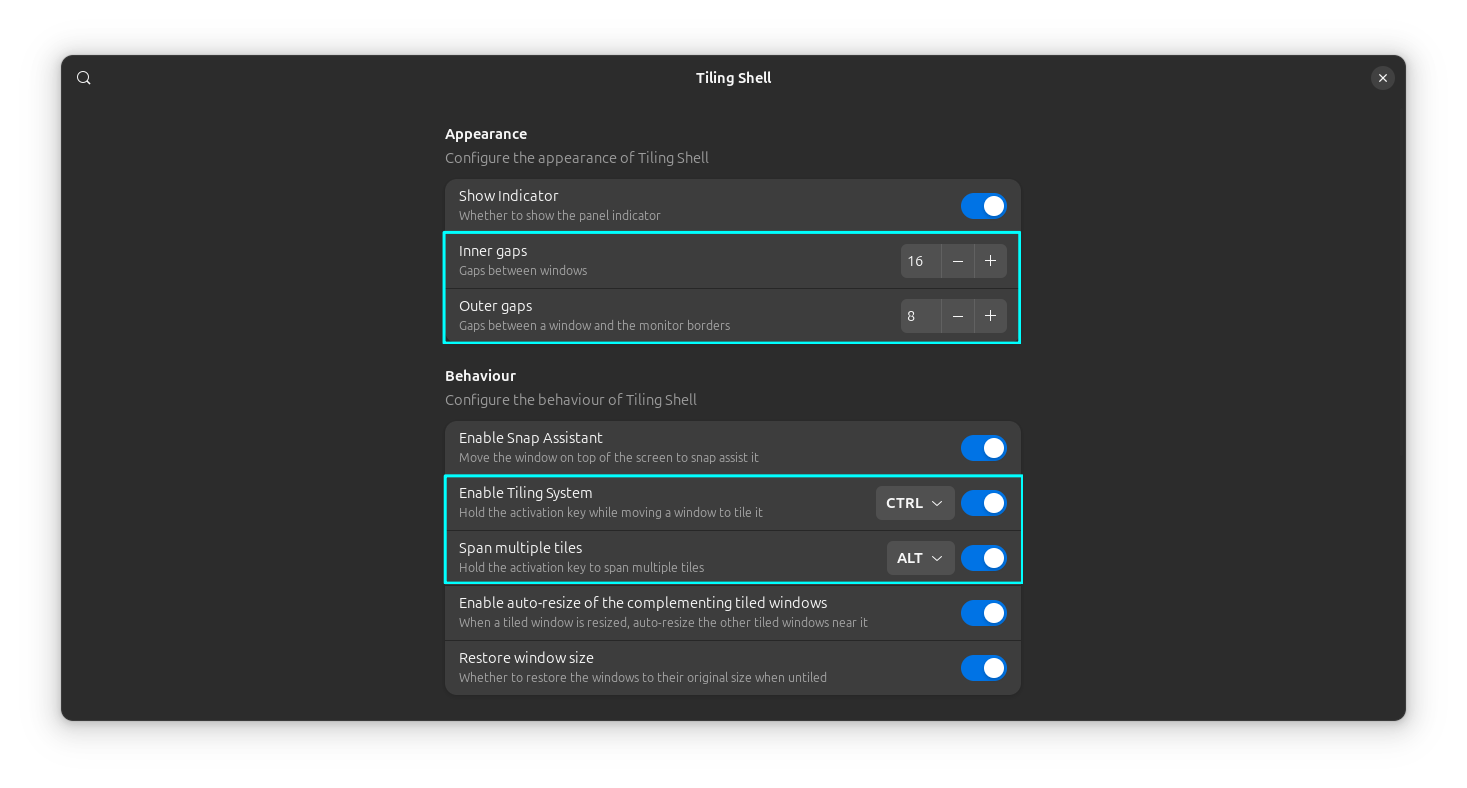
This will open the settings for the Tiling Shell. Here you can tweak it to adjust window gaps and screen edge gap, along with some other tweaks.
Export and import layouts for future use
This is a cool feature, where you can export a layout, that can be imported later. Open the Extension Manager and go to the Tiling Shell settings page. Scroll down to the bottom to the “Layouts” section.
Here, you need to click on the Export button to export the layouts to a file.
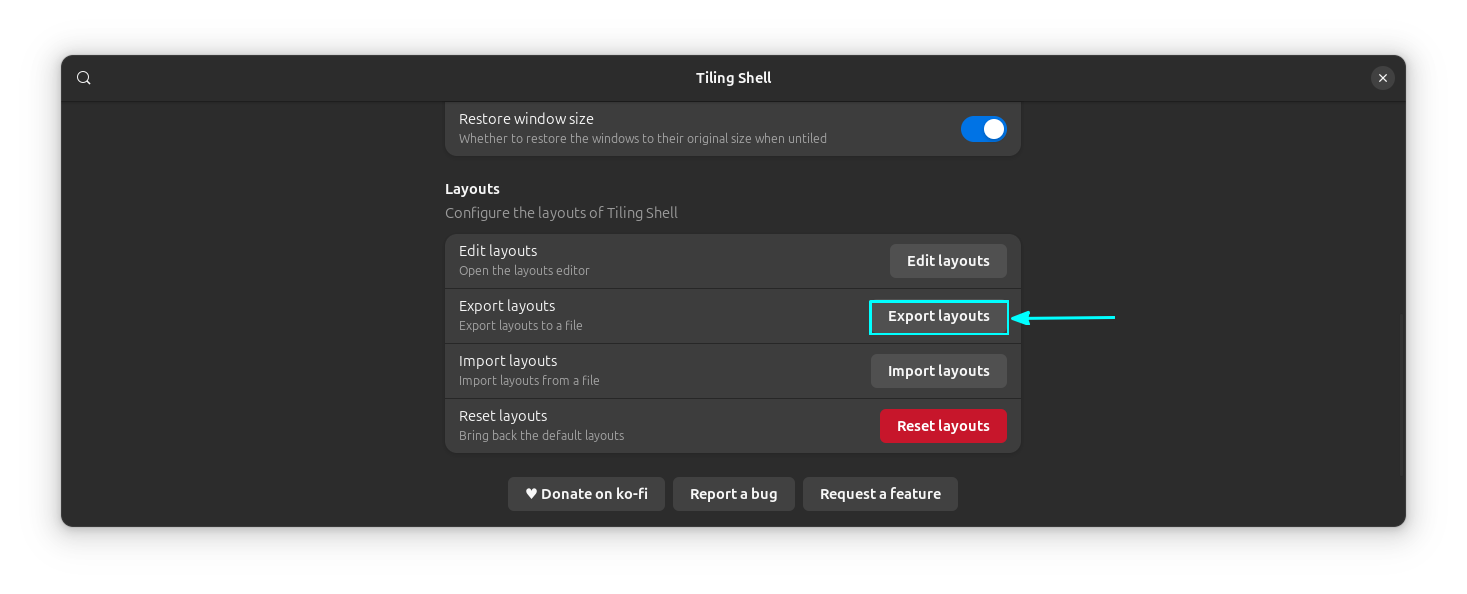
It will ask you to give a name to the file. Name it and click on Save to save the layout export. The export will be a plain text file.
At a later stage, when you want to import the same layouts, click on the Import Layouts button.
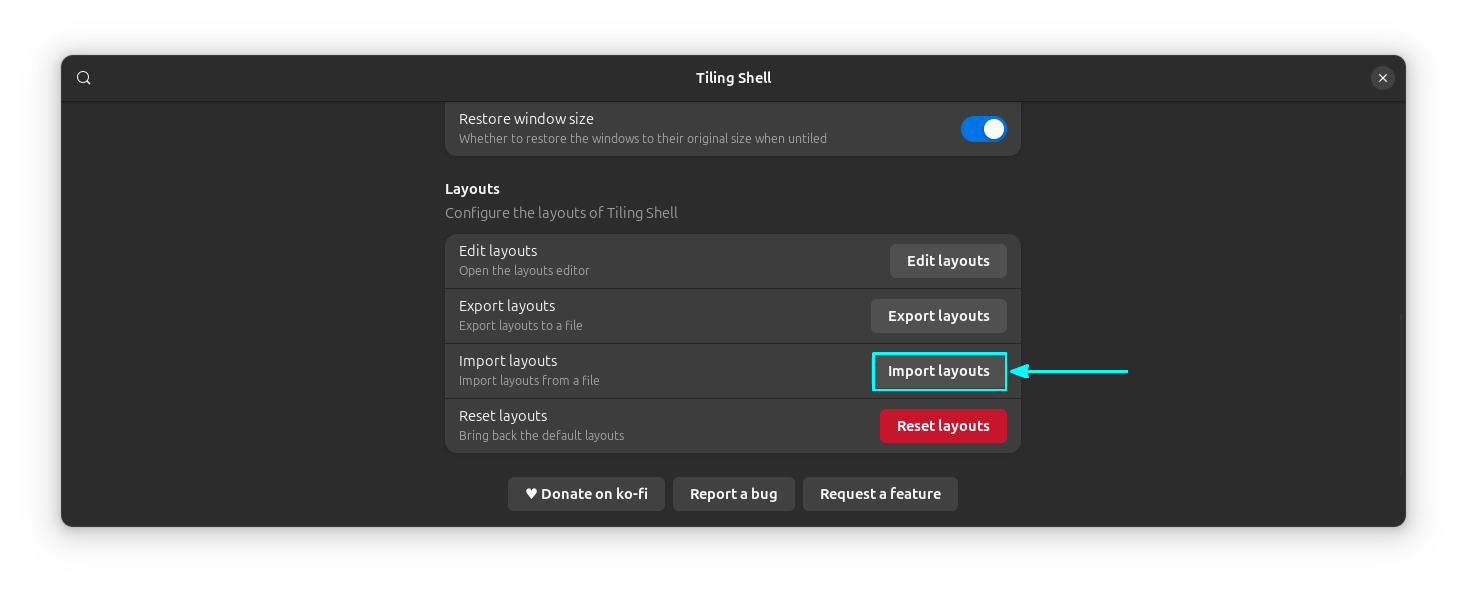
This will show a file chooser. Select the exported layouts JSON file to import it.
Wrapping Up
So, you saw the enhanced tiling feature of Ubuntu and learned the keyboard shortcuts to use it. You also learned that Ubuntu's enhanced tiling is quite basic but it can be further enhanced using the Tiling Assistant extension or using a different extension.
Of course, the experience is nowhere near what an actual tiling window manager provides. But configuring a window manager like i3 is a pain in itself.
 Sagar Sharma
This is why projects like Regolith exist to give you an out of the box tiling experience.
Abhishek Prakash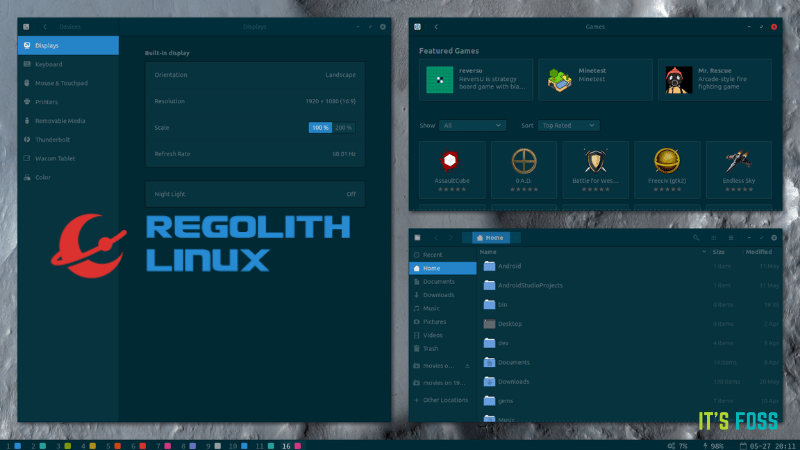
I hope you find this helpful in your Ubuntu journey. Please let me know your views on tiling windows in the comment section.

