

Thunar is the default file manager in the Xfce desktop environment, which is a balanced blend of lightweight and good user experience.
But like any other unexplored tool, you won't find much until you scratch the surface and that's what I did with Thunar.
And behind my bold statement, a variety of features will surely enhance your Linux experience.
In this tutorial, I will share the following tricks that you can use to levitate the Thunar experience:
- General shortcuts for Thunar
- Add Thunar plugins
- Open from where you left off last time
- Emblem for better recognition
- Highlight file/folder
- Copy or move files easily in dual pane mode
- Custom actions
So let's start with the first one.
1. Use keyboard shortcuts
It is a no-brainer that by using keyboard shortcuts, you can increase your productivity.
So here are some easy shortcuts that you can use in Thunar to reduce the usage of the mouse:
| Shortcut | Description |
|---|---|
Ctrl + T |
New tab |
Ctrl + N |
New window |
F3 |
Switch to dual pane mode |
Alt + ⬅ |
Back |
Alt + ➡ |
Forward |
Ctrl + F |
Search for files |
Ctrl + S |
Select a file by pattern |
Ctrl + H |
Show hidden files |
Ctrl + E |
Enable tree view in the side pane |
Alt + ⬆ |
Open parent directory |
Alt + home |
Go to the home directory |
While it looks like nothing, trust me, implement these shortcuts to your daily workflow and you'd want more!
2. Open Thunar from where you left off
Opening your file manager with the same tabs opened that you closed last time is a big feature and should be celebrated.
I'm one of those guys who loves to explore Linux by diving deep into the Linux directories. And to open the Thunar from where I left off is a great feature.
To enable this, follow three simple steps:
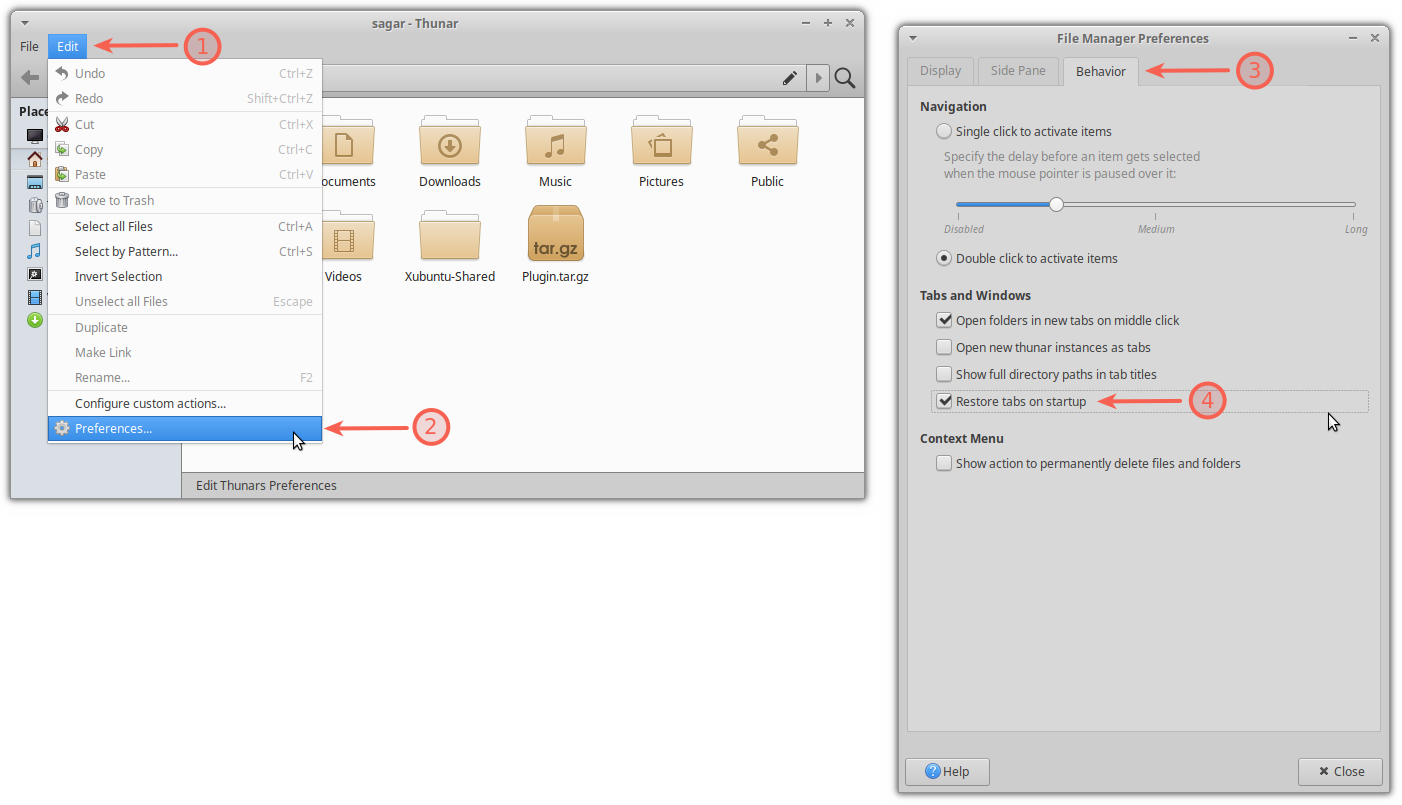
- Click on the
Editmenu and choosePreferences - Go to the
Behaviortab - And check the
Restore tabs on startupoption
3. Add emblem to file or folder
Think of emblems as a special sticker for that file or folder that you want to identify as soon as possible.
Also, you can add emblems to make directory names more relatable. For example, you can add an emblem of ▶️ to the Videos directory.
To add an emblem, you have to follow the given steps:
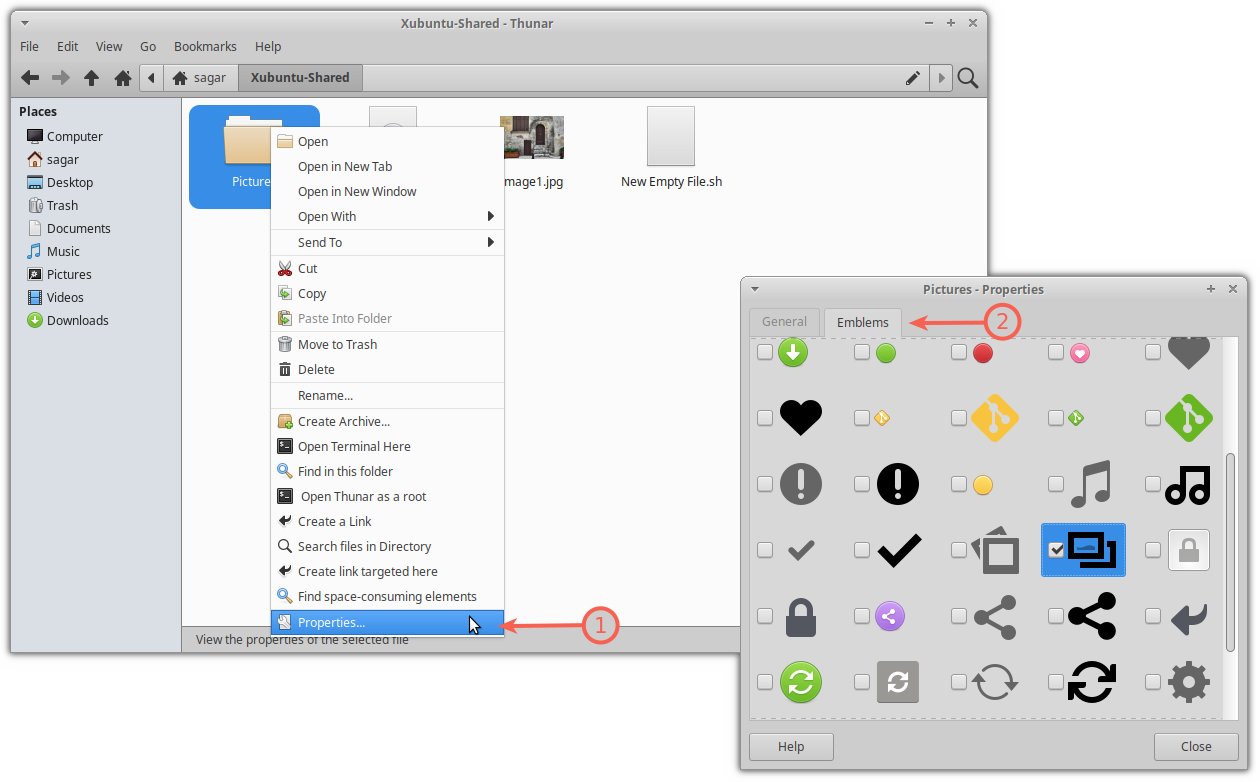
- Right-click on the file/folder and select
Propertiesfrom the context menu - Go to the
Emblemtab and choose one or more emblems for the selected item
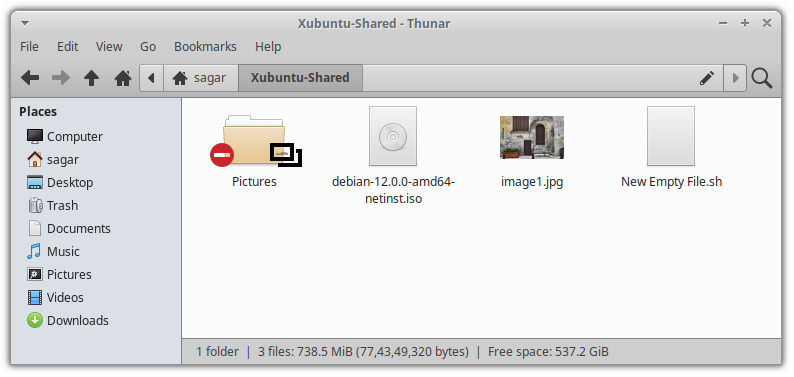
Mine looks like this:
4. Highlight file/folder with an accent color
If adding emblems is not enough to stand that file/folder among others, then you can change its background color or even foreground color.
Note: Changing the foreground color will only affect the font color of the selected item.
To highlight a file or folder, you need to follow the given simple steps:
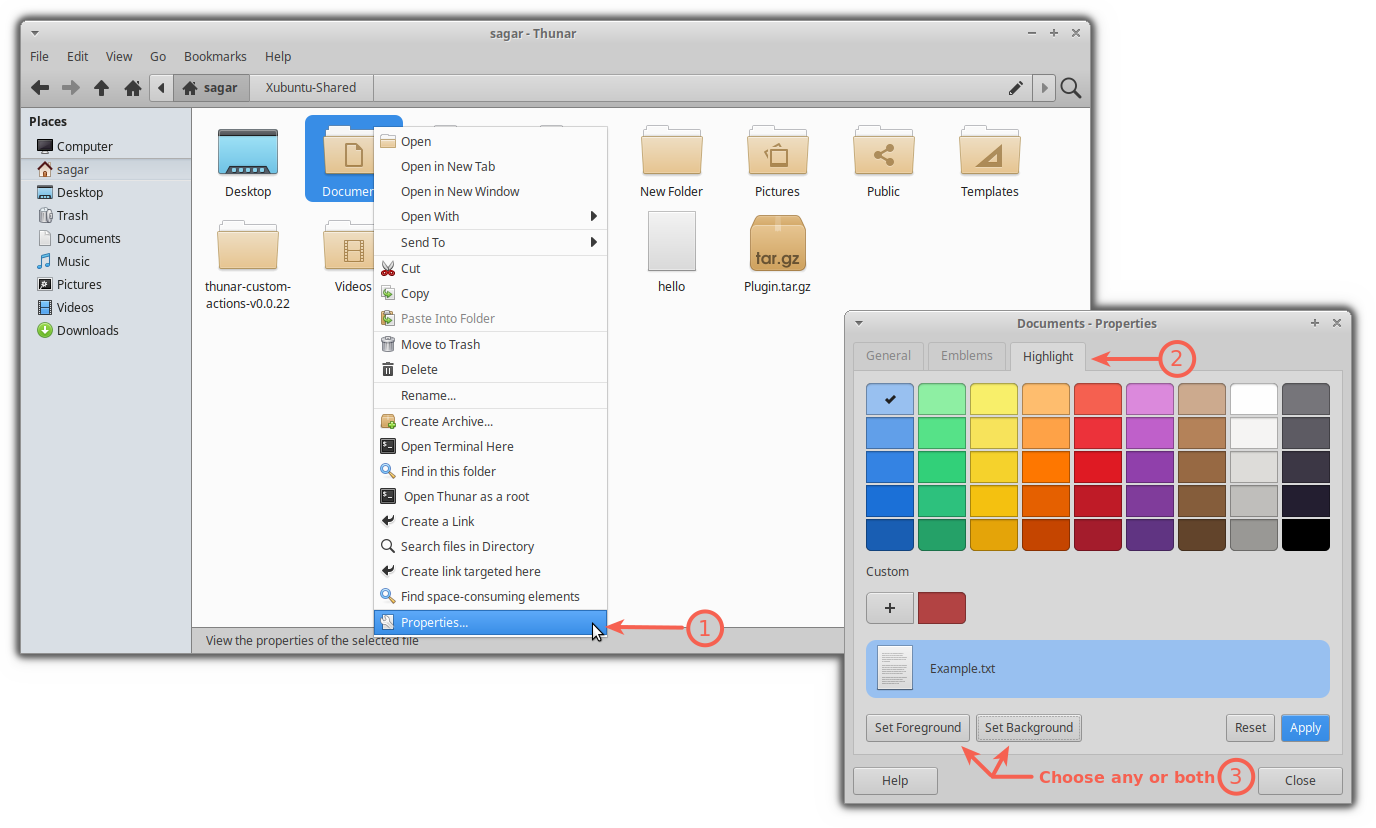
- Hover to the item that needs to be highlighted, right click and select
Preferences. - Go to
Highlightand choose between foreground or background (or even both but one at a time). - Then, select the color and it will show how will it look. If satisfied, hit the
Applybutton and if not, then reset to default by pressing theResetbutton.
5. Explore Thunar plugins
Unlike famous file managers, Thunar has comparatively fewer plugins as everything can be done through custom actions and other features are inbuilt. (cough fanboy cough).
But some useful plugins are there.
To learn more about them, you can head over to their official site.
And in this section, I will show you how you can add an archive plugin by which you can create and extract archives from the context menu only:
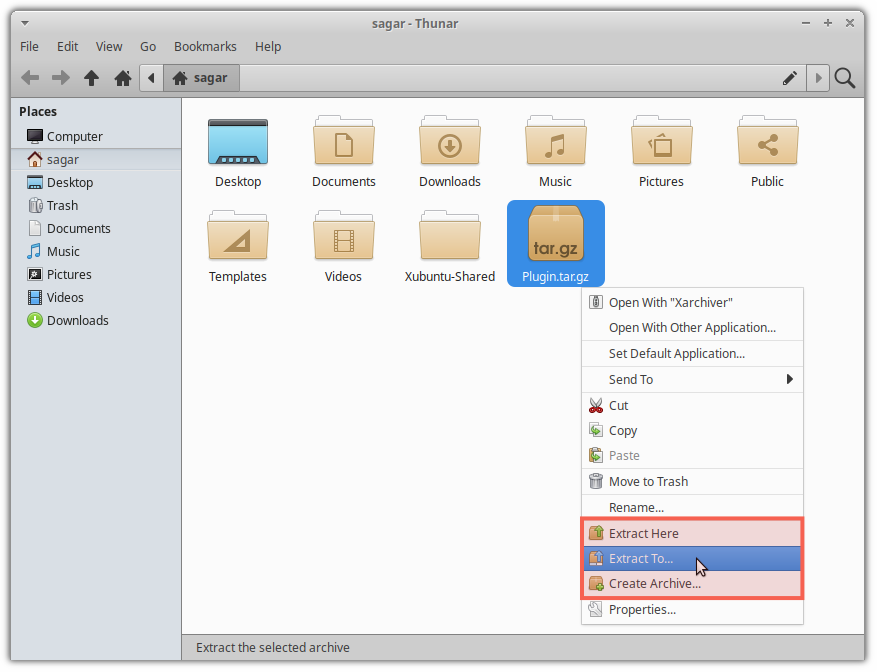
To install the Thunar archive plugin in Ubuntu, use the following command:
sudo apt install thunar-archive-pluginFor Fedora:
sudo dnf install thunar-archive-pluginFor Arch:
sudo pacman -S thunar-archive-plugin6. Use dual pane feature for moving and copying files
This is one of those generous tips available to almost every file manager, but most people are unaware of that.
Then why am I adding this as a tip for Thunar? The answer is simple. The dual-pane feature of Thunar is outstanding and copying/moving files is the easiest task.
Moving files
Let's have a look at how you can move files from one directory to another:
- First, press the
F3to enable dual pane mode. - Navigate to directories on both sides. On one, navigate to the file that needs to be copied, and on the other side, navigate to the destination where it needs to be copied.
- Now, select the items that need to be moved.
- To move a file, simply select the items and drag them to the next pane (where you've opened the directory to paste the file).
Moving files
Copying files
Copying is almost the same as moving. But here, you need to press Ctrl key while dragging and dropping the file.
- Switch to dual pane mode using
F3. - Navigate to the target and destination on both sides.
- Now, select the files, press the
Ctrlkey, drag them to the 2nd pan, release the mouse key first, and then Ctrl.
Copying files
If you notice carefully, the mouse cursor indicated an arrow ↗ whereas when you copy the file, it shows a plus ➕.
7. Use custom actions in Thunar (for advanced users)
By far, this is the most useful feature of Thunar where you can create your own action like creating a selected file executable, opening Thunar as a root user, and a lot more.
This means this will be the longest section of this tutorial!
First, click on the Edit menu and you will find the second last option to configure custom actions:
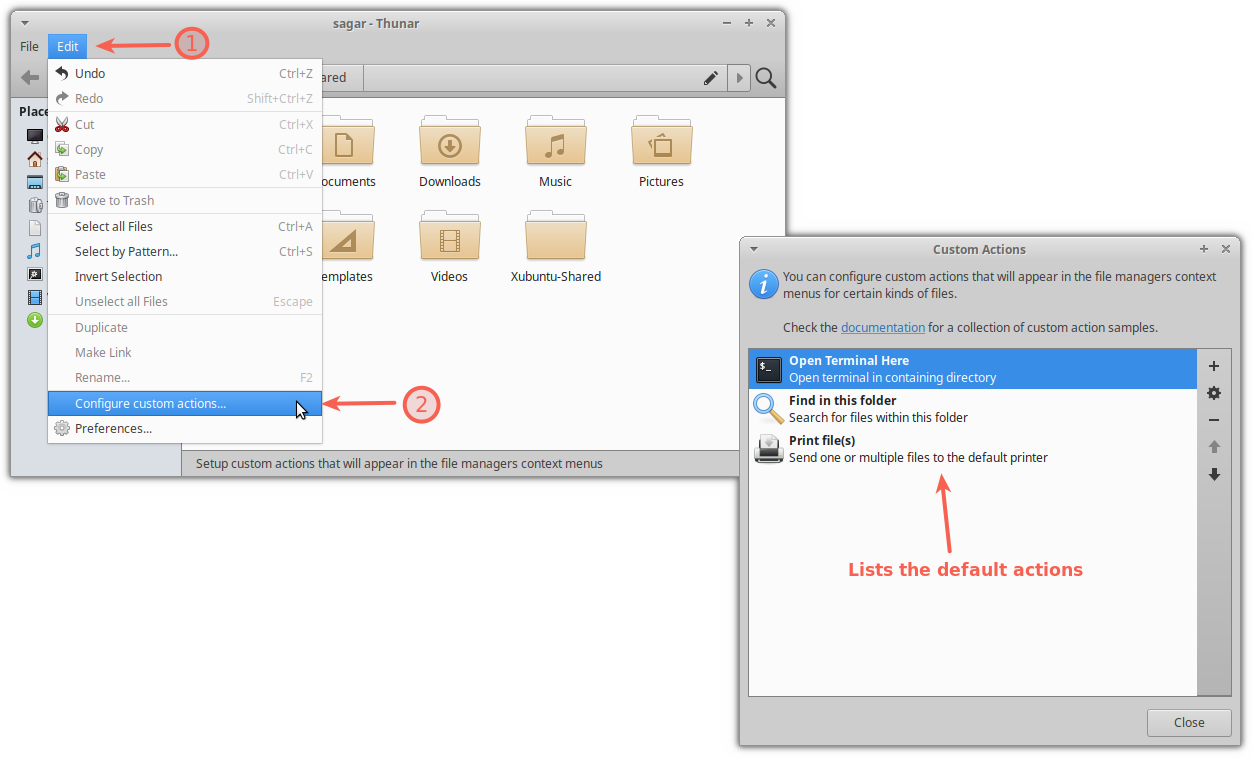
And as you can see, it listed all the actions available.
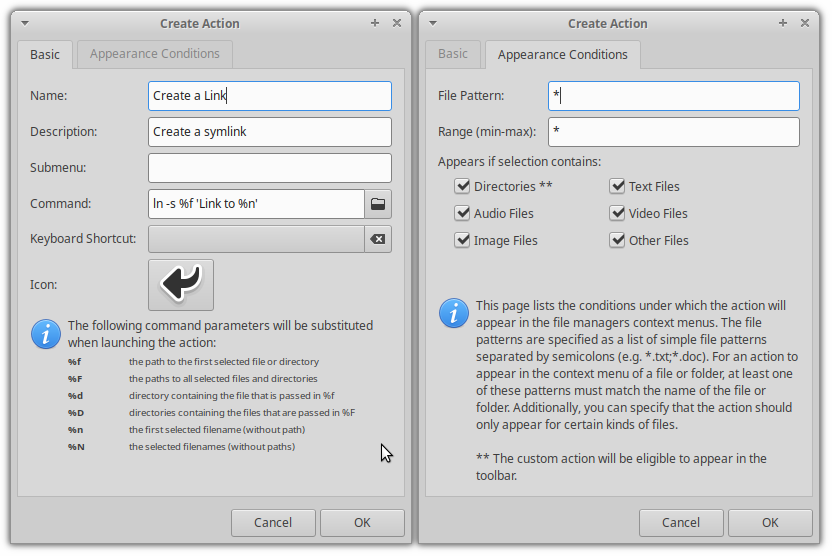
To add the action, click on the plus ➕ button and you'll see multiple options:

Here,
Name: Name your custom action.Description: Info on what this action is all about (for the user's understanding).Submenu: To group multiple actions into one.Command: The key part where you'll assign a command to make this action work.
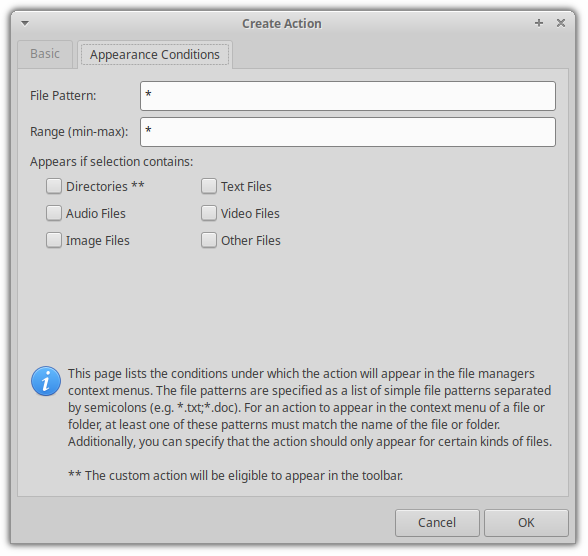
But if you notice carefully, there's another tab named Appearance Conditions where you specify what types of files (and directories) this action should appear in the context menu.
For example, if the action should only be visible when the selected file is a text file, then you tick mark the Text Files box:
Now, let me show you the custom action for opening Thunar as a root.
Creating custom action to open Thunar as a root
You must have encountered a situation where you wanted to work with a file but only the root user can access it so you open the terminal and then execute the command to start the file manager as a root.
But using this action, it can be done with a single click.
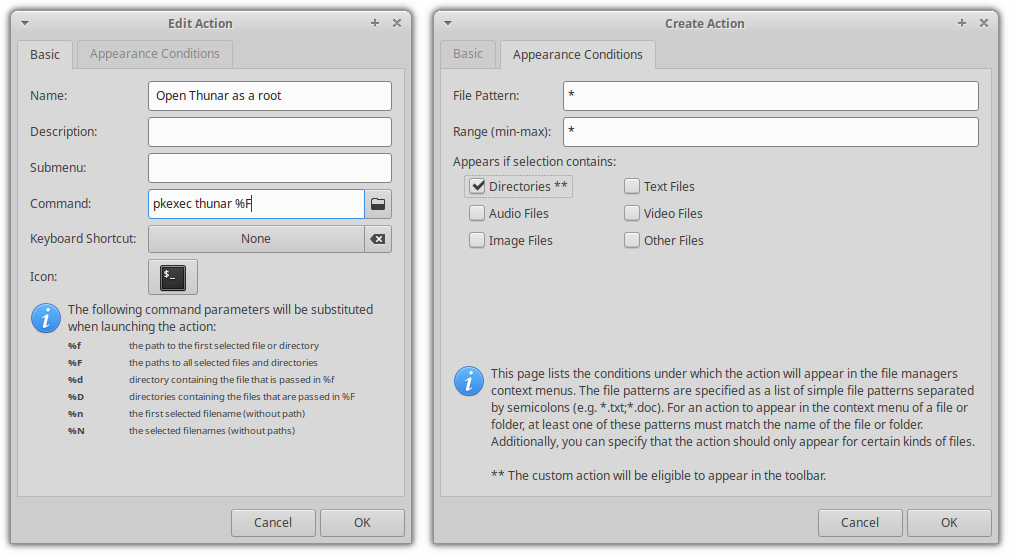
To do so, enter the following in the data fields of the Basic tab:
- Name: Open Thunar as a root
- Command:
pkexec thunar %F
You can select any relatable icon. I'm going with a simple terminal icon here.
Now, click on the Appearance Conditions section and enter the following:
- Appears if selection contains: Directories
In the end, data fields should look like this:
And here's the end result:
Opening Thunar as a root
Pretty cool. Right?
Here are some more that can be useful:
Custom action for creating a symlink
Creating symbolic links is one of the easiest ways to access files that are located deep inside the filesystem. Sure, it is also used to redirect paths to packages.
And to create a custom action to create a symlink, enter the following:
- Name: Create a Link
- Description: Create a symlink
- Command:
ln -s %f 'Link to %n' - Appears if selection contains: check all the boxes.
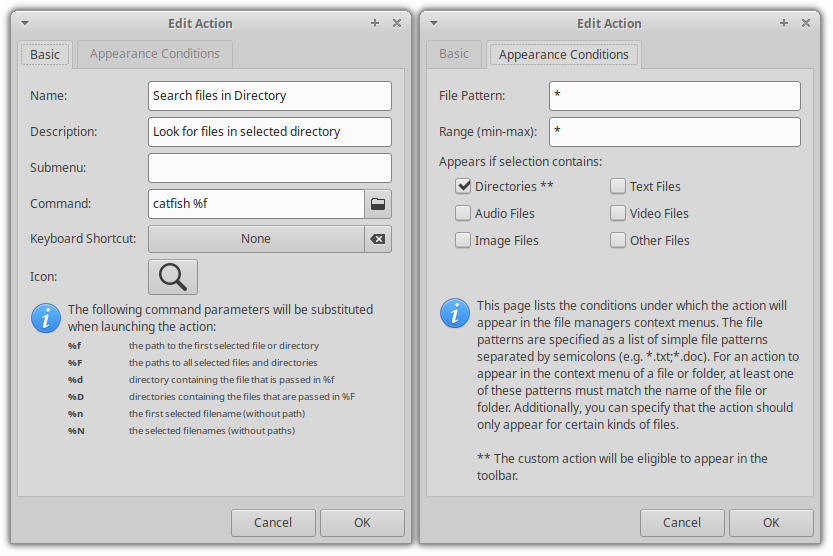
Search files directly
Click on a directory, select search, and type whatever you want to search.
The most convenient way to search files within the directory.
First, install catfish in your system and if you're using Ubuntu/Debian base, then the following command will get the job done:
sudo apt install catfishNow, create a custom action and add the following:
- Name: Search files in the directory
- Description: Look for files in the selected directory
- Command:
catfish %f - Appears if selection contains: Check
Directoriesonly
Install multiple image conversion actions at once
While writing, I found an amazing package that includes custom actions for the following:
- Rotate images
- Shrink images
- Grayscale images
- Convert images to PDF
- Convert images to arbitrary formats
- Merge PDF files
- Shrink PDF files in size
- Creating symbolic links
- Showing checksums
- Fill color to the transparent area of an image
- Encrypt/decrypt files
First, install the following packages to your system:
sudo apt install make imagemagick gnupg2 m4 build-essential pandoc gettext python3-lxml ubuntu-dev-tools gitNow, clone the repository and change your directory to it:
git clone https://gitlab.com/nobodyinperson/thunar-custom-actions.git && cd thunar-custom-actionsNext, check the dependency satisfaction using the following:
./configure --prefix=$HOME/.local PASSWDFILE=/etc/passwdIf it shows any missing package, then you may need to install that package manually (in most cases, it won't).
Then, build the package from the source:
makeAfter that, install the package:
sudo make installTo merge changes to Thunar, use the following:
uca-apply updateNow, log out and log back in to take effect from the changes you've made.
Once you do that, you'd see various custom actions installed in the system:
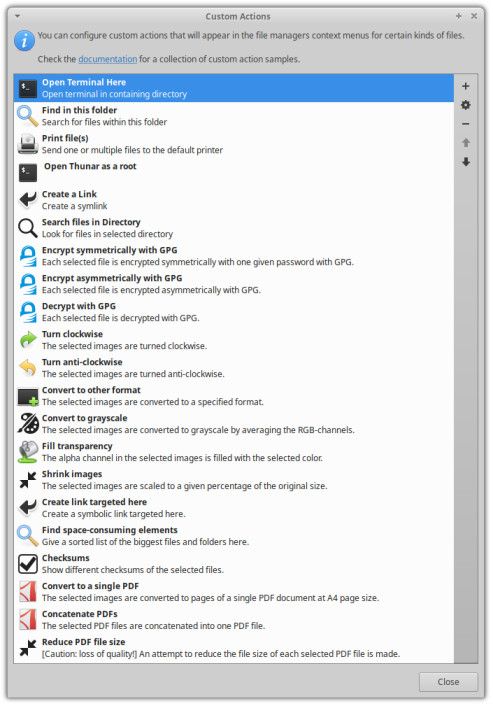
But if that's too much for your use case, then you can also remove any unnecessary action by selecting it and hitting the minus button:
And with your imagination, you can create endless variations of custom actions. Please share your favorites (with commands) so new users can benefit from it.
More on Xfce, more on customization
Some people think Xfce has a retro feel. You can surely give it a modern touch.
 Abhishek Prakash
Theming is the predominant method of customization. Here are some Xfce theme suggestions.
Community
I hope you liked the Thunar tweaks. We have similar articles for GNOME's Nautilus and Cinnamon's Nemo file managers.
Abhishek Prakash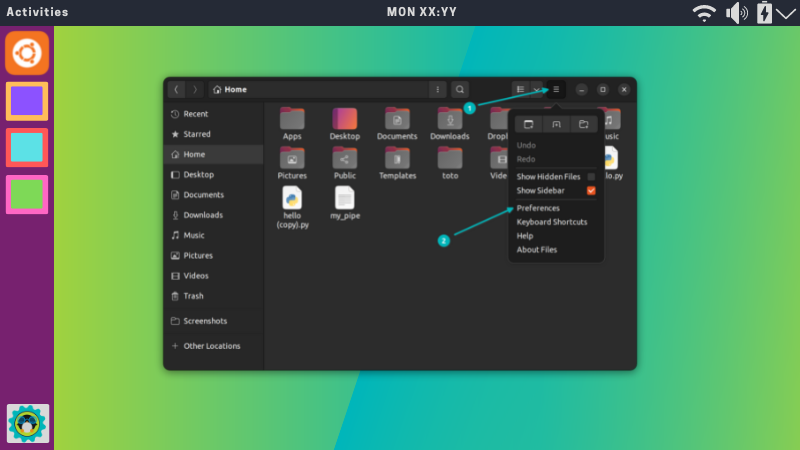 Sreenath
Enjoy exploring new things in your Linux desktop with It's FOSS :)