
In the world of Linux desktop environments, the ones that dominate are GNOME and KDE. There are several other desktop environments but these two are the leaders.
Ubuntu used to have Unity desktop in its default edition but it switched to GNOME desktop since version 17.10 release.
Ubuntu offers several desktop flavors and the KDE version is called Kubuntu. With Kubuntu you get the KDE desktop baked with Ubuntu, out of the box.
It’s possible that you installed the default Ubuntu with GNOME desktop. If you want to use KDE, you don’t necessarily need to remove the present Ubuntu and install Kubuntu from scratch. You can install KDE desktop in your current Ubuntu system and switch between the available desktop environments.
I'll show you how to install KDE on Ubuntu in this tutorial. But before that, let me discuss KDE and Plasma dilemma.
KDE vs KDE Plasma: What's the difference?
You may come across two terms: KDE and KDE Plasma. This may confuse you because most of the time, both refers to the same thing: a desktop environment. So, what’s the deal here? Let me explain it to you.
Historically, KDE was the desktop environment when it was created more than twenty years ago. In fact, KDE is the short form for K Desktop Environment. But eventually KDE grow to be more than just a desktop environment. It has a huge list of applications developed under the KDE project like Kdenlive video editor.
Since they were not essentially a desktop environment anymore, a few years ago, they segregated the desktop environment. Plasma is the desktop environment and KDE is the umbrella project responsible for the development of Plasma desktop and a bunch of other applications.
It is still common practice to refer KDE as the desktop environment but now you know that it’s actually Plasma.
Getting KDE Plasma desktop environment on Ubuntu
Before you start, let me tell you that different variants of the KDE package are available, according to the need. We will see what they are and how to install them:
KDE Full
This is the complete KDE pack. It comes with the complete package and core KDE plasma desktop. If you want all of KDE goodness (and its dependencies), this is what you would install. Since it is the complete pack (around 1 GB), it will take some time in downloading and installing. You can install it using the following command:
sudo apt install kde-fullKDE Standard
The standard KDE includes Plasma desktop with standard set of KDE apps such as Kate (default text editor), Konqueror (default web browser), Kget (Download Manager), KMail (email client), Dolphin (File Manager) etc. The whole package is around 273 MB in size. You can install it using the following command:
sudo apt install kde-standardKDE Plasma Desktop
This is just the minimal package of KDE with just the Plasma desktop and a minimal set of KDE applications such as browse, file manager, text editor etc. No apps are installed by default. You can install them later at any time. Ideal in the case when you just want to give it a try. The download size is around 175 MB.
sudo apt install kde-plasma-desktopKDE Plasma Netbook [Discontinued]
No prizes for guessing that this is for netbooks. This light version was best suited with low end systems and netbooks are just that. It is not available anymore.
sudo apt install kde-plasma-netbookThere is also a package named kubuntu-desktop. It includes all the packages included in Kubuntu. You may install it as well but it may (or may not) lead to conflicts with your existing GNOME desktop.
KDE Plasma installation procedure
Whichever package you choose to install KDE Plasma desktop, the procedure should be similar to the steps mentioned here.
You’ll be prompted to configure SDDM, i.e., Simple Desktop Display Manager, which is the Display Manager used by the KDE Desktop. Select ‘sddm’ from the list and press Enter.
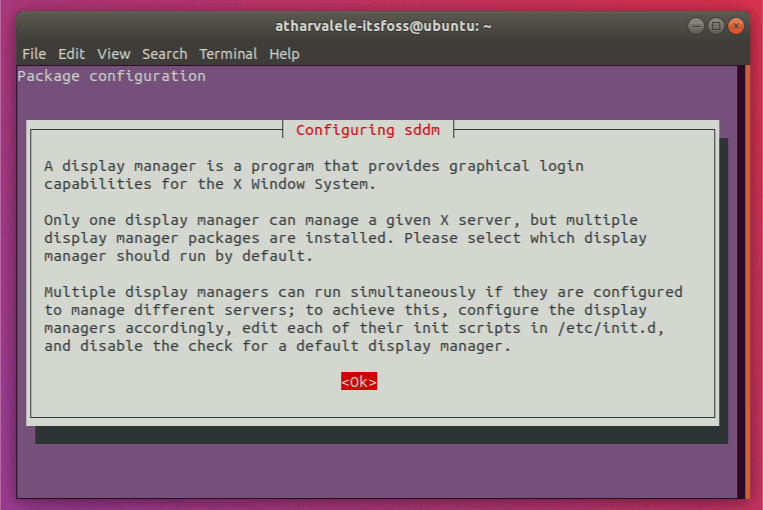
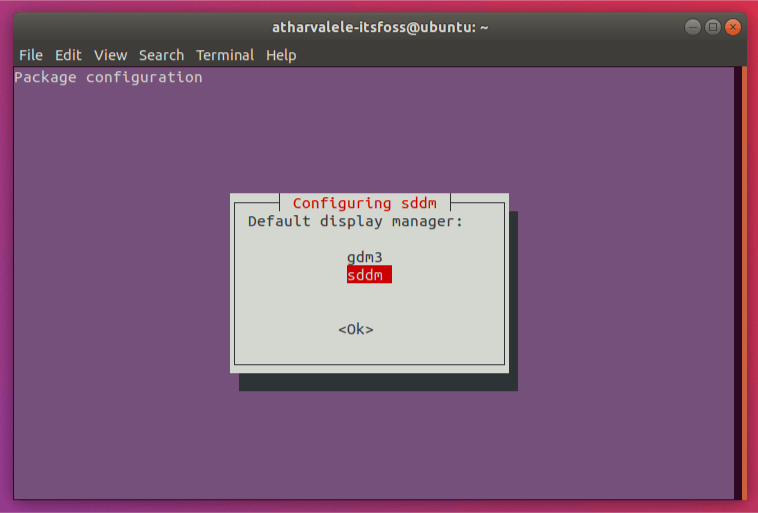
Once this is done, the remaining packages will be configured. After that, you can reboot. After the reboot, you will be greeted by the SDDM Lockscreen.
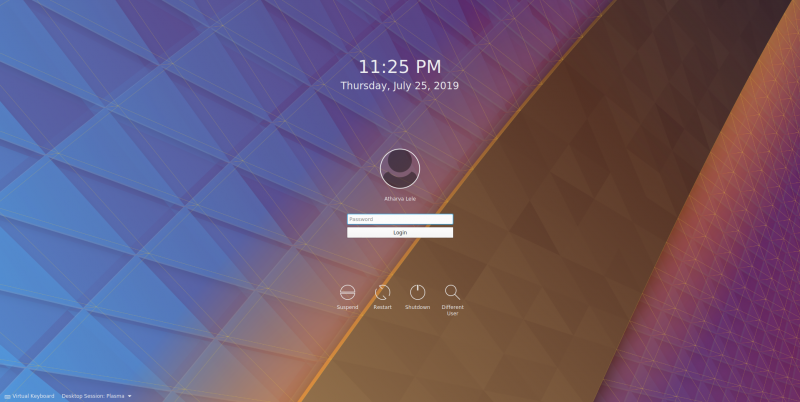
You can also select between KDE and GNOME using the “Desktop Session” option in the lower left corner.
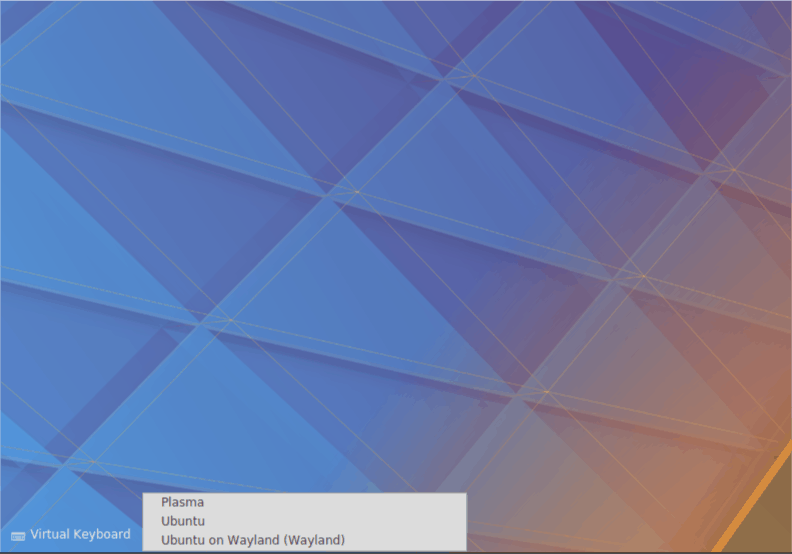
The default GNOME Desktop will be available in the “Ubuntu” session. If you want to use the Wayland Display Server, you can select the appropriate option for that.
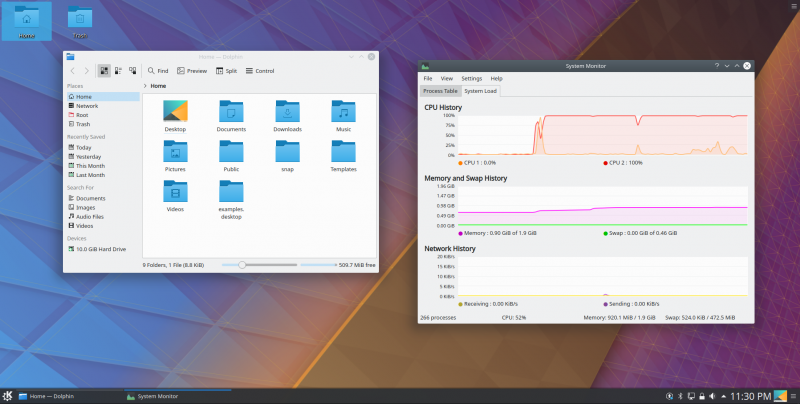
After logging in, you will be at the KDE Desktop Home. From here you can start using apps, and customizing it to your liking.
Removing KDE from Ubuntu
If you do not like KDE, you can switch back to GNOME and continue using it.
You may also remove it if you want.
The first step is to log in to GNOME again.
And then you reconfigure the display manager to use GDM (GNOME Display Manager).
Finally, you can use the apt remove command to uninstall the KDE package you installed earlier.
More desktop choices available
Feeling experimental? How about using Budgie desktop?

Or perhaps you would like to install the Cinnamon desktop on your Ubuntu system.
I, for one, love the traditional desktop experience as well as the customization provided by KDE. I hope this guide was helpful to you in installing KDE on Ubuntu.
How do you like your desktop to be? Simple or as customizable as possible? Let us know in the comments below, as well as drop any questions you may have.


