
Formatting removable media like a USB disk or an SD card is a pretty simple task on Ubuntu Linux. No, I won’t be using the terminal here although you can always use the command line on Linux. I’m going to show you how to format a USB on Ubuntu or other Linux distributions graphically.
Format USB disks on Ubuntu & other Linux distributions
I’m using Ubuntu with the GNOME desktop environment in this tutorial, but it should be applicable to other Linux distributions and other desktop environments as well.
Plug in your USB or SD card. Now go to the File manager. You should see your USB or SD Card here.
Right click on it and you should see the format option.
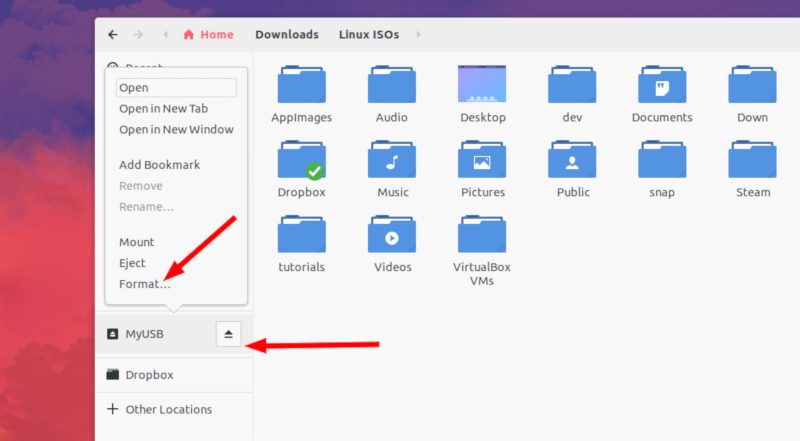
When you hit the format option, it will give you the option to name the device and choose the filesystem.
When you’ve selected the appropriate options, hit the Next button in the top right corner.
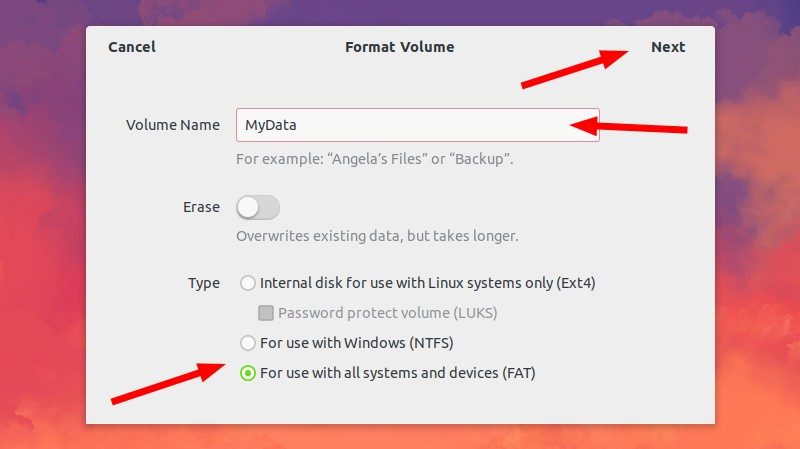
You’ll see a warning that all the data on the USB disk/SD card will be erased. That’s obvious.
Just hit the format button in the top right corner.
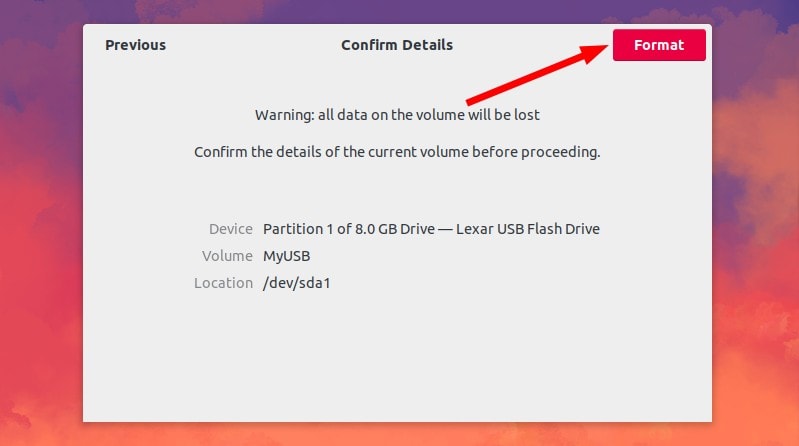
Your USB disk will be formatted in a few seconds or a couple of minutes at the most.
Once it’s formatted, you’ll see that it has reappeared in the file manager with the new name you gave it.
That’s it. That’s the standard way of formatting a USB drive on Ubuntu Linux.
Troubleshooting when you cannot format the USB disk on Ubuntu Linux
I never thought I would have trouble formatting a simple SD card or USB/pen drive until I encountered this problem on Ubuntu. When I looked at the options available by right clicking on the mounted removable disk, I found none for formatting.
So I tried using the default disk utility of Ubuntu: Disks. But it failed and gave me the following error:
Error formatting disk – Error synchronizing after initial wipe: Timed out waiting for object (udisks-error-quark, 0)

The above mentioned error is a known bug which has been unresolved for months – despite this, Disks is still being served as the default disk utility program (why?).
I had to go around and format the removable disk with the help of GParted. And thus I came up with this tutorial to help others learn how to format a SD card or USB key in Ubuntu.
Step 1:
Install GParted. It’s a free and open source partition manager for Linux. You can install it using the terminal (Ctrl+Alt+T):
sudo apt install gpartedStep 2:
Insert the SD card or USB key. Now launch GParted. It takes some time to search for all the disks present on the system. Have some patience.
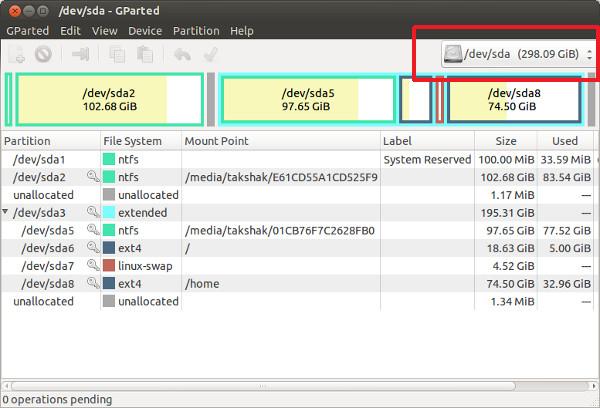
When it’s recognized the drives, you’ll see a screen as below. By default, it goes to the hard drive of your computer. To access removable media, go to the top-right corner of the application and choose removable media. You can see the size of the removable media to identify the right one :
Step 3:
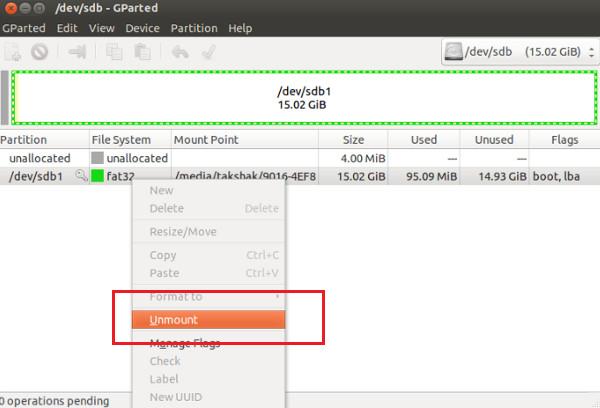
Now you’ll see a screen like the one below. This shows the partitions of the removable disk. Before you go for formatting, unmount the disk by right-clicking on the partition in the following manner:
Step 4:
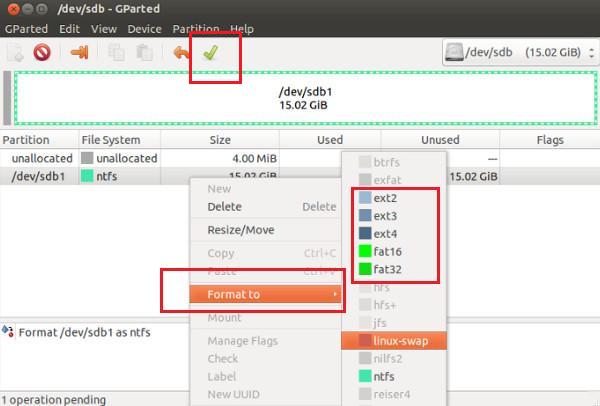
Once you have it unmounted, right-clicking on it will show you the Format To option. You can choose whatever type of file system you want on the disk. Once you’ve selected the drive to format, click on the Tick sign at the top to start the process:
Step 5:
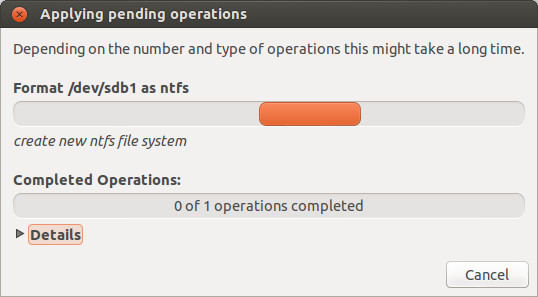
Nothing more needs to be done now. You will see a couple of warnings and then the format procedure will start.

Voila! You are done.
There is another possible formatting related issue. I’ve written another tutorial to fix this ‘error formatting volume’ issue in Ubuntu.
Was the tutorial helpful to you and were you able to format a USB key in Ubuntu? Any questions? Feel free to go to the comments section of the page.

