

If you're working with HTML regularly, whether for client projects, portfolio pages, or just experimenting, it’s important to have a smooth way to preview your changes as you go.
VS Code, by itself, doesn’t render HTML in a browser. But thanks to its rich extension ecosystem, it becomes incredibly convenient to test and view web pages in real time.
One of the most useful tools for this is the Live Server extension. It creates a lightweight development server that refreshes your page automatically every time you save your file.
I personally find this handy when I’m editing CSS, no need to jump back and forth refreshing the browser manually just to check if a margin is still being ignored or if my color: salmon; is really the vibe I want (spoiler: it usually isn’t).
In this guide, I’ll show you how to use Live Server to preview your HTML files in the browser and also share a few workflow tips to make working with HTML in VS Code faster and easier.
Writing HTML in VS Code
For this tutorial, Here's a small demo snippet that I created. It includes a touch of CSS, just enough to make the webpage look nice and not just a blank screen with "Hello, World!" on it.
<!DOCTYPE html>
<html lang="en">
<head>
    <meta charset="UTF-8">
    <meta name="viewport" content="width=device-width, initial-scale=1.0">
    <title>Sample Layout</title>
    <style>
        body {
            font-family: sans-serif;
            display: flex;
            justify-content: center;
            align-items: center;
            height: 100vh;
            margin: 0;
            background-color: #f0f0f0;
        }
        .card {
            background: white;
            padding: 2rem;
            border-radius: 10px;
            box-shadow: 0 0 10px rgba(0,0,0,0.1);
            text-align: center;
        }
    </style>
</head>
<body>
    <div class="card">
        <h1>Welcome to My Page</h1>
        <p>This is a quick preview layout using HTML and CSS.</p>
    </div>
</body>
</html>
You can play around with the layout if you want to improve my bleak effort of creating a webpage, tweak the styling, etc.
The point is, we can now edit this file while viewing it in a browser. but first install the extension.
Viewing HTML with Live Server
HTML doesn’t “run” in the way a script or application does. You view it, and the browser interprets it.
The easiest and fastest way to preview your HTML file in real time is to use the Live Server (my personal favorite)

or you can also use Live Preview extension by Microsoft, they both do the same thing.
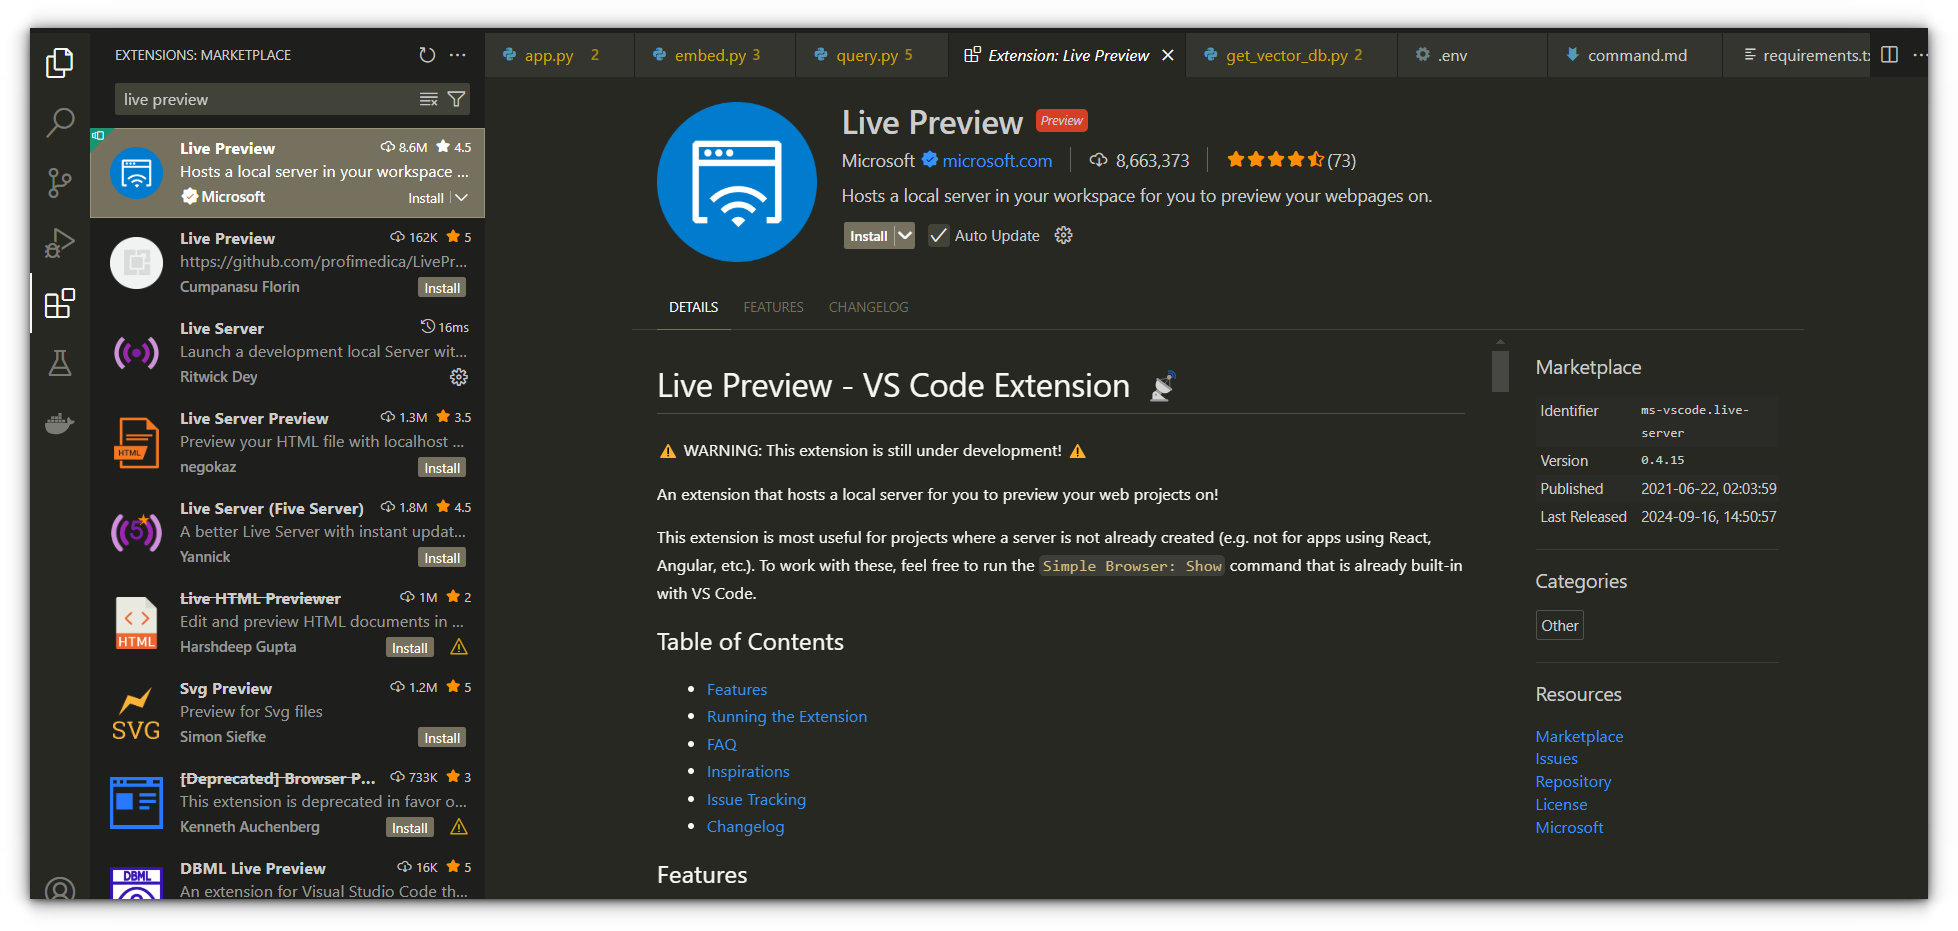
If you haven’t already installed it, open the Extensions panel (or hit Ctrl + Shift + X), search for Live Server, and install it.
Once that’s done:
- Right-click on your HTML file.
- Click "Open with Live Server."
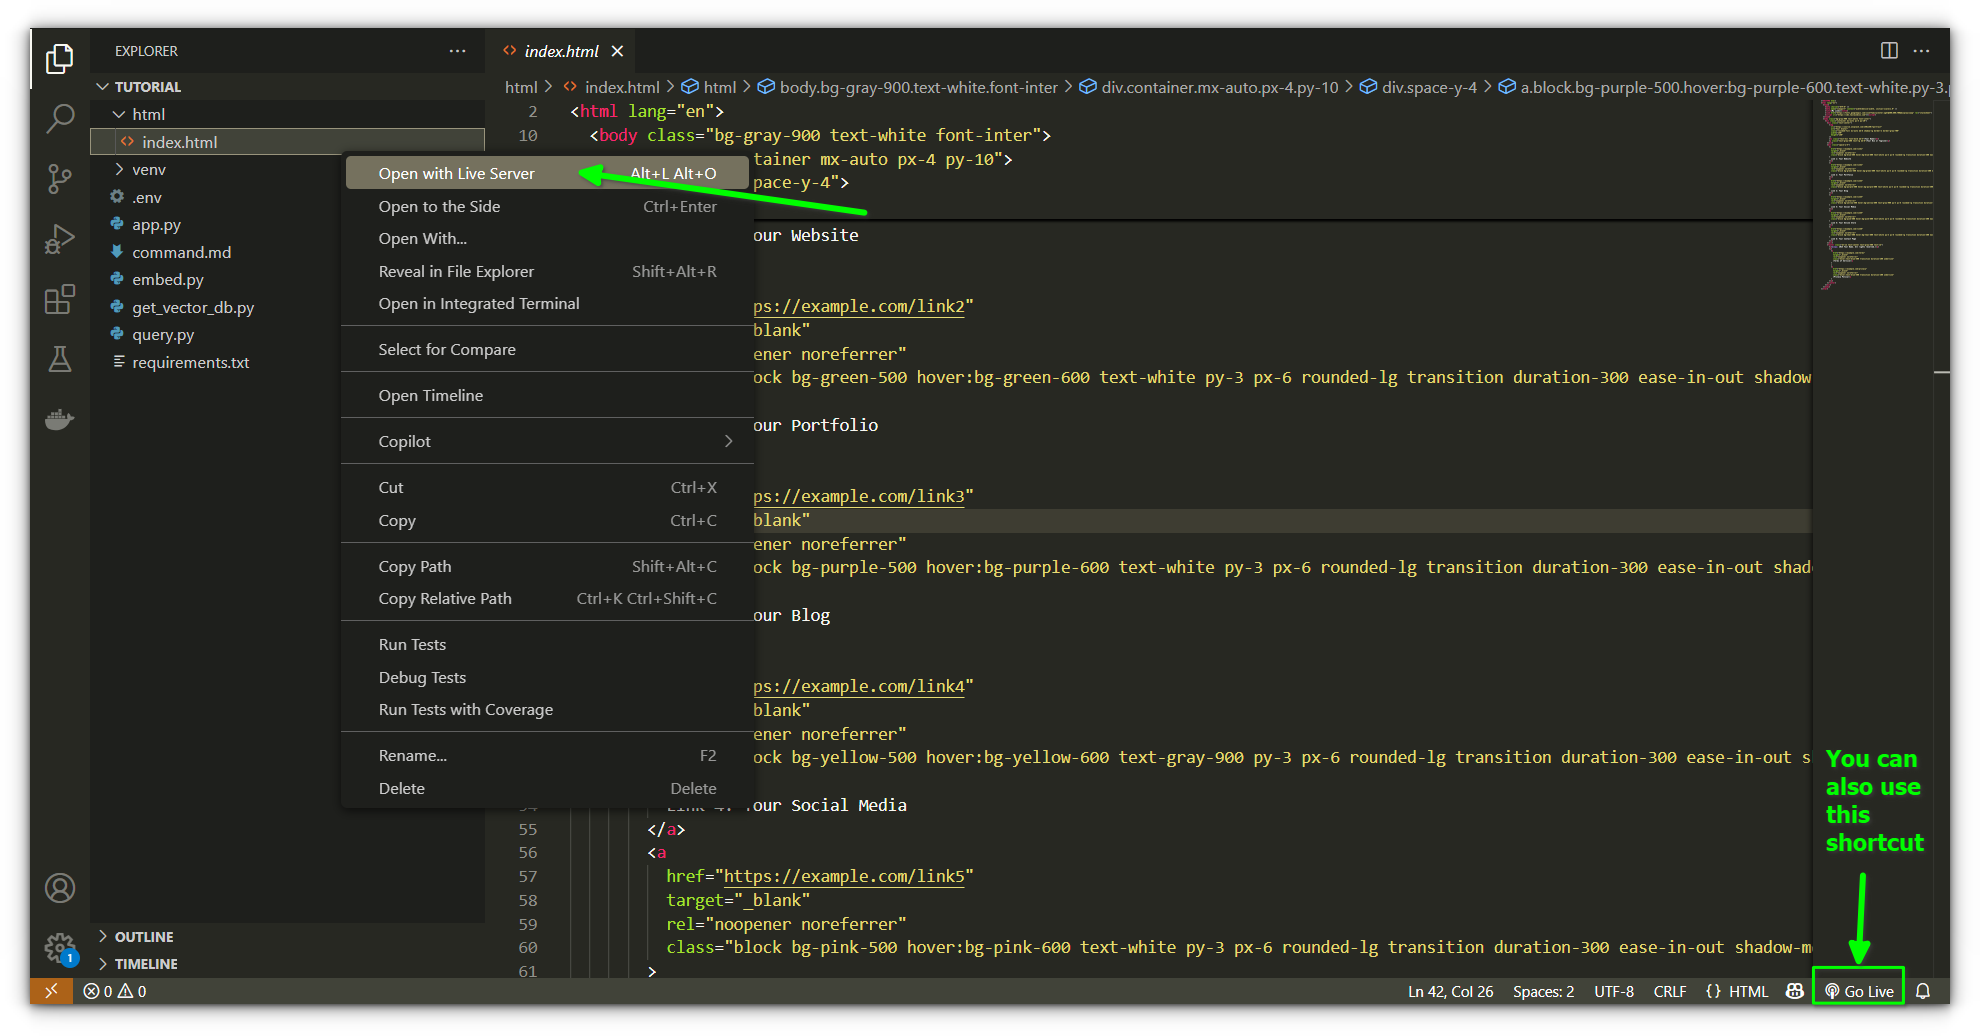
Your default browser will instantly load the page.
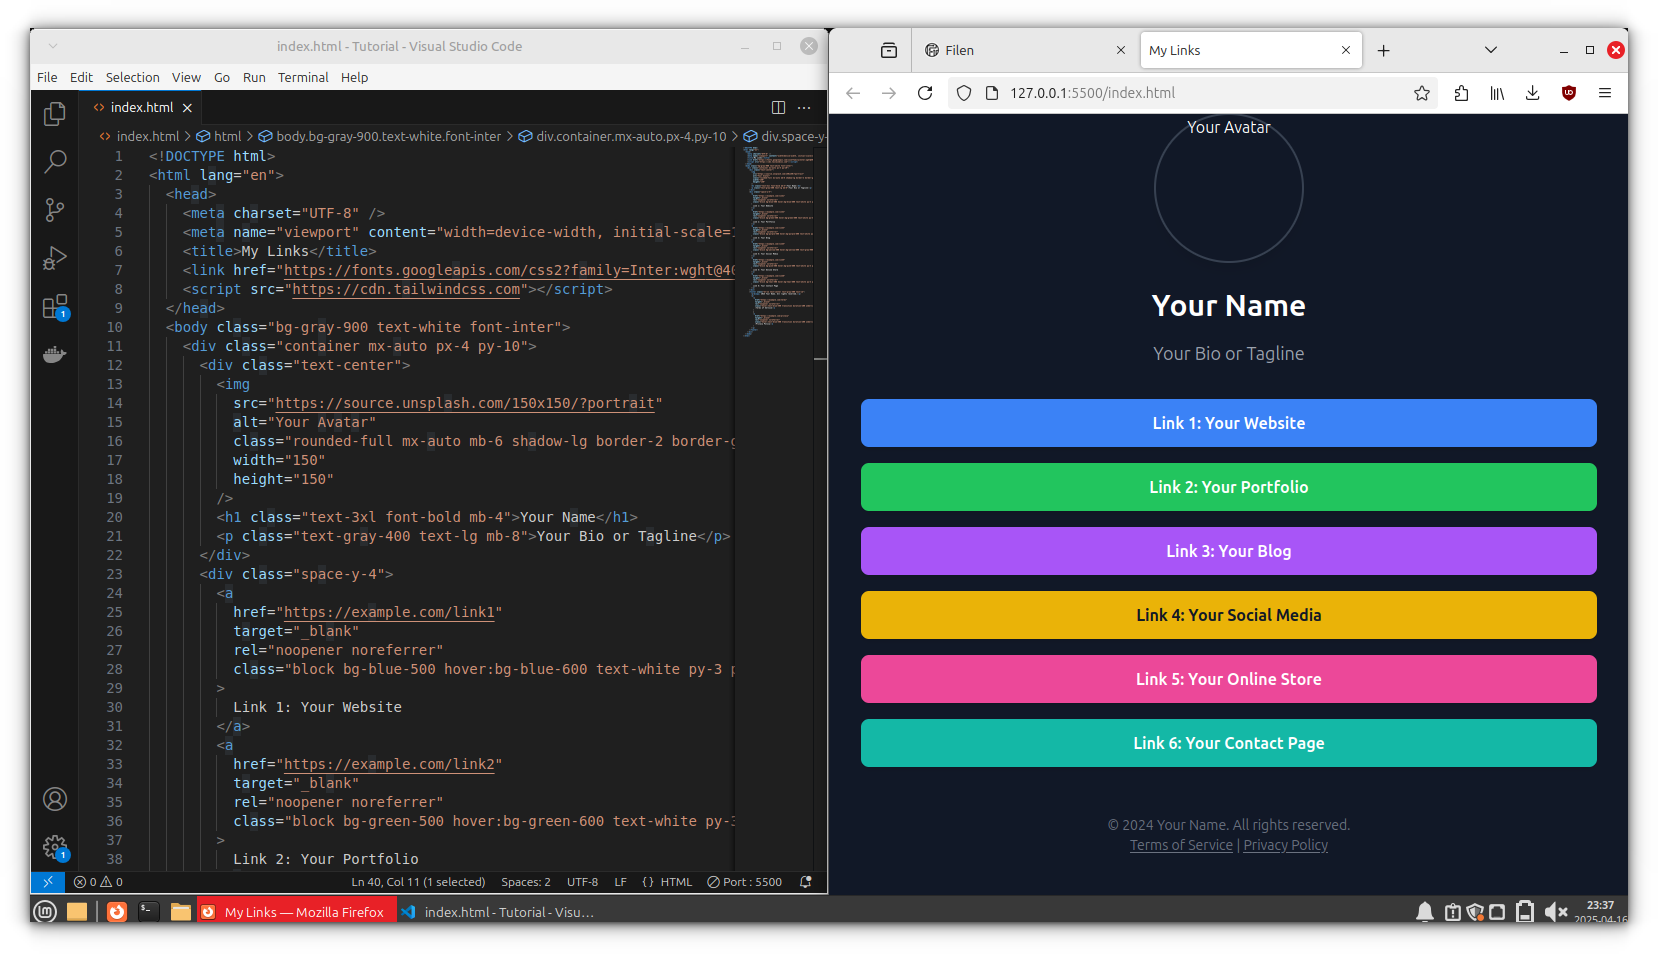
Now, here's the cool part: every time you make changes in your HTML and hit save, the browser refreshes automatically. No need to reload manually.
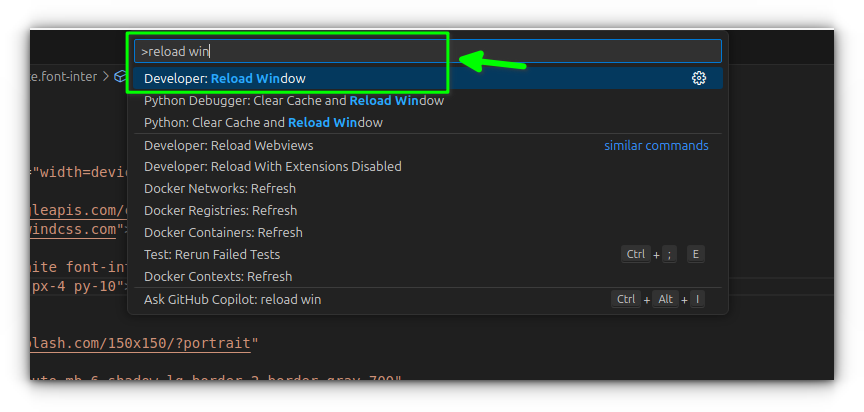
http://127.0.0.1:5500. That means it works on your local network too. So if you grab your phone or tablet and enter your computer’s local IP (like 192.168.1.x:5500), you can view the same live HTML page there. Super useful for testing responsiveness on real devices.Quick Fix: If "Open with Live Server" doesn’t show up
Sometimes the right-click option doesn’t appear right away. Just restart VS Code or reload the window (Ctrl + Shift + P, then type and select Reload Window). That usually solves it.
Pro tips to enhance HTML workflow in VS Code
VS Code is more than just a text editor, it’s packed with tools that make writing HTML faster, cleaner, and easier.
Here’s a short list of features I keep coming back to:
Emmet Abbreviations: Type shortcuts like ul>li*5 and hit Tab, Emmet expands it into five list items inside a ul. It’s magical once you get the hang of it.
IntelliSense: As you type, VS Code auto-completes HTML tags and attributes. It even suggests attribute values.
Format Document: Messy code? Hit Ctrl + Shift + I and your HTML will be formatted cleanly. This helps you stay readable, especially on larger projects.
Color Picker: When working with inline CSS or style attributes, the color picker pops up to help you visually pick hex or RGB values. No need to Google color codes.
Wrapping Up
If you're already spending a lot of time inside VS Code writing HTML, getting the Live Server extension running is a no-brainer.
It's simple, snappy, and just makes the feedback loop faster. And that’s what modern web development is all about, tight, instant iterations.
Personally, I rely on it not just to view my pages, but also to quickly test mobile layouts or animations on other devices. It’s made designing responsive sites a lot smoother.
Once you’re comfortable here, you can start layering in CSS, JS, and frameworks like Tailwind or Bootstrap right inside the same setup. VS Code can handle it all.

