

This is a regularly updated guide for upgrading an existing Linux Mint install to a new available version.
You can follow the appropriate steps based on your current Mint version and requirement.
The guide has been updated with the steps for upgrading to Linux Mint 22 from Mint 21.3. Linux Mint has a GUI tool to upgrade to the latest version.
Things to know before you upgrade to Linux Mint 22
Before you go on upgrading to Linux Mint 22, you should consider the following:
- Do you really need to upgrade? Linux Mint 21.x is supported until 2027.
- You’ll need a good speed internet connection to download upgrades of >1 GB.
- It may take a couple of hours to complete the upgrade procedure based on your internet speed. You must have patience.
- It is a good idea to make a live USB of Linux Mint 22 and try it in a live session to see if it is compatible with your hardware. Newer kernels might have issues with older hardware, so testing it before the real upgrade or install can save you a lot of frustration.
- A fresh installation is always better than a major version upgrade, but installing Linux Mint 22 from scratch would mean losing your existing data. You must take backup on an external disk.
- Though upgrades are mostly safe, it’s not 100% fail proof. You must have system snapshots and proper backups.
- You can upgrade to Linux Mint 22 only from Linux Mint 21.3 Cinnamon, Xfce, and MATE. Check your Linux Mint version first. If you are using Linux Mint 21.2 or 21.1, you need to upgrade to 21.3 first from the Update Manager. If you are using Linux Mint 20, I advise you to go for a fresh installation rather than upgrading to several Mint versions.
Once you know what you will do, let’s see how to upgrade to Linux Mint 22.
Upgrading to Linux Mint 22 from 21.3
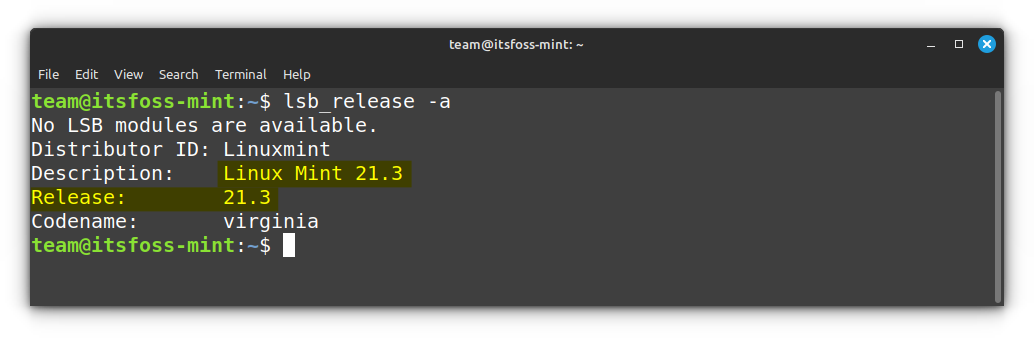
Check your Linux Mint version and ensure that you are using Mint 21.3.
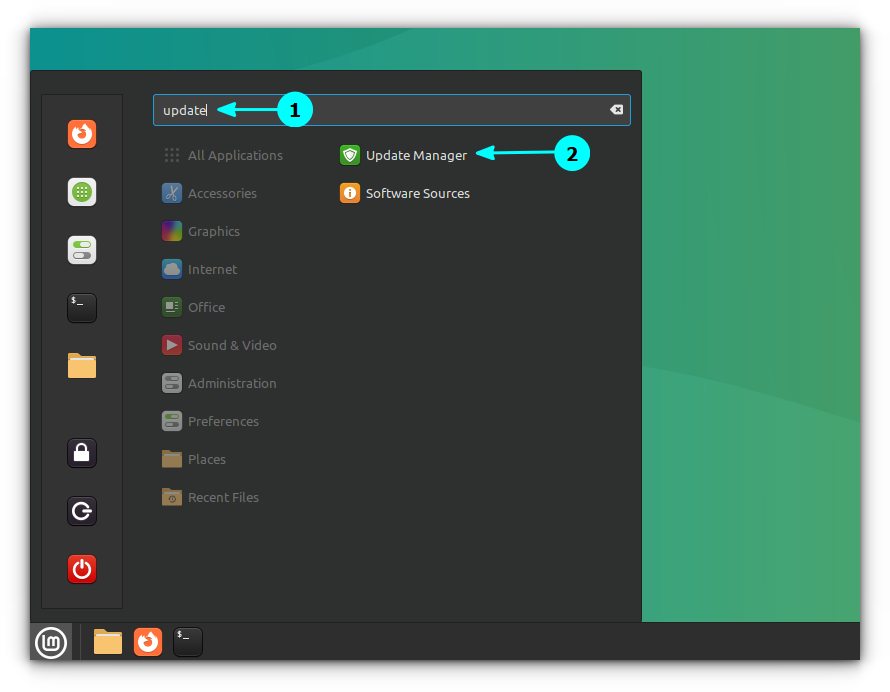
Step 1: Update your system by installing any available updates
Launch the Update Manager with Menu → Administration → Update Manager.
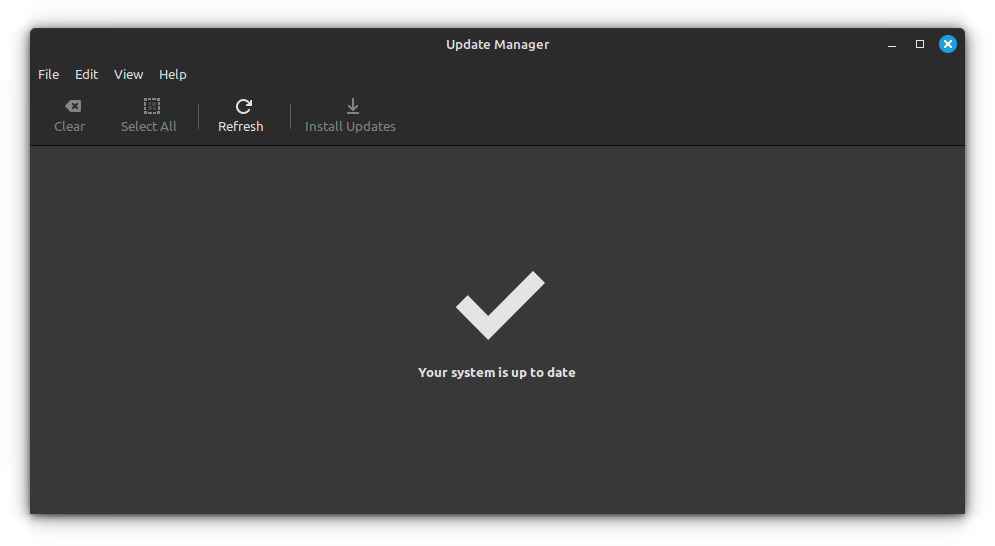
Check if there are any package updates available. If yes, install all the software updates first.
You may also use this command in the terminal for this step:
sudo apt update && sudo apt upgrade -y
Step 2: Make a backup of your files on an external disk (Optional yet recommended)
Timeshift is a good tool for creating system snapshots, but it’s not the ideal tool for your documents, pictures, and other such non-system, personal files. I advise making a backup on an external disk. It’s just for the sake of data safety.
When I say making a backup on an external disk, I mean to simply copy and paste your Pictures, Documents, Downloads, and Videos directory on an external USB disk.
If you don’t have a disk of that much size, at least copy the most important files you cannot afford to lose.
Step 3: Install the upgrade tool
Now that your system is updated, you are ready to upgrade to Linux Mint 22. The Linux Mint team provides a GUI tool called mintupgrade for upgrading Linux Mint 21.3 to Linux Mint 22.
You can install this tool using the command below:
sudo apt install mintupgrade
Step 4: Run GUI Tool from the terminal
You cannot find the new GUI tool listed in the App menu. To launch, you need to enter the following command in the terminal:
sudo mintupgrade
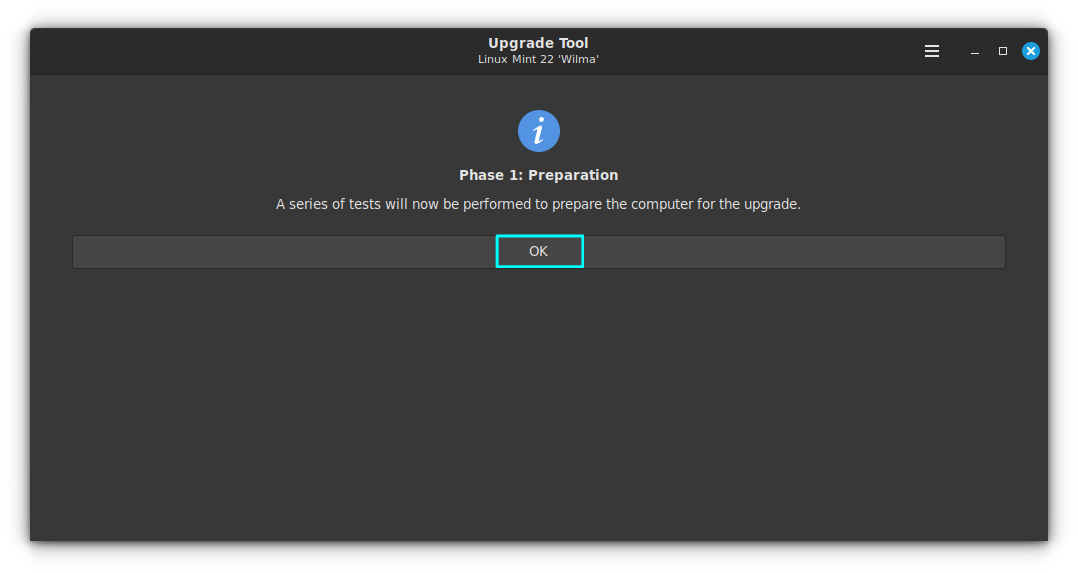
This simple, yet comprehensive tool, takes you through the upgrading process.
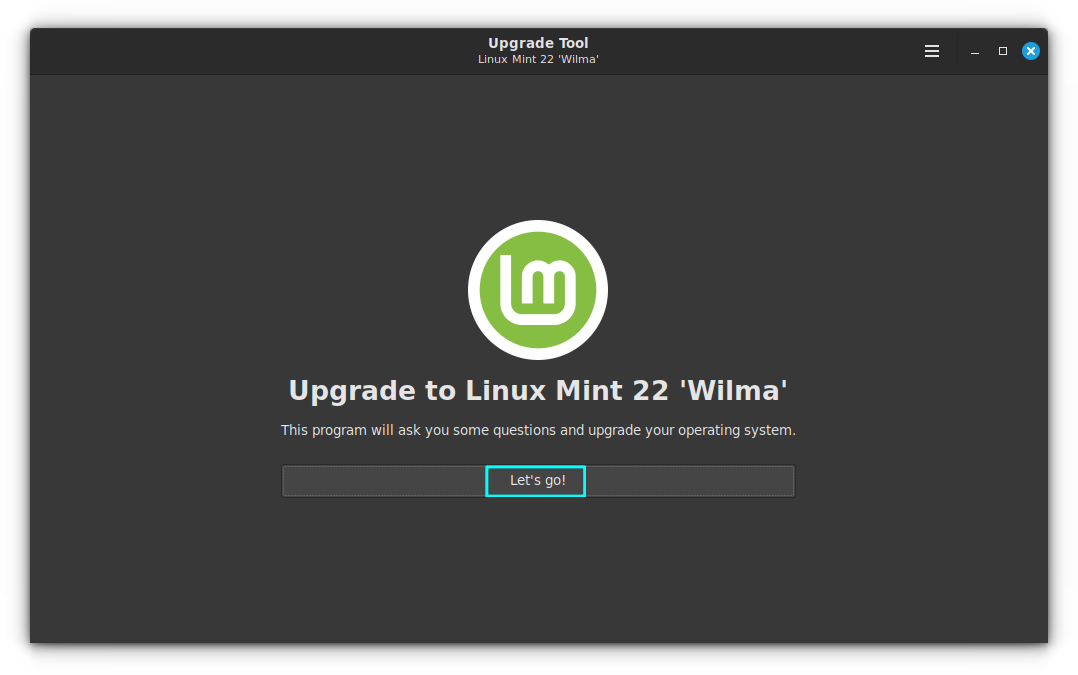
It will ask for permission to perform a series of tests to prepare your computer for an upgrade.
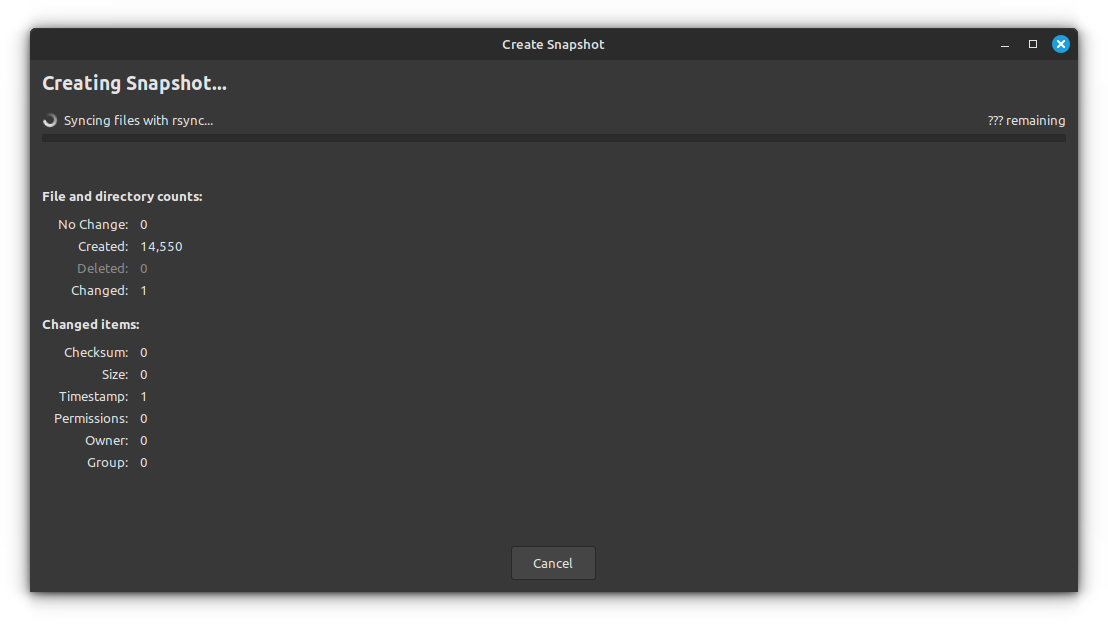
After these initial tests, it will prompt for a Timeshift Backup. If you already have a backup created, you are good to go.
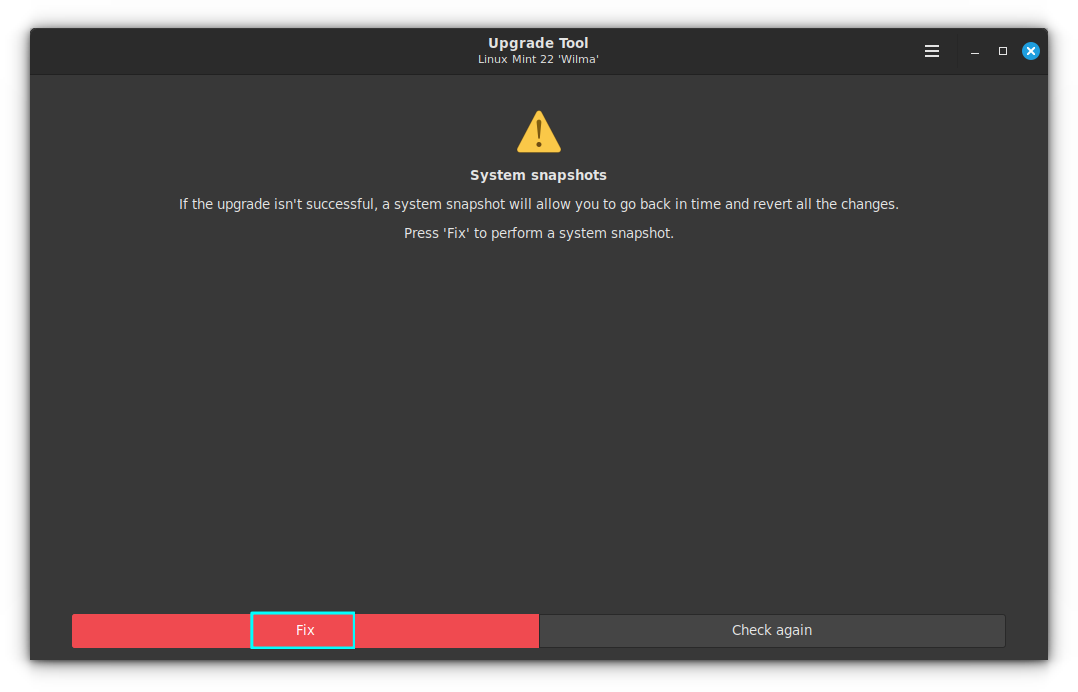
Else, you need to create a backup here, since it is indeed a crucial step before any upgrade.
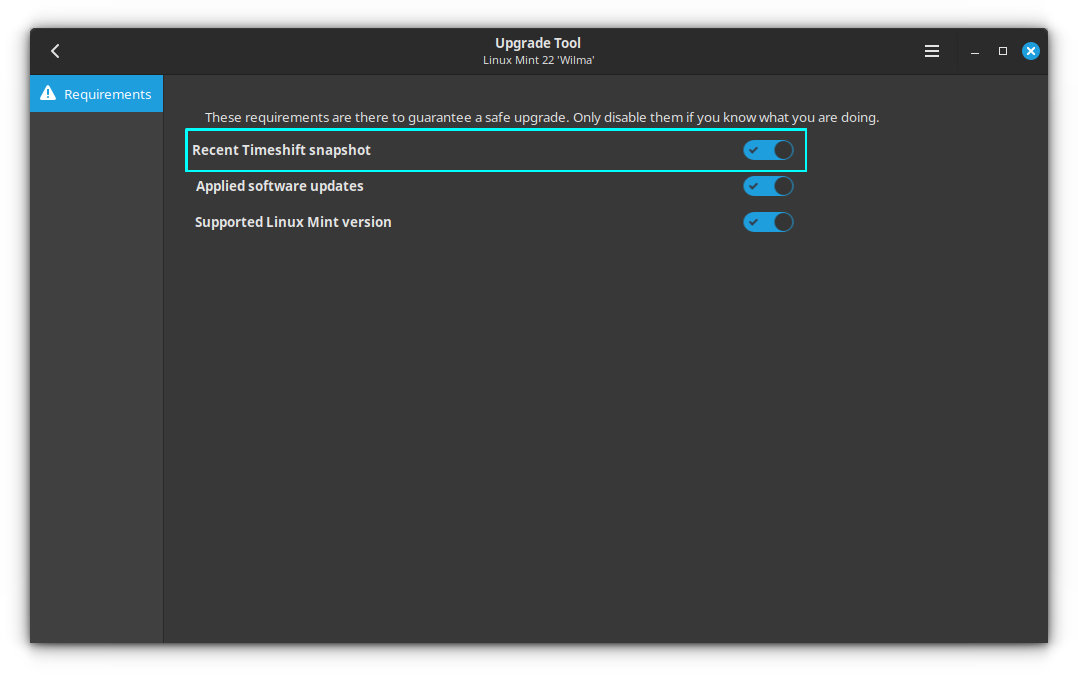
If you are testing the upgrade on a VM or some other sort, you may not need the Timeshift Snapshot. In this case, click on the top-right hamburger menu and select Preferences.
From the preferences window, you can disable the Timeshift backup requirement.
Some PPAs might be already available for Ubuntu 24.04 and thus for Mint 22. But if the PPA or repository is not available for the new version, it may impact the upgrade procedure with broken dependencies. You will be prompted the same within the upgrade tool.
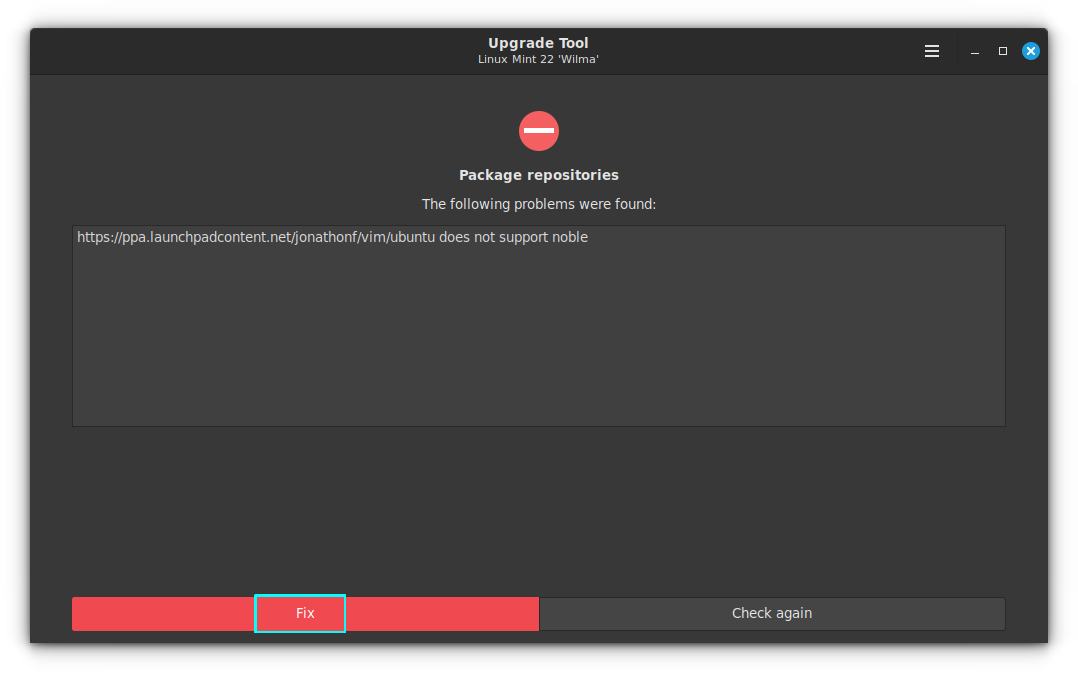
Here, I used Vim's latest version through its PPA. The same PPA is supported only up to Ubuntu Jammy Jellyfish (22.04) , showing the error, since Linux Mint 22 is based on Noble Numbat (24.04).
Click on Fix and you will be given the option to disable the PPAs through Software Sources within the upgrade tool.
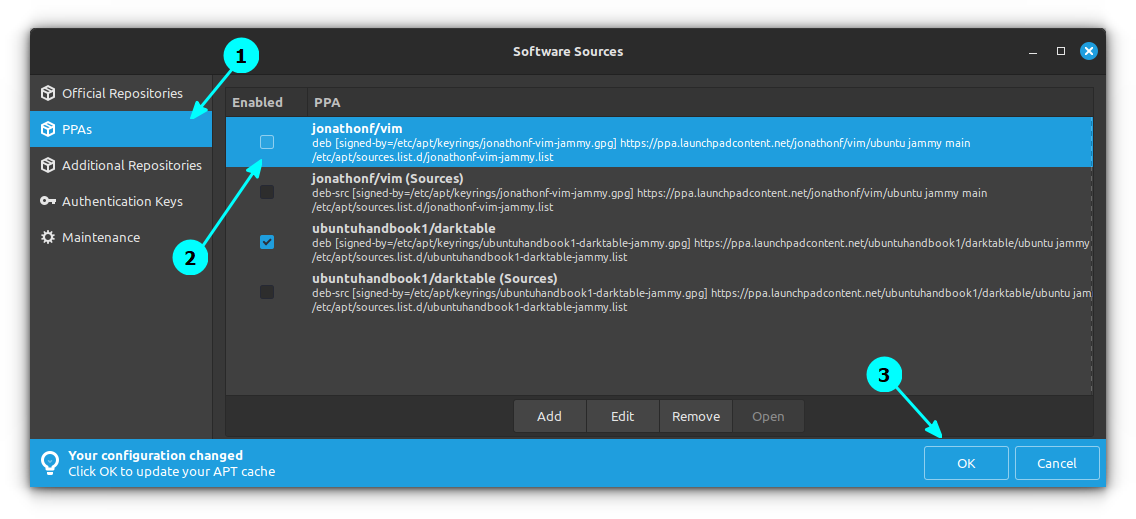
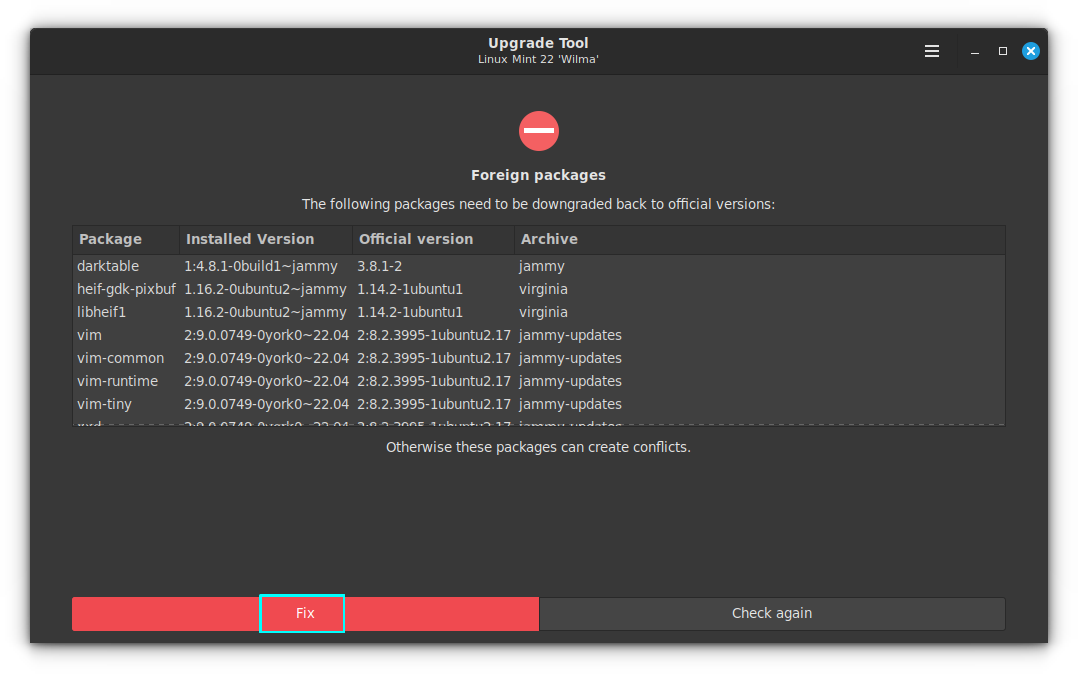
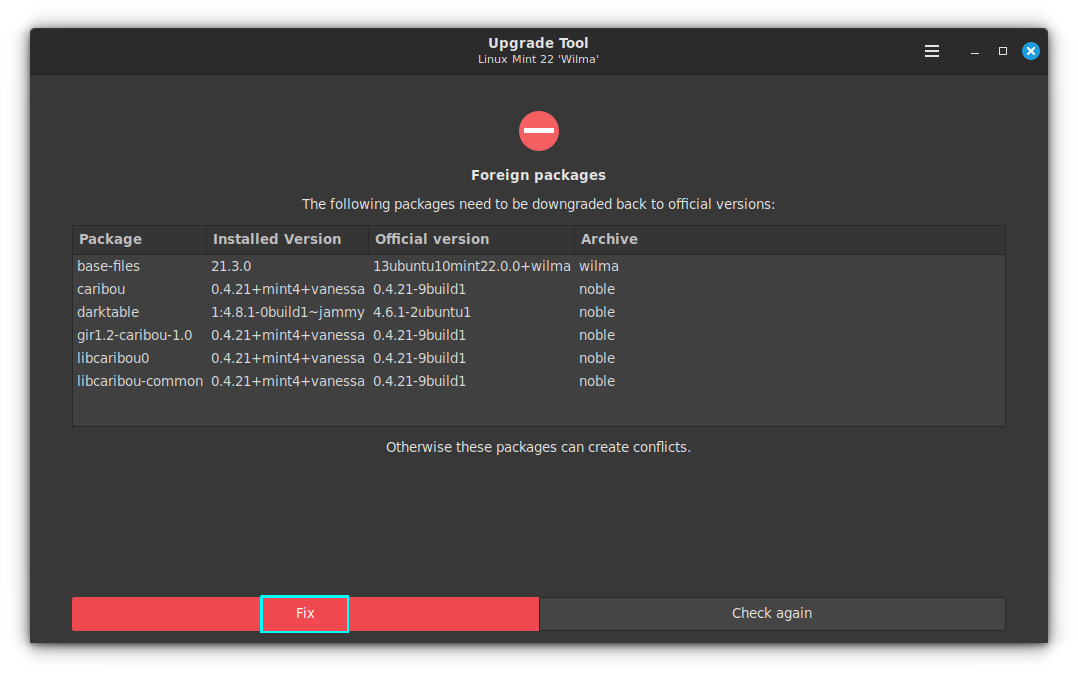
Since the PPA is disabled, the package becomes ‘foreign’ because the version available from the repository doesn’t match the ones from Mint repositories. So you need to downgrade the packages to a version available on the repository.
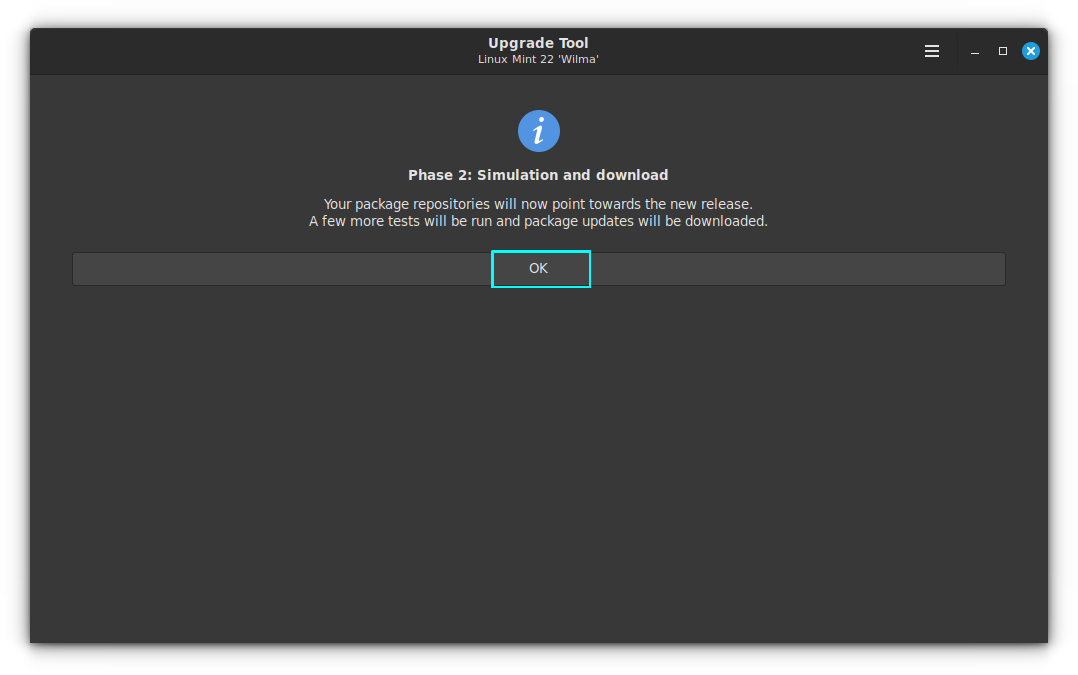
Here, the phase 2 of upgrade, that is Simulation and package download, is started. Some more tests will be done and updates will be downloaded.
The upgrade tool now lists the changes that need to be carried out.
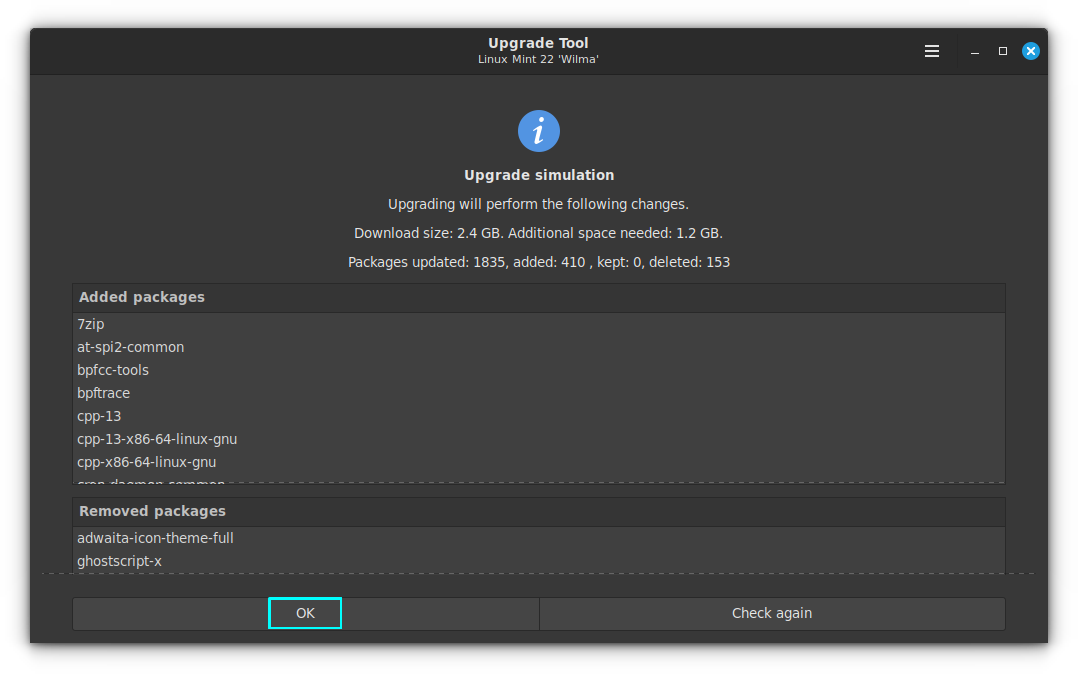
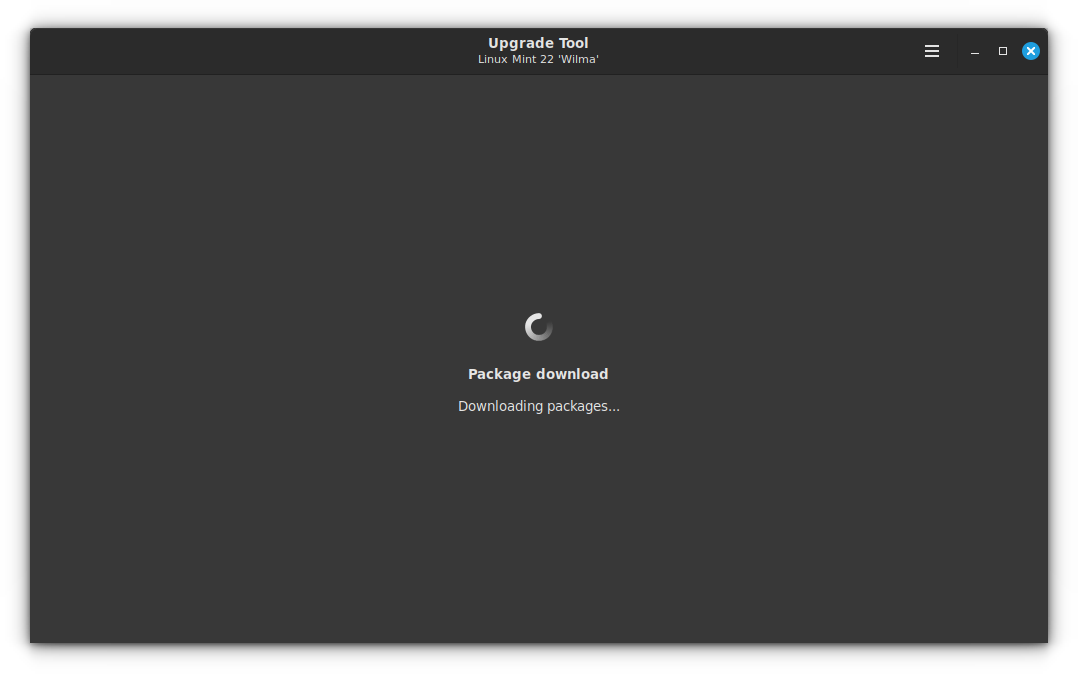
Upon accepting, the tool will start downloading packages.
Once the downloads are completed, you will be asked to start the Phase 3 of the upgrade.
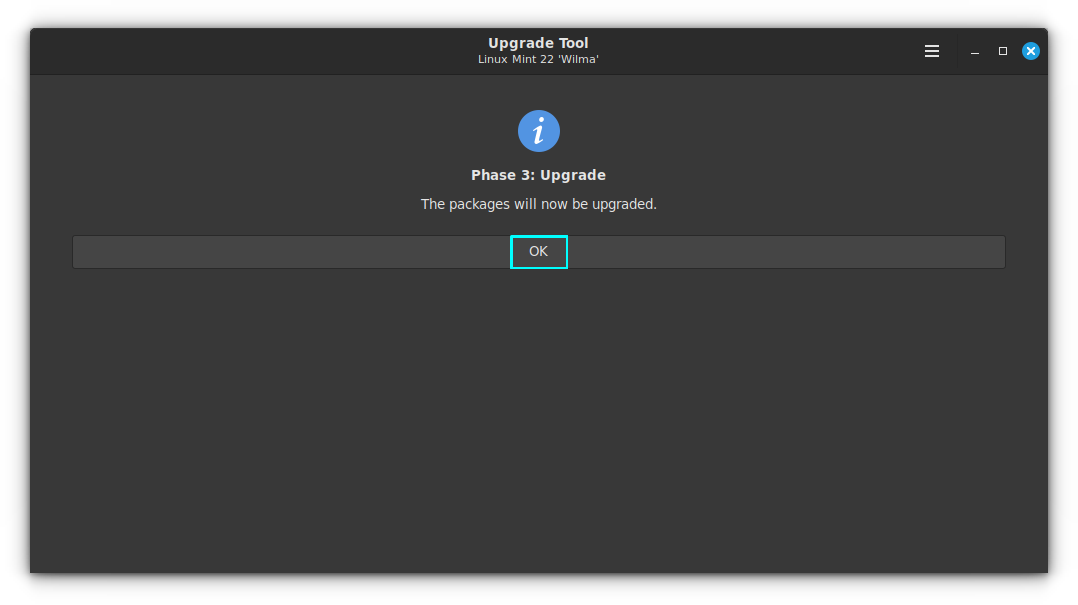
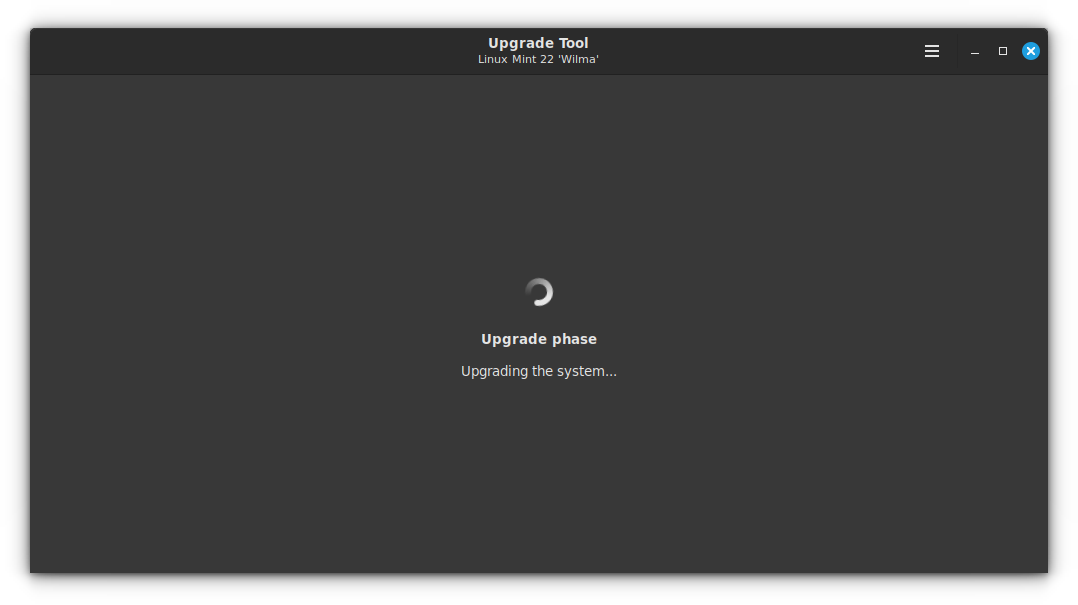
When you click OK, the actual upgrading of the packages starts.
In some cases, there will be more packages to downgrade to avoid conflict. Click on Fix to continue. In this case, I had darktable installed as a PPA and that is causing more package downgrades.
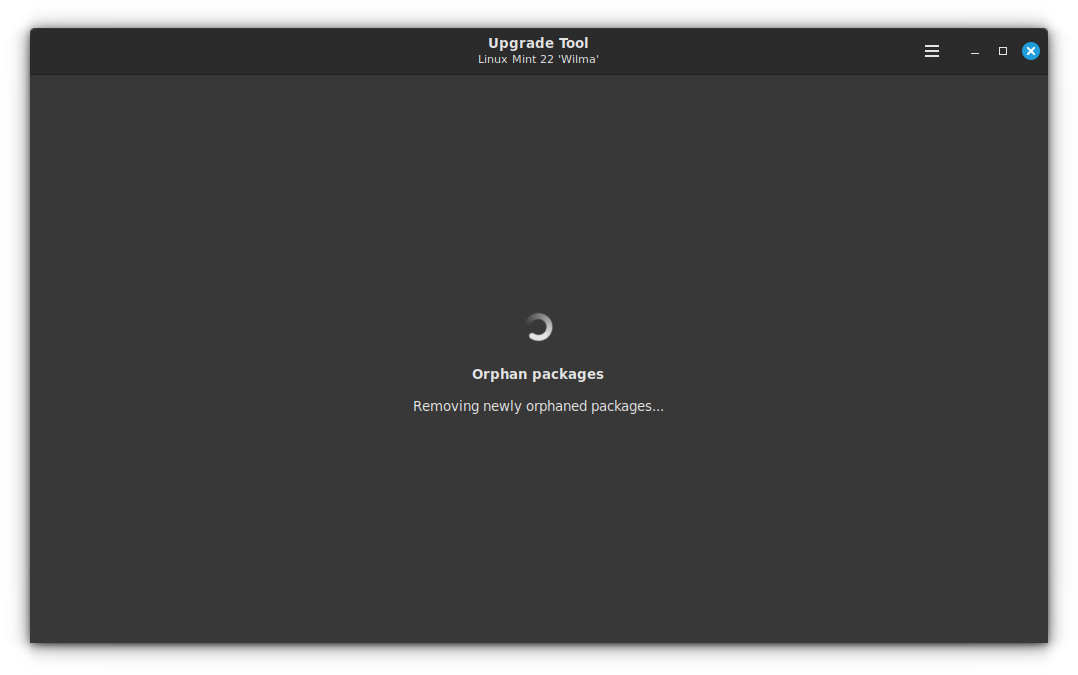
This will remove the orphan packages, including the newly created orphan packages.
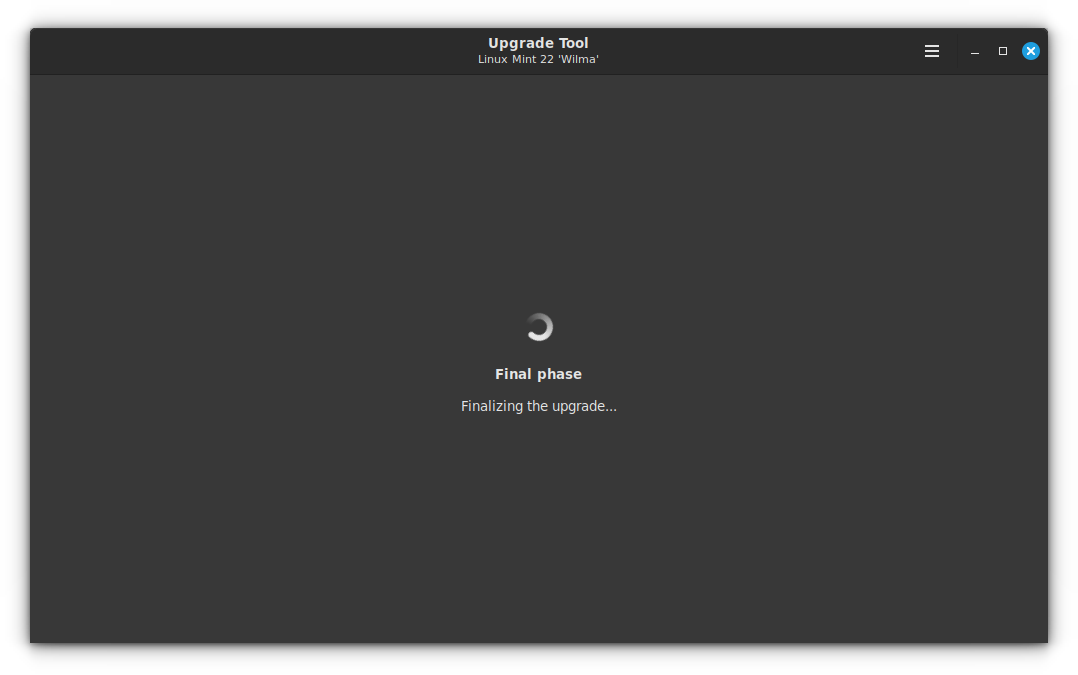
Once done, you will move to the finalizing phase.
Once this phase is completed, you will get an upgrade completed notification.
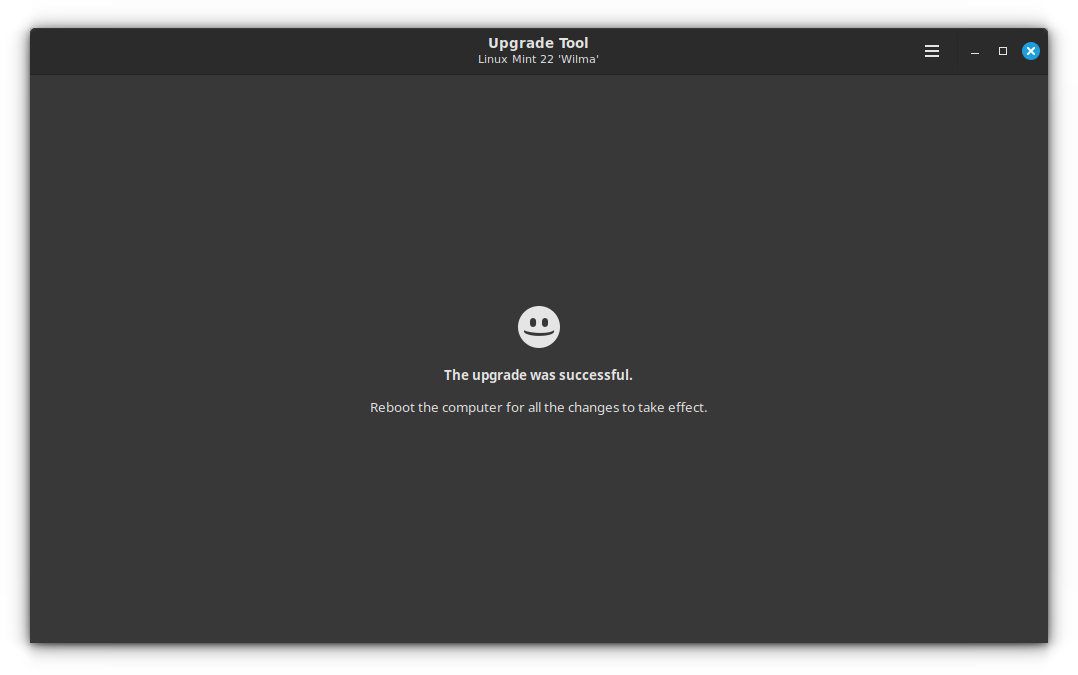
Close the upgrade tool and reboot your system to make the update come into effect.
Upon rebooting, you will be in the new Linux Mint 22 🎉

Did you upgrade to Linux Mint 22?
Upgrading to Mint 22 is as simpler as the previous version. And, it is only going to get better.
If you still cannot decide, you might want to check out our Linux Mint 22 review before upgrading:
 Ankush Das
I hope you find the tutorial helpful. Did you upgrade to Linux Mint 21 or you opted for a fresh installation?
If you faced any issues or if you require any further assistance about the upgrade procedure, please feel free to ask in the comment section or head to our It's FOSS community forum.
