

In 2010, the government of India unveiled the ₹ symbol for its currency, the Indian rupee. It has the Unicode character U+20B9.
Over time, the ₹ symbol started appearing on both Indian and International keyboards. It is placed on the key 4 with US Dollar $.
Now, typing $ is pretty straightforward. You use Shift+4 and you get the $ symbol. But that’s not the case with ₹. It’s the third symbol on the key 4 and the question arises, how to type ₹?
To use the third symbol on any key (like the € on key 5), you have to use the AltGr (or the right Alt) key with the symboled key. So if you use the right Alt+4, you should get the ₹ symbol.
But that doesn’t happen all the time. You have to make a few changes in order to type ₹ sign on Ubuntu.
Typing Indian Rupee Symbol (₹) on Ubuntu
Step 1: Adding the correct keyboard
In order to type ₹ on Ubuntu, you need to use the Indian English keyboard with Rupee.
No, I am not asking you to buy a brand new keyboard that has ₹ displayed on the key 4. I am suggesting adding this keyboard layout to your operating system. Let me show you how to do that.
Just so that you know, the same steps could be applied to other desktop environments like MATE, KDE Plasma, etc. The screenshots won’t look the same though, so you would need to find your way through on your own.
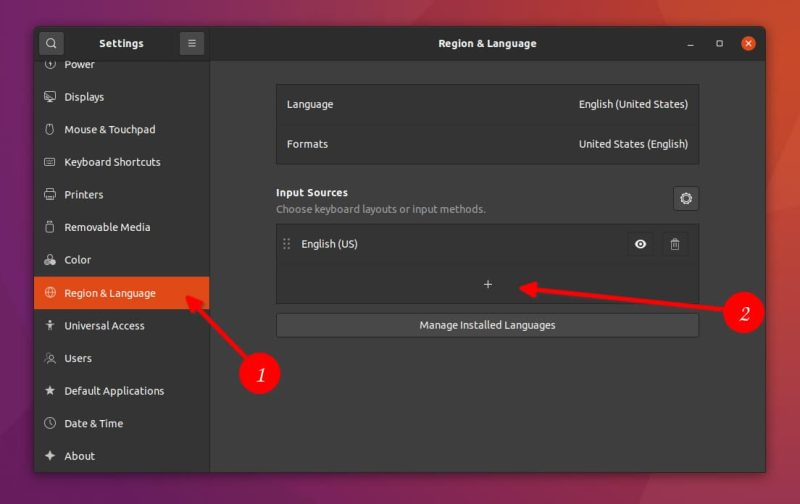
In Ubuntu GNOME, press the Windows key and search for Settings:

In the Settings, look for Region & Languages and here click on the + symbol under the Input Sources. This is the way to add a new keyboard layout.
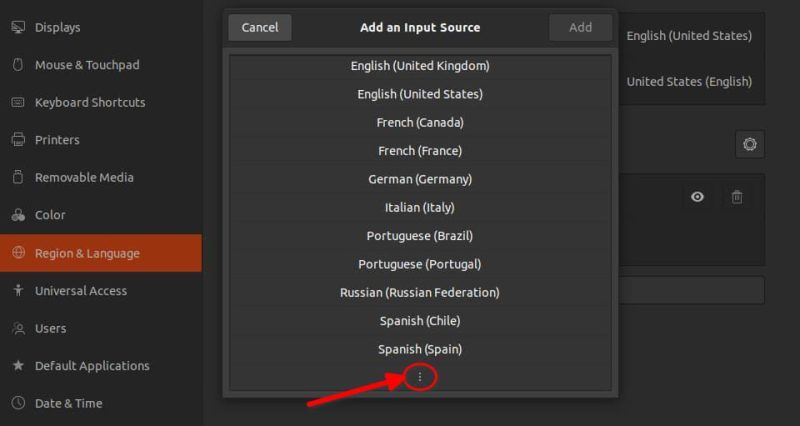
Click on the three vertical dot symbols to display more keyboard layouts.
The search option may not work. So, you may have to scroll down and look for English (India). Click on it.
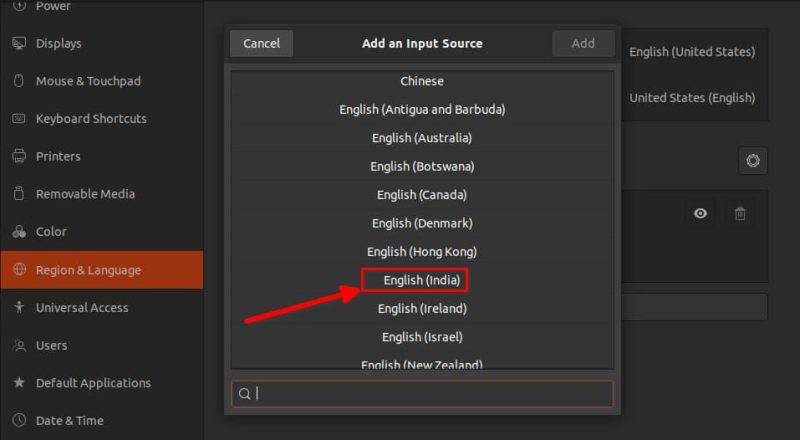
You would expect that it will add the English (India) keyboard immediately but that doesn’t happen. You’ll have plenty of keyboard options under English (India).
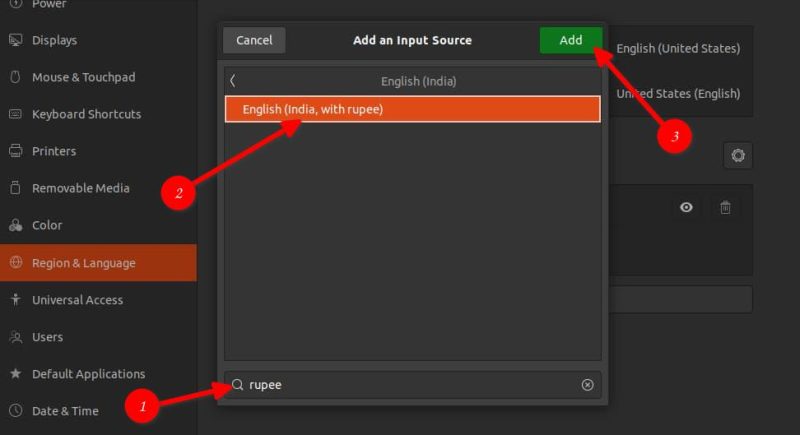
Look for English (India, with rupee). You can also search with ‘rupee’ here. Once you have found this keyboard, click on Add button to add this layout.
Step 2: Change the keyboard layout
Now that you have added the English (India, with rupee) keyboard, it’s time to use it.
You can use the Windows + Space keyboard shortcut in Ubuntu. to change the input source i.e. to change the keyboard.

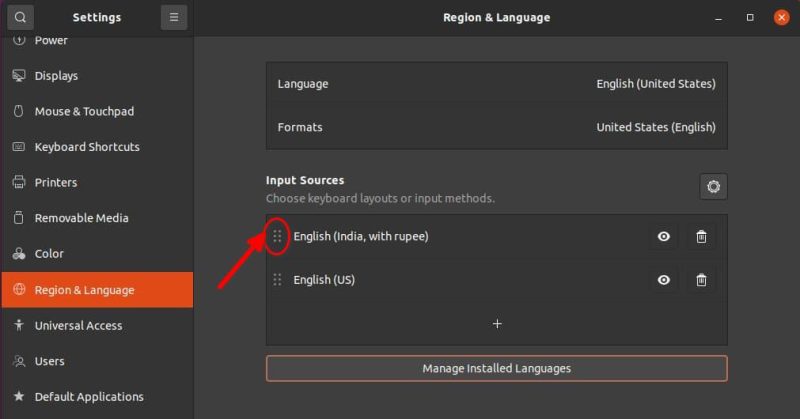
If you are going to use the Rupee symbol all the time, you should make English (India, with rupee) the default keyboard. You can do that in the Settings by moving it up the order (drag up or down).
Note: You may have to log out or reboot after changing the default keyboard so that these changes take effect.
Step 3: Using keyboard shortcut to type ₹ on Ubuntu
Now that you have made sure that you are using the English (India, with rupee) keyboard layout, use either of the following keys combinations to type ₹:
- If you have the AltGr key on your physical keyboard: AltGr+4
- Else, use the Alt key on the right-hand side: Right Alt+4
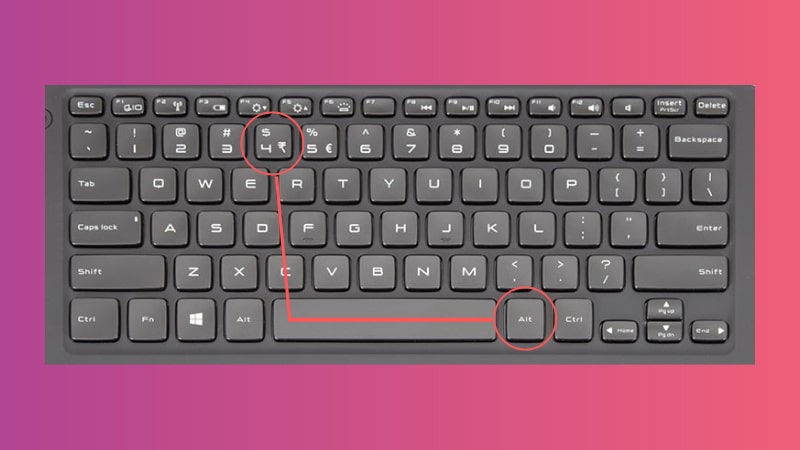
This will type the ₹ symbol.
I hope you were able to type the rupee symbol after following this tutorial. If you have any questions or suggestions, please use the comment section below.
