
Have you every wished that you had a Linux powered laptop that fits in your hand, complete with keyboard? If you said, yes, then you are in luck. A hardware designer has created such a device and open-sourced the design so that anyone can make it at home.
What is it?
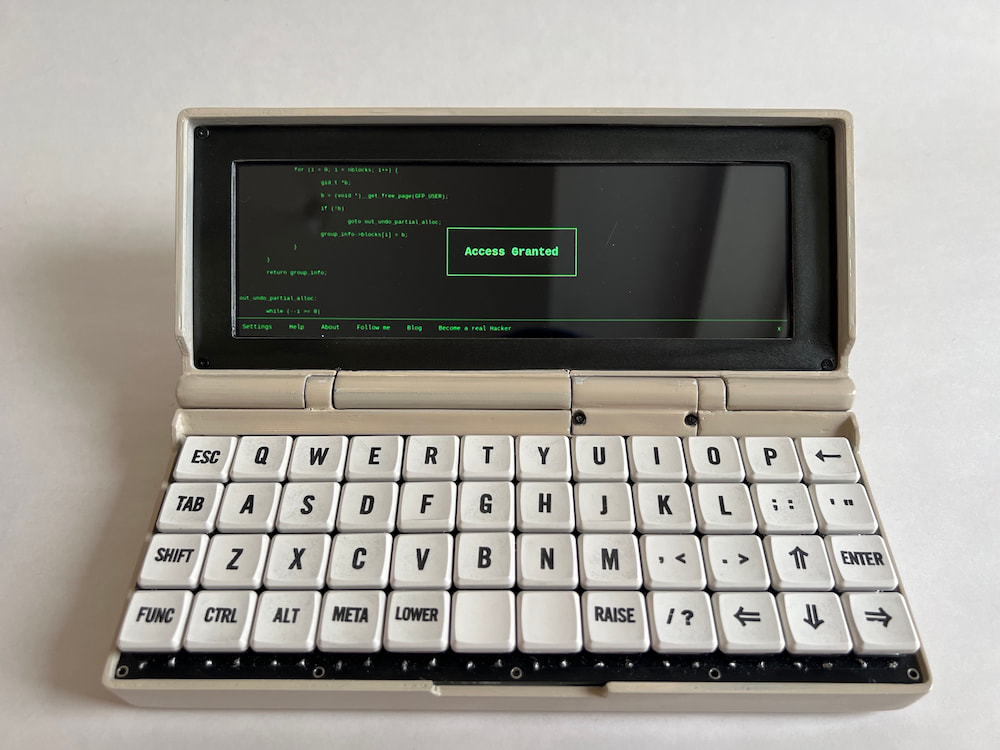
The Penkēsu Computer (Penkēsu is Japanese for pencil case) was designed by Penk Chen. If that name sounds familiar, he’s the designer behind the CutiePi.
According to the website, Penk created this project because:
Ever since the CutiePi tablet has been successfully funded and started shipping, I feel the need to work on a new project, something I don’t need to worry too much about commercial viability, and to remind myself why I started tinkering. A “rebound” project, so to speak.
He also said that he doesn’t have any plans to mass produce the Penkēsu at this time, so he open-sourced the plans. “I’d like to publish all the designs and plans so there’s enough information for anyone interested in making one.”
The Parts
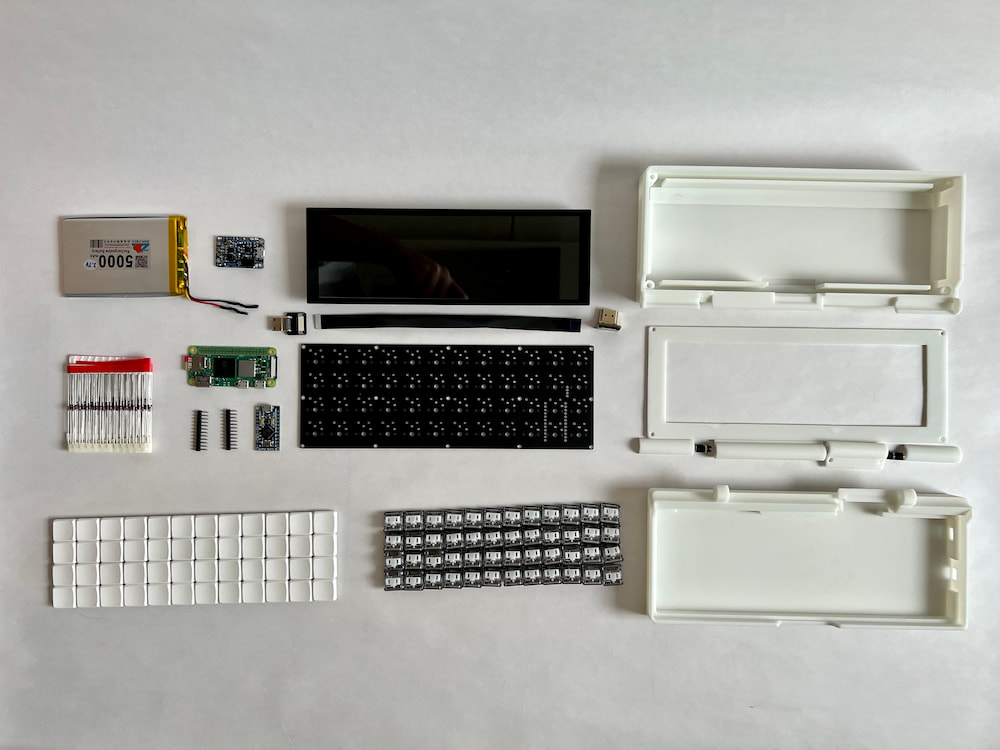
Penk designed the Penkēsu around a 7.9 inch touchscreen and a custom keyboard. The internals are powered by a Raspberry Pi Zero 2 W and a Li-Po battery. The Raspberry Pi Zero 2 W has a 1 GHz ARM quad-core ARM Cortex-A53 processor and 512MB of RAM. For $15, that should run most Linux distros designed for the Pi.
Interestingly, Penk said that “my 3D printer is not accurate enough to print a fully functional hinge lock”. So, he decided to use replacement hinges from a Game Boy Advance SP.
The most difficult looking part is the keyboard, which involves a custom PCB. Penk does note that “If one wishes to use other 40% keyboard for the build, it can be done by editing the CAD file and adjusting the compartment size in the chassis”.
Here is the full list of required parts:
- Display
- Waveshare 7.9 inch Capacitive Touch Screen
- Adafruit DIY HDMI Cable Parts – Right Angle adapter, Mini HDMI adapter, and 20 cm Ribbon Cable
- Case
- Game Boy Advance SP Replacement Hinges
- 3D printed parts (STL files and STEP file)
- Electronics
- Raspberry Pi Zero 2 W
- 3.7V 606090 (or similar size) Li-Po battery
- Adafruit PowerBoost 1000C
- Keyboard
- Kailh Low Profile Choc V1 Switches x 48
- MBK Choc Low Profile Keycaps x 48
- 1N4148 Diode x 48
- Arduino Pro Micro x 1
- PCB x 1 (gerber file and QMK firmware)
See the website for complete details.
What project have you made with a Raspberry Pi? Share in the comments below.
