

"If there is a media out there, VLC can play it!". I want to say the same thing about Kitty and its versatility.
If you didn't know already, Kitty is one of the most comprehensive terminal emulators available in Linux.
It offers image support, ligatures, animated cursors, and a whole lot of productivity tweaks. I could write a mini-book if I had to explain each one in full detail.
I am not going to do that. Instead, I'll share some of my favorite features and tweaks I use with Kitty.
If video is your preference, you can see Kitty setup in action on our YouTube channel.
Installing Kitty
Since Kitty is a pretty popular terminal emulator, it is available in the default repository of most of the Linux distributions.
In Ubuntu, you can install a slightly older version of Kitty by using the APT command:
sudo apt install kittyArch Linux users can install it from the Extra repo:
sudo pacman -S kittyFor Fedora,
sudo dnf install kittyIf you are any other distro user, or your system repo provides an older version of Kitty, use the official pre-built binary from the Kitty team.
curl -L https://sw.kovidgoyal.net/kitty/installer.sh | sh /dev/stdinOr, download binary from the GitHub releases page.
1. Generating default config
Kitty offers a huge configuration possibility, but through its config file. This config file should be kitty.conf located in ~/.config/kitty directory.
It is always good to use the default config file and make changes to it rather than creating a config from scratch.
Open Kitty and use the keyboard shortcut CTRL+SHIFT+F2. This will open the Kitty config in a new window. If not present already, it will create one for you and open it.
For me, it opened in the Vi editor. If this is not needed, you can quit the config using the Vi shortcut :q (without any changes).
Open Kitty config file using the shortcut in Kitty. This will open the config file in Vi editor.
Then open it in your favorite command line editor or GUI-based text editors.
nano ~/.config/kitty/kitty.conf2. Setting a different font
A proper monospace font can increase the terminal aesthetics. Here, we will set the terminal font as JetBrains Mono font.
Before proceeding, make sure the font is installed on your system.
First, list the set of supported fonts using the command:
kitty +list-fontsFrom the list, note the exact name of the font you want to use:
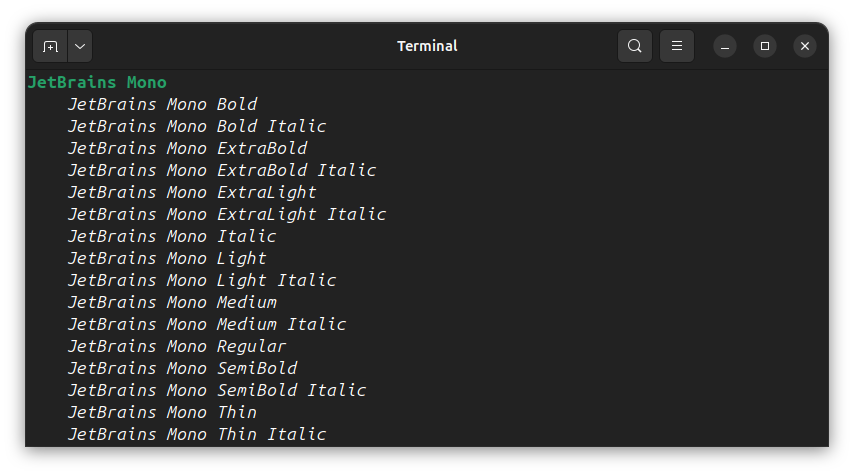
Now, open Kitty config and scroll down to the line that says font-family. Here, remove the comment in front of the item and change the name as follows:
font-family "JetBrains Mono"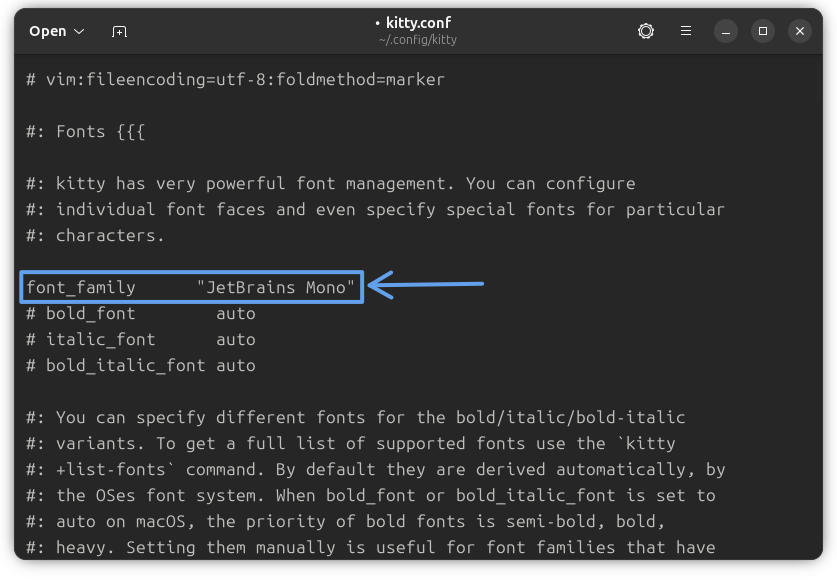
Setting font alone is not sufficient; you should be able to change the font size as well. Fret not! Kitty has an option here.
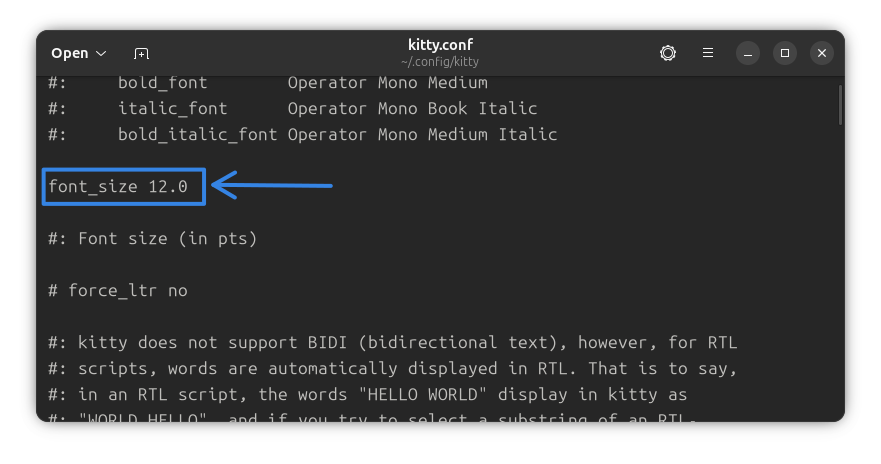
Search for font-size. Uncomment the line and change the value to sufficiently large.
3. Re-setting scrollback
One of the most essential features in a terminal is a sufficiently long scrollback lines.
Many commands like cat, do not use a pager like less to print text. So, if a text has a huge number of lines, more than your scrollback, then the beginning parts of the text will be unreachable.
At the same time, setting a huge scrollback line is also not advised. Since the scrollback lines are stored in RAM, more scrollback lines means more hit on the RAM usage.
A value of 10000 will be good for most users, and a 2000 is also fine for a GUI-only user.
On the Kitty config file, find the line scrollback_lines. By default, the value is 2000.
To change, uncomment the line and add a value, say 5000.
scrollback_lines 5000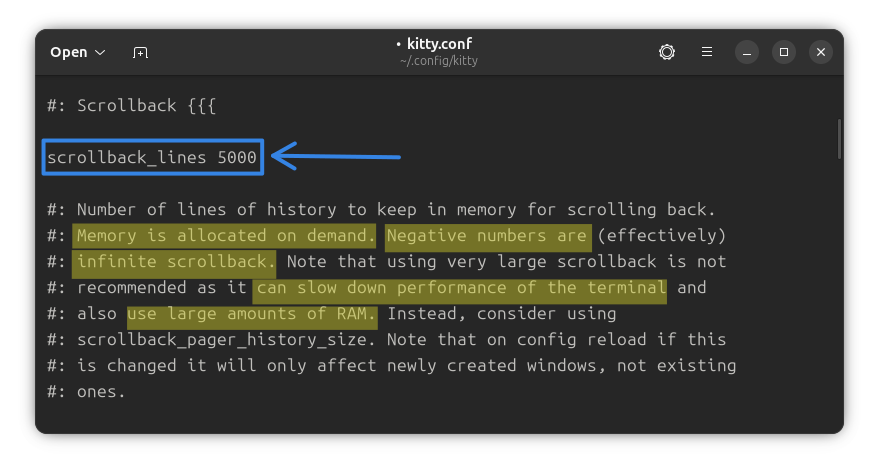
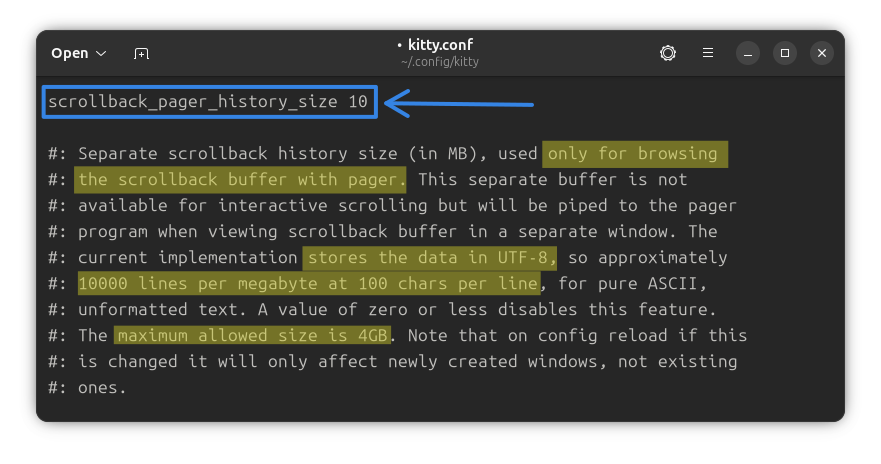
The scrollback pager feature in Kitty allows you to open your terminal’s scrollback history in a full-featured pager program (like less or nvim) for easier navigation, search, and copying.
By default, this is disabled. You need to enable it by specifying the value in MB.
4. Hiding mouse on typing (for keyboard addicts)
For terminal power users, the mouse may feel like a distraction. In Kitty, you can play with the mouse presence in several ways. Hiding the mouse immediately when you start typing is my preference.
To get this action, set the mouse_hide_wait variable to a negative value.
mouse_hide_wait -3.0If you make this value any positive number, the terminal will wait for that many seconds and then disable the mouse if no mouse action occurred within that time range.
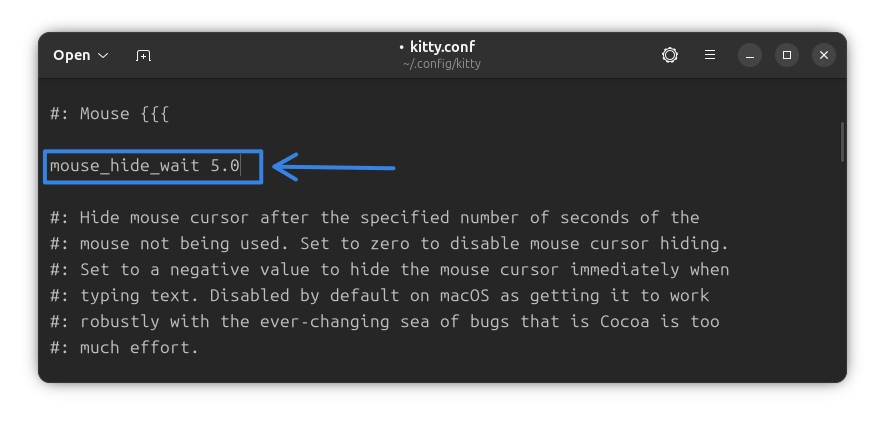
In the screenshot above, I set the value to 5.0 seconds. So now, no matter you type or not, the mouse will be disabled if you don't touch your mouse for more than 5 seconds.
Set it to 0 and the mouse won't hide at all.
5. Setting window size
Kitty remembers the window size from the last session by default, so you don't need to resize it every time.
Still, you can set the default window width in Kitty.

The remember_window_size yes is self-explanatory. The window size will be remembered with Kitty instances.
You can set the initial_window_width/height key to a required size and then disable the remember_window_size so that the new instances always open in the specified size.
This is specifically useful in the next section, where we disable the window decoration and thus you can't resize the terminal with mouse anymore.
6. Hiding window decorations
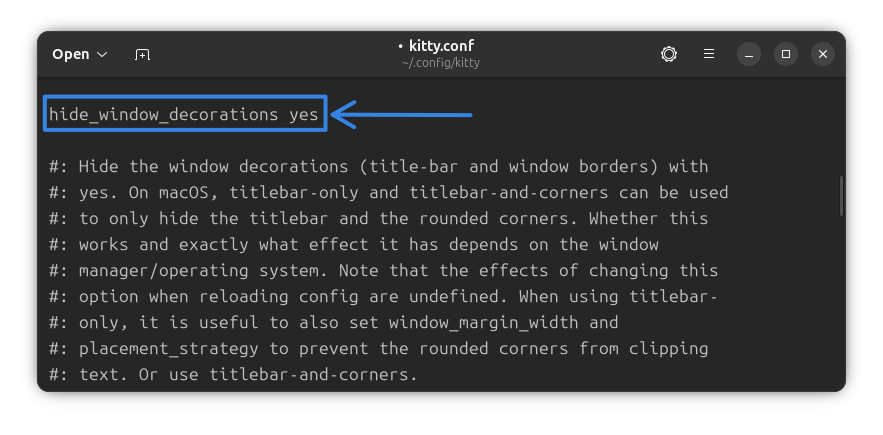
If you are using tiling window managers like Hyprland, it is good to avoid the title in Kitty. You won't find any serious use for it, because window resizing is done differently in tiling window managers.
Search and locate the hide_window_decorations option. Uncomment the line and change its value to yes from the default no.
7. Customizing the tabs
Like most of the terminal, Kitty offers tabs as well. The difference is that Kitty offers some ways to make the tabs look unique.
Tab bar position
You can use the tab_bar_edge key to specify whether you want the tab list at top or bottom. The default is bottom, and that is fine.
Tab bar style
There are several cool styles available for the tab bar, like fade, slant, separator, powerline, and custom.
We will be going with the powerline, which is pleasing and can be quickly made work. Uncomment the line and change the value.
tab_bar_style powerlineNow, the powerline offers another key called the tab_powerline_style. This can be set to angled, slanted, round.
All these looks cool, but I will be going with round which along with the Catppuccin Starship prompt will look aligned.
tab_powerline_style roundTabs in Kitty
8. Changing the shell
Most of the Linux distributions come with Bash as the default shell. Many users, on the other hand, love the ZSH shell.
The most common way people follow is to change the system shell. But that applies to all the terminals.
Here comes the use of shell key. You can set a shell for only the Kitty terminal and the rest of the system will use the default bash shell.
For this, first find the command location of your desired shell using the which command:
which zshFor me, it is /usr/bin/zsh.
Now, search for the shell key in Kitty config.
shell using the editor's find tool, search for shell ., so that you reach the result directly.The default value is . which means the user's default shell is used as Kitty shell.
Remove this . and paste the location of your desired shell.
shell /usr/bin/zsh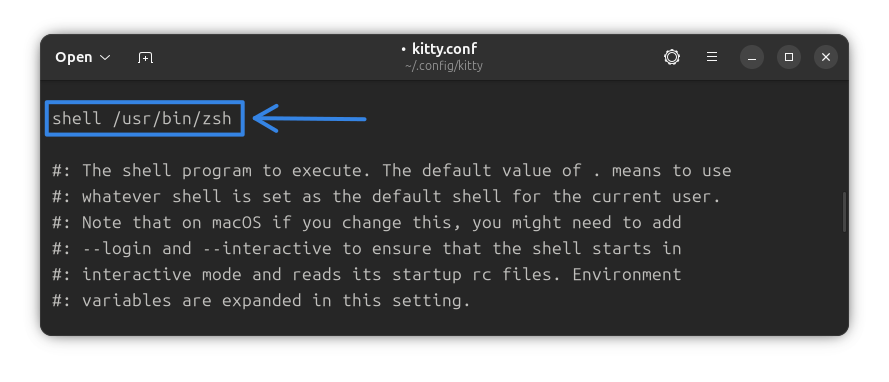
editor key in Kitty configuration file. The procedure is the same as changing shell.9. Notifying on command finish
With Kitty, you can get a desktop notification when a long-running command finishes up.
For this, uncomment the notify_on_cmd_finish key and set its value to invisible or unfocussed.
I am going with invisible, since, as per manual, it will:
Only send a notification when the window both is unfocused and not visible to the user, for example, because it is in an inactive tab or its OS window is not currently active.
notify_on_cmd_finish invisibleIf you are more into detail, set a time limit for the long command.
I am going to set 20 seconds as the duration of a long command.
notify_on_cmd_finish invisible 20
There is more to explore in this section for you!
10. Changing themes
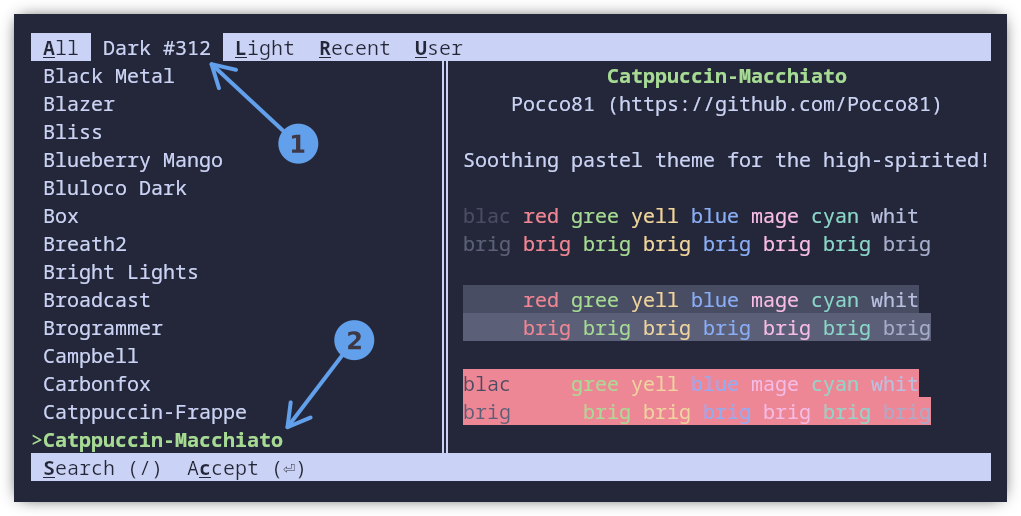
Kitty offers a huge number of themes. Run this command:
kitten themesThis will download the themes from the repo and display it to you.
Scroll down to see them all. Once you find the perfect one for you, press the ENTER key to apply the theme!
Also, use the / button to start a search.
In the small video below, you can see that I apply Catppuccin theme to Kitty.
Applying theme to Kitty Terminal
Once you have selected the theme, press enter and it asks whether you want to modify the config or add the theme to ~/.config/kitty/themes.
I will press the M key so that the Kitty Config is modified and the theme is set.
11. Animating cursor tail
Latest versions of Kitty support setting a cool cursor animation.
To enable it, first search for the key cursor_trail. Uncomment it. I have set a value of 200 for it.
Now, set a value for cursor_trail_decay and cursor_trail_start_threshold as shown in the screenshot below.
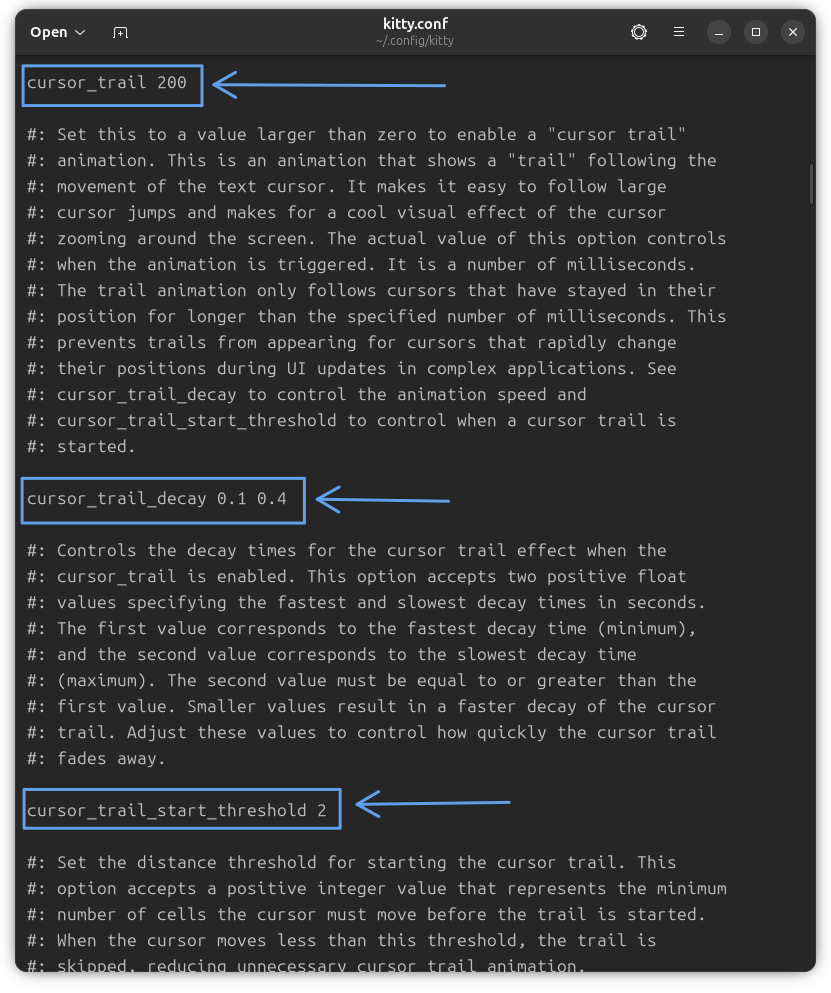
Now, reopen Kitty. You can see a cool cursor trail animation when the cursor is moved significantly.
Showing Cursor Trail Animation
12. Automatic dark and light theme change
Kitty supports automatically changing themes according to the system dark and light mode.
For this, first open Kitty and run:
kitten themesNow, from the list of dark theme, select a dark theme and press enter.
In the next page, press the D key so that this theme is the default theme for the dark mode.
Now, run the kitten themes command again. This time, select a light theme from the list and press enter. In the next screen, press the L key, to make the selected light theme default for light mode.
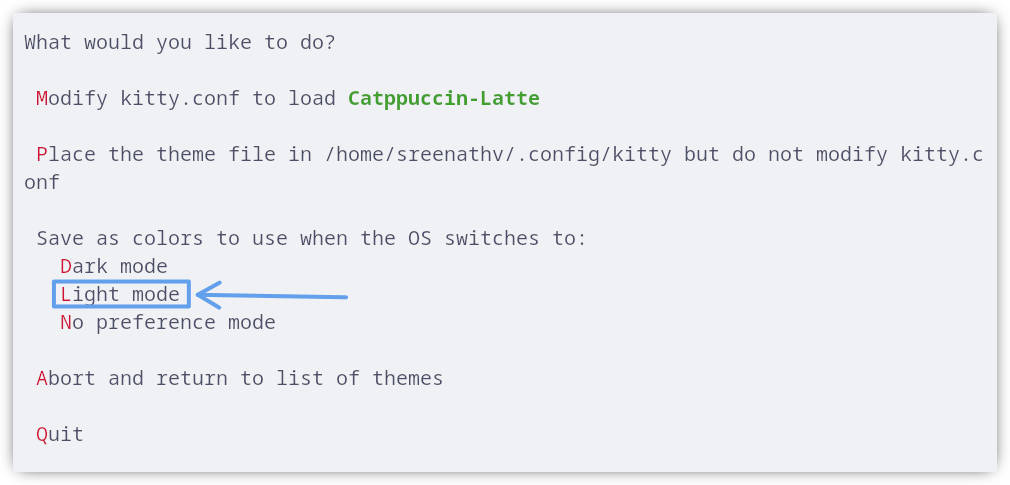
Run kitten themes one more time and select a theme at random, and in the settings screen, press the N key to make it the default in case of no preference.
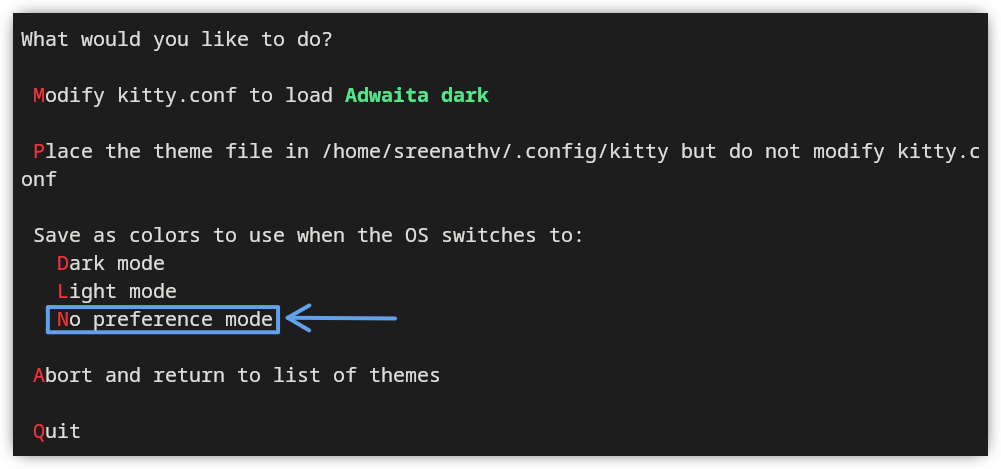
That's it. Now, the Kitty will show the theme based on the current system mode.
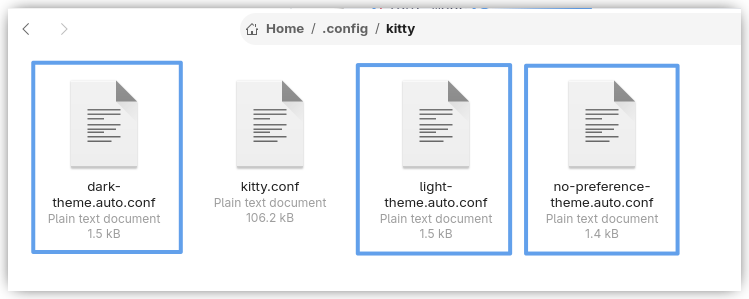
You can take a look at the ~/.config/kitty folder to make sure that the dark, light, and no-pref mode themes are present as config file.
13. Setting a background image
Take the customization to the next level by adding an image as the background for Kitty terminal.
Locate the key background_image in the kitty config file.
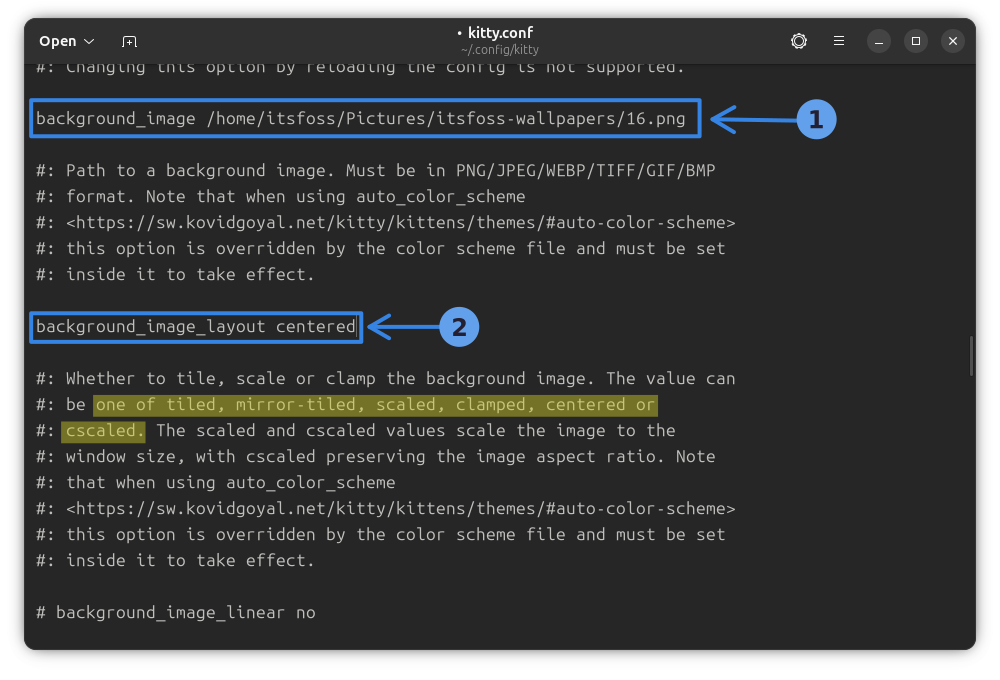
Set its value as path to the image file. Also, change background_image_layout to a required value, as shown in the screenshot above.
And you can see that my kitty terminal now has an entirely different look that matches the theme of It's FOSS. Good for the social media videos.
14. Adding a watermark/logo
Want to spice up the terminal even more? Let's add a small logo as well!
Make sure you have a small image, say 50x50 sized images. This will make things easy. There is a scale option window_logo_scale, but that may require some trial and error.
Now, in the Kitty config, locate the key window_logo_path. Uncomment it and change its value to the path of the logo file.
Also, fix the position of the logo using the window_logo_position key.
Use the window_logo_alpha key to set a fade to the logo.
That's it! Save the config file and reopen Kitty to view the result.
15. Setting mouse actions
You can define what the mouse buttons do in Kitty using the mouse_map option in the Mouse Actions section.
The general syntax is:
mouse_map button-name event-type modes actionFor example, the default middle-click to paste from selection action is set in Kitty using:
mouse_map middle release ungrabbed paste_from_selectionKitty offers a wide range of customization, and I have mentioned some of the cool ones that I use regularly.
There are more power user friendly features, like:
- Keyboard shortcuts mapping.
- Using Kittens to extend the functionality, etc.
Explore the vast possibilities of Kitty by using it.
Conclusion
You saw a glimpse of customized Kitty terminal in our terminal makeover video first.
We discussed internally and decided to do a dedicated tutorial on customizing Kitty. And hence this article.
I understand that customizing the terminal is not everyone's preference but I like changing things to make them look asthetically pleasing. Kitty is my current favorite, even though I am thinking of using Ghostty.
Please let me know in the comments if you like this article or if you notice any issues with the config changes.

