

It is time to talk about the most important love-hate relationship that has ever been. It is Instagram and... you.
Instagram has become irreplaceable if you're in a spot where you need to reach out to the world to present your work and follow others' in any area, be it art, music, dance, science, tech, modelling, etc. Being one of the biggest platforms, you can't skip out on it if you want to keep up with the world and the lives of your friends. But on the other hand, it is also one of the most distracting apps to exist because of the possibility and addictiveness of doomscrolling your hours into nothingness.
Worry not, because we once again bring you the way to make your life better. The solution, unsurprisingly, lies in the Linux terminal (as most of them do), which will be your next Instagram Client.
Well, actually it is not, as you'll read in this article. But before you do that, check out It's FOSS Instagram account as we are killing it with some realli infotaining stuff. 92K+ people are the proof of that.
Behold Instagram-CLI! And it's not from Meta
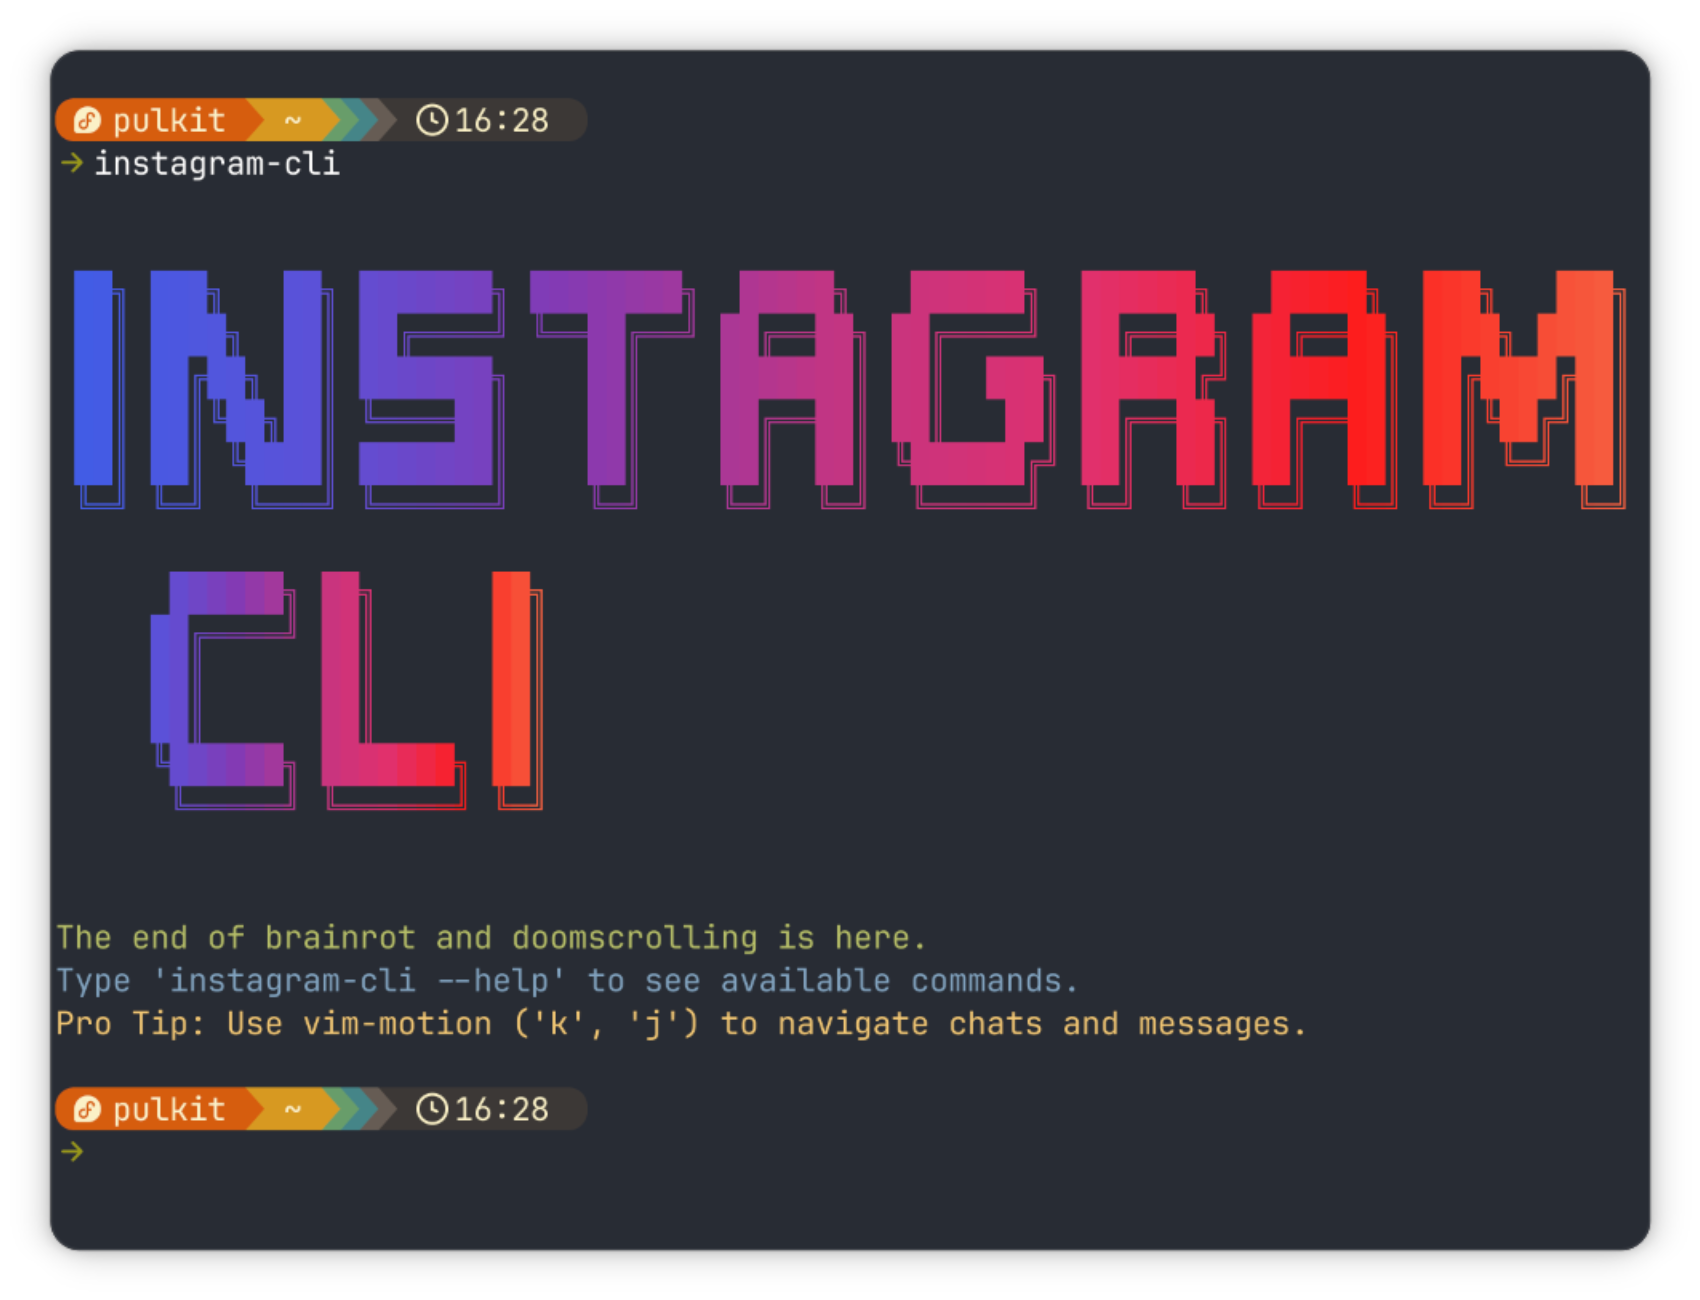
Claiming to be the "ultimate weapon against brainrot", Instagram-CLI provides an exciting option to use Instagram through your terminal. Said mission is achieved by limiting possible actions to only three things: checking your messages, your notifications, and your feed (consisting only of the accounts that you have followed).
Sliding into the DMs via CLI
The command to access the chats is:
instagram-cli chatThe interface of which looks like this:
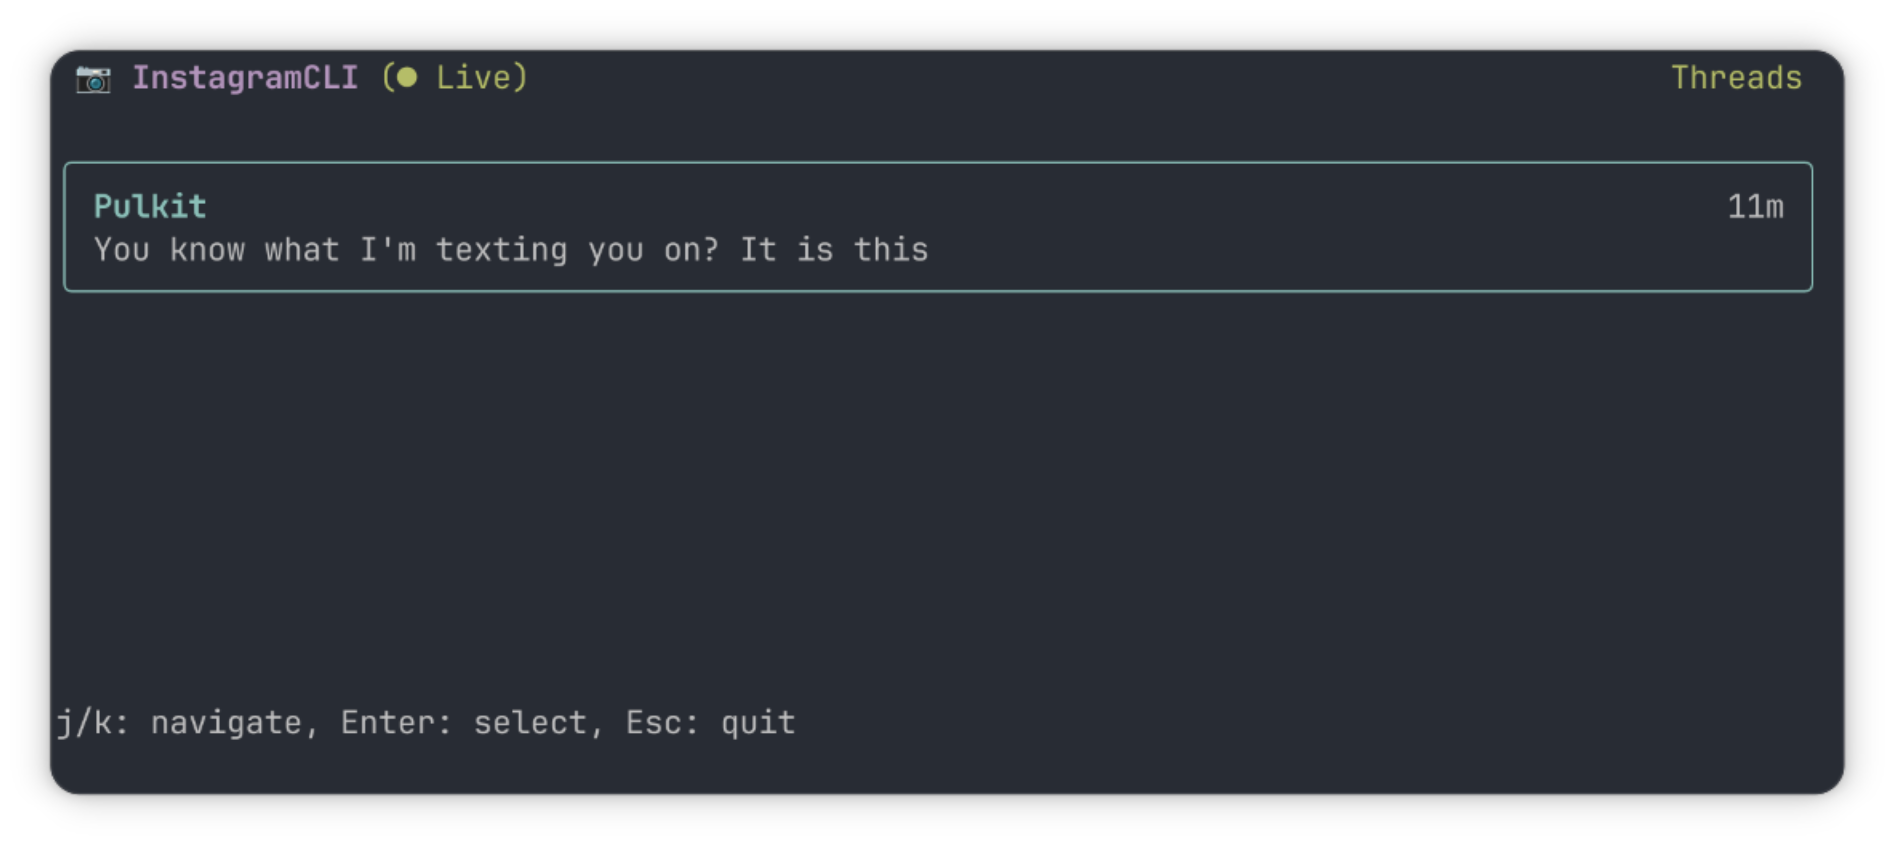
The navigation is quite simple. j/k keys to scroll through the accounts you can chat with (J/K to select the absolutely first or the absolutely last chat), when you press Enter to choose the chat you want to access. When chatting with someone, you can obviously just write your texts in the chat-box and hit Enter to reply. But if you either want to reply, react or unsend a message, it all starts with the input:
:selectAfter writing that and pressing Enter, you can navigate through the texts using j/k keys (again, J/K to select the absolutely first or the absolutely last text) and select one for an action. To send a reply saying "You have been replied to.", the input will look like:
:reply You have been replied to.To embed an emoji in a normal text, you can do it as so:
You have been replied to :thumbsup:To unsend the message, the input given is:
:unsendAnd to react, say with a thumbs-up emoji, the input will look like:
:react thumbsupTo mention someone in a group chat, you can use the "@" as usual, and you can even send files using a simple hashtag. It even supports autocomplete after the hashtag, similar to how it would on the terminal itself. So to send a file called "test.png" that is in your Downloads directory alongside a message, simply write:
This is image testing #Downloads/test.pngIt does take a while for a file to be sent, though. I have demonstrated the process in this video:
However, to send the file on its own, you can use:
:upload #Downloads/test.pngGotta check the feed
To access your feed, you can simply enter:
instagram-cli feedThis brings up your feed, where you can scroll through the posts using j/k and through the carousel of a single post using h/l. If you do it for the first time without much configuration, the images in your feed will look something like this:
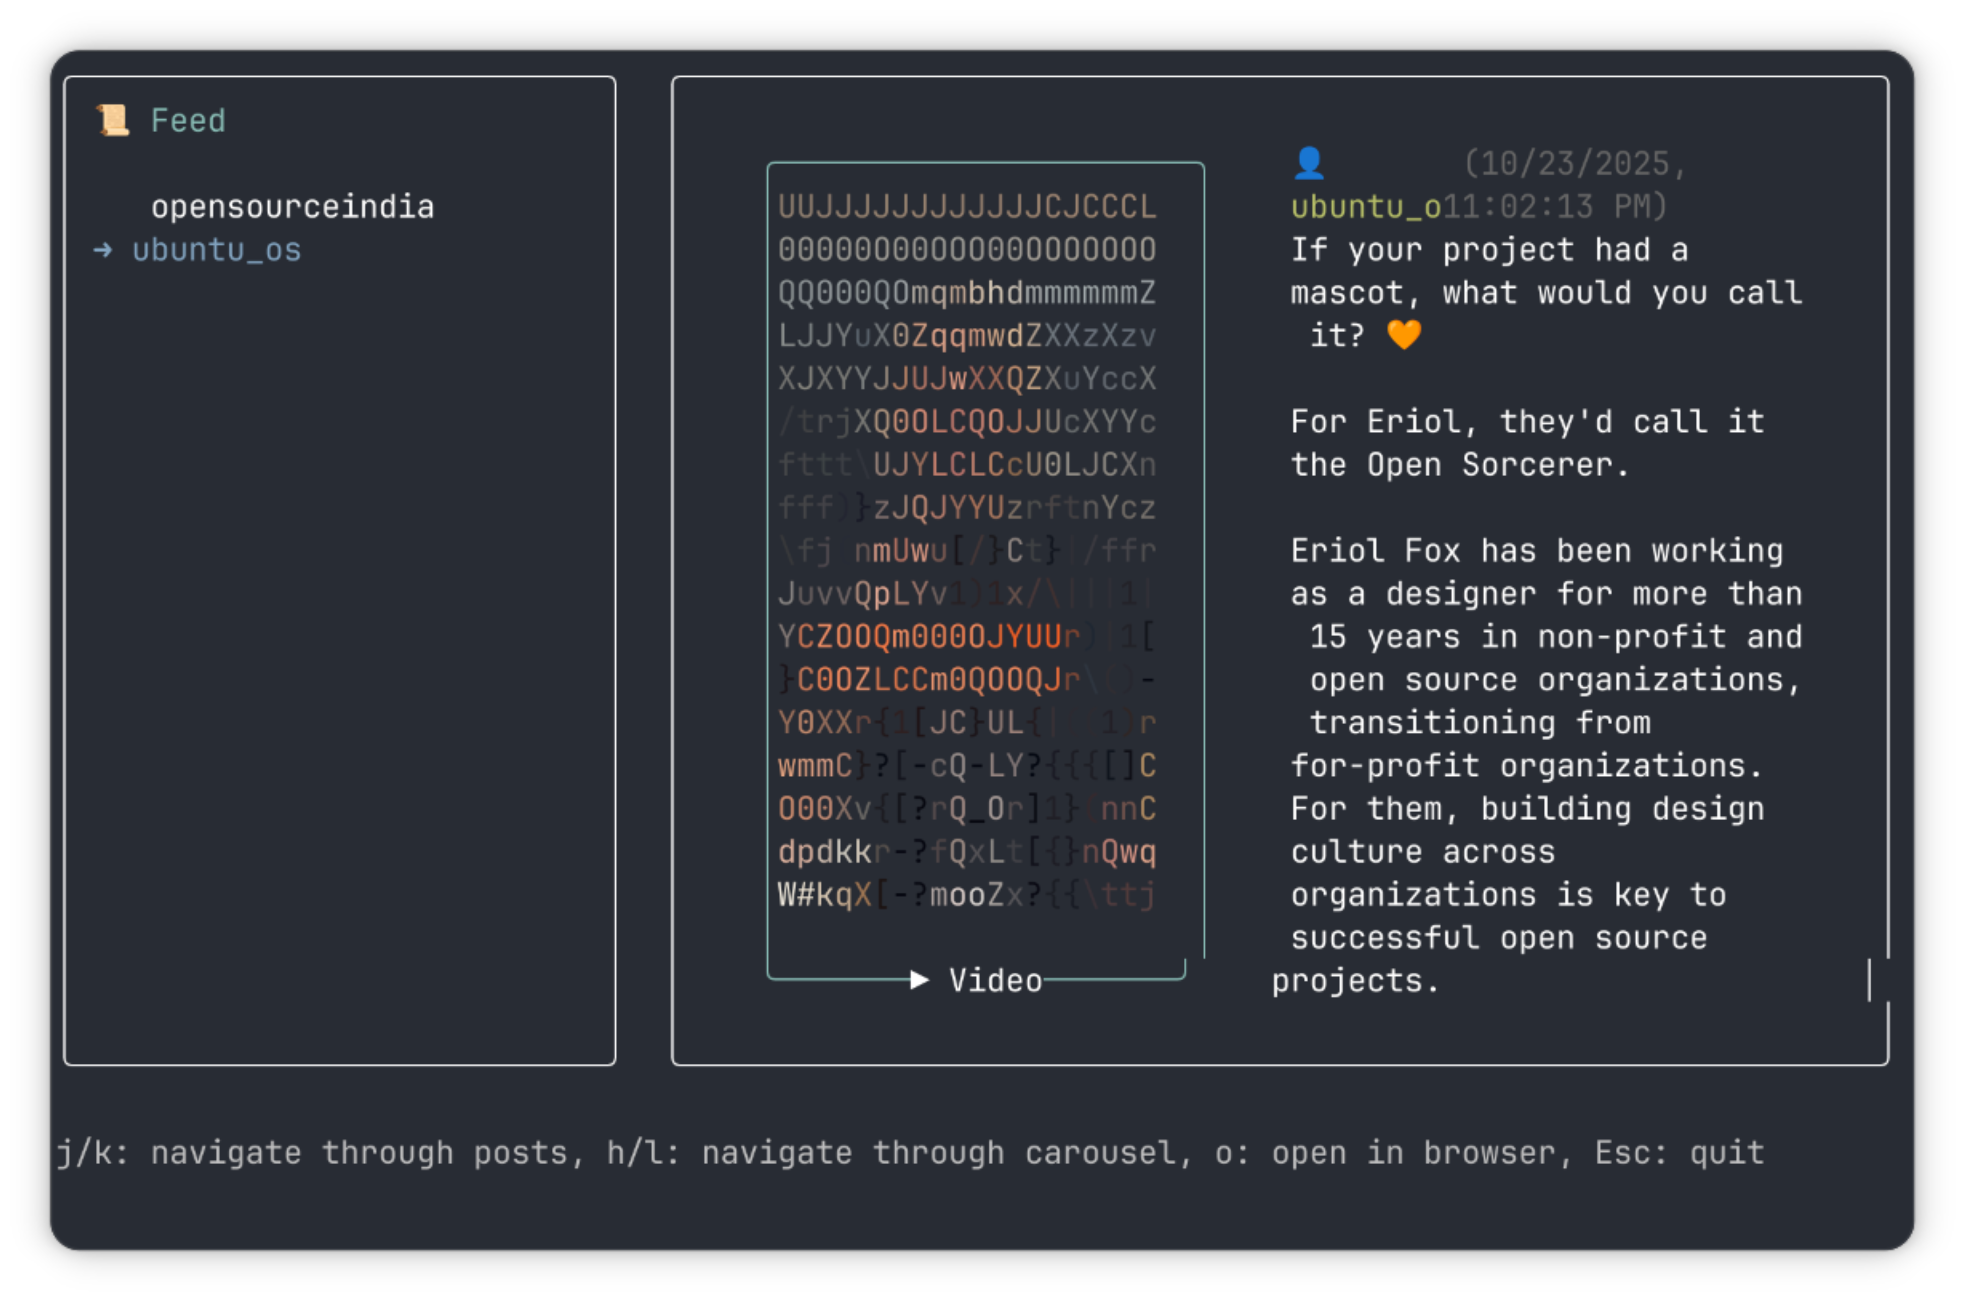
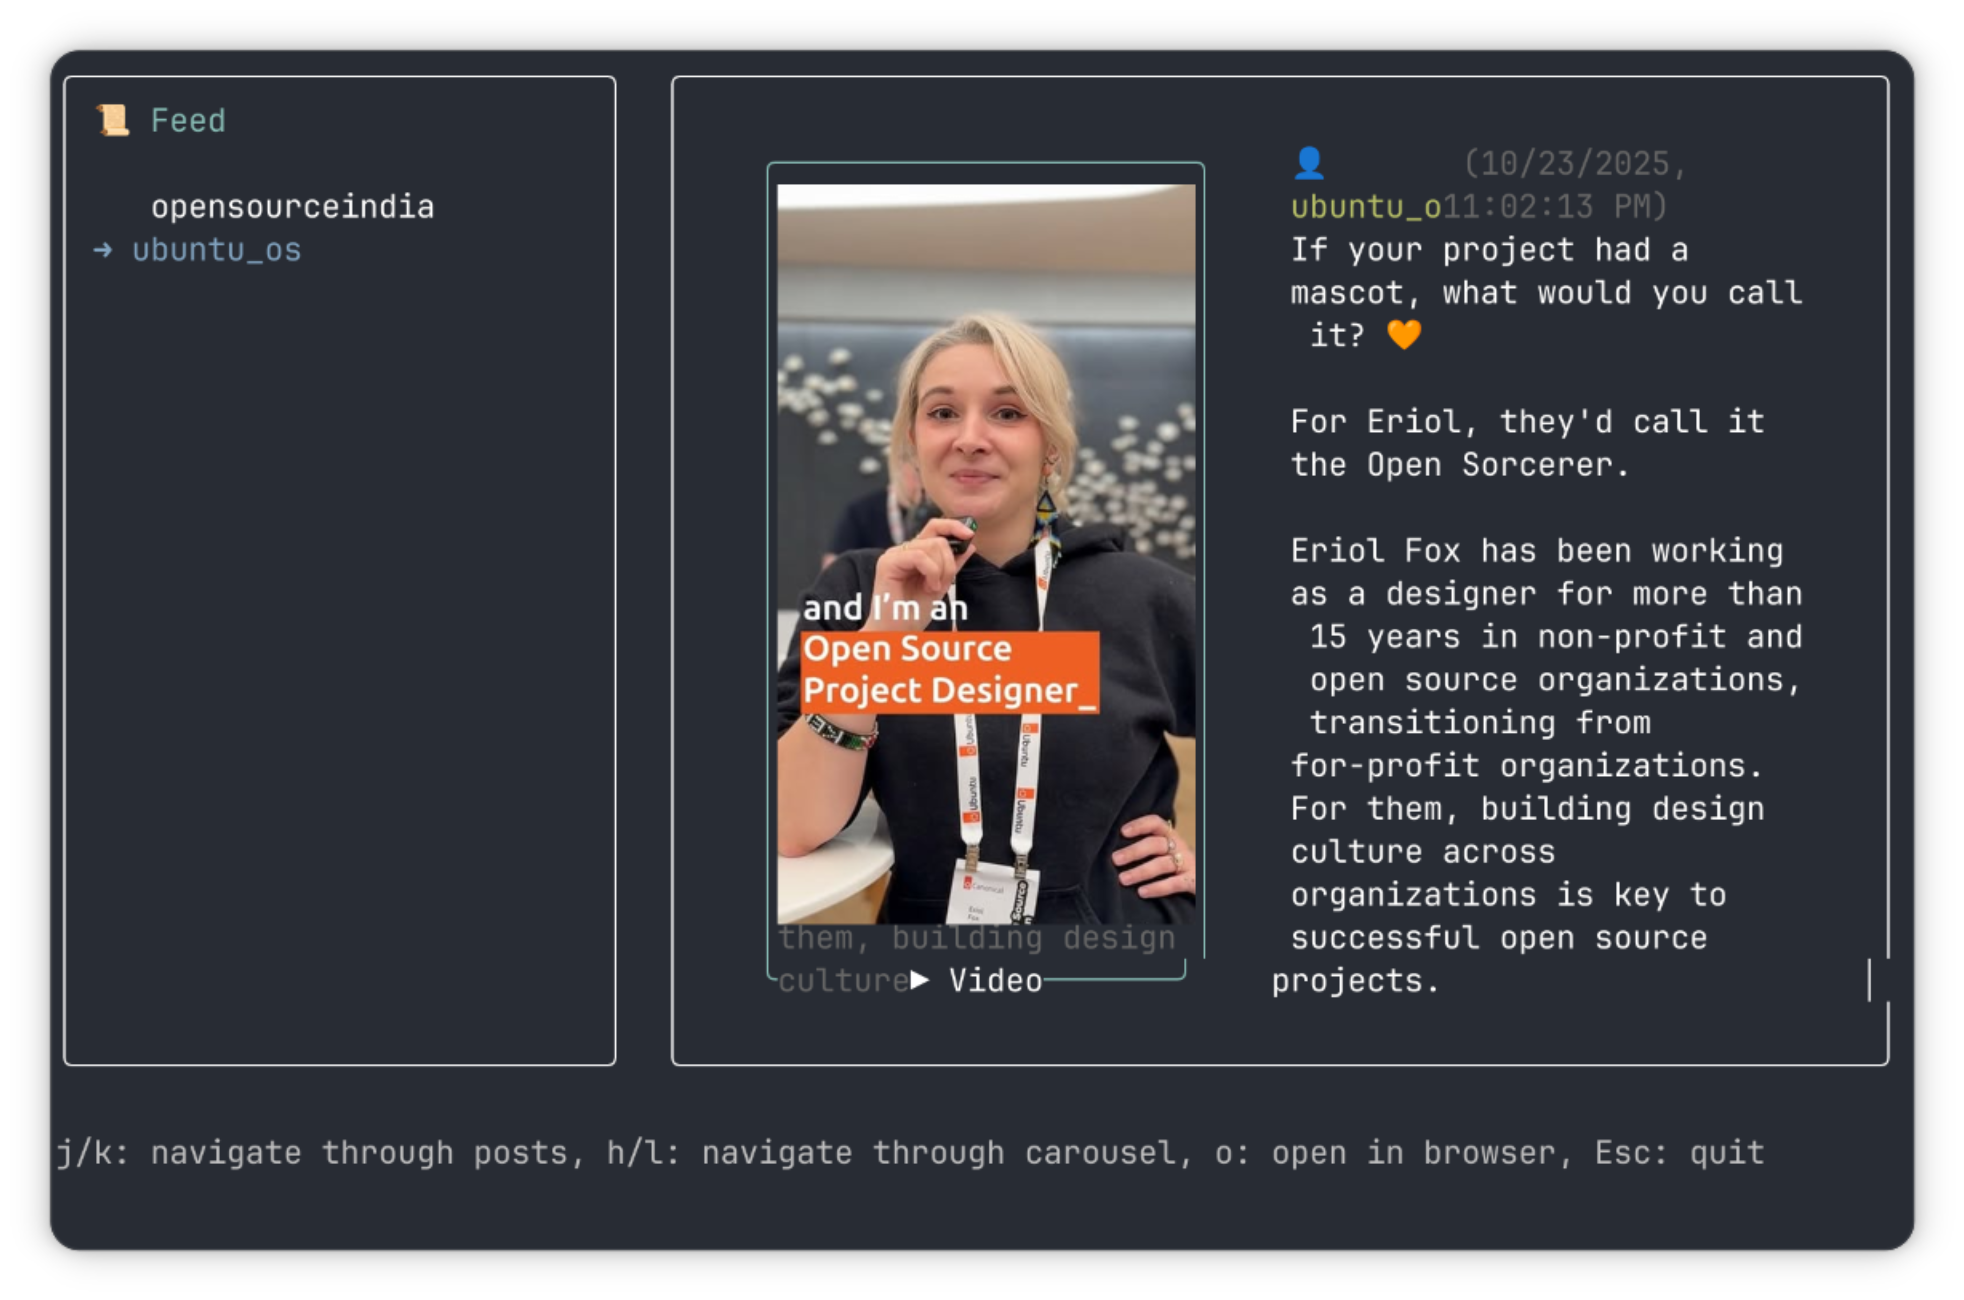
The graphics by default are ASCII, and that might not be something you want, considering the fact that nothing is quite clear (however cool it may be). So how do you fix that? You switch the image mode with the following command:
instagram-cli config image.protocol kittyNow, the graphical media will look... well, graphical:
If it doesn't work, try using a terminal like Ghostty or Kitty.
If you want to switch back, replace the "kitty" in the command with "ascii". In total, there are 6 imaging options Instagram-CLI provides: "ascii", "halfBlock", "braille", "kitty", "iterm2", "sixel", or "", but knowing only these two might suffice.
Notify my terminal
This simply requires one command, and there isn't much more to it:
instagram-cli notify
Authenticating in the CLI
Logging in can be done with the simple username-password combination after entering the following command:
instagram-cli auth login --usernameYou can log into multiple accounts in this manner, which you can switch among through this command:
instagram-cli auth switch <username>In case you forget what account is currently active, you can ask it who you are:
instagram-cli auth whoamiAnd to finally log out of your currently active account, simply enter:
instagram-cli auth logoutConfig if you can
Since it offers a bunch of configuration options, it only makes sense to have a command that can list them all at once so you can keep a track of it all:
instagram-cli configAny of the values can be changed with:
instagram-cli config <key> <value>But if you want to change multiple keys at once, you can simply edit the config file as a text file at once:
instagram-cli config editTry it (but perhaps not risking your main account)
The recommended method for installation of the program uses npm, so make sure that you have that preinstalled on your system. If not, you can install it using:
sudo curl -qL https://www.npmjs.com/install.sh | shAnd then to install Instagram-CLI on your system, enter:
sudo npm install -g @i7m/instagram-cliAlternatively, if you want to install it without npm, you can use Python:
sudo pip3 install instagram-cli💡 Bonus Banner
If you want to recreate the banner at the beginning of the article (perhaps to show off the capabilities of your terminal), enter the command without any other parameters:
instagram-cliWrapping Up
Instagram-CLI is an interesting initiative because of the way it reduces your screentime while still giving you an option to socialize. Not to forget, it helps you avoid Meta's trackers. Helps you simultaneously improve your social media habits while also managing your FOMO.
The project is still very clearly quite rough around the edges, which has more to do with Meta's policies than the developers themselves. It is a hit or miss, but it might just work for your account, so give it a shot. But if you see your account flagged, you know what you got to do.
Let us know what you think about this it in the comments. Cheers!

