
Here’s the scenario you may come across sooner or later.
You installed one or more operating systems in VirtualBox. While creating those virtual operating systems, you also created virtual hard disks for them in VirtualBox.
You specified the maximum size of the virtual disk to say 15 or 20 GB, but now after using it for some time, you realize that your virtual machine is running out of space.
While there are ways to free up disk space on Ubuntu and other operating systems, a more robust way of handling the situation is to increase the disk size of your virtual machines created in VirtualBox.
Yes, you can enlarge the virtual hard disk in VirtualBox even after creation.
How to enlarge VirtualBox disk size
I will show you how to resize disk in VirtualBox graphically and via command line (for Linux geeks or experienced users).
Both methods are easy and straightforward. The steps are the same for Linux and Windows.
Method 1: Using the Virtual Media Manager in VirtualBox
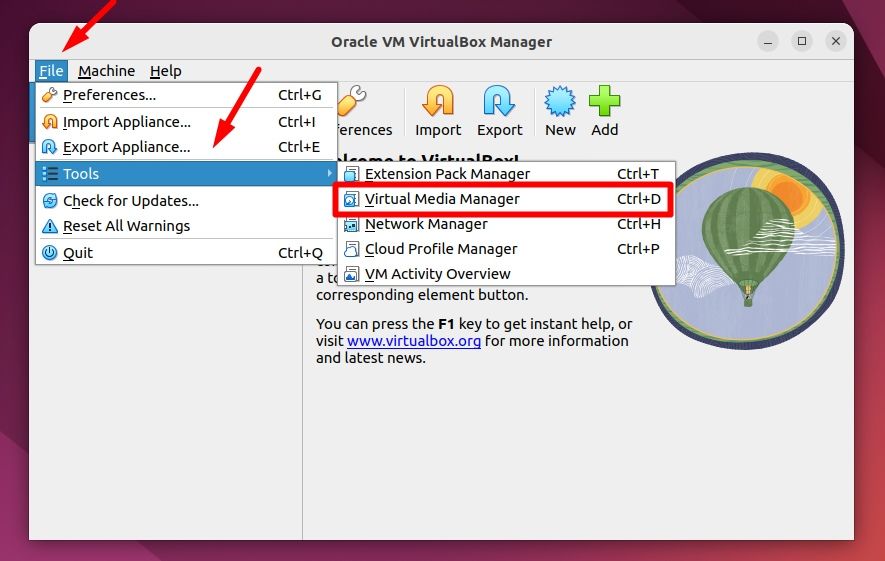
VirtualBox 6 added a graphical option for resizing virtual disks. You can find it on the file menu of VirtualBox window.
Go to File→ Tools → Virtual Media Manager:
Select one of the hard disks from the list that you want to modify, click on Properties from the top, or double-click on the virtual disk name.
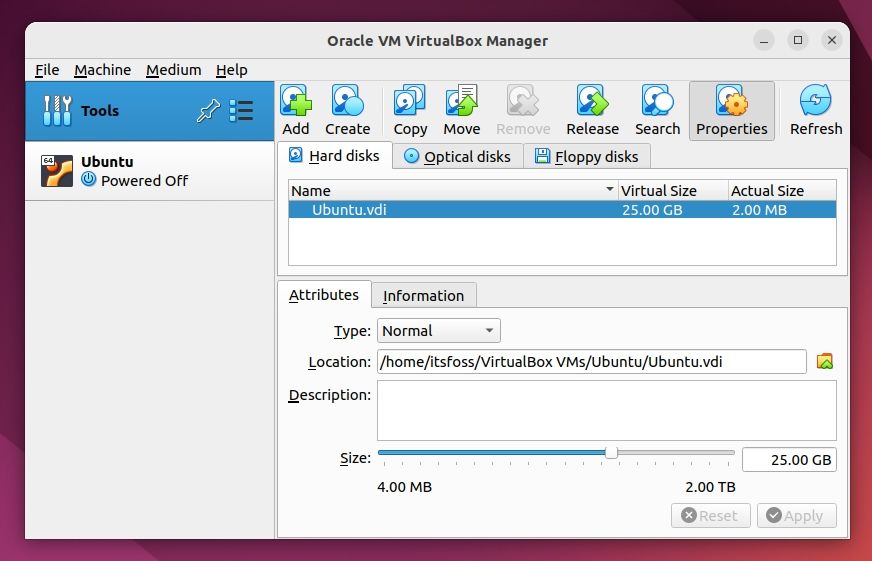
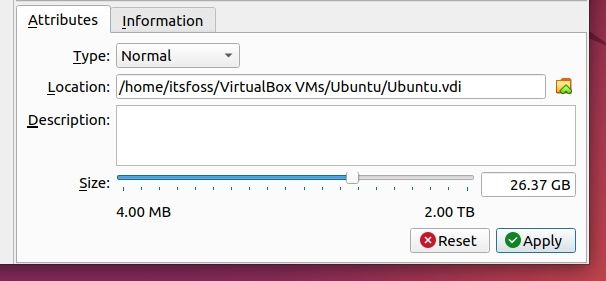
Here, you can drag the slider for "Size" or type the disk size name in the field where you see 25 GB.
Once done, you just have to hit “Apply” as shown below.
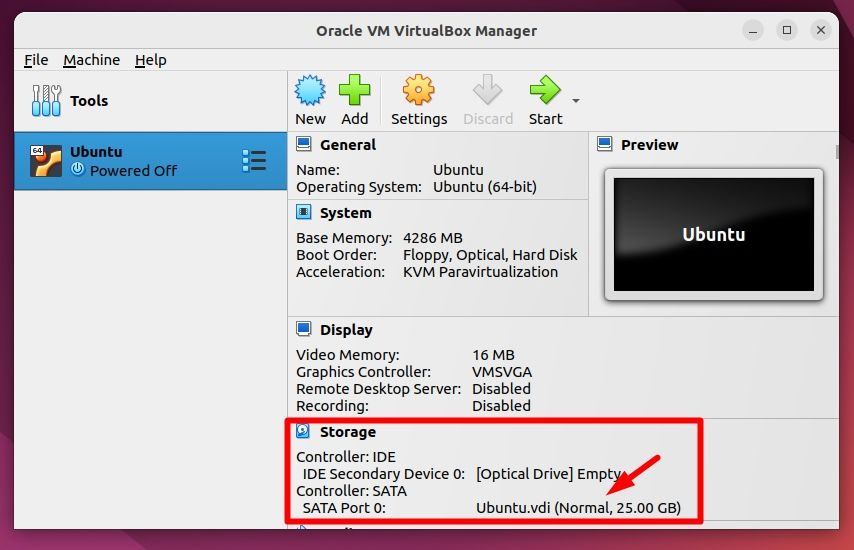
If you are not sure of the name, you can go to the list of virtual machines, and check the information under the "Storage" tab to check.
Keep in mind that though you increased the size of your virtual disk, the actual partition size remains the same if your space is dynamically allocated.
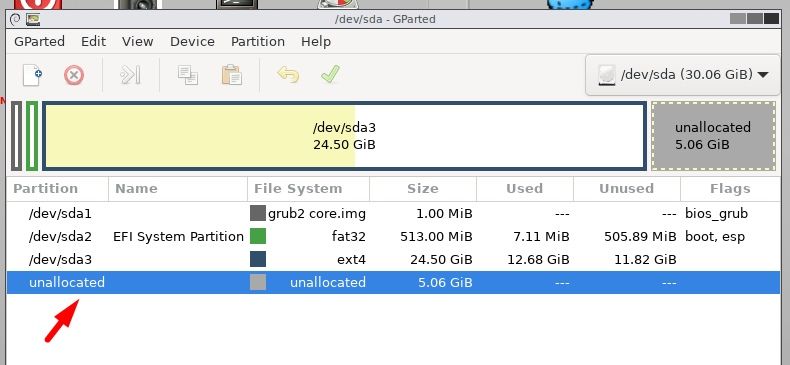
For that, you can download GParted ISO, mount it as an optical drive from the virtual manager settings to find the extra space as “unallocated” space.
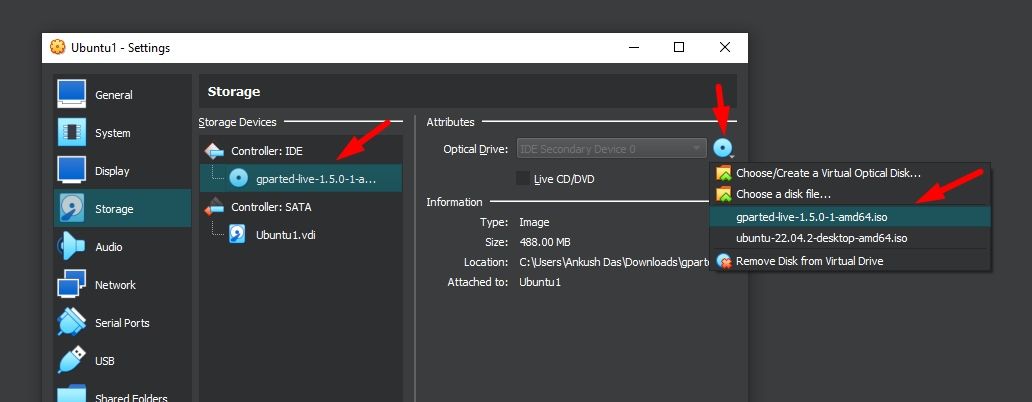
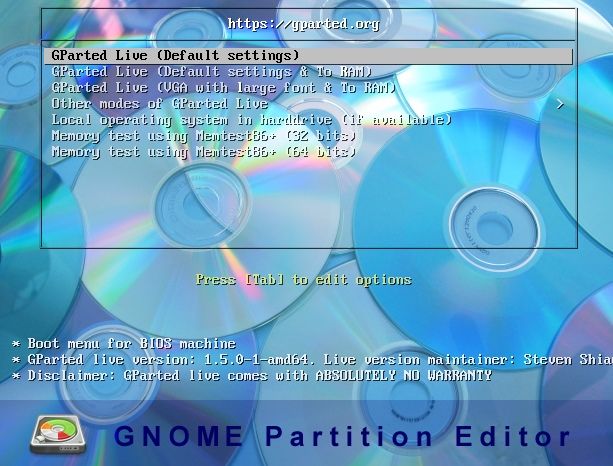
By default, when you add the ISO as an optical drive, and re-launch the VM, it will boot into the GParted partition editor.
You can expand the current partition using the unallocated space or choose to make a new one if you like.
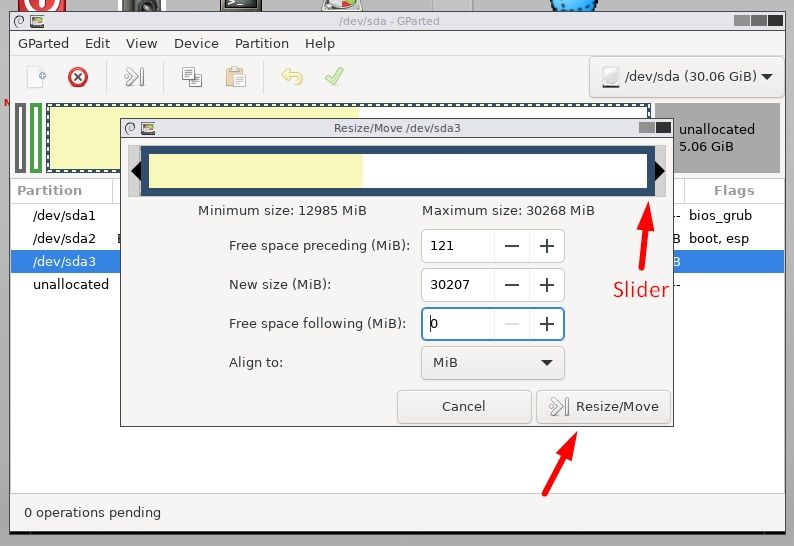
Here's how it looks like when you use the slider on top of the window (as shown in the screenshot below) to allocate all the free space and expand the current partition. Just hit "Resize" and it will be done.
Method 2: Increase VirtualBox disk space using Linux command line
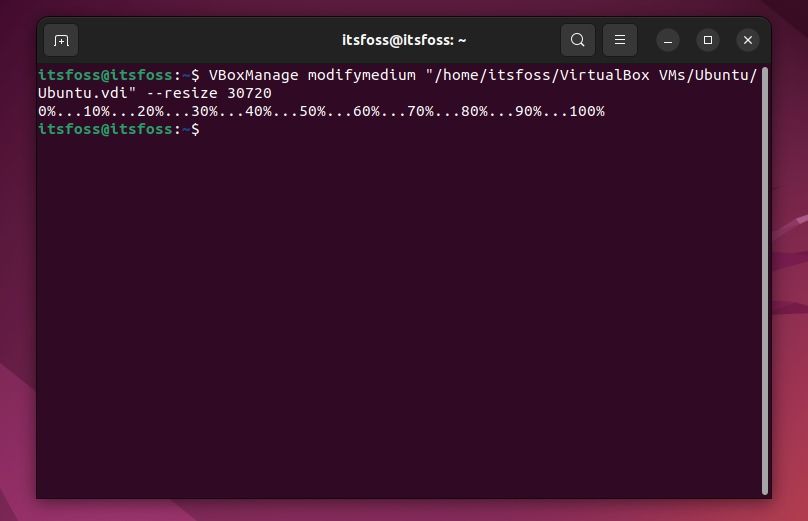
If you are using a Linux operating system as a host, open the terminal and type the following command to resize VDI:
VBoxManage modifymedium "/path_to_vdi_file" --resize <megabytes>You can convert Gigabytes to Megabytes by simply multiplying 1000 (for deci.
The resize process should finish right after you click the enter button to execute the command.
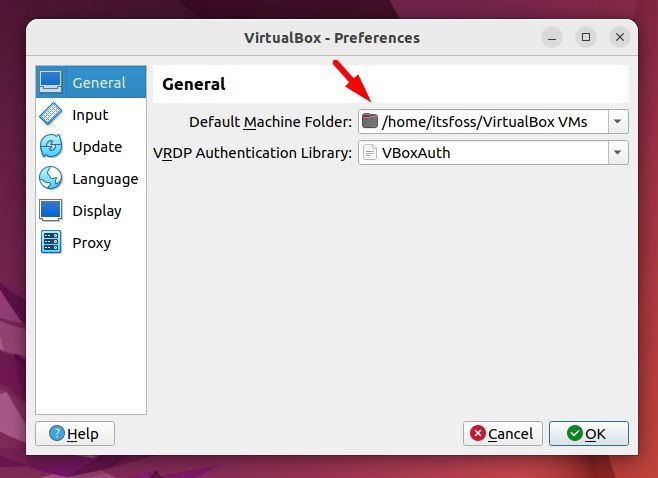
If you are not sure where your virtual machines are saved, you can find the default location from the VirtualBox home page by clicking on Files → Preferences or by using the keyboard shortcut Ctrl+G.
Suggested Read 📖

Conclusion
Personally, I prefer to use the terminal on every Linux distribution that I use for expanding disk, the graphical option is a very handy addition to the latest VirtualBox release.
This is an easy and quick tip but a great addition to VirtualBox fundamentals.


