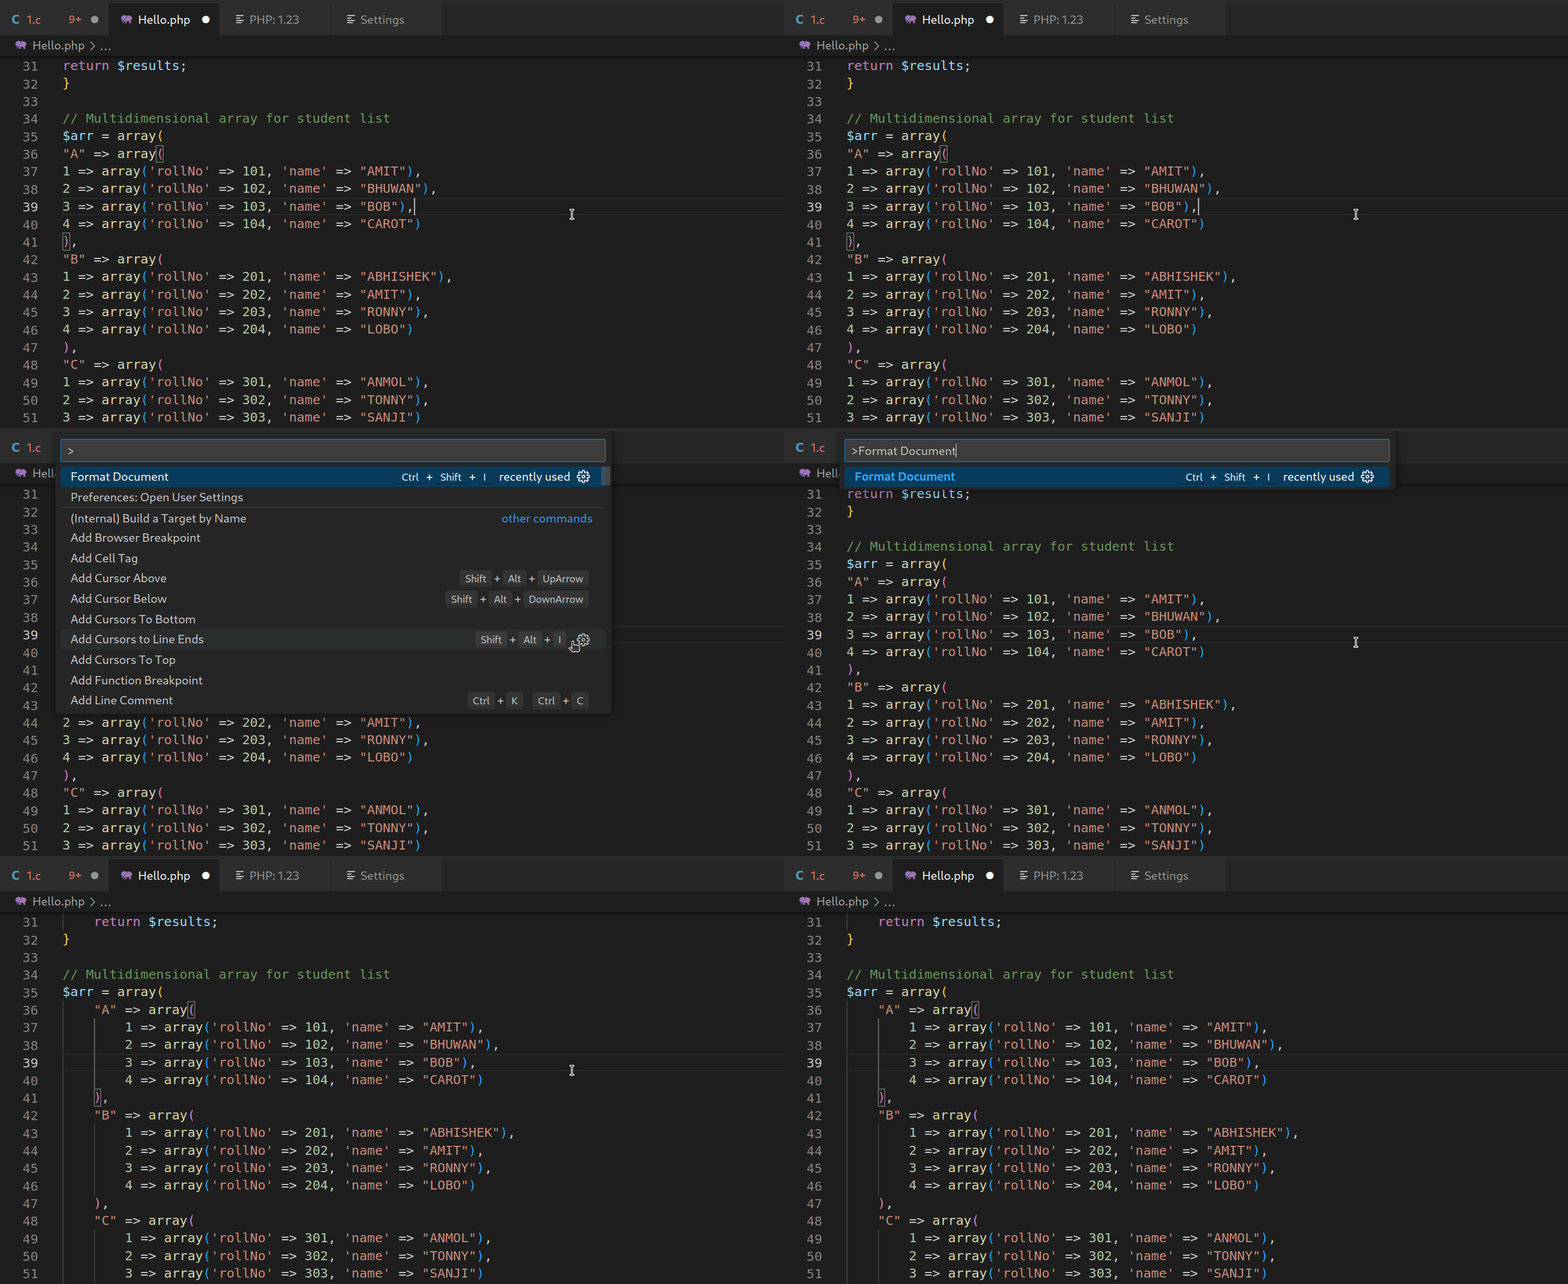
The indent in code refers to the space you have at the beginning of the code line.
If you want to indent multiple lines at once, select them and press Ctrl+] to add the indent or Ctrl+[ to remove it. Pressing the same keys again will add (or move back) indent again.
But this is the manual method. You have to identify and select the lines by yourself.
Like other code editors and IDEs, VS Code allows you to indent your code automatically.
You can set tabs or spaces or whatever you prefer for the indentation.
Sounds good? Let’s see how to do it.
Enable automatic indent in VS Code
There are multiple ways you can achieve this. In this guide, I will show you three ways to indent your code in visual studio code automatically.
Method 1: Configuring global user settings
You can access the global user settings via the command pallet. Use Ctrl + Shift + P to open the command pallet and search for Open User Settings and hit enter:

It will open up the settings. From there, you will have to search for Auto Indent and choose Full as an indent option in Editor: Auto Indent:

And the automatic indent is enabled and applied to every opened file in VSCode.
Method 2: Using linter or formatter for automatic indent in VS Code
In this method, you will be required to add extensions such as a code formatter or linter to have the desired results.
Linters will identify the errors in code, whereas formatters will only format your code to make it more readable. You can search for code formatters in the VSCode marketplace specific to your programming language.
And here are some of my favorite code formatters and linters for widely popular languages:
- C/C++: For C and C++ programming language.
- PHP: For PHP.
- markdownlint: For markdown files.
- Python: For Python programming language.
- ESLint: For JSON and javascript.
- Beautify: For javascript, JSON, CSS, Sass, and HTML.
Once you are done adding a formatter for your preferred programming language, you can press Ctrl _ Shift + I to format the code.
Similarly, you can use do the same using the command pallet. Press Ctrl + Shift + P to and search for Format document, and hit enter.

Method 3: Enable auto indent while saving the file
VSCode allows you to format your code while saving it with a little tweak. Let me show you how.
Press Ctrl + , and it will open the user settings prompt. From there, search for Format On Save:

And from now on, your files will add an indent automatically when you save them.
Wrapping Up
Knowing and practicing the keyboard shortcuts help you work faster. Here are some interesting ones you should know.

In this guide, I explained how you could add an indent automatically in VSCode. I would recommend using the second method for better flexibility.
I hope you will find this guide helpful and if you have any queries or suggestions, let me know in the comments.


