
Like many other Linux users, I use a desktop and unlike a laptop, you don't get a camera and mic pre-installed.
And you have to invest in a premium webcam to match the quality of your modern smartphone.
Well, in this tutorial, I will walk you through step-by-step how you can use your phone as a mic and camera which can be used in online meetings.
Use the phone's camera and mic in Ubuntu
Here, I will guide you through the following:
- Installation of OBS (if you haven't)
- Generate invite through
vdo.ninja - Setup virtual audio cable (for audio output)
- Configure OBS to redirect audio and video from
vdo.ninja
So let's start with the first one.
1. Install OBS in Ubuntu
OBS (Open Broadcaster Software) is one of the best software for recording and streaming videos and most streamers use OBS to live stream on digital platforms.
The good thing is OBS is available in the default repository of Ubuntu and can be installed using the following command:
sudo apt install obs-studio2. Generate an invite through VDO.ninja
In this section, I will show you how you can generate an invite to stream your audio and video over vdo.ninja and how you can start streaming from your phone.
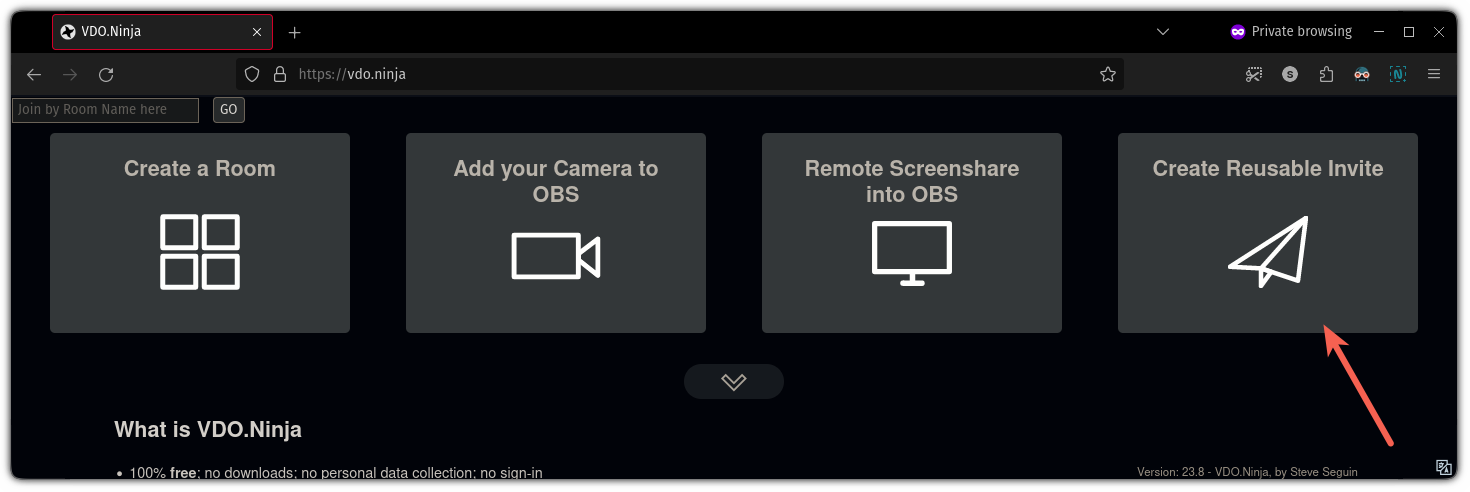
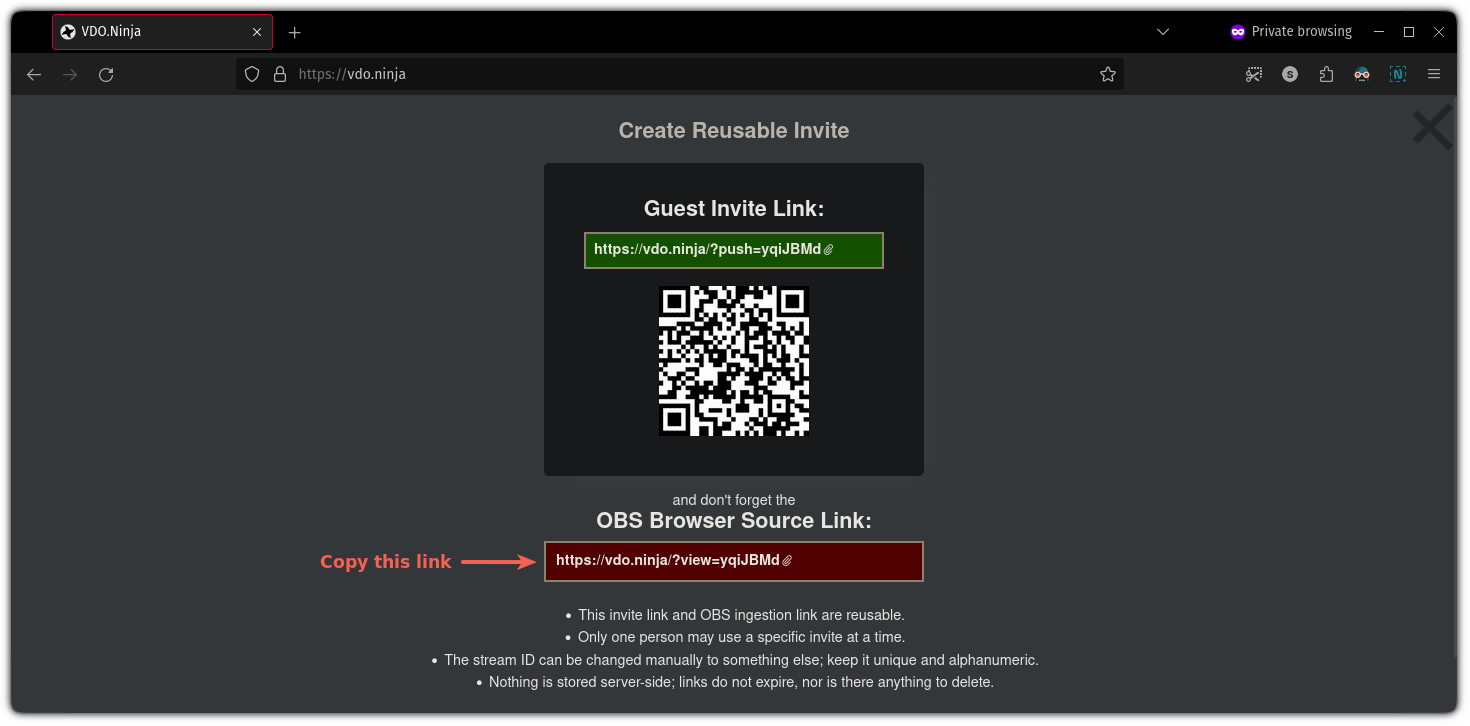
First, go to VDO.ninja and click on Create Reusable Invite:
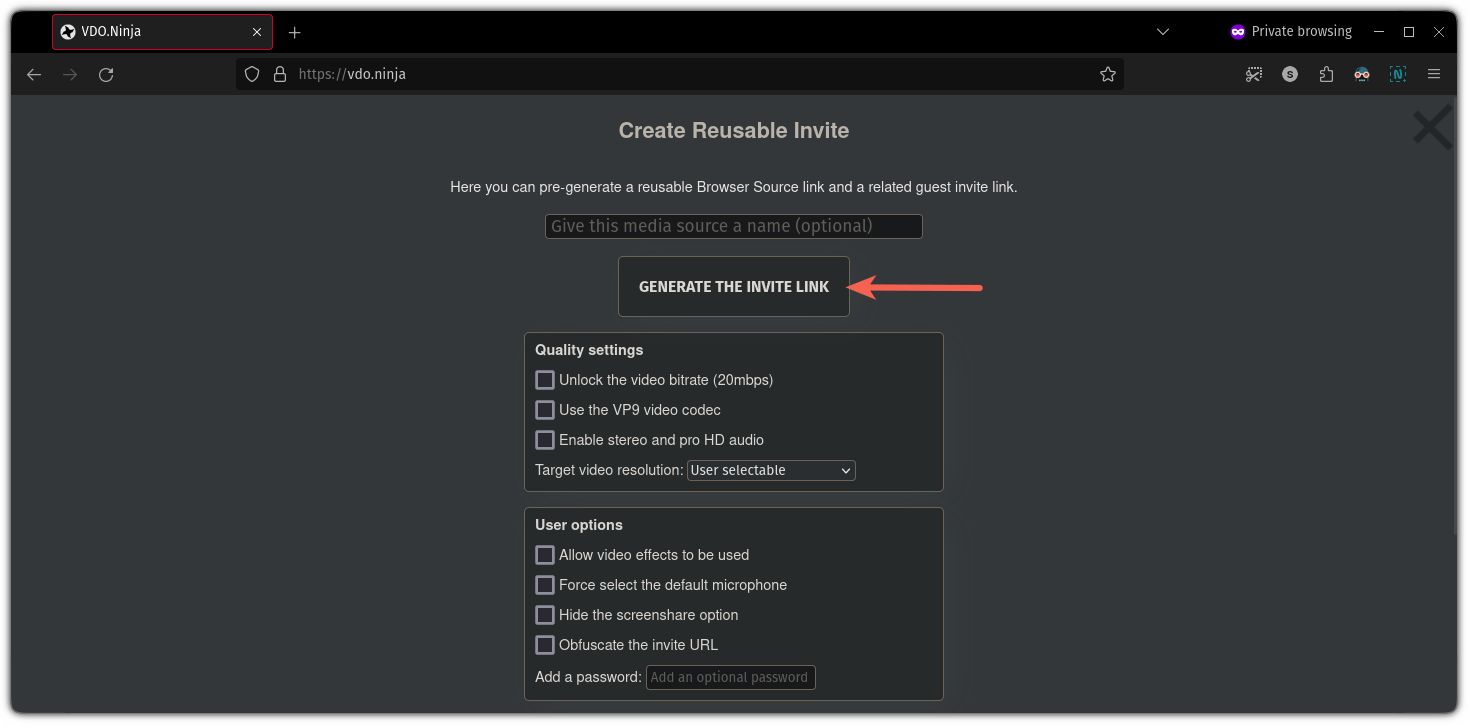
It will show you multiple options such as quality settings, adding video effects, etc. I recommend using the default settings as you may need faster processing and more bandwidth for high-quality videos:
And to create a link, all you have to do is click on GENERATE THE INVITE LINK button:
And it will show you the following:
- A QR code that you have to scan through your phone (alternatively, you can also use the link).
- Link for the OBS.
I will cover the OBS part later on this tutorial so please don't close the window.
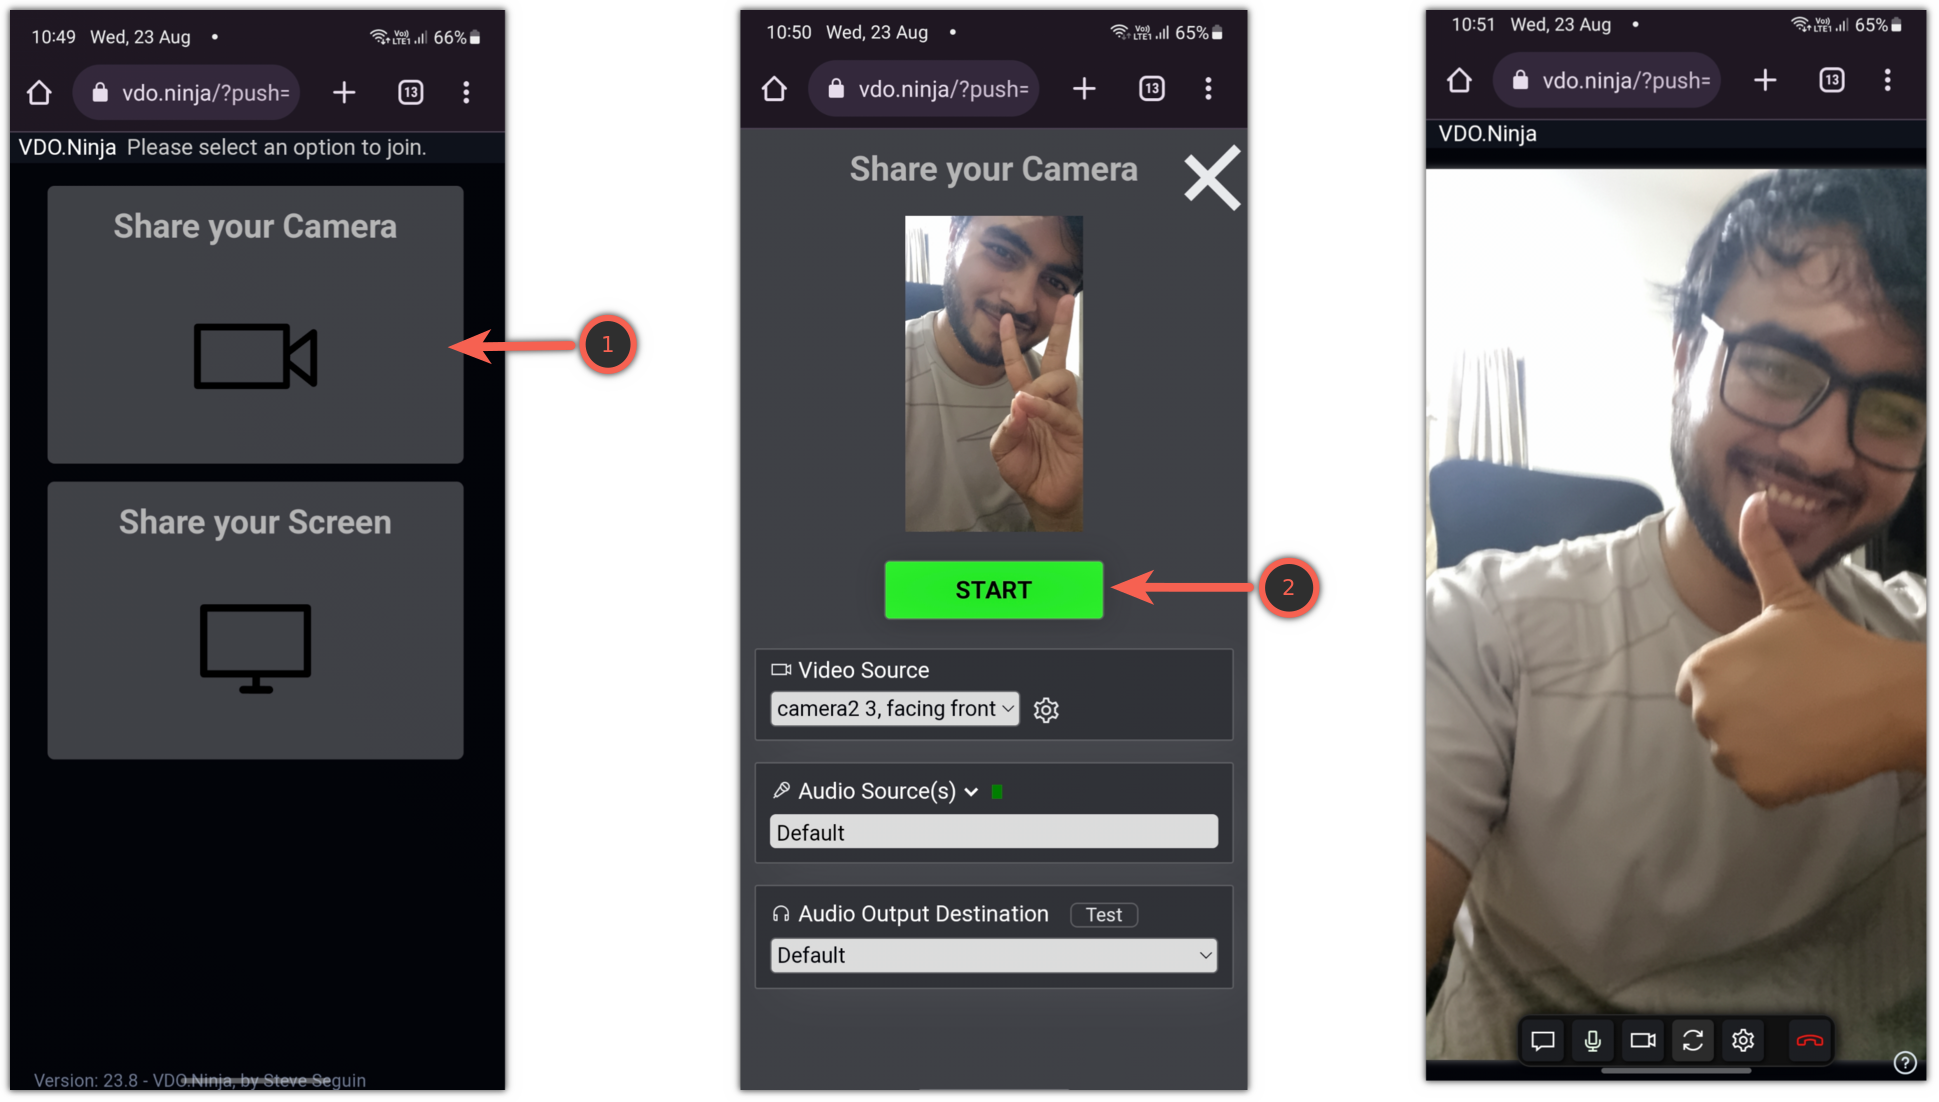
First, scan the QR code from your smartphone and it will redirect you to another page of the VDO.ninja where you have to select the following:
- Select
Share your Cameraoption. - You can choose a front or rear camera from the video source (the front will be selected by default).
- Hit the
Startbutton and it will start the streaming on the OBS link.
3. Setup a virtual cable for OBS on Ubuntu
First, let's talk about what is virtual cable and why you need it to use your phone as a camera and mic.
The virtual cable is software used for transfering audio streams from one application to another.
But the sad part is that it is only available for Windows and macOS.
Hmmmm???? So why am I writing this?
The answer is simple. I found a workaround to this where you can have the same functionality as a virtual cable for the current session.
To set up a virtual cable, first, you have to load the module-null-sink module using the following command:
pactl load-module module-null-sink sink_name=SourceAnd then, execute the given command to create a virtual audio source named VirtualMic:
pactl load-module module-virtual-source source_name=VirtualMic master=Source.monitorBoth commands will return some numbers that you don't have to worry about.
Now, go to the system settings, and there you will find settings for sound:
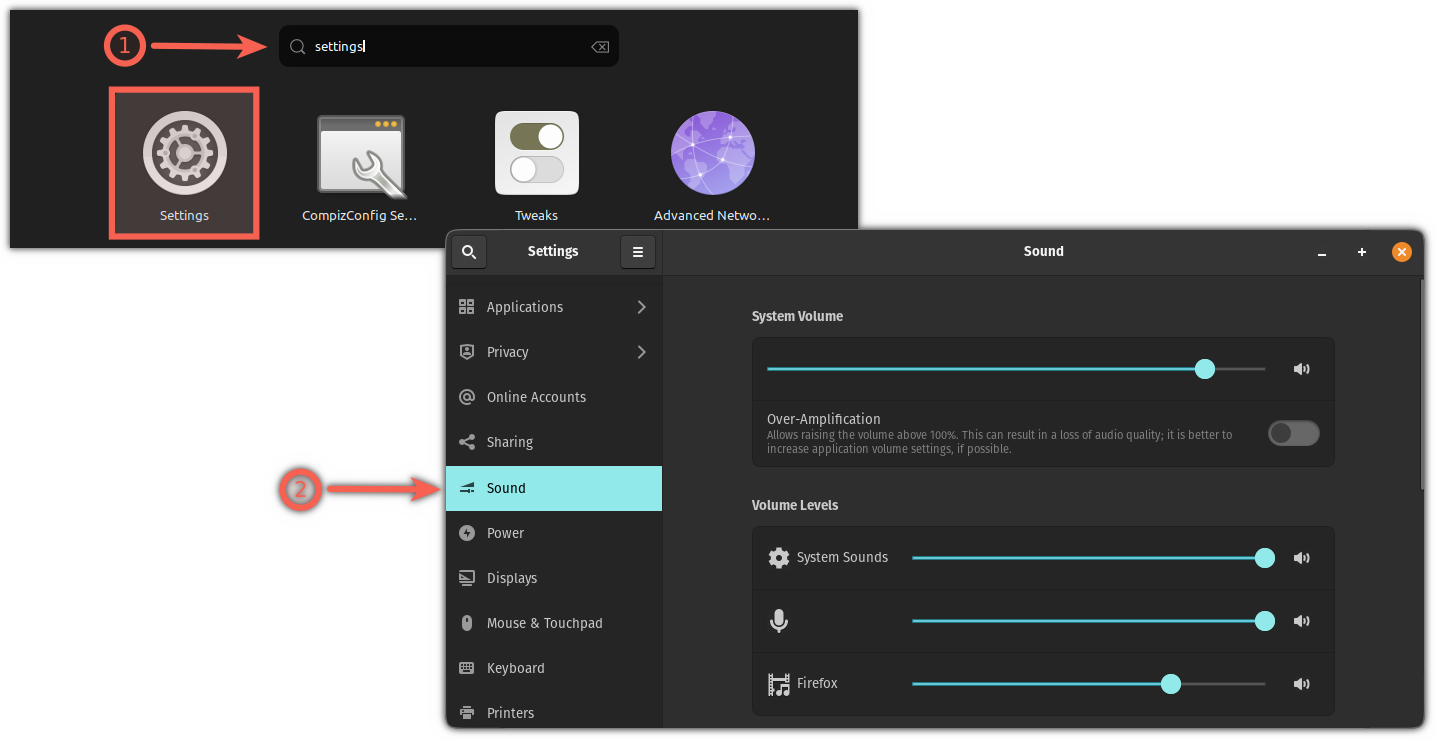
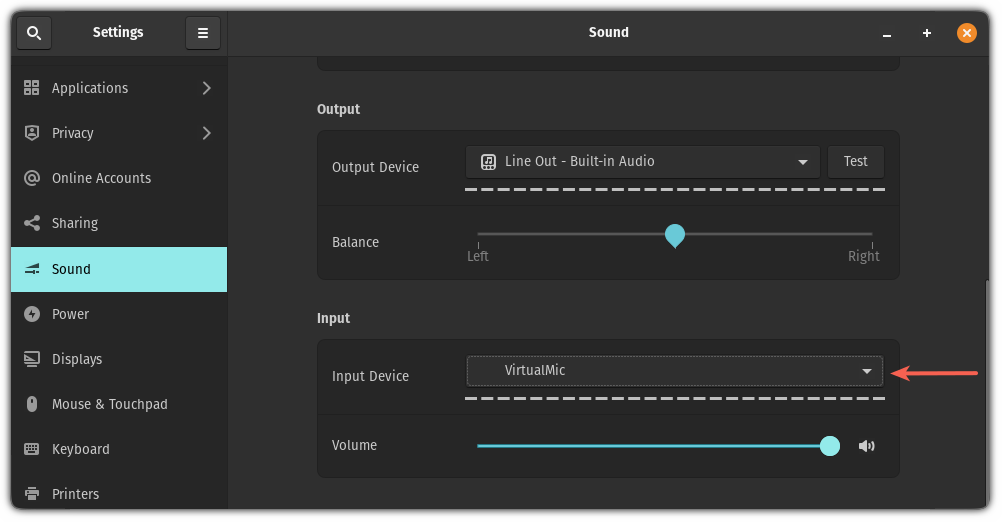
Next, go to the Input section and there, you will find the option to choose an input device.
Chose VirtualMic as an input device:
That's it!
But as I said earlier, once you reboot the effect of virtual audio will be flushed and if you regularly want to use your phone as a camera and mic, it can be inconvenient.
To cater to this, you can create an alias for those two commands. For example, you can create aliases for both commands: vc1 and vc2.
Once done, you can execute both commands at once like this: vc1 && vc2.
4. Setup OBS to stream audio and video from the phone
First, open the VDO.ninja tab that I told you not to close and copy the OBS link:
Once copied, open OBS, and under the Sources section, you will find a ➕ (plus) button. Click that button and select Browser.
It will open a little prompt to create/select a source. Simply press the OK button:
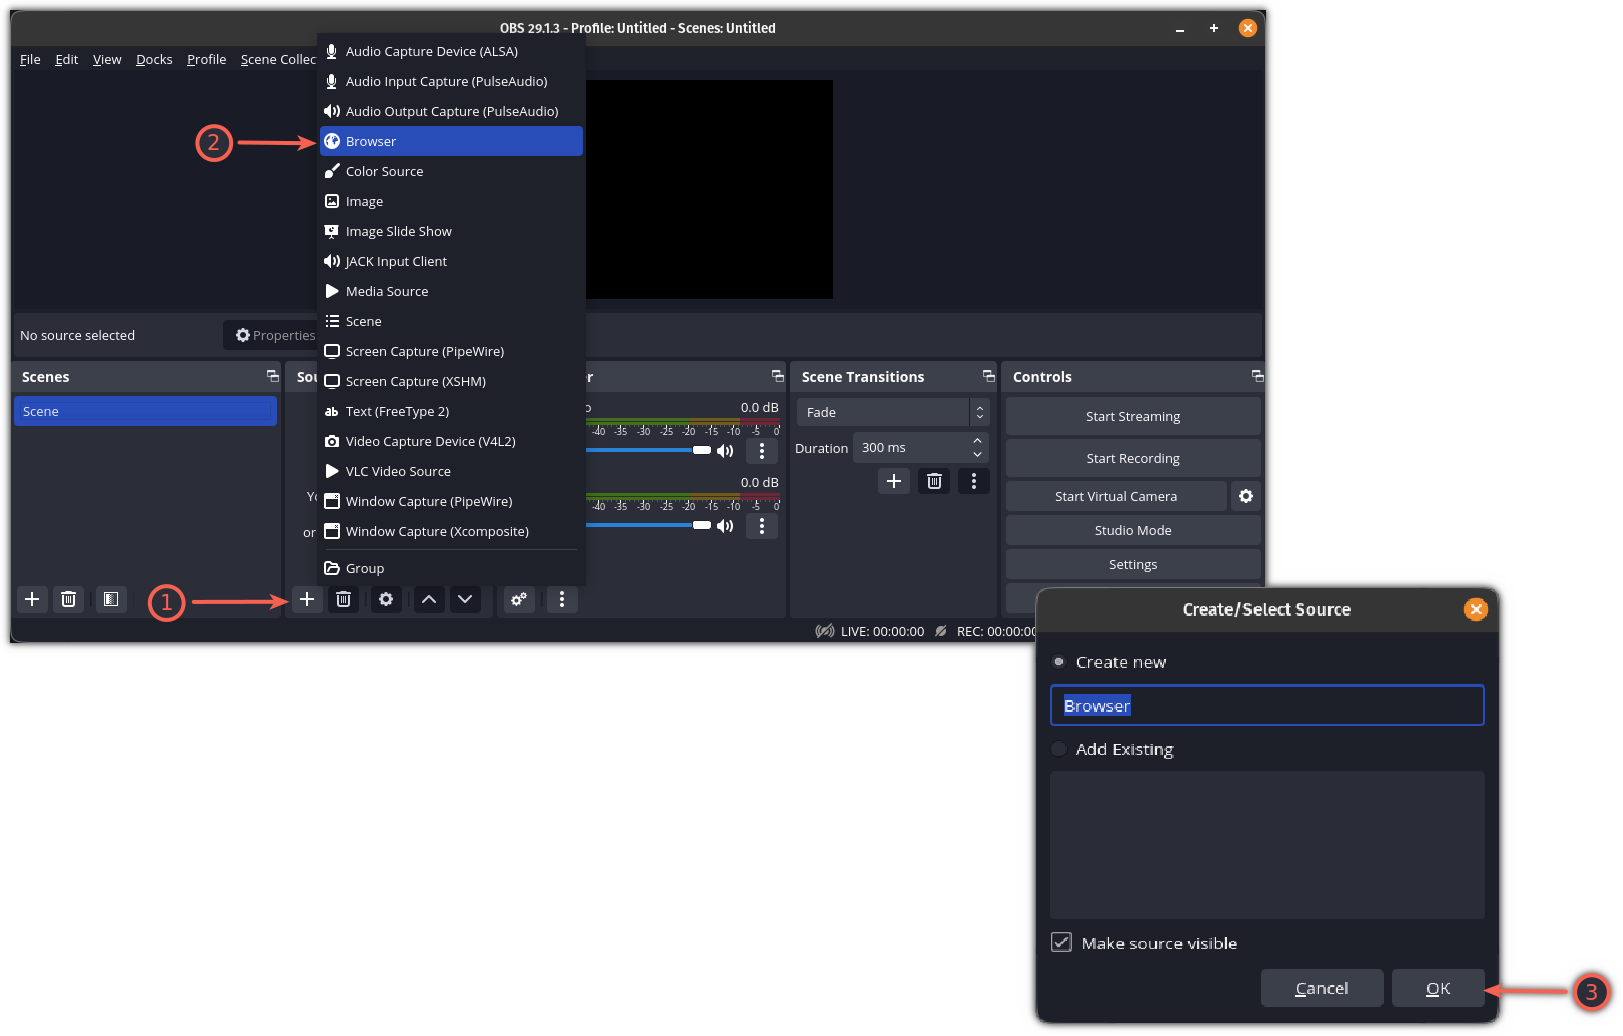
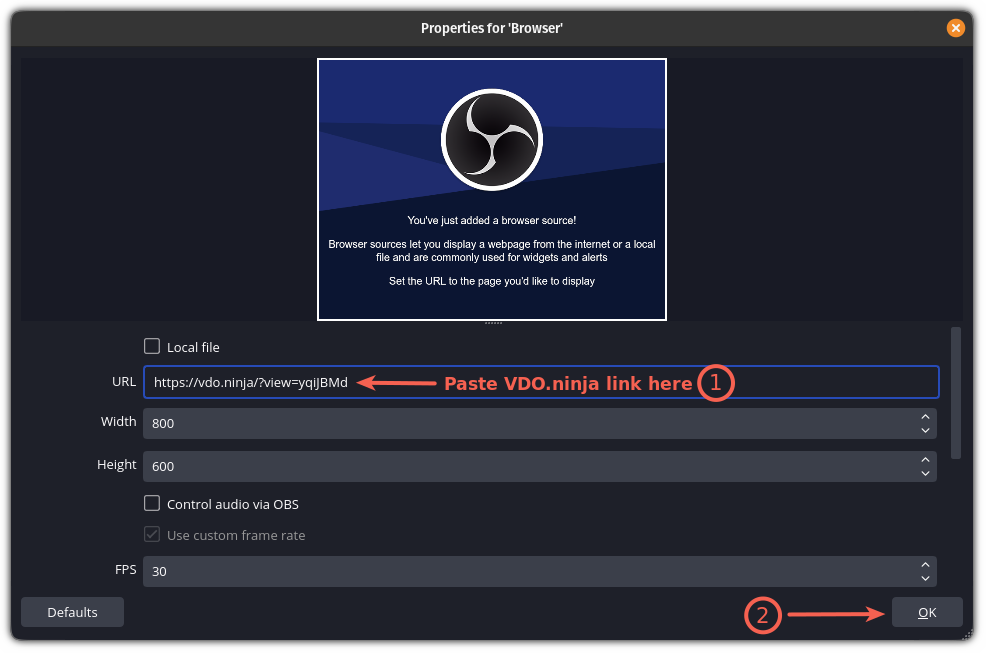
Finally, paste the link in the URL field:
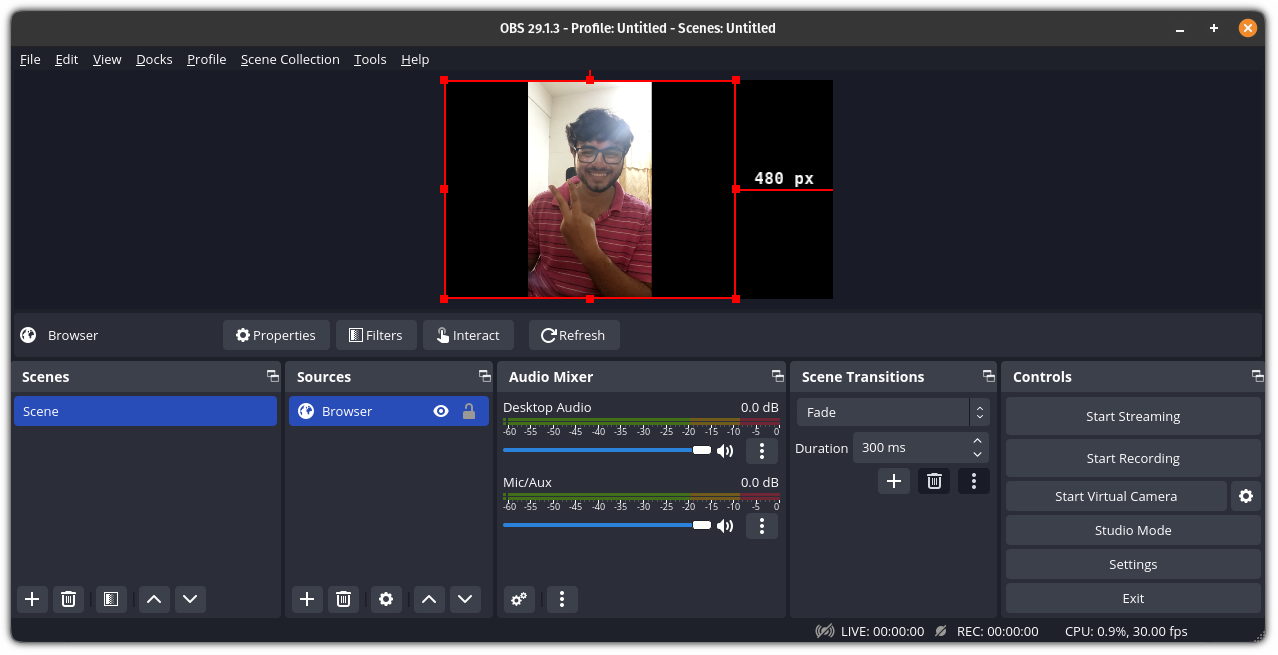
And soon, you will see OBS using your phone's camera:
But there are a few extra steps to get audio from your phone.
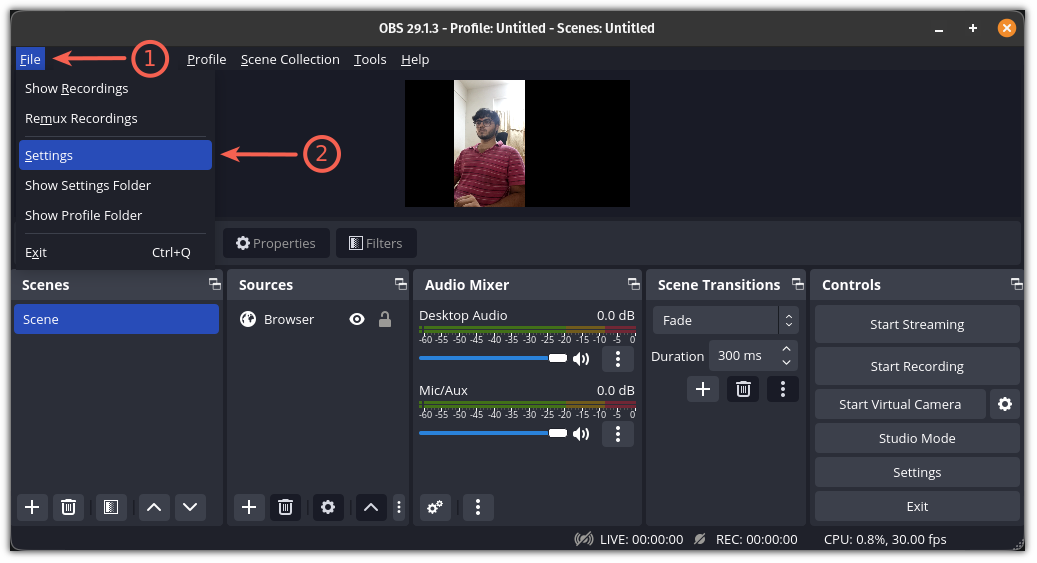
First, click on the File and choose Settings:
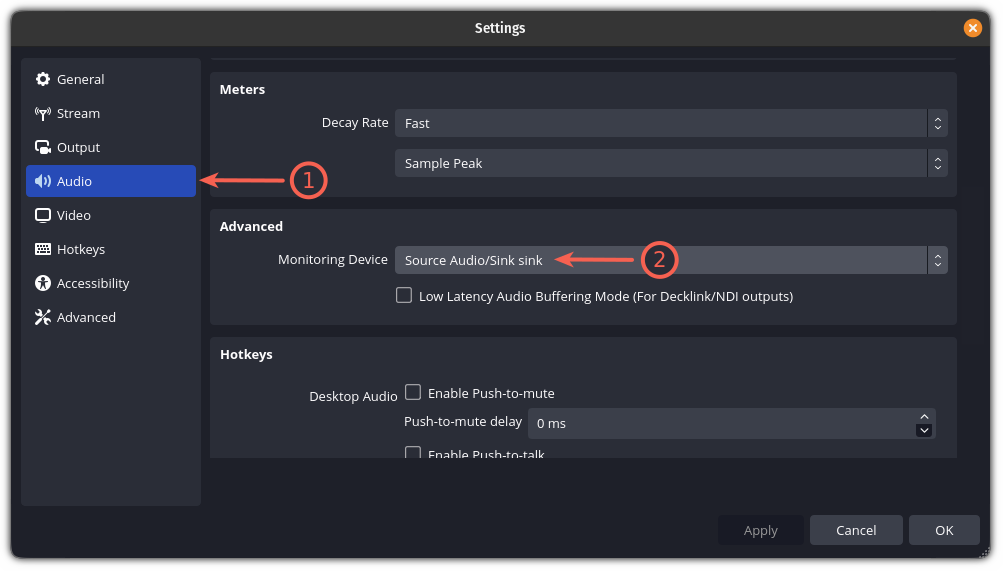
There, Choose Audio and look for the Advanced section.
In the Advanced section, you will find an option for Monitoring Device and there you have to choose Souce Audio/Sink sink:
Apply the changes.
For most users, the audio should be working by now. But if yours don't then here's how you can make it work.
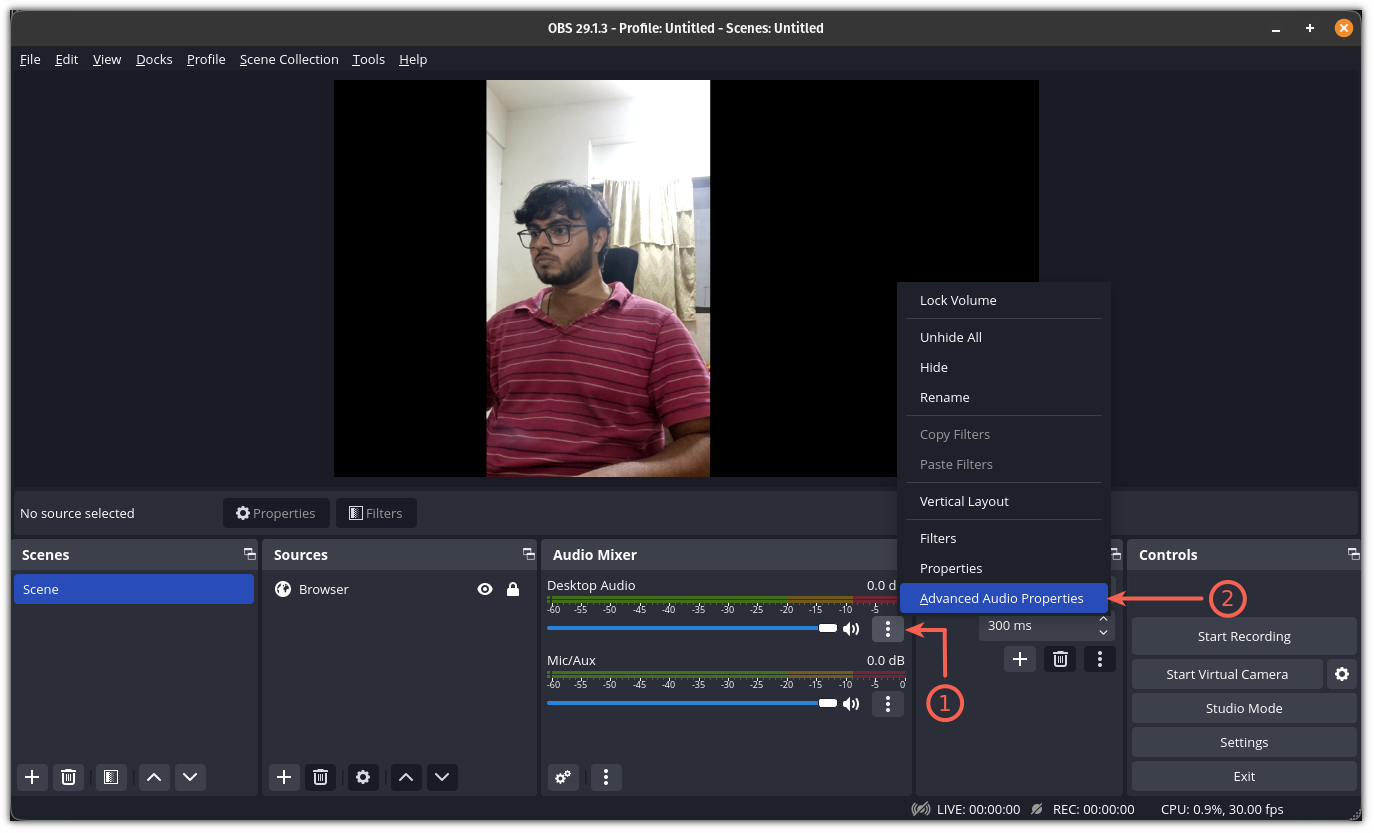
In the Audio Mixer section, it will be either the Browser or the Desktop Audio , or you may also see both of them.
Click on those three dots for Desktop Audio or Browser (in my case, it's Desktop Audio) and choose Advanced Audio Properties:
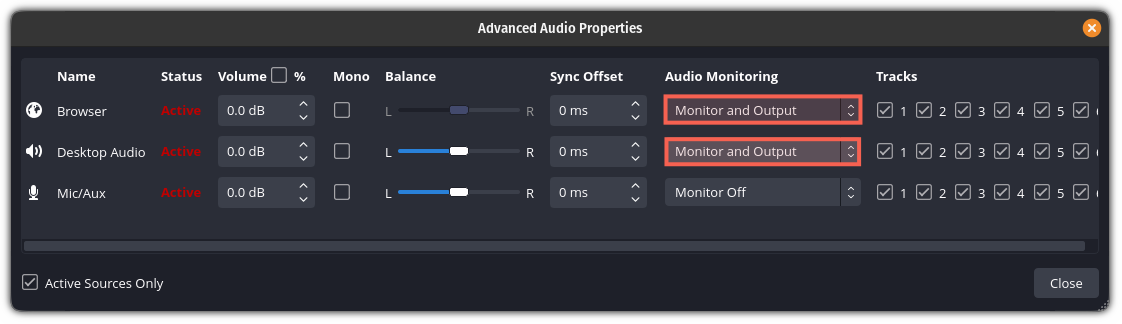
From there, choose Monitor and Output for the Browser and Desktop Audio:
And that's it! You can enjoy the camera and mic from your phone.
5. Test the whole setup
To test this, I used my phone as a camera and mic in our book club's weekly meeting and it worked flawlessly.
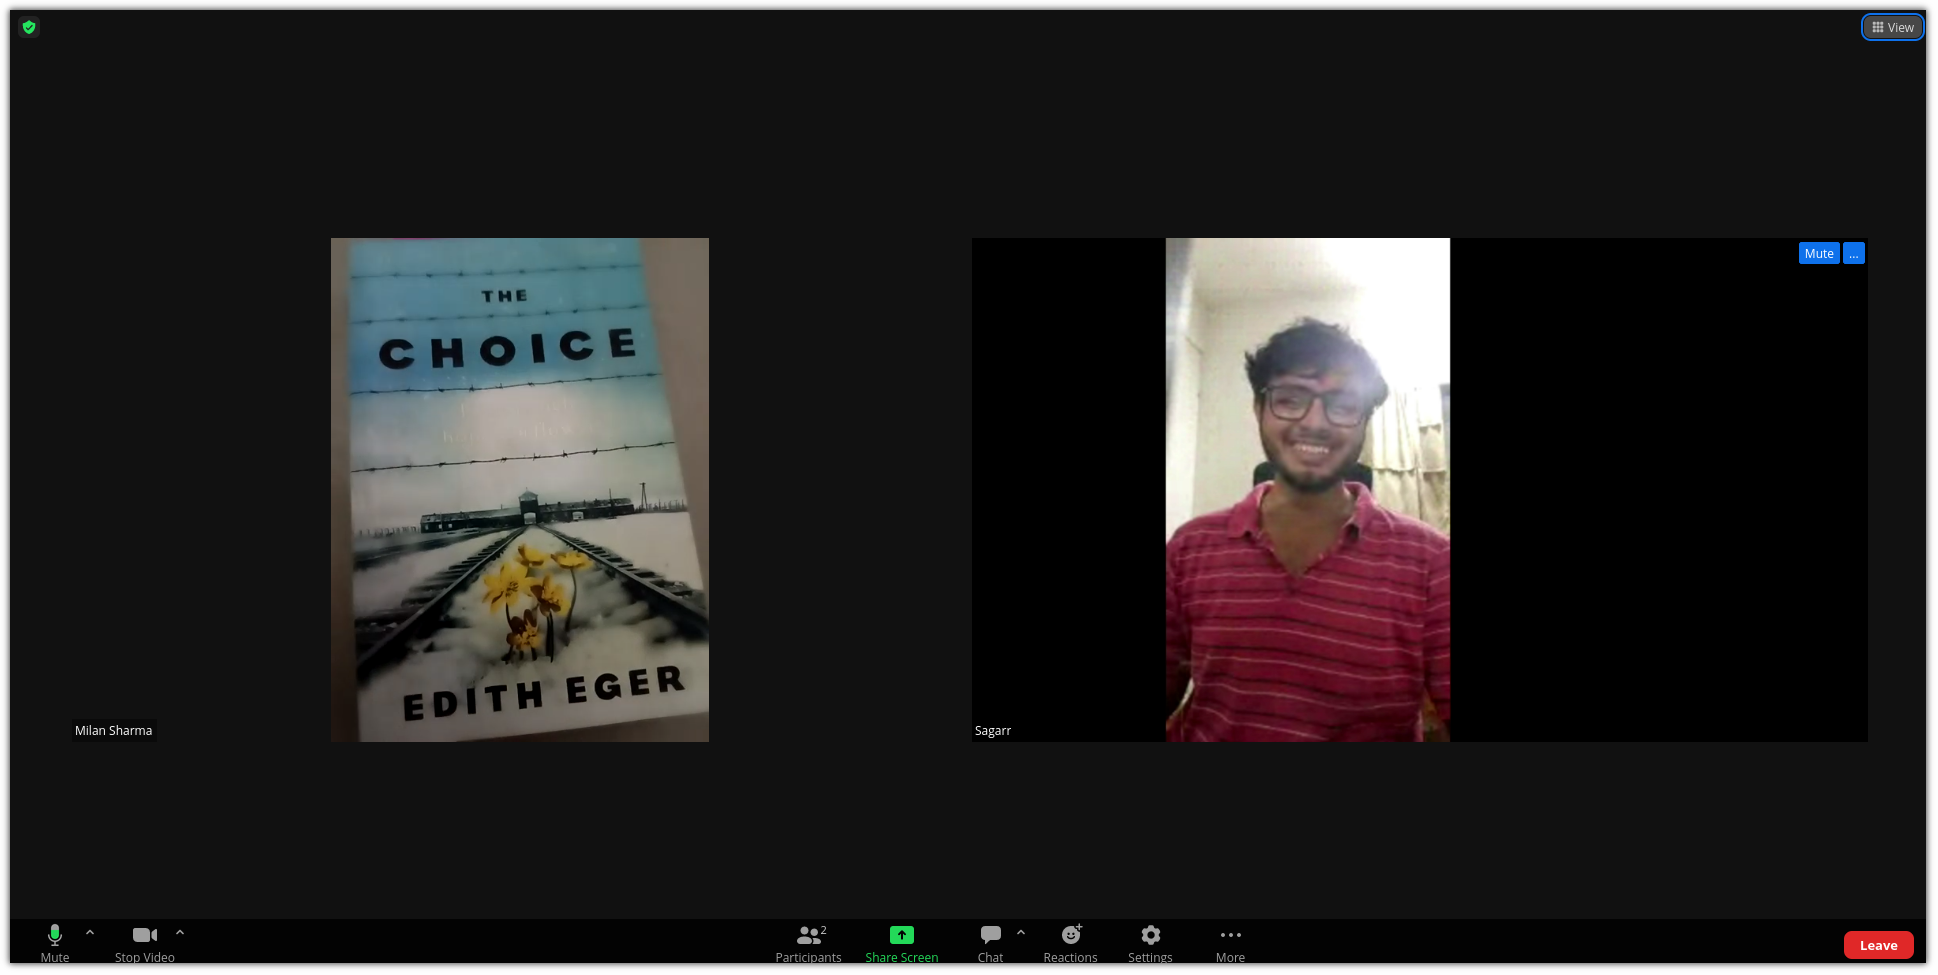
As you can see, the above image indicates a working mic and camera (which brought a smile to my face 😸).
The video quality depends on the internet bandwidth so make sure you have a good connection before starting an important meeting.
Wrapping Up...
I'm one of those desktop users who don't have access to a camera and mic and have to rely on a laptop or mobile for office meetings and I was irritated by that.
Remember, you have to create a virtual cable every time you reboot, but it won't take much time as it takes two command executions.
Have used this solution multiple times and it worked every time I put it to the test. I really hope you will have the same output.