

If you need to run Linux virtual machines, Qemu is one of the fastest hypervisors out there, if not the fastest.
Along with the speed, you also get excellent configuration options. Even if you are not an advanced user, it gives you enough room for tweaks.
In this tutorial, I will walk you through:
- Installing Qemu and KVM on Ubuntu
- Installing another distro on Qemu
- Enabling shared folder, auto-resize, and copy-paste in Qemu (optional but makes your VM experience smoother)
So let's start with the installation.
Installing Qemu and KVM on Ubuntu
To do so, use the following command:
LC_ALL=C lscpu | grep VirtualizationIf you have an intel processor, it should bring the following output:

And if you have an AMD processor, it should get you the following output:
Virtualization: AMD-VAlso, make sure your system has multiple cores so that you can allocate some to your VM and still have enough to power the host machine.
And if you're not sure, use the following command and the output should be more than zero:
egrep -c '(vmx|svm)' /proc/cpuinfo
Once you are all set, you can install Qemu and KVM on Ubuntu using the following command:
sudo apt install qemu qemu-kvm virt-manager bridge-utilsReboot your system once the installation is over.
Add user to appropriate groups
To make Qemu work, you'd have to add your user to two groups: libvirt-kvm and libvirt.
To do so, use the following commands one by one:
sudo useradd -g $USER libvirtsudo useradd -g $USER libvirt-kvmNext, enable and start the libvirt service:
sudo systemctl enable libvirtd.service && sudo systemctl start libvirtd.serviceThat's it! The installation of Qemu is done.
Installing another Linux virtually with Qemu
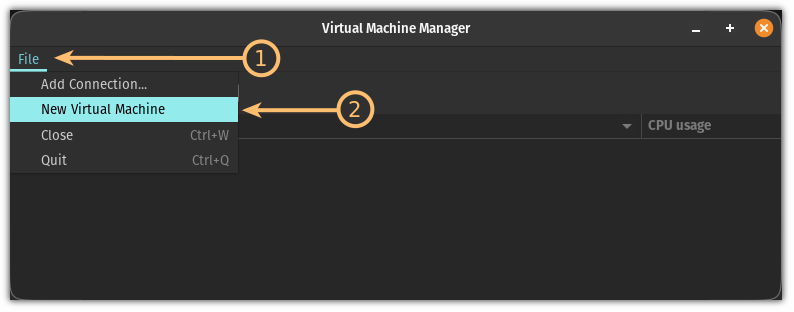
First, open the Virtual Machine Manager from the system menu:

Next, click on the File menu and choose the New Virtual Machine option:
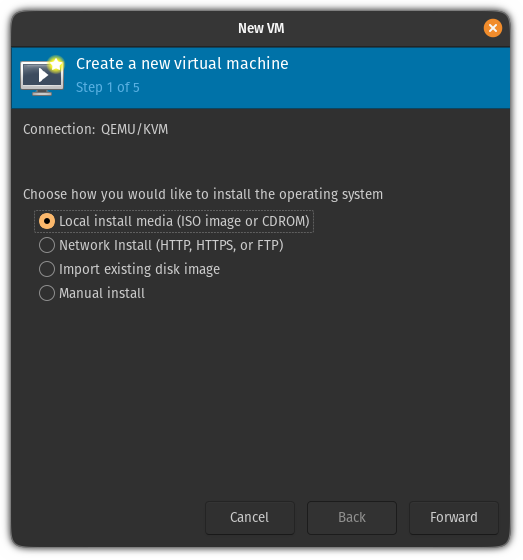
From here, choose the first option Local install media which will allow you to choose the ISO from your file manager:
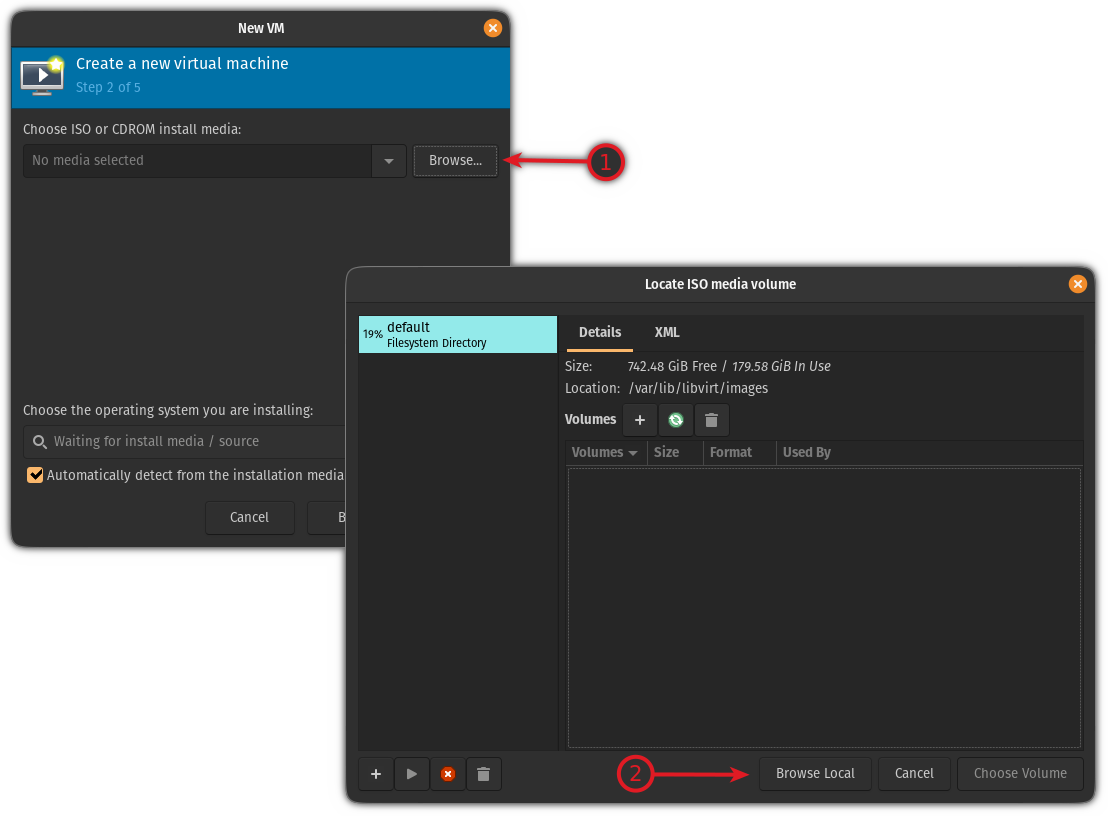
Next, you will be asked to add the ISO file. Here, click on the Browse button; it will open a new prompt, and there, click on the browse local.
It will open the file manager and from there, select the ISO file:
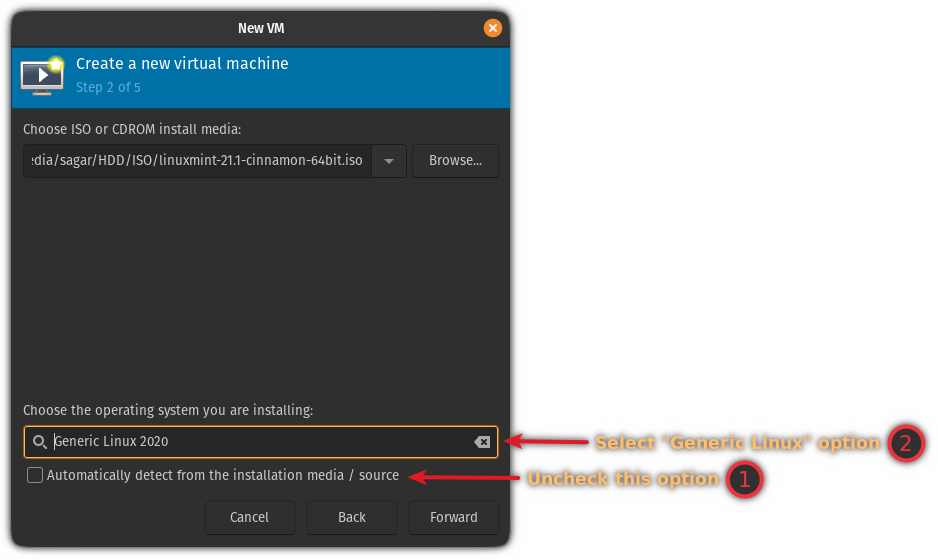
In most cases, the ISO file will be detected but if you find a situation where it does not detect it automatically, follow the given steps:
- Uncheck the Automatically detect from the source option
- Choose the
Generic Linuxoption
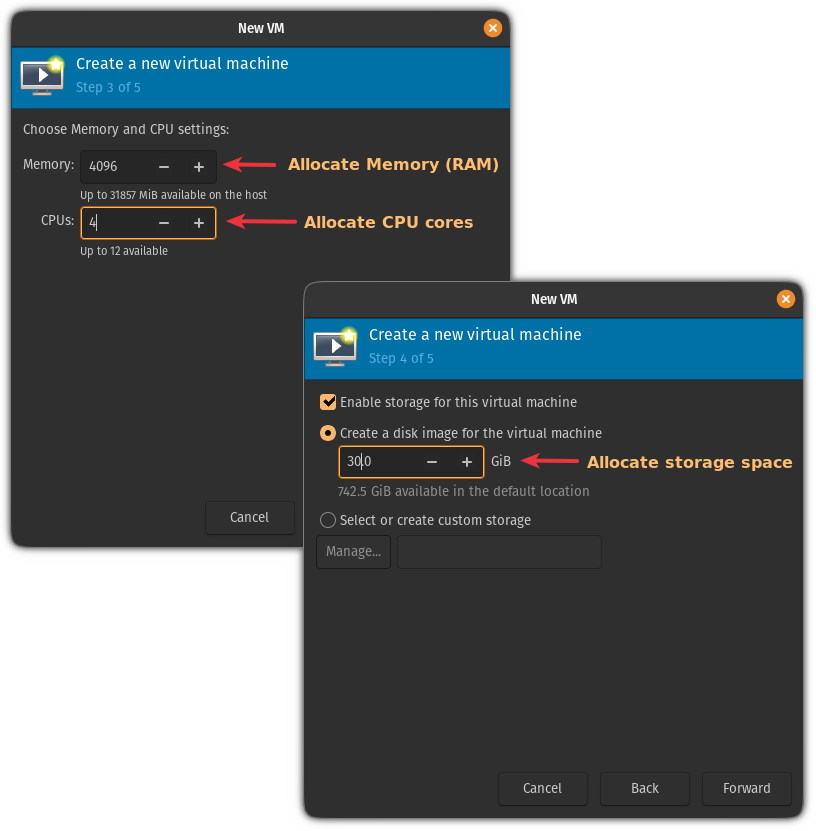
Next, you will be asked to allocate memory and storage as per your needs. I would recommend going with a minimum of 2 cores, 4 GB of RAM, and 25 GB of storage for the desktop version:
And finally, give the appropriate name to your VM; once done, click on the finish button:
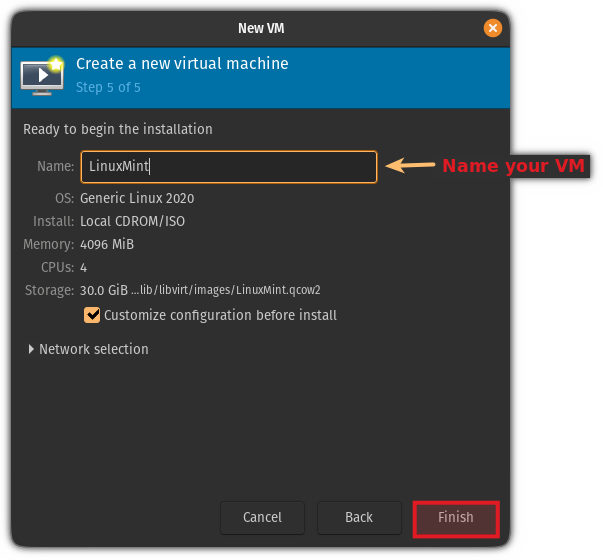
It will load the ISO, so you can start the installation from here.
That's done. You may enjoy your VM but you'll even enjoy it better if you enable shared folder, clipboard sharing, etc. The following few sections show how to do that.
Enabling shared folders in Qemu (optional)
In this section, I will show you how you can share the existing directory of the host machine with the VM.
To do so, you'd have to perform the following:
- Adding a shared filesystem through VM settings in Qemu
- Mounting the FS in the VM
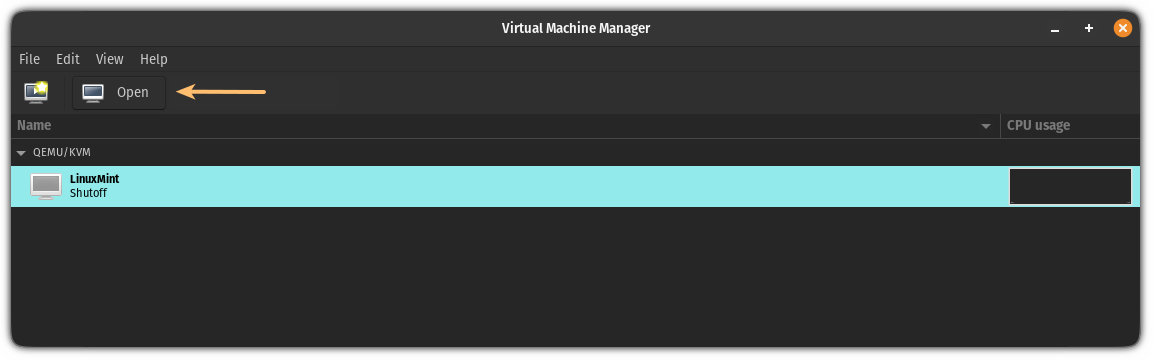
So first, open the Virtual Machine Manager from the system menu, select the VM, and click the Open button to manage the console:
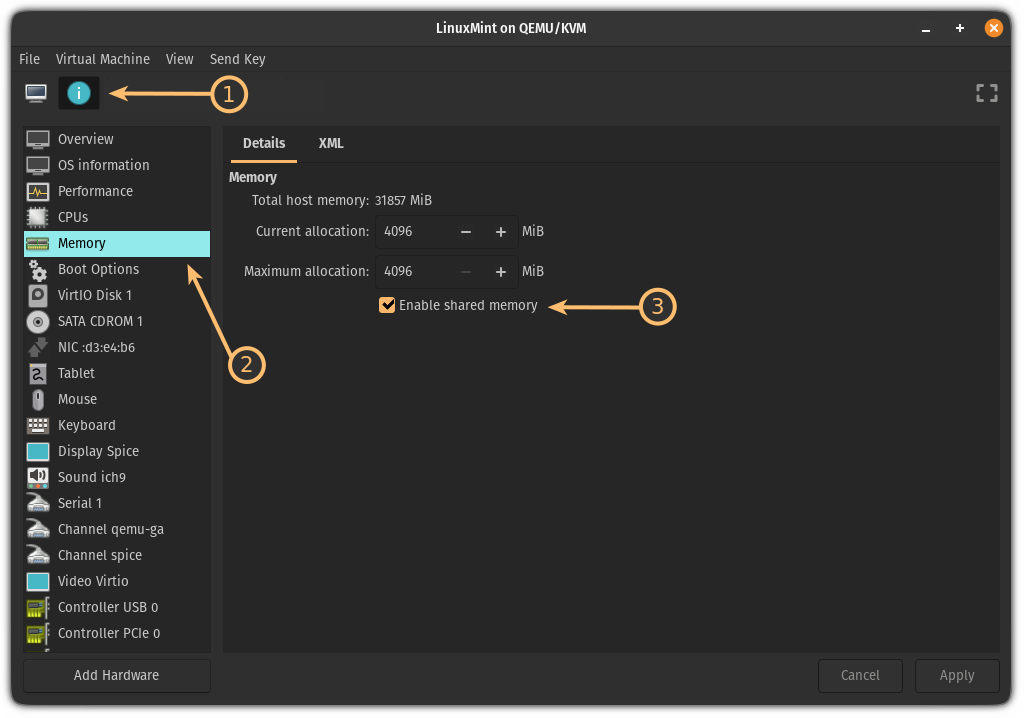
Now, click on the info button, select the Memory and enable the shared memory:
Next, click on the Add Hardware button, select the Filesystem option.
Here, you'd have to do the following:
- Add a path to the directory you want to share in the
Source pathsection - Add the name of the directory in the
Target pathsection
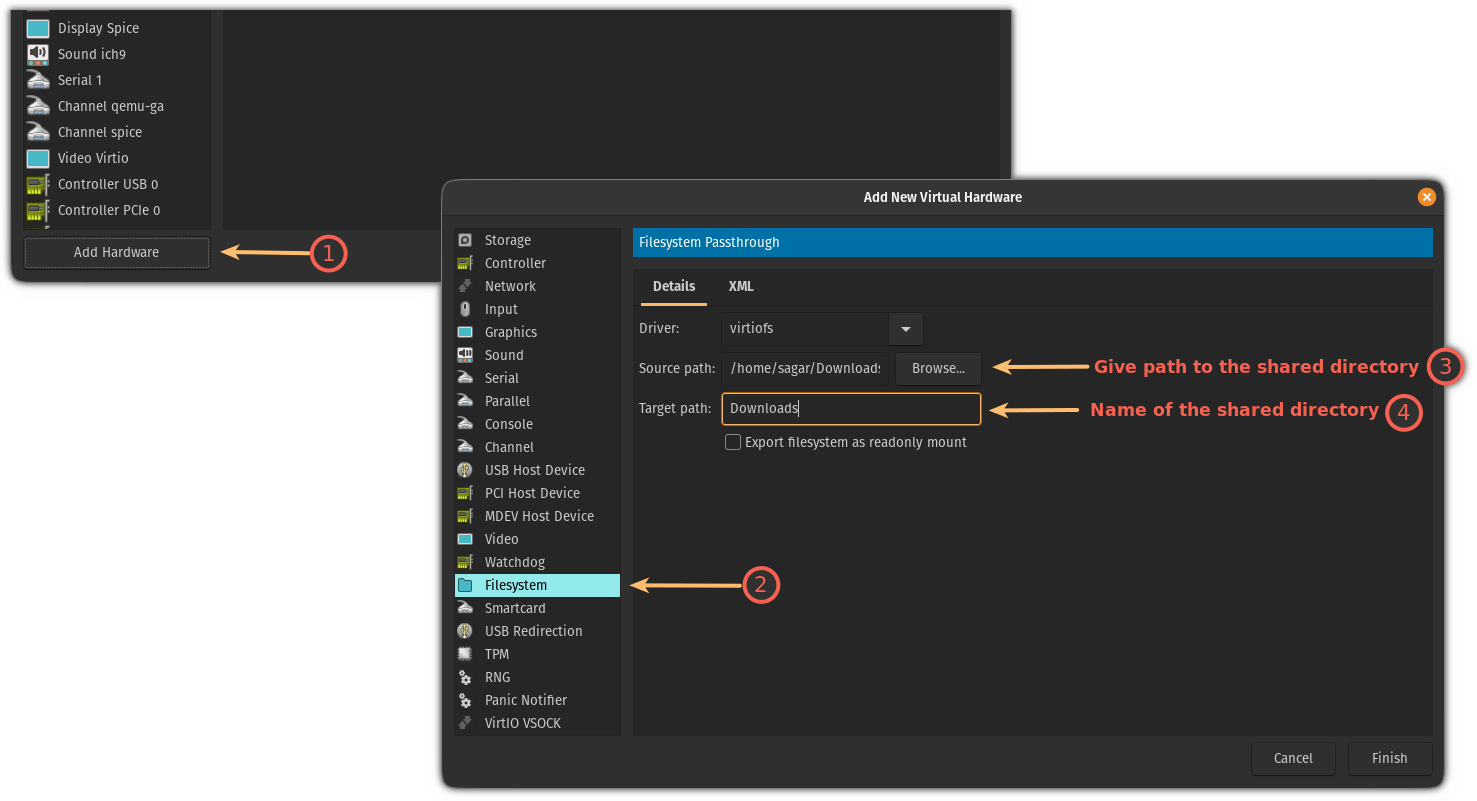
Once done, click on the Finish button and start the VM. Create a directory in the same location with the same name and location in the VM
In VM, open the terminal and use the following syntax to mount the shared directory:
sudo mount -t virtiofs sharename path/to/shared/directoryIn my case, it was the Downloads directory, so I will be using the following:
sudo mount -t virtiofs Downloads /home/sagar/Downloads
That's it!
But that's a temporary solution.
To make it permanent, you'd have to make create an entry in /etc/fstab In the VM.
To do so, first, open the /etc/fstab config file using the following:
sudo nano /etc/fstabGo to the end of the file in the nano text editor using Alt + / and use the following syntax to create an entry:
sharename path/to/shared/directory virtiofs defaults 0 0Here's what my config looks like:
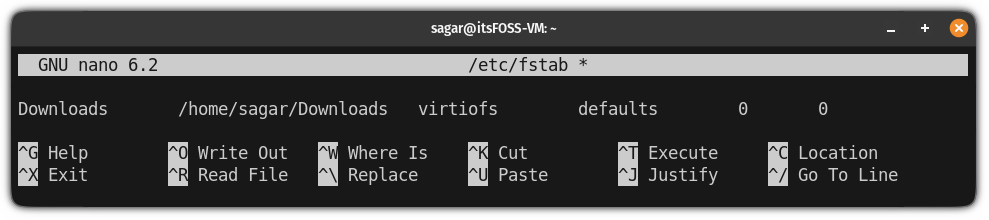
Once done, save changes and exit from the nano text editor.
Here I've shown how I created a new file in my host machine in the Downloads directory and the changes were reflected in my VM:
So now you can use this shared folder to transfer files between the host and VM without any issues!
Enabling shared clipboard in Qemu (optional)
To enable the shared clipboard, all you have to do is install the spice-vdagent utility in the VM.
So if your VM is Ubuntu/Debian based, you can use the following:
sudo apt install spice-vdagentFor Arch base:
sudo pacman -S spice-vdagentFor Fedora-based distros:
sudo yum install spice-vdagentOnce you are done with the installation, reboot your VM, and the clipboard should work as intended!
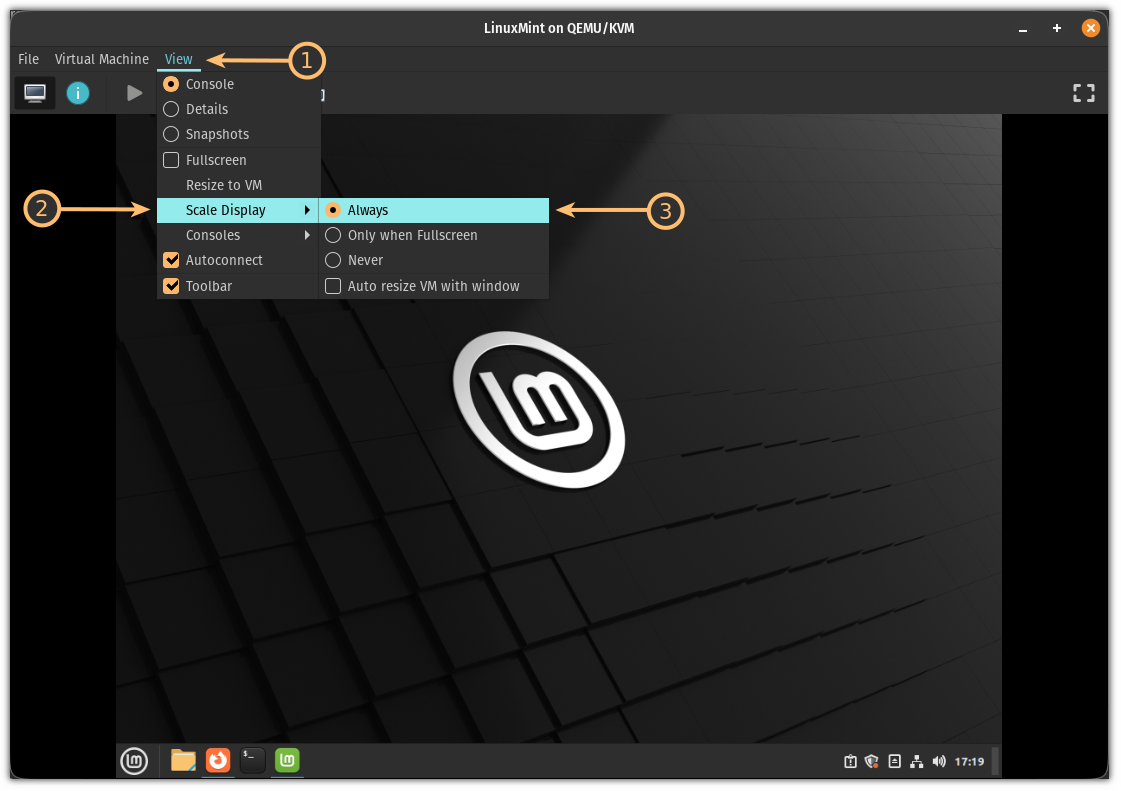
Enabling auto-resize in Qemu (optional)
The auto-resize feature is nothing but when you resize the VM window, the VM display will adapt to the change in size immediately:
To enable the auto-resize in Qemu, you will have to follow 2 simple steps:
- Click on the
View(from top menubar) - Select the
Scale Displayoption and choose theAlwaysoption
That's it from my side.
Want to use a plug-and-play version of Qemu?
In this tutorial, I went through how you can manually install a VM in Qemu but what if I tell you that you can automate the whole process, like allocating storage, RAM, etc?
Yes, it gives the same efficiency but comes in handy when you want to create a new VM ASAP! The tool is called Quickgui and we have a dedicated tutorial for the installation:
 Ankush Das
I hope you will find this guide helpful. And if you have any queries, feel free to ask in the comments.