
Many current Linux users switched over from windows simply because they were sick of using a machine so sluggish that it was barely able run its native OS; sick of spending time watching an “hour glass” icon waiting for something—anything—to happen. And many found this simple act to be a type of upgrade since Linux systems always were far more efficient in their use of resources. Likewise, you could also upgrade your ram or your graphics card.
If you do all three, you’ll get tangible though probably only an incremental improvement.
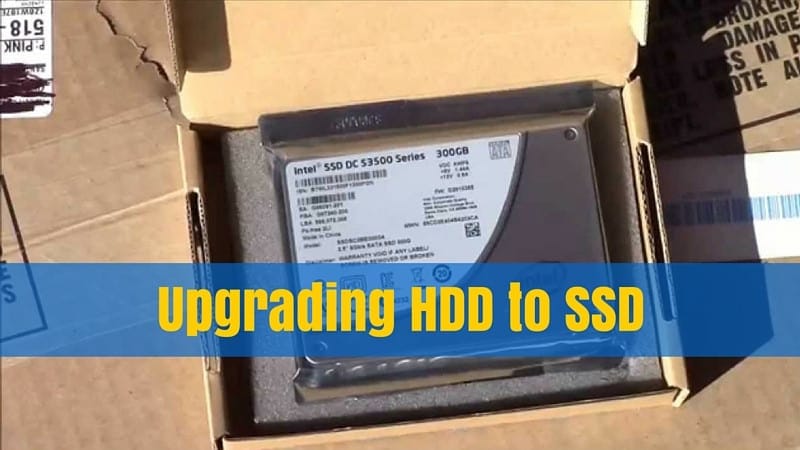
How can I get even more performance out of my system? As technology changes so do the choke points in your system. These days what’s usually gumming up the works is a spinning metal disc; your hard disc drive. Over the years, I’ve tweaked lots of systems, but nothing I’ve ever done has produced such spectacular results as installing a solid-state hard drive. Suddenly every thing’s faster; boot-ups take a 1/5th to a 1/6th of the time and programs pop into action. This isn’t incremental change; it’s a radical change.
Initially, I was skeptical; I’d heard stories about random bit flips and I already knew that SSDs were expensive.
These days SSD’s are now just as reliable as their ancestors, and though cheaper than before, still a lot more than HDDs by about 5x to 10x per gigabyte. In other words, a 1T SSD can cost up to $1,000.00US.
So the first question to ask is how big does my hard drive really needs to be?
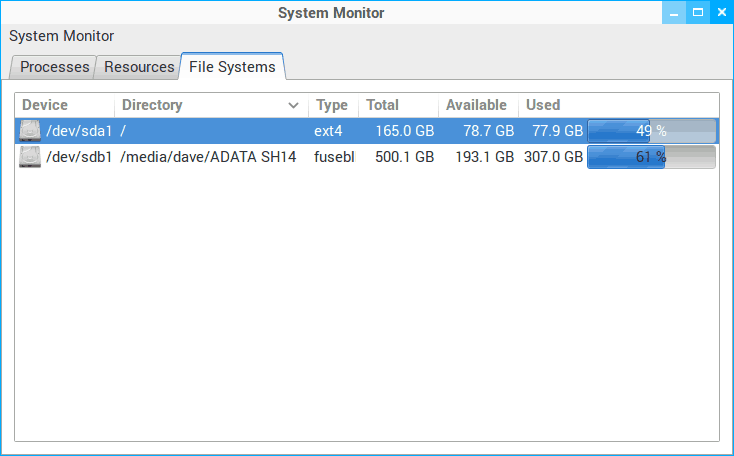
Above is a screen shot of my system. Notice that I’m only using about 1/2 my main drive. And I still have space for a second 100G partition.
So to answer my own question: “No, I don’t need a terra-byte”. On this computer, I installed a 256G SSD which cost me about $70.00US. And since the system and all my programs are running off a big hunk of semiconductor, suddenly it’s the fastest system I’ve ever had.
Another thing you may have noticed is while the data on my main drive is a svelte 79G, the data on the other is a waddling 307G. There are two reasons for this. First, I never throw anything away. Second, I’ve read the words “but first back up your home folder” so many times that I stopped putting stuff there in the first place. It’s a habit that another advantage I’ll get to later.
Upgrading your system to SSD: The easier way
It turns out—like so many things Linux—that the easiest way is also the best way.
- Backup your home folder.
- Remove the old HDD.
- Replace it with your sparkling new SSD. (If you have a desktop computer remember you’ll need an adapter bracket; with SSDs it’s one size fits all. And don’t worry about the tiny four-pronged wire. It’s there to power the motor that SSDs don’t have since they don’t spin!)
- Re-install your favorite Linux distro from CD, DVD or flash drive.
One of the beauties of Linux is that there are hundreds of flavors to choose from and many are free. So starting from scratch won’t break the bank. And, a clean installation ensures that your OS will be finely tuned to all your hardware, including your new SSD. Besides, configuring a new system can be lots of fun when you don’t have to watch a spinning wheel all the time.
Finally, don’t throw out your old HDD. If your machine has extra drive bays you can re-install them and use them as storage media. If not, you can get the same result by purchasing a drive enclosure. And why—you might ask—would I store all my files on my old slow drive? Because for your computer opening files is fast and easy anyway, so you don’t really gain much. Furthermore, on my laptop—which has a second drive bay—I use the old HHD as a home folder. That way each of the three OS’s I installed on the SSD have access to exactly the same files, and they’re always in perfect synchrony.
There is a much harder way of doing this: cloning your old disc to the new one. We are going to see it in the next section.
Upgrading your system to SSD: The harder way
So, you’re convinced that upgrading to an SSD is a good idea, but you are adamant about keeping your current OS. Don’t worry, it can be done, but remember you’re choosing the “hard way”. This means a lot more preparation, time and some extra software and hardware besides.
What we’re talking about here is cloning. Fortunately, there are lots of open source options. They all seem to operate on the same principle: they make an image of the partition you want to clone and store it as a single file or series of files. Think of them as bit-for-bit photocopies of your hard drive. This has two important consequences. First, if your partition is 250G, it will photocopy all 250G of it—even the unused space. Second, the empty “destination” partition—on your new SSD—usually must be bigger than the source.
But let’s not get ahead of ourselves. Before starting, make sure you have the following:
- A bootable disc with your clone-ware.
- A bootable grub rescue disc.
- A bootable version of G-parted
- A 21/2” drive enclosure.
- A big fat external HDD; like the one you are about to backup your home folder on.
- Your sparkling new SSD.
- 2 empty USB sockets.
Before Cloning:
Create a live G-parted disc. G-parted is a simple and powerful partition editor, but if you’ve never used it before take the time to read about it; especially “shrink partition” and “create partition”. You can find the manual here. And if you remember nothing else remember that no changes are made until you click “apply all operations”, and that after re-sizing sda, it must be re-booted—perhaps for the last time. This to ensure that errors—if there are any—can be immediately corrected. It also ensures that you won’t be spending the next few hours cloning a buggy drive.
After putting your SSD into an enclosure, unmount all unnecessary USB devices and boot into G-parted. When G-parted (eventually) boots it will show your main drive as sda1. Right clicking on it gets you to “re-size/move” option, where you can graphically shrink your partition. This ensures your target drive is bigger than the source and it prevents you from wasting a lot of time copying unused space.
Next, plug in your SSD—it should appear as sdb and “unallocated”—and create a bootable primary partition formatted to ext4. Don’t worry about labels or UUIDs; all the particulars will be in the image you’re about to clone onto it. All we want to do here is create a target partition that the clone-ware can easily find and write to.
Then, tidy up your external HDD. This is where you’ll store your image; you want to make it easy for your clone-ware to find it when it’s time to restore. If you’re lazy (like me) and your external HDD is a mess (like mine) it’s easiest to just grab it all and nest it in all in one file for the time being. Also, make sure you have loads of space; if you’re imaging a 150G partition it’s not going to fit onto a 32G flash drive.
Finally, you’re going to have to pick out some clone-ware. For an excellent overview see this. Once you’ve made up your mind download and create live CD or flash drive.
Cloning:
I ended up using Clonezilla, but they all do the same sorts of things in the same sorts of ways. In a two-step process they first “image” your system to your external HDD, then restore from your HDD to your target drive. They are all bootable media, meaning patience is required. For an excellent overview of Clonezilla see here. The only thing I did differently is I stuck with partition cloning, so I used the “saveparts” and “restoreparts” commands.
Once you boot into Clonezilla you’re going to have lots of time to kill. It’s not unusual for the whole save and restore process to take 3 hours.
One thing the cited tutorial doesn’t show is the “restore grub” option. If you’ve been looking for it and can’t find it, don’t worry, it’ll show up after Clonezilla gets past the “WARNING!!! WARNING!!! WARNING!!!” bit and before the final copying begins.
Testing:
At this point, it’s plug and play. Remove your SSD from the enclosure, and swap it with your old HDD. Even if you have a free bay I would not recommend re-installing your old HDD at this point. It’s always best to keep things simple.
Finally, power it up. Most of the time your old OS will be up and running on your new SSD. You’ll notice a real improvement in boot times and in general responsiveness.
However, there is also a chance boot right away. If this happens, kill it (Ctrl Alt Del) and try again. It’s not unusual for it to boot on the second or third attempt. And once it does, it will boot properly from then on.
If your SSD still stubbornly refuses to boot, simply boot into your grub rescue disc and re-install grub2.
A Final Caveat:
This really is the hardest way to achieve the worst results. After going through all this and using it for a few months I ended up overwriting it with a fresh installation of the same OS. As I expected the newer installation was quicker still.

Dave Merritt
I’m a 59 year old, fulltime landscaper and parttime PCmedic. I’ve been an avid Linux user for over ten years. In that time, I do not claim to have made every possible mistake, only most of them. I’m a big fan of prog rock, avant jazz and J S Bach, and enjoy reading Neal Stevenson and anything to do with the foundational problems in modern physics.