This quick tip shows you various ways to remove old Linux kernels from an Ubuntu system.
Ubuntu regularly provides newer kernel versions along with system updates. This also means that you would have more than one Linux kernel version in your system taking valuable disk storage.
Removing the old kernels is one of the many ways to free disk space in Ubuntu.
In this tutorial, I’ll discuss various ways of removing older Linux kernel versions from your Ubuntu system:
- Using
apt autoremovecommand (simplest and recommended for all) - Using the Software Updater (for desktop users who prefer GUI)
- Using apt remove command (for manually removing a kernel version installed explicitly)
But before you the methods to get rid of the older kernels, let me share a few things you should know about Linux kernel versions in Ubuntu.
Dealing with various kernel versions in Ubuntu
There was a time when the older Linux kernel versions would stay in the system and clutter up the boot menu.
Things have changed. Ubuntu has improved the way it handles kernel updates. First, the available kernels are not directly listed in the grub menu. They are under advanced options.
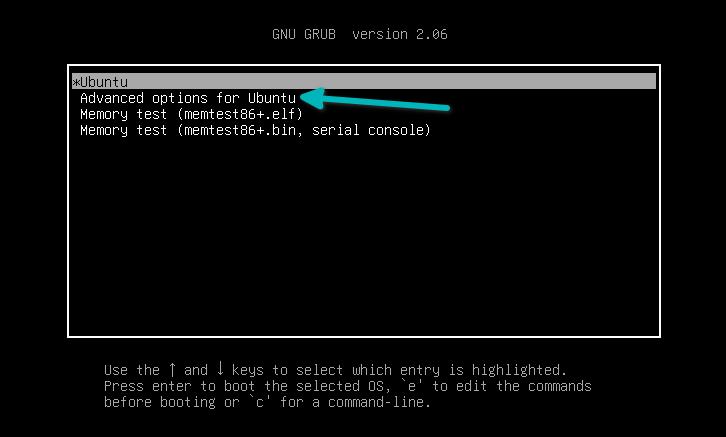
Ubuntu always keeps two kernel versions at a time in your system. By default, it boots into the newer kernel. You can choose to boot into the older kernel version from the Advanced options in the Grub menu.
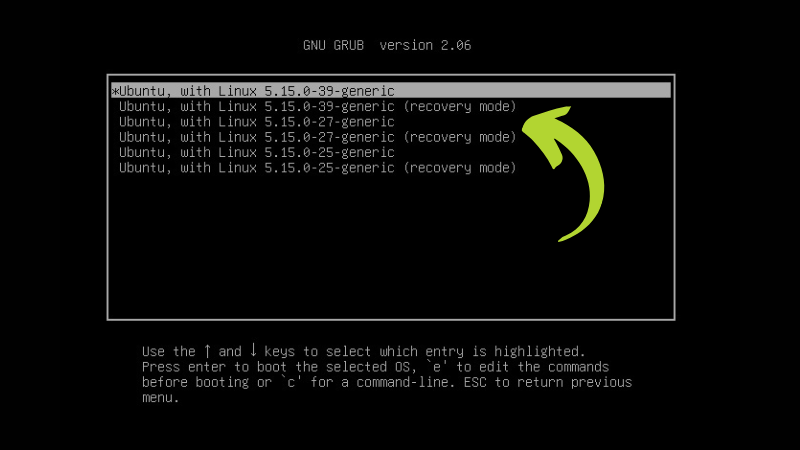
From the GUI point of view, things don’t change visually irrespective of the kernel version you choose to boot into.
Keeping additional kernel versions helps you troubleshoot your system in certain conditions.
Unless you have installed a kernel explicitly in Ubuntu, you get the newer versions provided by the Ubuntu team with the system update. A restart is required for the changes to effect, and the system boots into the newer kernel by default.
The older kernel remains in the system taking up the disk space. There is a mechanism to delete them easily.
Method 1: Remove old kernels using apt autoremove command (recommended)
This is the easiest possible option. All you have to do is to use the command below:
sudo apt autoremove
This apt command removes all the unnecessary packages that are not required anymore. This includes the older Linux kernel versions. In fact, this command is one of the best ways to make free space on Ubuntu.
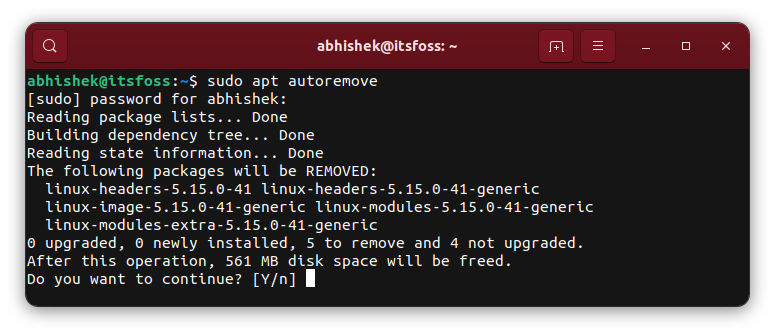
As you can see in the screenshot above, the command will delete the kernel version 5.15.0-41 and free up 500MB of disk space. This will leave kernel versions 5.15.0-43 (booted by default) and 5.15.0-42 in my system.
The apt autoremove command will keep two kernel versions in the system. The one which is used currently and one older kernel for recovery.
You should use this command after you notice a kernel update installed on your system.
Method 2: Remove old kernels using Software Update
Things have improved around the kernel updates in Ubuntu. Well, almost.
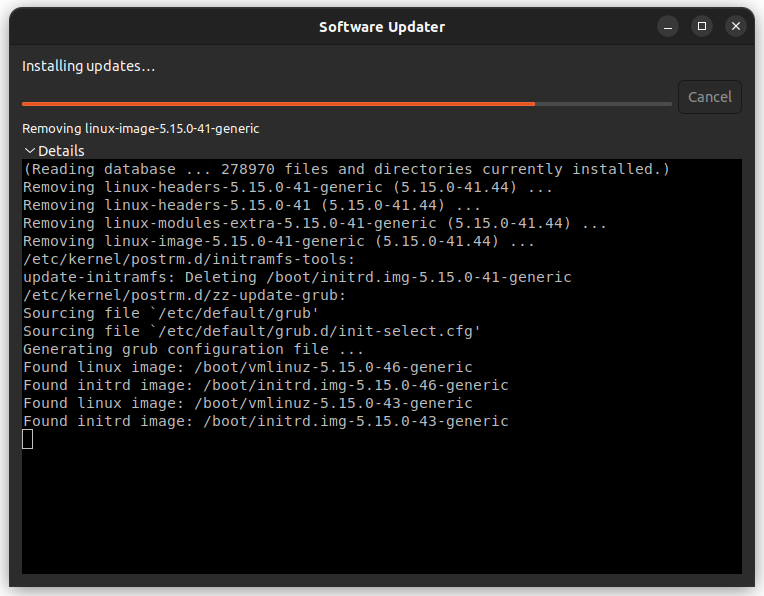
If you prefer the graphical Software Updater tool for updating your Ubuntu system, it will also give you the option to remove older Linux kernel versions if there are any.
The only problem is that it doesn’t do it properly and might even confuse new users. Look at the screenshot below:
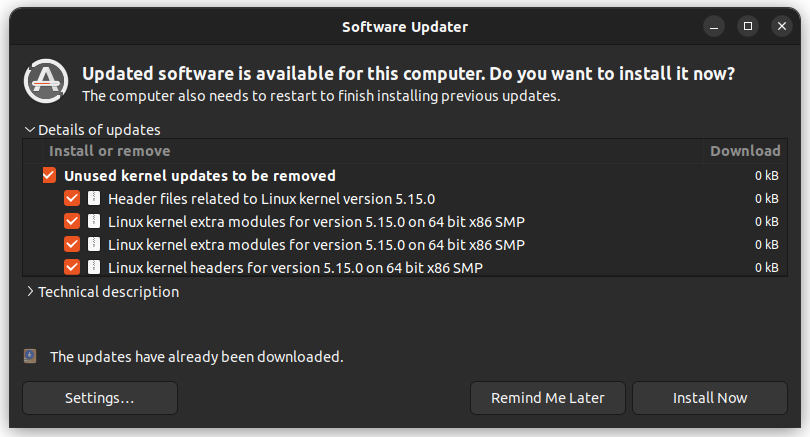
It’s not clear that you are going to remove any package. Instead, it looks like package updates with 0KB size.
Weird, I know. But when you hit the ‘Install Now’ button, it starts removing the mentioned old kernel version.
Method 3: Use apt command to identify and remove kernels (for experts)
If you installed the mainline Linux kernel in Ubuntu and want to remove it now, you can use the apt remove command with the package name.
You have to be extra careful here. Check the running Linux kernel version and ensure that you are not removing the currently used kernel version.
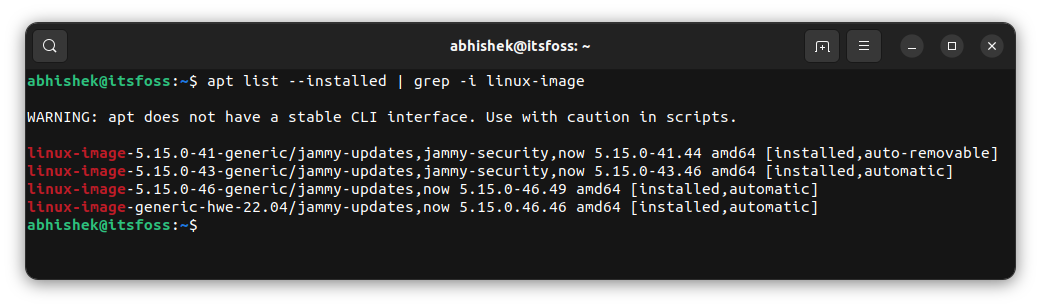
Then list the installed packages on your Ubuntu system and grep through the result like this to list all the installed kernels:
apt list --installed | grep -i linux-imageYou can get the desired package name.
Now use the apt command to remove the kernel.
sudo apt remove linux-image-version-nameConclusion
You may also use system cleaning applications like BleachBit, Ubuntu Cleaner, etc. but I advise sticking with the apt autoremove command. The easiest and safest way of removing old kernels from the system.
I hope the article clears the air on the topic. If you have questions or suggestions, let me know in the comments.